The letters of the 90s are back: WWJD. And I'm bringing them to embroidery with this free pattern featuring my kawaii style!
WWJD? or What Would Jesus Do? is a phrase or question that I've kept in my mind ever since I got my first WWJD bracelet way back when. My own bracelet was hunter green, and then I got a black one as well. It was the thing to have, but I never want it to just be a nice idea. I want it to be the very thing I live by.
What WOULD Jesus do? Sometimes it's hard to know exactly, but at the very least I can know some things he WOULDN'T do. I also know that I mess this up all the time and I'm certainly not always living and making choices like Jesus. But bit by bit, hopefully I become more like him in the way I go about my days, months, and years.
So it felt like a good time to make a little embroidery pattern that can serve as a reminder for myself. And if you'd like that reminder too, I offer this free pattern.
I haven't stitched my own yet, but I'll be doing the letters in three strands of chain stitch, just like I did for my Do the Next Right Thing hoodie. The faces are French knots and scallop stitches.
If you print the pattern at 100% it will fit in a 5-inch embroidery hoop, but it would also be great on a t-shirt or hoodie. Just something to show what you believe, while not forgetting how to orient your life.
Simple stitches. A simple idea. But harder to live. And that's okay.
If you're someone who wants to base your life off of Jesus and what he would do in any situation, be encouraged. It's worth pausing to ask this question. And even better if you ask HIM for help. Get to know him and you might just become more like him.
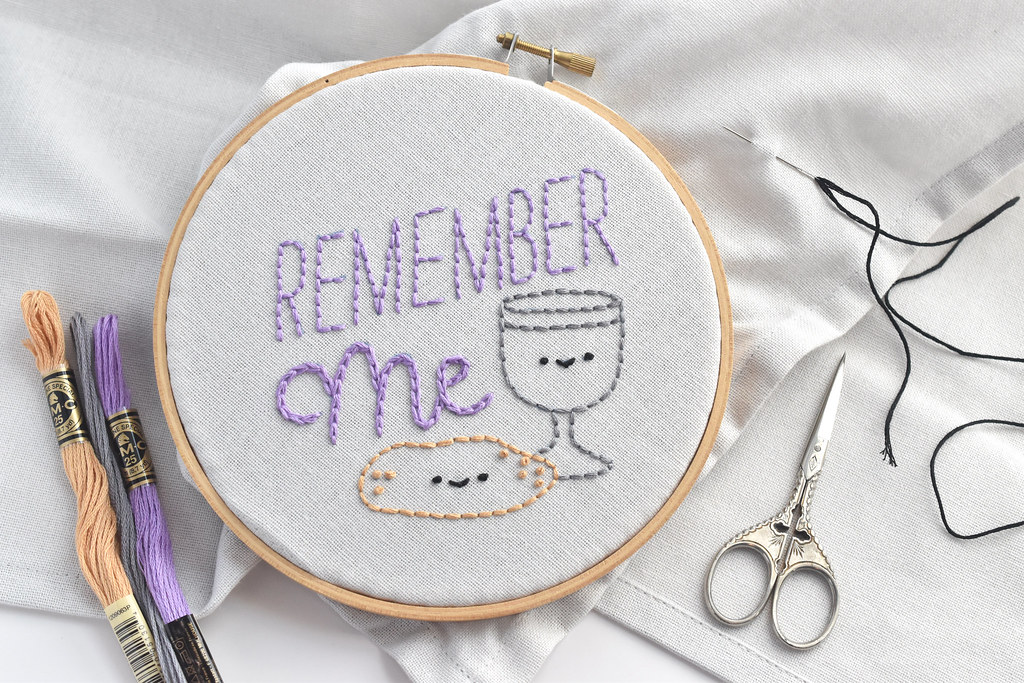
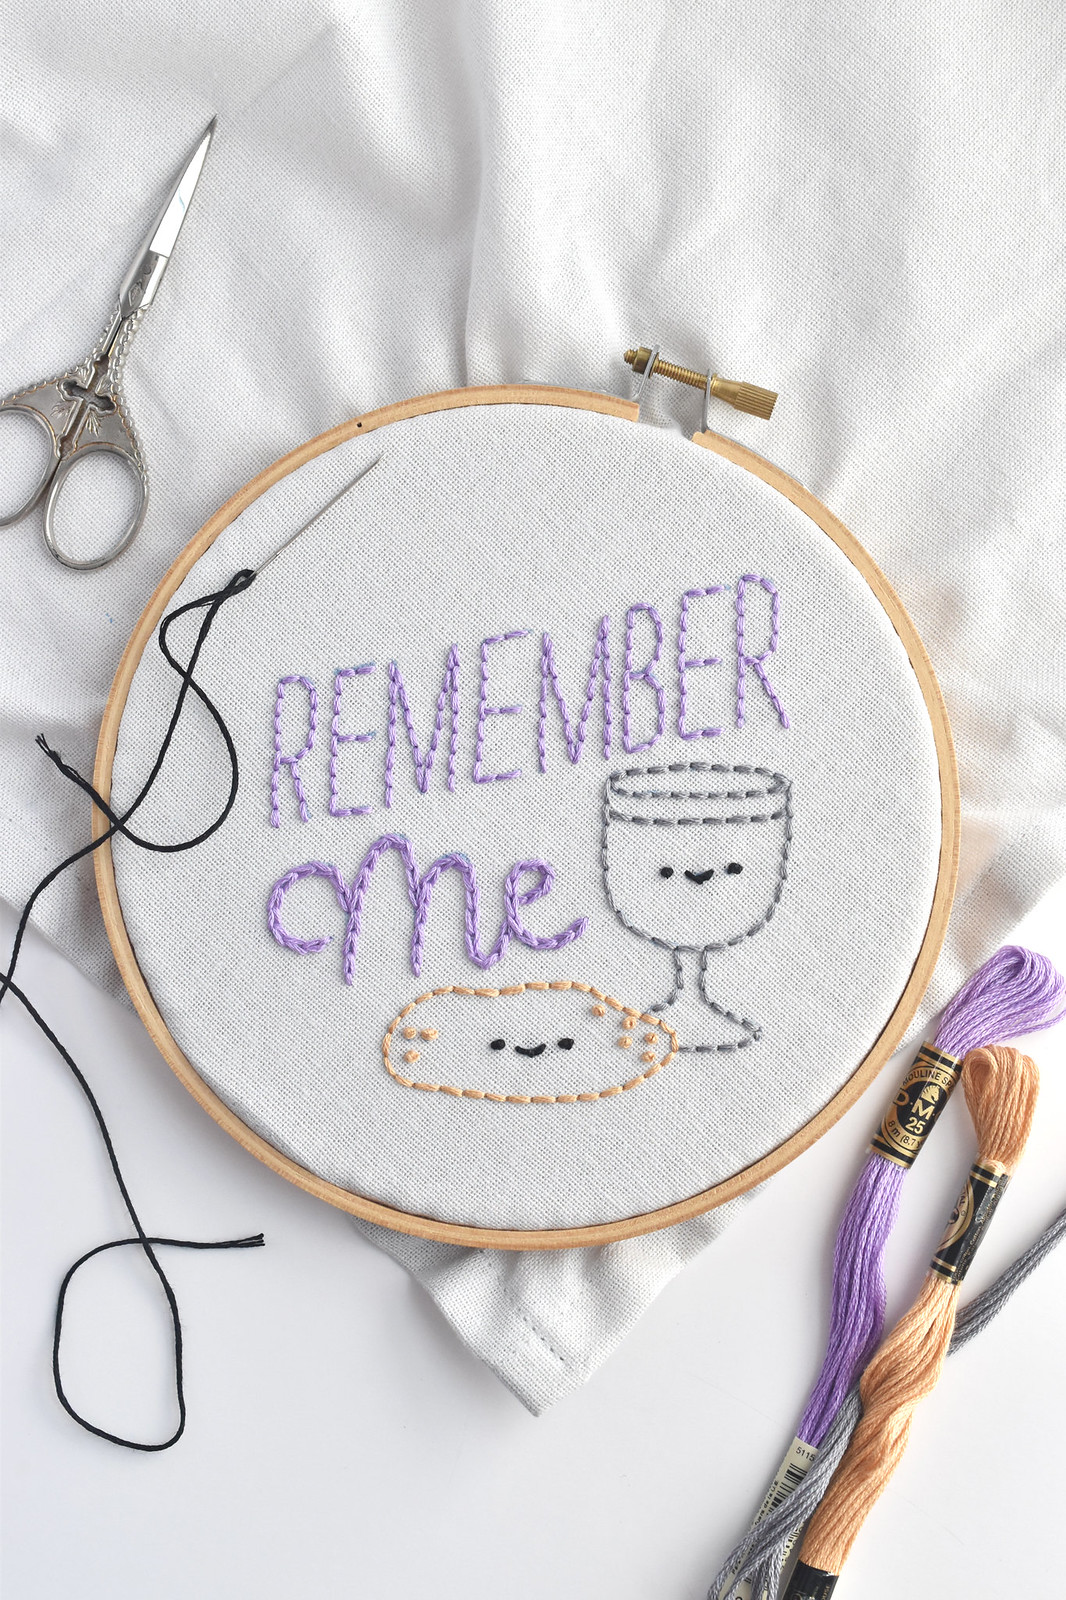
Remember Me. This embroidery pattern is a celebration of Jesus' last supper with his friends and our celebration of communion. It's Good Friday as I publish this, but this is a reminder for all of time. To me, that makes it worth stitching!
When Jesus broke bread and passed the cup, he said "Do this in remembrance of me." It was a directive to have a sort of memorial to God. But also it is about remembering who Jesus is and what he did and does. I don't know about you, but I forget. Like, every day. All of the things that I'm juggling in life and all of the things swirling around us in the world make it easy for me to forget.
Remembering Jesus is the thing that refocuses what it's all about.
When we receive communion in church, it's usually more formal. And that's great! But whenever we gather and share a meal, it's a perfect time to remember Jesus. Whenever we breathe a fresh breath it's a great time! But since Jesus' words were around a meal, I chose to include the bread and cup on my pattern.
I also chose to embroider the design on a kitchen towel that will work well in a bread basket. My mom often grabs a fresh cloth napkin or towel to line a basket for a meal, and my hope is that this will be the go-to bread towel now. Not just for special occasions, but for regular meals. (She thinks it may be too nice for all the regular washing, but I'm not gonna let that stop me from making use of this!)
I placed the embroidery at one corner of the towel and stitched it on a 45-degree angle. All of the stitching was with six strands of embroidery floss. Most of the lines are backstitch, the word "Me" is chain stitch, and I used french knots for all the dots and the eyes. The mouths are scallop stitch.
Of course, you can make adjustments and stitch this on whatever you'd like and however you'd like!
By the way, I started and ended all this embroidery with knots. Very tight and secure knots. And I also wove the tails (both and beginning and end) through the backs of the stitches. I want this thing to not come undone, but also, if I have to go back and fix it over time, that's fine. I'm also prepared to make another one. I have a feeling the towel will get more wear than the stitching!
If you like this design but don't want to or aren't able to stitch it, I created a printable version that is available to those who support me on Ko-Fi. You can leave a one-time tip or you can join the Ko-Fi Klatsch, which has new content added every month! The printable is a 5x7-inch piece of art that you can print at home and add to a frame.
Whether you choose to stitch (or print!) this for a special time of communion (it might make a nice first communion gift!) or for your everyday meals, my hope is that as you make and enjoy this, you would remember Jesus and how much he loves you.
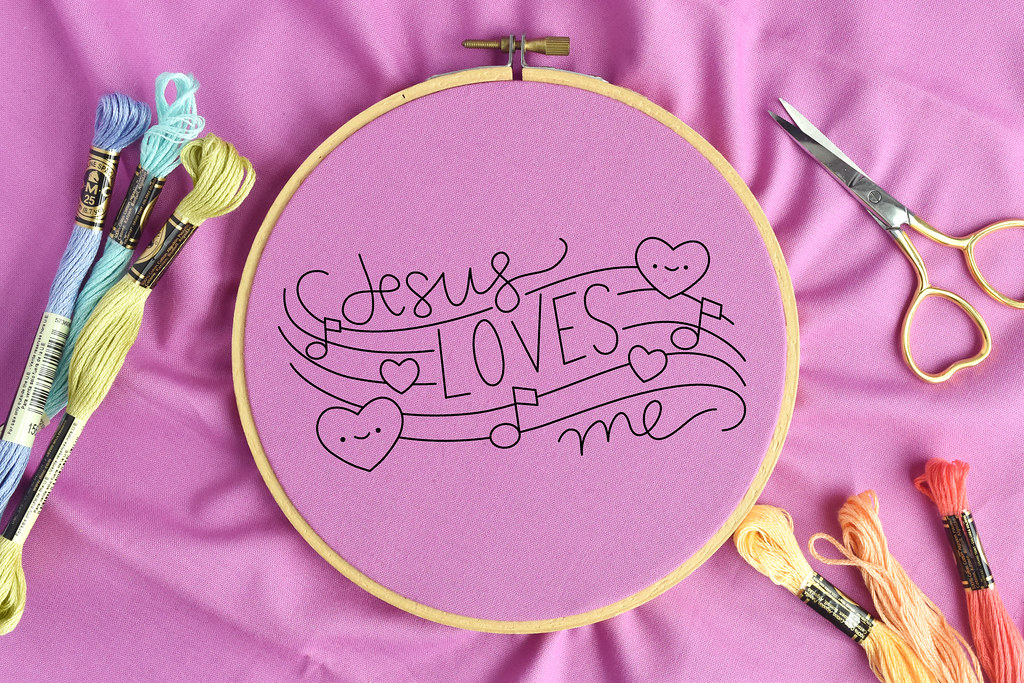
Jesus loves me. This I know. These simple words from a childhood song are now a kawaii Wild Olive embroidery pattern, free for you.
I've actually had this pattern drawn up for months, just waiting for when I was ready to post it. I always thought that I would have it all stitched up before posting, but it hasn't happened. And now it feels like a good time to share it with you, so here it is just digitally added to the fabric I envisioned using, along with the colors I thought would look nice.
But before I get to the pattern download, I just want to share a little about this.
First of all, I grew up with the song Jesus Loves Me. I not only went to Sunday School my entire childhood, but my parents taught my Kindergarten class and I went on to teach Sunday School in various ways through the years. This song is stitched into my very soul.
With all of that, you'd think that I had a firm grasp of what it means to know that Jesus loves you, but it took until I was in my 30s before I had this realization of...whoa...Jesus LOVES me. I'm not exaggerating when I say that it shook me in the best way. It's so real. And I say this knowing that not everyone believes or agrees with this whole Jesus thing. But I do.
And now that full meaning of Jesus Loves Me, not just the song, is stitched into my soul.
You would think that my little journey with these words would be enough to set me on a path to making this pattern. But no! It was actually something a friend sent me that had Jesus Loves Me on it and her asking something about if I had ever embroidered the words. HOW HAD I NOT? I really couldn't believe myself and so I sketched it up. And it sat for a while before I inked up the sketch on my computer. And then it sat again until now.
Which is a perfect time to share it with you and give you the opportunity to embroider this important reminder for yourself.
If you want to embroider this reminder for someone else or you want to express it as Jesus Loves You, I made an alternate version that I'm sharing over on my Ko-Fi for those who support me there.
Before I end this post, I'm going to repeat it again. Jesus loves me and He loves you too. So very much. I believe it with everything in me.
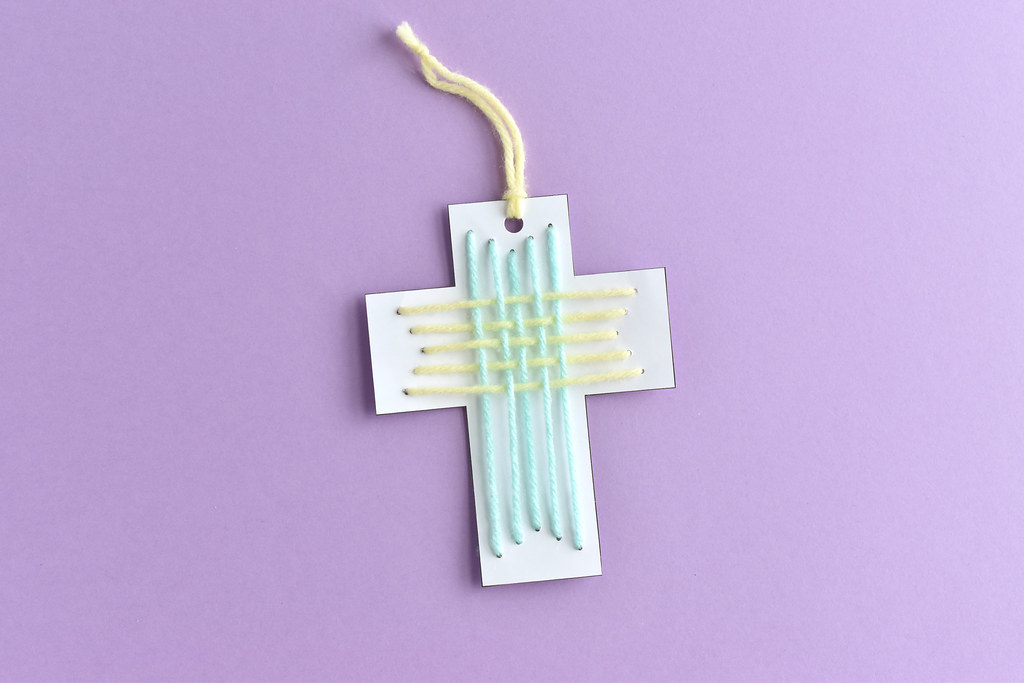
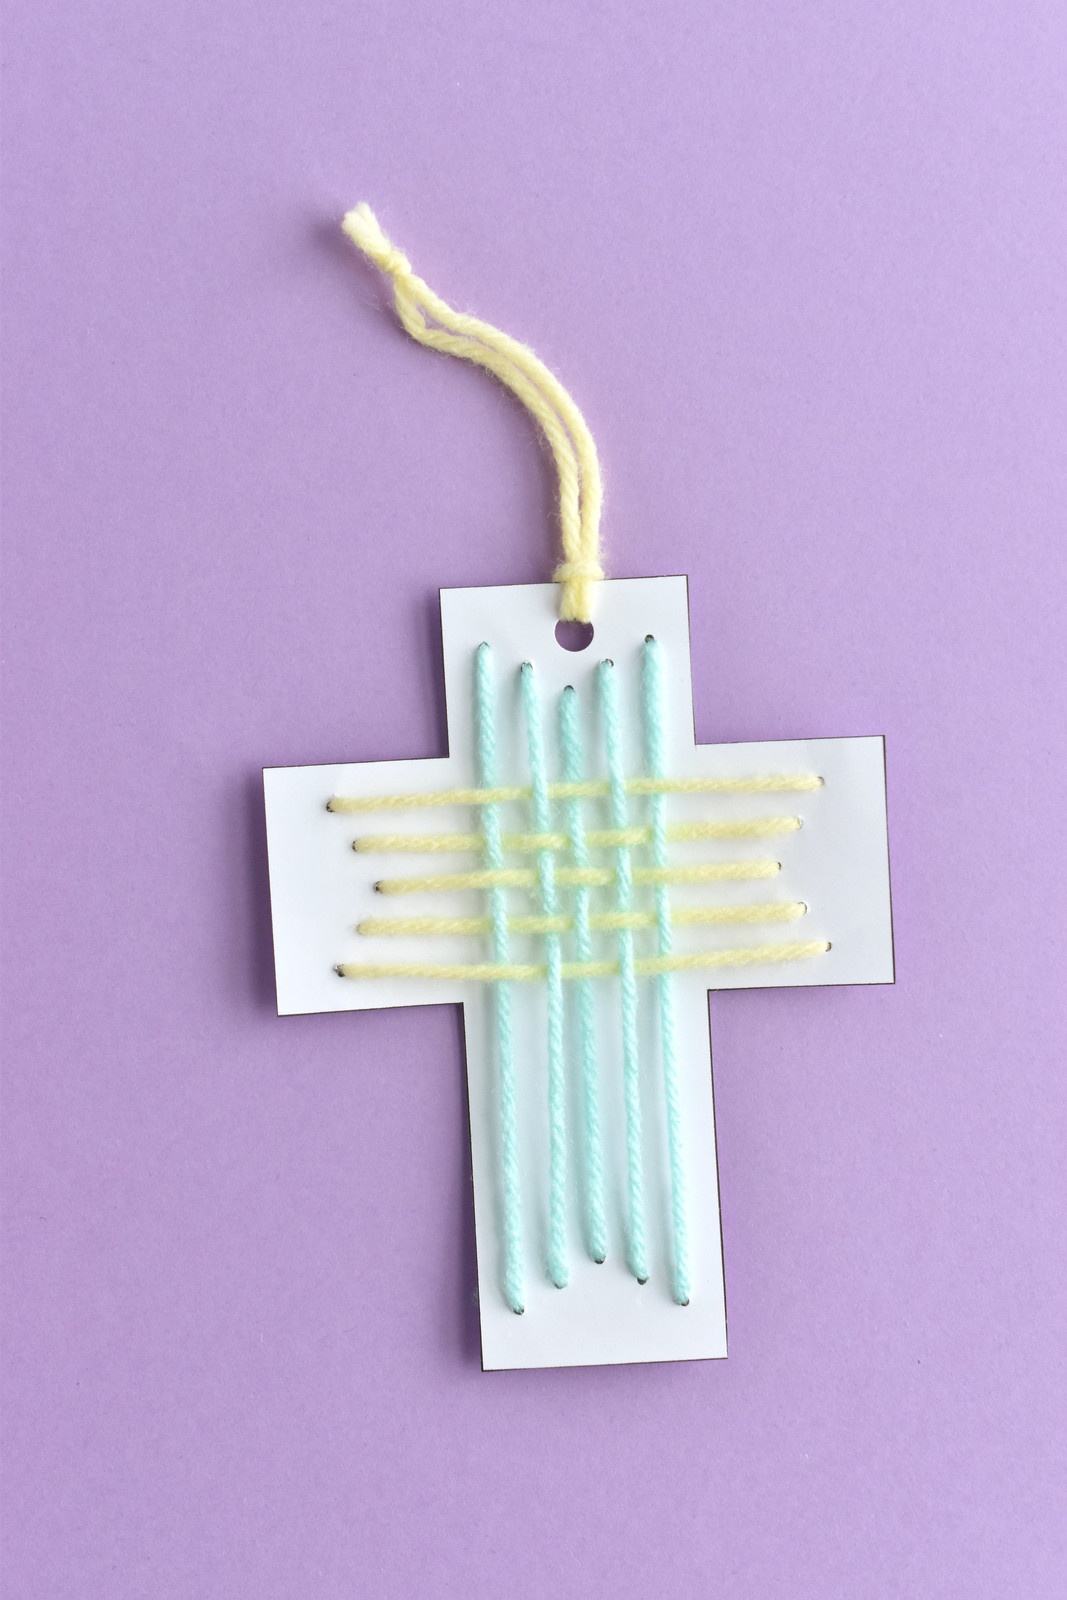
Today I'm sharing a simple little project that you can print and stitch for yourself, with your kids, or even share it with a group of students at your church! With Easter coming soon, this stitchable cross is a great reminder of what Jesus did to extend forgiveness to each one of us. You can hang it up as an ornament or use it as a bookmark!
You will need:
Cardstock
Scissors
Large Tapestry Needle
Yarn or Embroidery Thread
Hole Punch
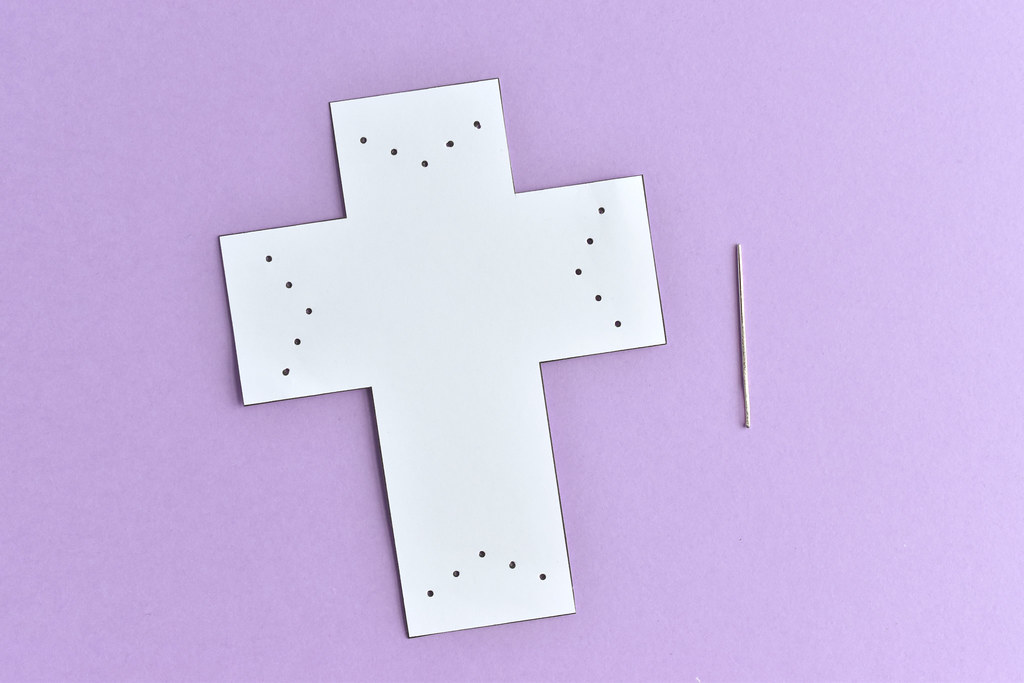
Cut out the cross shape. Use the needle to pre-poke the holes marked by dots.
Cut a piece of yarn or embroidery thread that's a little longer than your entire arm. Thread it through your needle and tie a knot at the other end.
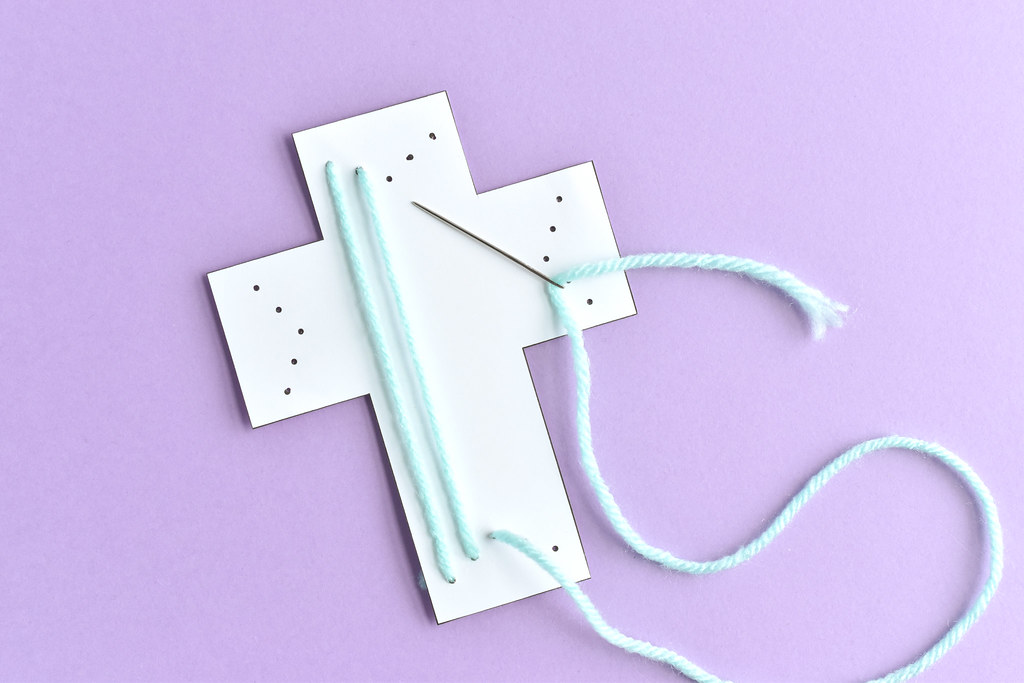
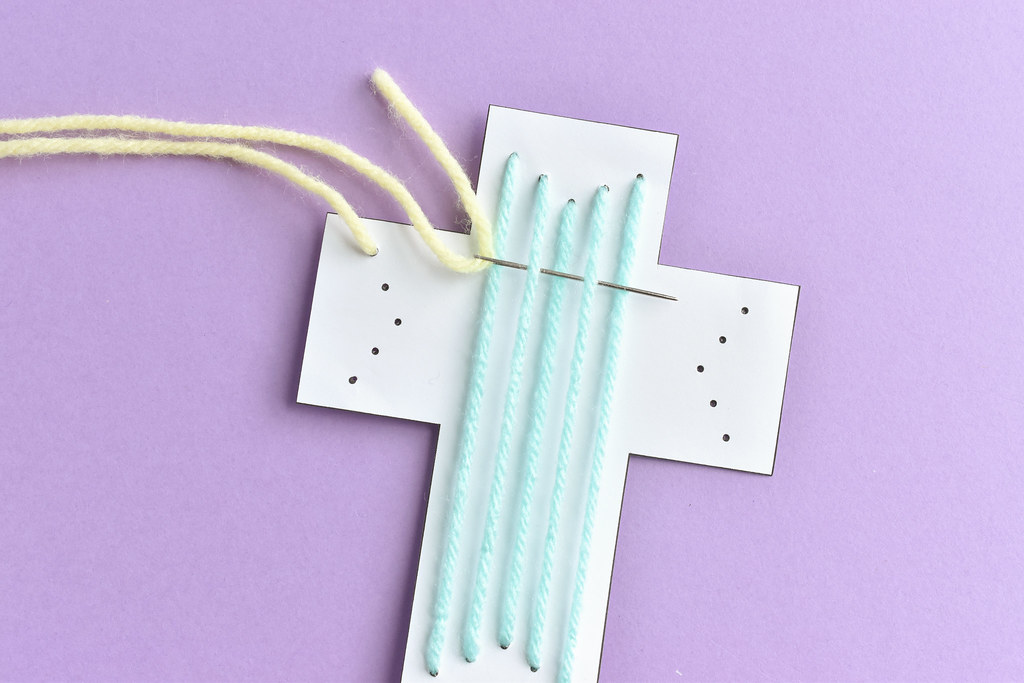
Come up through one of the holes near the edge. Stitch from bottom to top and top to bottom. Be careful not to pull the stitches too tight. End with a knot.
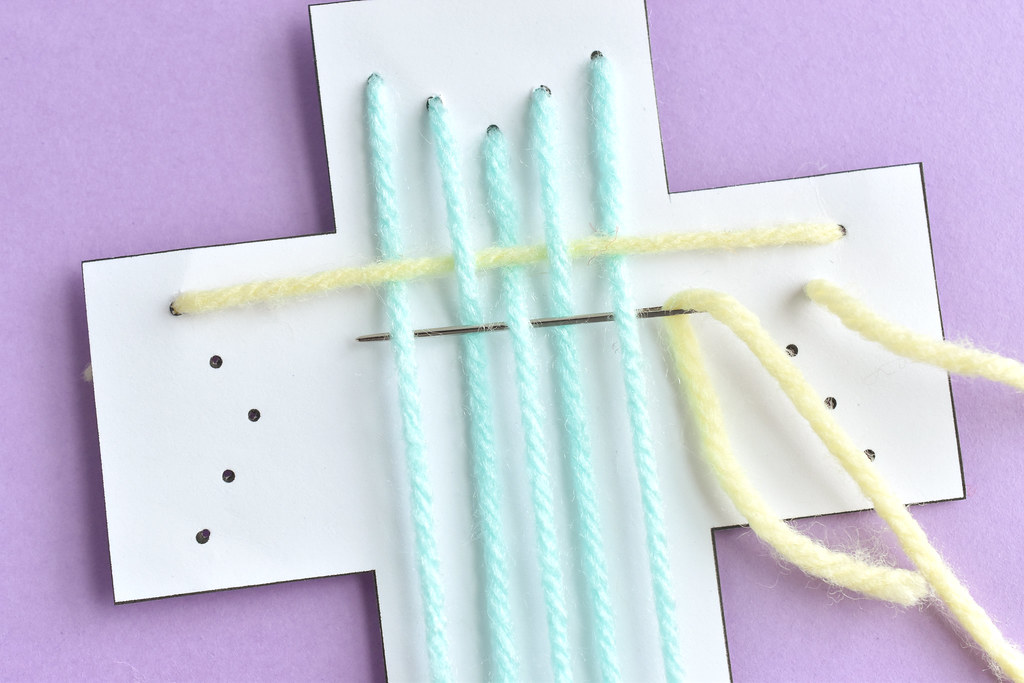
With a fresh piece of yarn, stitch from left to right and right to left. As you stitch, weave the yarn over and under the vertical stitches. Once again, try to keep the tension even on the stitches and then end with a knot.
Finish by punching a hole at the top and adding a hanging loop or a tassle if you want to use it as a bookmark.
For mine, I used two colors of yarn so the weaving was easy to see, but you can do this all in one color or with variegated thread! I also would suggest printing the templates on the heaviest weight cardstock you have. That will give it a bit more structure so it's easier to stitch without it bending.
These would also be pretty printed on colored cardstock...or even traced onto balsa wood! Ooh, yes...now I want to try that.
The real point here though is a cross that is decorated, but empty. It's a cross that reminds us of God's ultimate act of love, that didn't end with pain and death, but with new life! May this easy little craft bring joy and meaning to your Easter and your every day.
We are approaching Holy Week, a time when Christians remember and celebrate the week leading to Easter. When possible, I love to make and share projects that reflect my faith, especially when it comes to Easter. So today I'm sharing some patterns for making felt board pieces to tell the stories of Jesus.
If you are over a certain age and grew up in Sunday School or Awana, you may have experienced learning about the Bible on a felt board or "flannelgraph." In our tech-heavy culture, that seems like several lifetimes ago. And yet, the slow calm of felt pieces to tell stories is still effective
My dad helps in the special needs ministry at my church and I designed these simple shapes for him to use while teaching. Would you believe we've actually been doing a felt board on video? It's true. Even during this pandemic year when we haven't gathered in person, we worked with low-tech materials while presenting it though modern technology. And it's worked well.
It will also work well in your home. You can read from the Bible and use the pieces to teach your child, or you can let them act out the stories with the figures. It's as easy as cutting some simple shapes out of felt.
I started with several brightly colored people figures. There's also some animals. The pig and sheep have pieces that need to be glued together (this is better than dealing with loose pieces for them). And then we have some extra pieces that help tell the stories: a crown, bandages, and so on.
By the way, I just cut all the shapes out of wool blend felt, and I used my favorite freezer paper cutting technique!
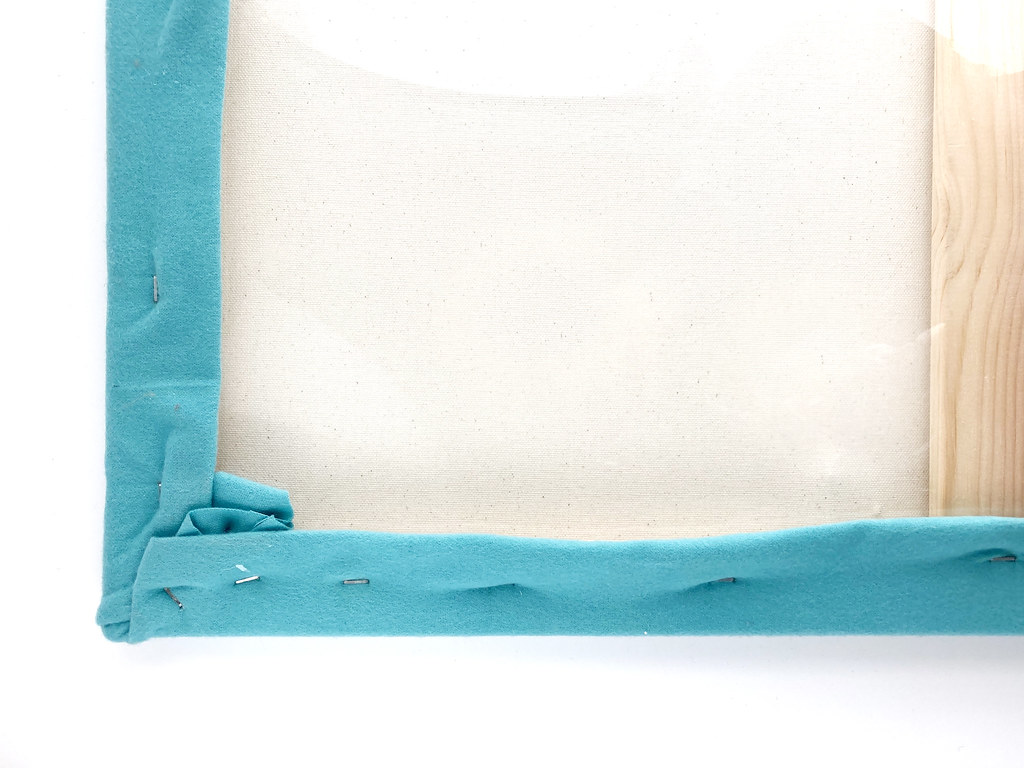
We made our own felt board by covering a stretched canvas with flannel. We stretched the flannel around the sides and attached it with a staple gun. But any flannel/felt board will do!
Now, let's take a look at some stories we used this for!
We started with some parables Jesus told, and we made a point of saying that Jesus told these stories to help us learn about God's Kingdom. They aren't like real things that happened. Also, I made a point of using the purple person to represent Jesus or God the Father in any of the parables or events. It's another layer of learning what these things mean.
First up: The Good Samaritan. You can see here how we used the bandages, showing how the Samaritan stopped to help the man by the road. We used other figures to walk by and the money bag showed up when taking the man to the inn.
The Forgiving King (sometimes this parable is known as The Unforgiving Servant). For this one, it just uses a few figures, the crown, and some money bags.
The Loving Father (this parable is commonly known as The Prodigal Son). In this story we've got the father and the two sons. We also used the money, the pig (because it's so much fun to include the son wanting to eat pig slop!), and a heart.
By the way, you may notice that the last two stories, we used titles that put the emphasis on the positive or the hero in the story. That was in the curriculum we follow at church, and I love it.
The Good Shepherd. One figure, the shepherd's crook, and a sheep. We didn't think it was really necessary to have 99 sheep to leave behind, and so I just made one. But we did pull out and show a bunch of cotton balls for the visual of all these sheep. That would be fun for you too!
Once we finished the parables section of our lessons, we've kept up the felt figures. The latest was when Jesus brings a child into the middle of the group of disciples and tells them that they need to be like children. Obviously this required a smaller figure!
And for Holy Week, we have...
Palm Sunday: several figures, the Donkey, several palm branches and coats
The Last Supper: at least several figures (or Jesus and the 12 disciples!), the bread, and the cup
Good Friday: Jesus on the cross figure, the cross, a few extra figures, and the heart (for John 3:16)
Easter: several figures and the empty tomb
Accension: several figures and the cloud (I also added the crown for King Jesus!)
Also, if you're looking for some good faith-based resources at a bundled bargain price (50 resources for $29.99!), check out the Christian Living Bundle. I'm a contributor and am excited to help make this available. But it's here for just four days, so hop on over to take a look!
Sometimes I create coloring pictures for my church and usually they are enjoyed by the kids, teens, and adults in our special needs ministry. Today I thought I should share two coloring pages based on what I've made for them, and both in the spirit of St. Patrick's Day! Each has a Bible verse on it, but I have plain versions without the Scripture too.
The first connects with one of the ways that shamrocks are used for symbolism. The three leaves represent faith, hope, and love, although sometimes they also are used to teach about the Trinity: Father, Son, and Holy Spirit.
I absolutely LOVE rainbows. There's something so orderly about seeing things in colors that perfectly blend from one shade to another. I also love that God made a promise with a rainbow, so this verse about promises being fulfilled in Jesus is such a good one to me. Rainbows and Jesus are a pretty perfect combination!
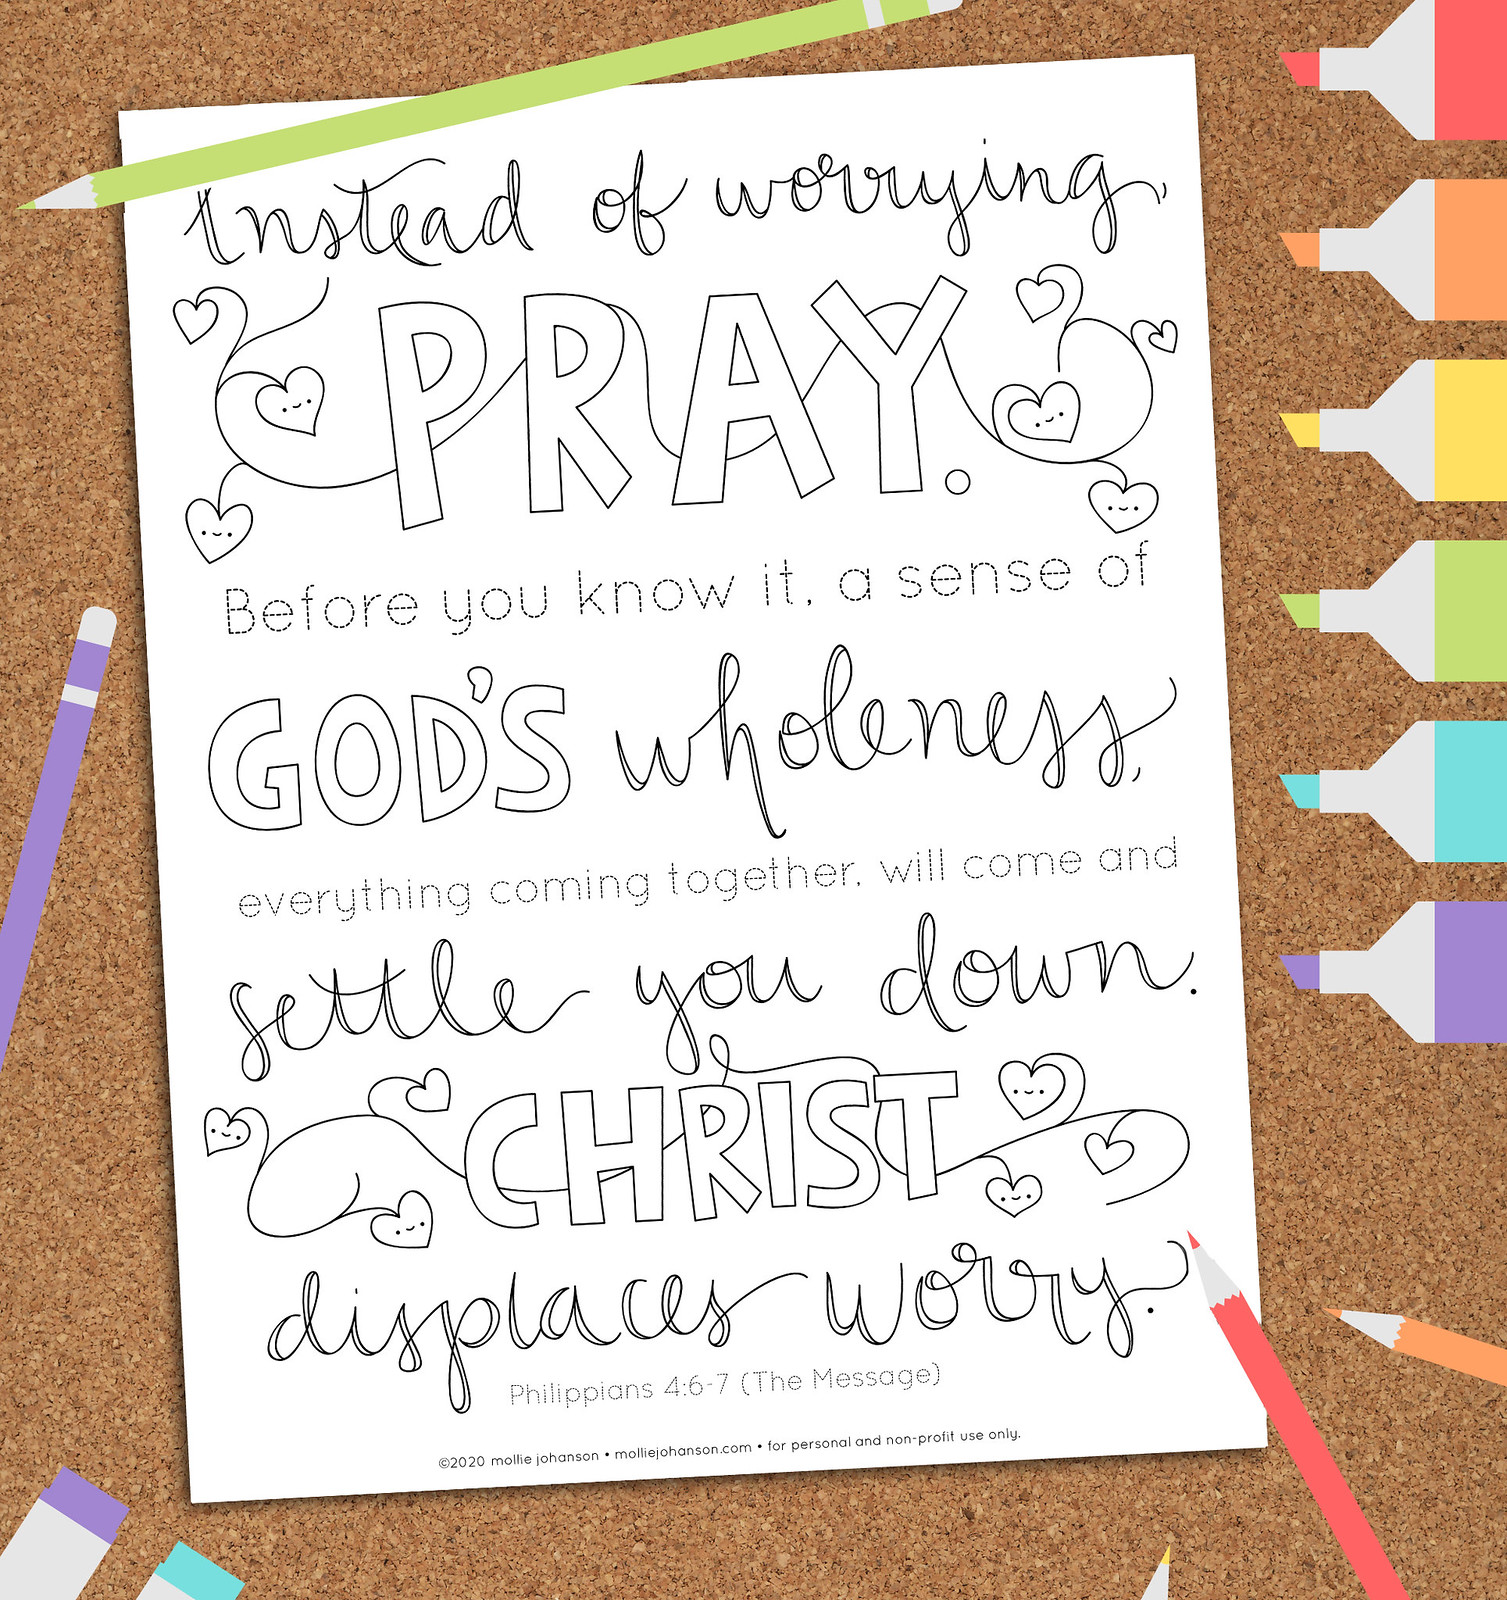
Feeling worried and anxious? Maybe you don't feel it as fear, but the fear all around you is still bringing you down. I have two suggestions! First, coloring is often found to help calm anxieties, so I have a free PDF coloring picture for you! But there's more, and it's right there on the coloring page.
Actually, this isn't my suggestion. This comes from the Bible, so personally, I believe it's even better than coloring. A lot better.
"Don’t fret or worry. Instead of worrying, pray. Let petitions and praises shape your worries into prayers, letting God know your concerns. Before you know it, a sense of God’s wholeness, everything coming together for good, will come and settle you down. It’s wonderful what happens when Christ displaces worry at the center of your life."
The coloring picture is a shortened version of the verse, and I included the parts that especially spoke to my heart.
And here's the good news! You can color AND pray at the same time! So as you calm your worries with art you can also invite Jesus to carry your anxieties because he cares for you.
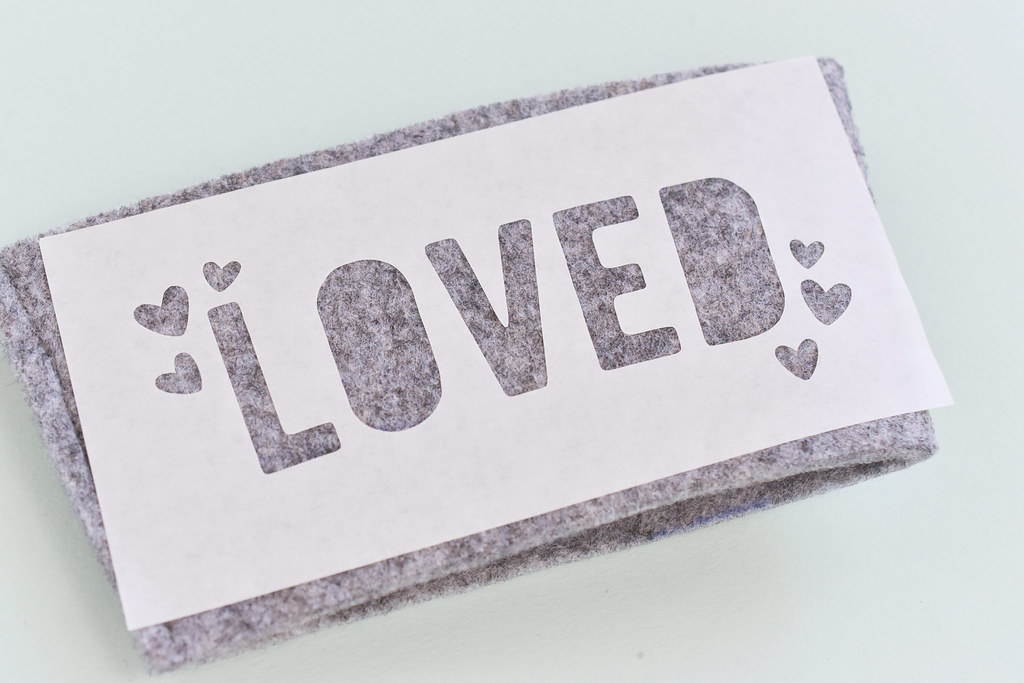
Remind someone (even yourself!) that they are loved with this easy freezer paper-stenciled coffee cuff! It's fast and easy to make, especially with the free SVG cutting file and a cutting machine.
You don't need to have a cutting machine though. You can hand cut the stencil for almost the same effect. Or, use the PDF template as an embroidery pattern and stitch a loved coffee cuff!
You will need:
A basic felt or fabric coffee cuff
Freezer paper
Cutting machine -OR - a pencil and craft knife
Iron
Acrylic paint
Stencil brush or foam paint dauber
For this project, I used the same sleeve base as I did for my Serious Crafter coffee cuff (scroll down in that post to grab the download and simple instructions). But you can use your favorite pattern and just apply my stencil.
Use the SVG cutting file on a cutting machine to cut out a crisp freezer paper stencil. The stencil should face the right way on the non-shiny side.
If you don't have a cutting machine, trace the PDF version of the pattern onto freezer paper. Use a craft knife to carefully cut out the design.
Iron the stencil onto the coffee cuff.
Dab paint onto the stencil and sleeve. Let the first coat of paint dry, then add a second coat.
Peel away the stencil to reveal the design!
I made this design so I could make gifts for some special people. I want them to know that they are loved, and I want you to know the same thing.
You are loved by me. I know we may not have met in real life or even exchanged emails or comments on social media. But I truly care about you.
And bigger than that, you are loved by Jesus. He created you and you have value. You are loved no matter what.
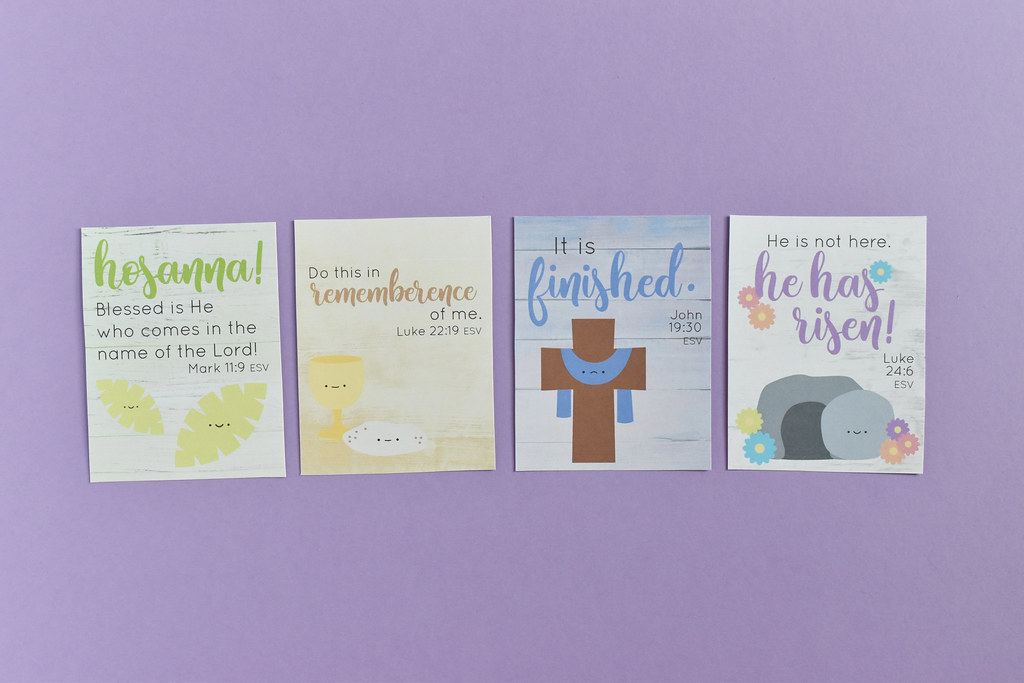
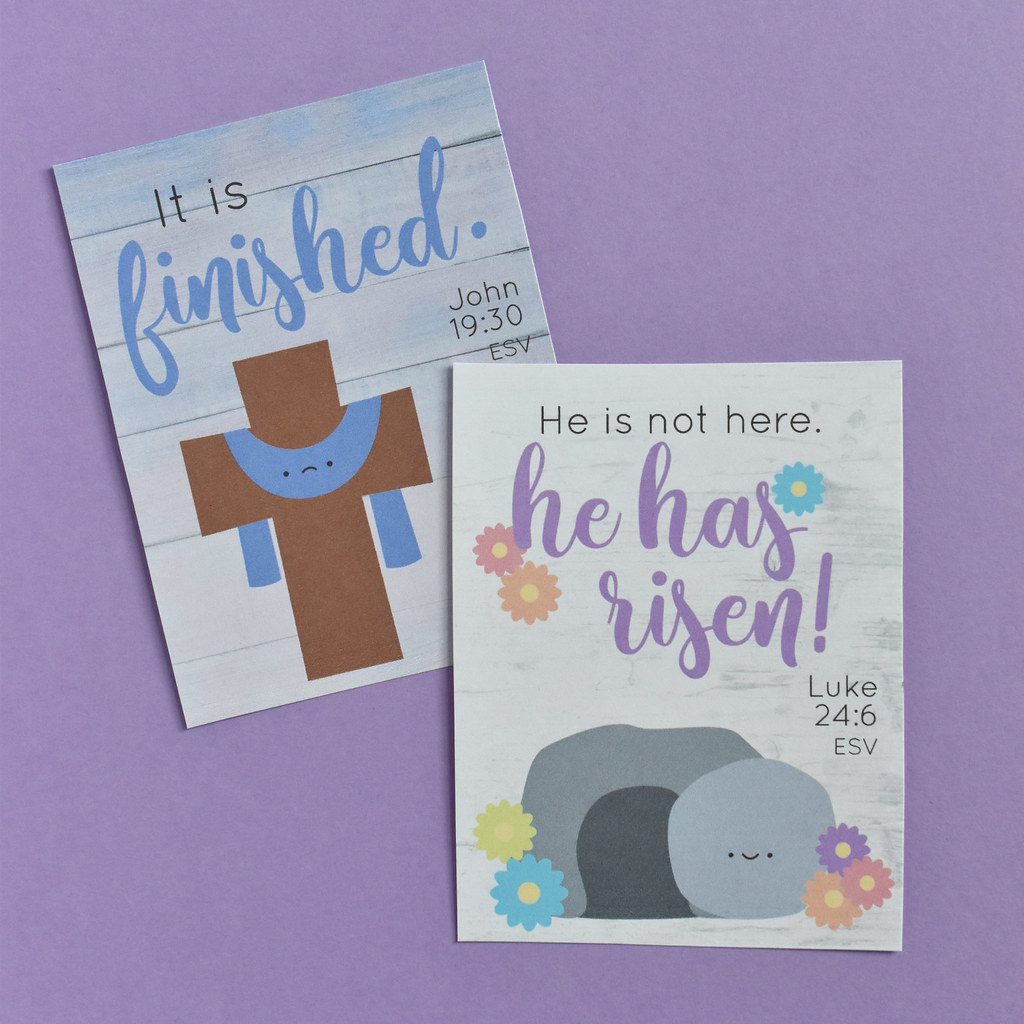
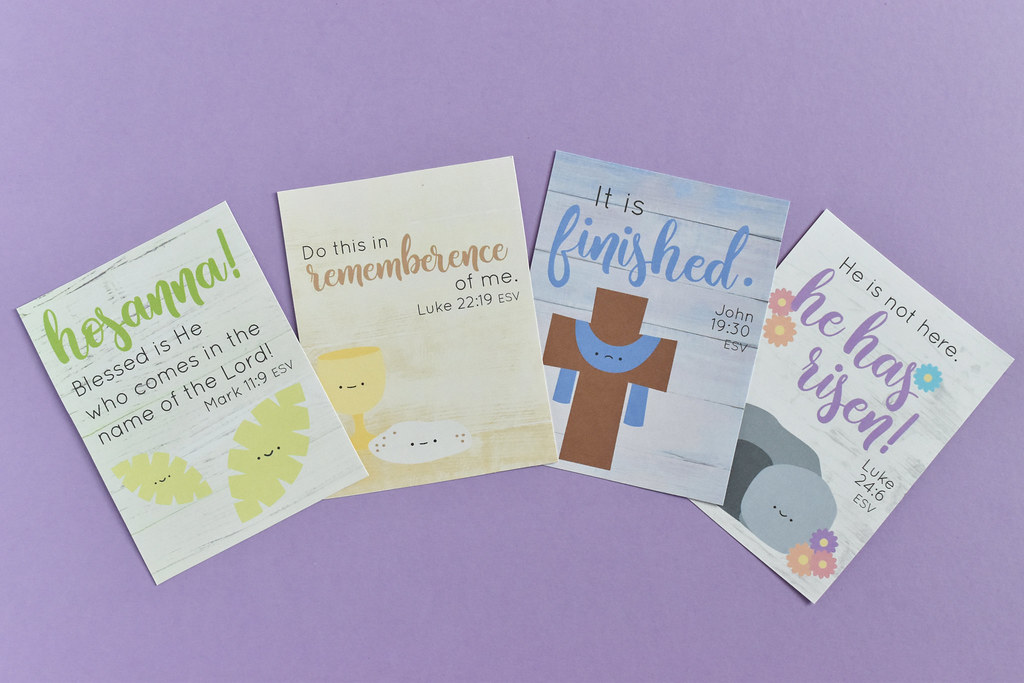
It's almost Holy Week, and I like to find my own Wild Olive ways of remebering, observing, and celebrating the most important week in history. This year I'm sharing these printble verse cards with you. The artwork is based on the Holy Week felt garland I made a few years ago.
These cards are a great way to learn a few verses from this week in Jesus' life, to mark these sections of your Bible, set around in your home to see Scripture daily, or even to add in to your Bible journaling.
All you need is some card stock and a pair of scissors.
I recommend printing the cards at the highest quality setting on your printer. You can also send this to an office supply print shop.
While I ask that you not use these commercially, I do love it when people share my work. Feel free to print as many as you want to give away, whether to a friend or your entire church.
For the cards, I could have chosen a lot more verses and icons to go with them. But I went with Palm Sunday, the Last Supper, Good Friday, and Easter Sunday. I'll also be sharing these on Instagram (I'm @molliejohanson there) on these key days, with some reflections.
Allow me to be candid. Sometimes I question whether I should put face on these objects that we connect with things that are holy. Like, do I cross a line by making communion cute? But here's the thing: my faith — my relationship with Jesus — is in every part of me. Or at least that's my hope! And making things cute is part of me, so why wouldn't I make these kawaii faith icons?
"So here’s what I want you to do, God helping you: Take your everyday, ordinary life—your sleeping, eating, going-to-work (for me, that means drawing cute things), and walking-around life—and place it before God as an offering. Embracing what God does for you is the best thing you can do for him."
Romans 12:1 The Message (parentheses added by me!)
May your Holy Week and your everyday ordinary life be filled with good things and God things!
This Sunday is the third Sunday in Advent, and traditionally you light the "joy" candle. There are other versions of this one, but I like joy.
We sing Joy to the World at Christmas, but it's not really about Jesus being born. It's about Jesus coming. And He's the true source of joy. Back in Bethlehem, today in the midst of difficulties, and forever in eternity. And I actively seek that.
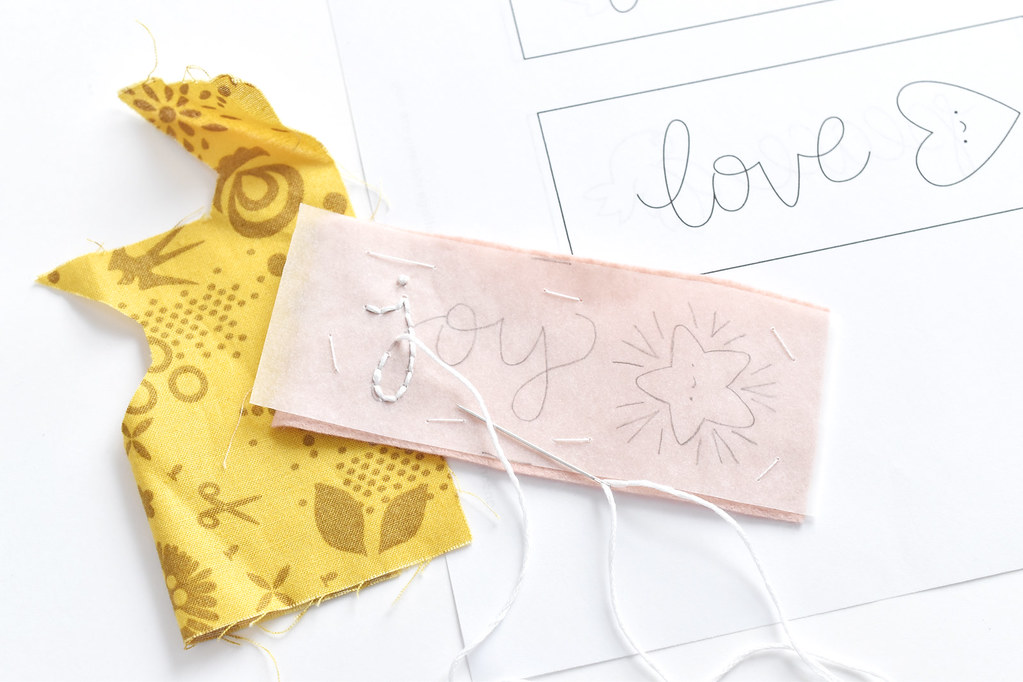
Anyway, here are the patterns for "joy" and "love", which is the fourth candle. These go with the Advent Candle Garland project I shared.
On Christmas Day, one last candle is lit, and it's the Christ Candle. This one is white, and for my pattern, I chose to use the name Jesus. It has a crown image to welcome the King of Kings.
Side note: Can I just tell you how much it bugs me that the joy candle is pink? I either want them all to be the same, all be different, or at least make the love candle pink. Honestly...this has always been a pet peeve of mine, but nobody asked me when they were planning this whole Advent thing...
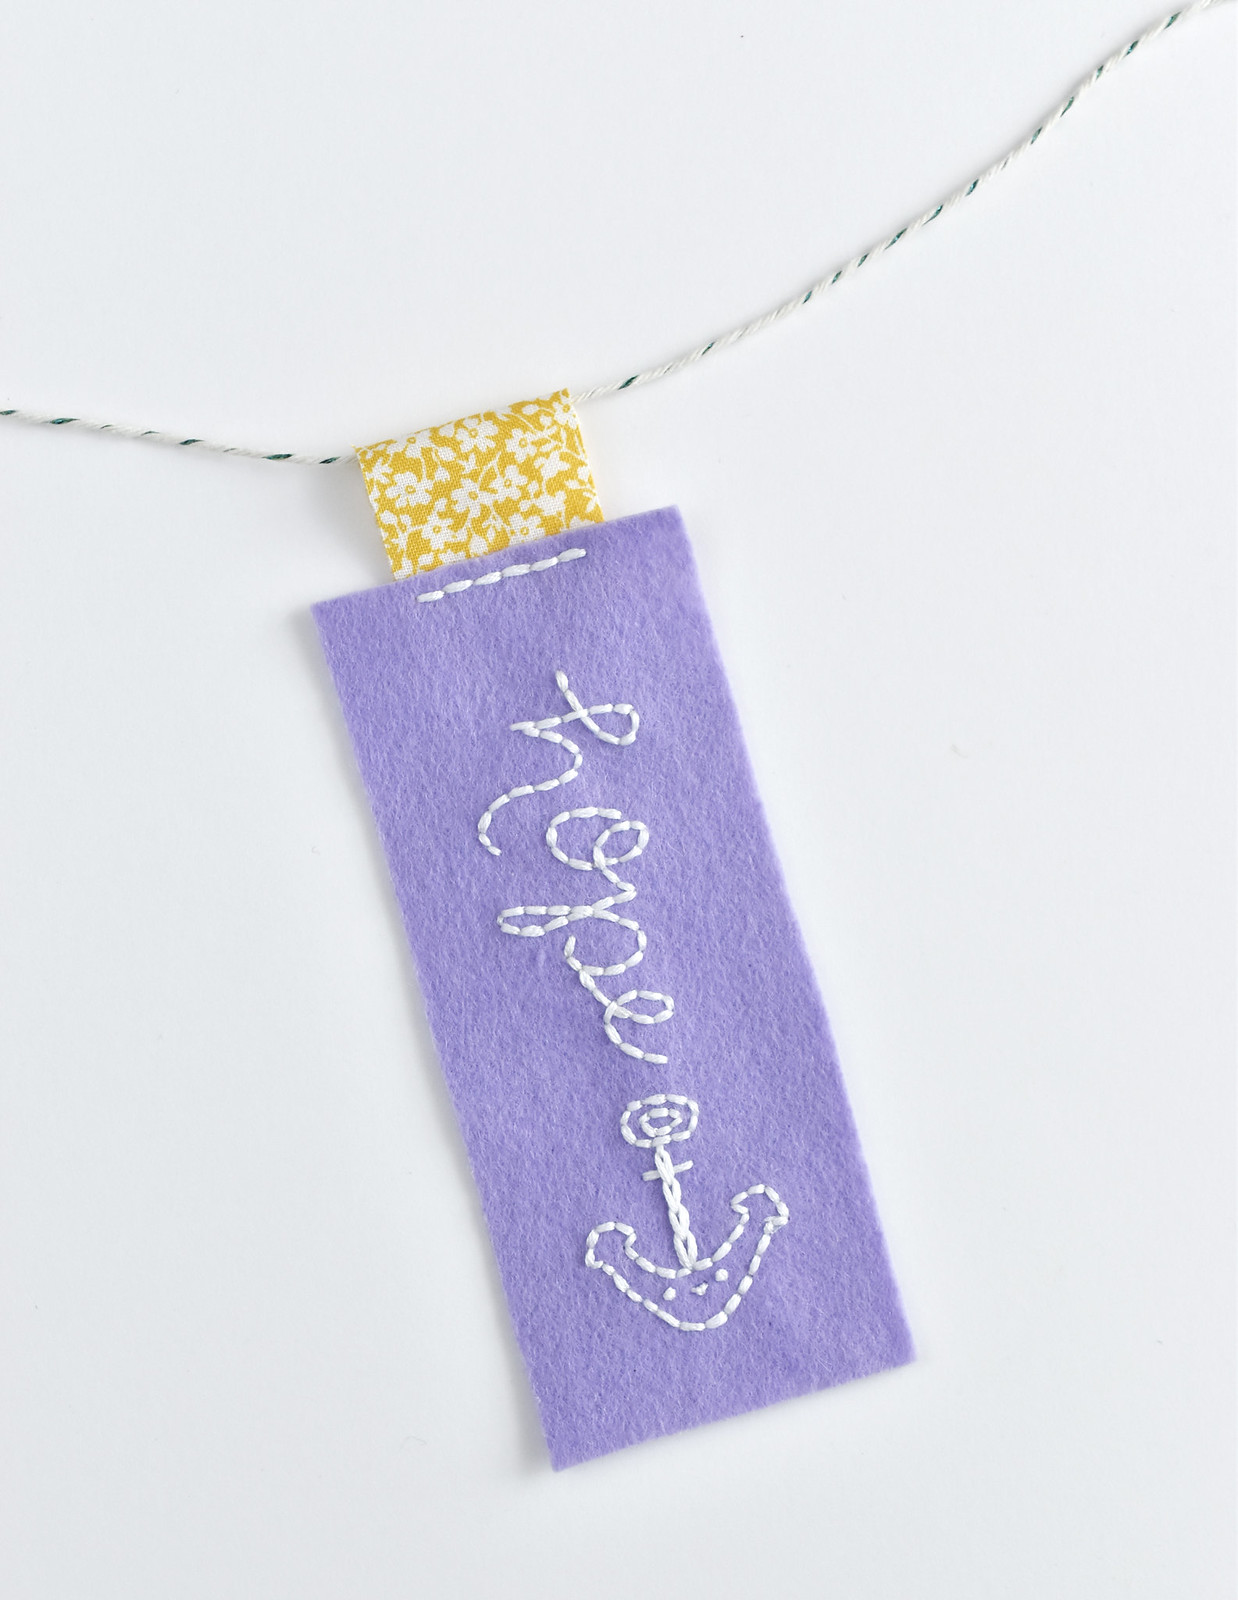
Advent wreaths come in many shapes and sizes, and this one isn't even a wreath at all, but rather, an Advent candle garland. It's stitched with words and icons (Wild Olive style!) that represent each week, and it's an easy project to make through this season.
We love to celebrate Advent at my house. Celebrate may not always be the right word, actually. Observe might be closer, because sometimes there's some sadness and longing that comes with Advent. But all of that helps make Christmas more of a celebration.
And I don't know about you, but even when I'm thinking that I'm ready for Advent, I'm rarely actually ready. Case in point: I started this project on the first Sunday of Advent. Ideally, I would have had this whole thing ready to go and display each week. Instead, I'm making it along the way. And you know what? I like that. It's part of the process of waiting well.
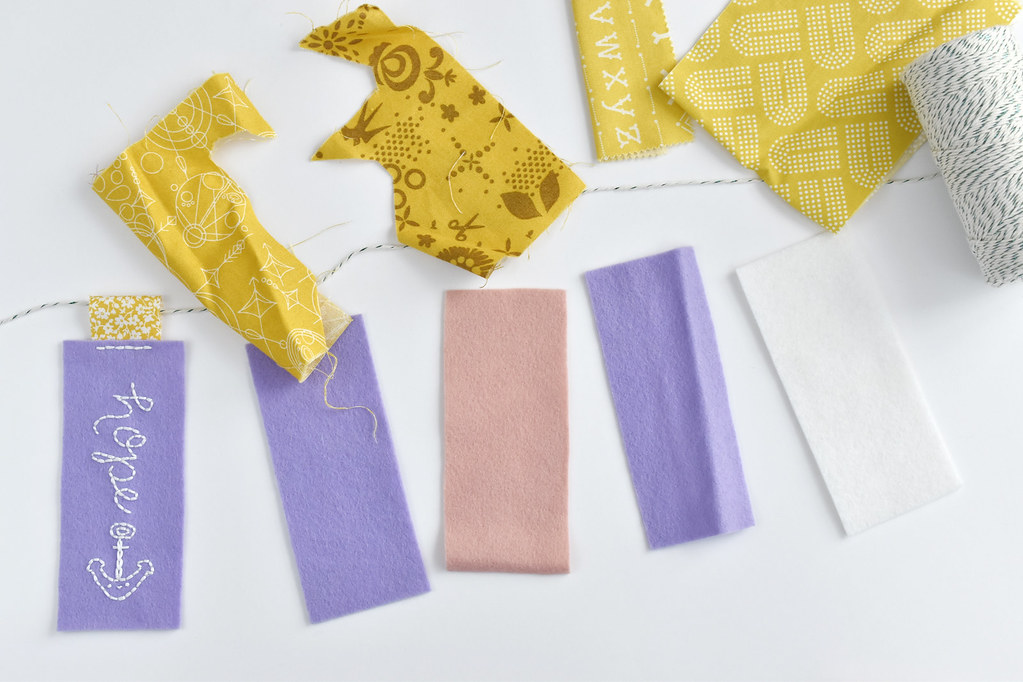
The idea I had was to make an embroidery for each week. (Last yearI madesome largerpatterns) Then I thought about the candles, and tried to come up with a way to include them, and then...what if the candles were a garland! It's abstract, with a yellow tab for the flame, but if you squint, you'll see candles. Maybe at some point, I'll add some greens in between, but for now, I have green sparkle string.
If you'd like to work on this along with me, please do. Below you'll find the first two patterns for weeks 1 & 2. They are hope (with an anchor...see Hebrews 6:19) and peace (with a dove). Both are on purple candles.
In the next few weeks, I'll share the patterns for the joy, love, and Christ candles.
You will need:
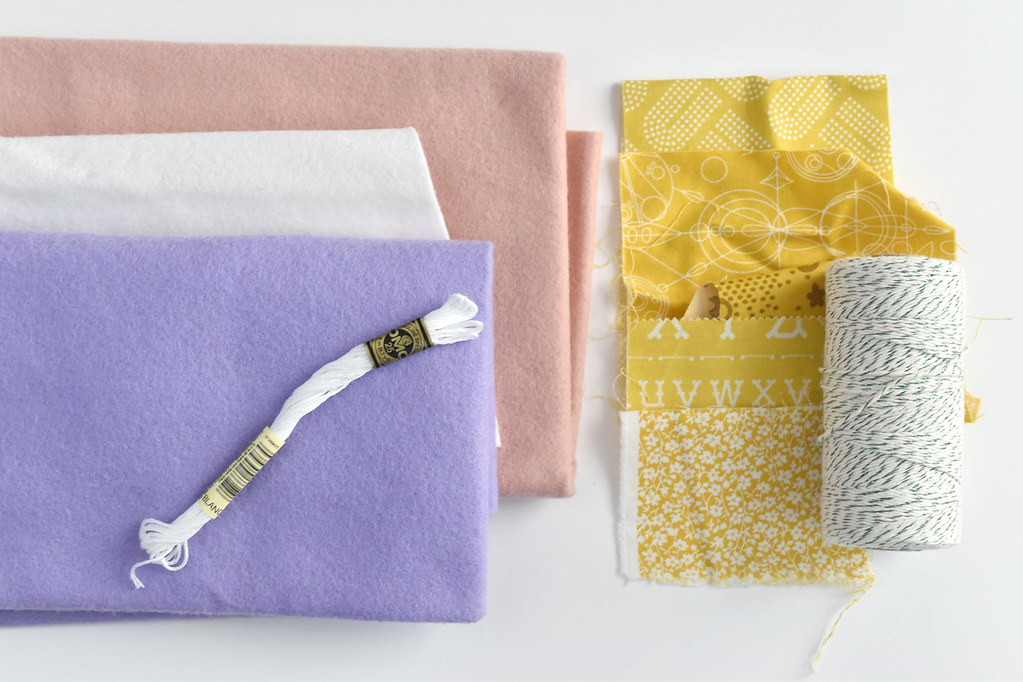
Purple, pink, and white felt (I use Benzie Design felt!)
Embroidery floss
Tracing paper
Yellow fabric scraps
String
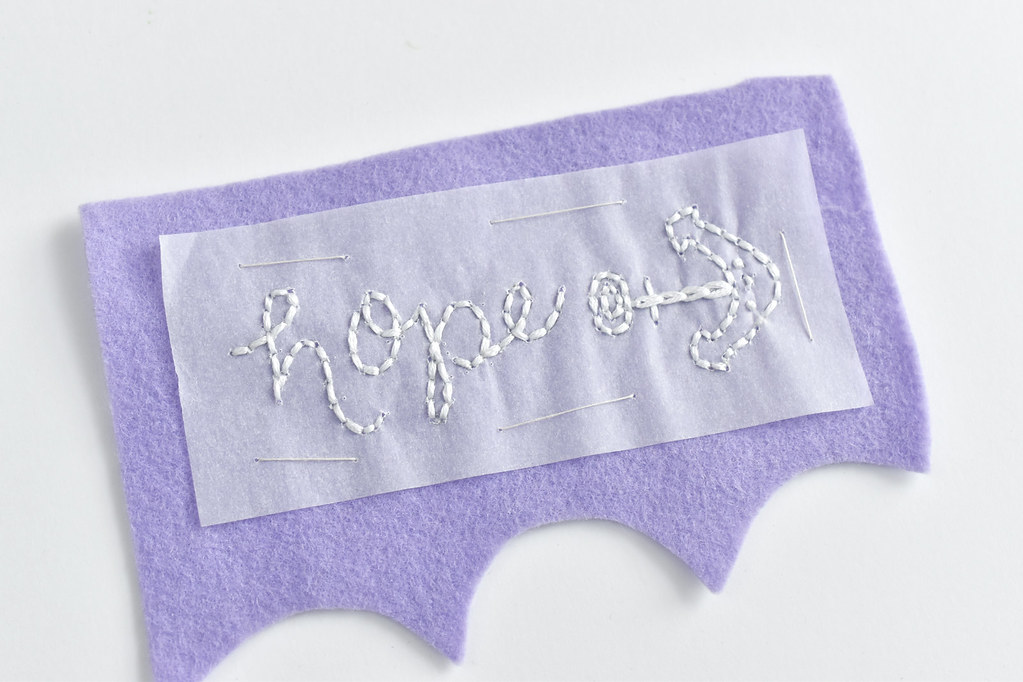
To make each candle, trace a pattern onto thin tracing paper. Baste the paper onto the felt. I used to always use pins for this, but basting the paper is a little easier for me because there's nothing for the embroidery thread to catch on.
Stitch through the felt and the paper as you embroider the design. I used all six strands for this. On the eyes for the anchor, I wrapped the needle just one time for the french knots so they were tiny.
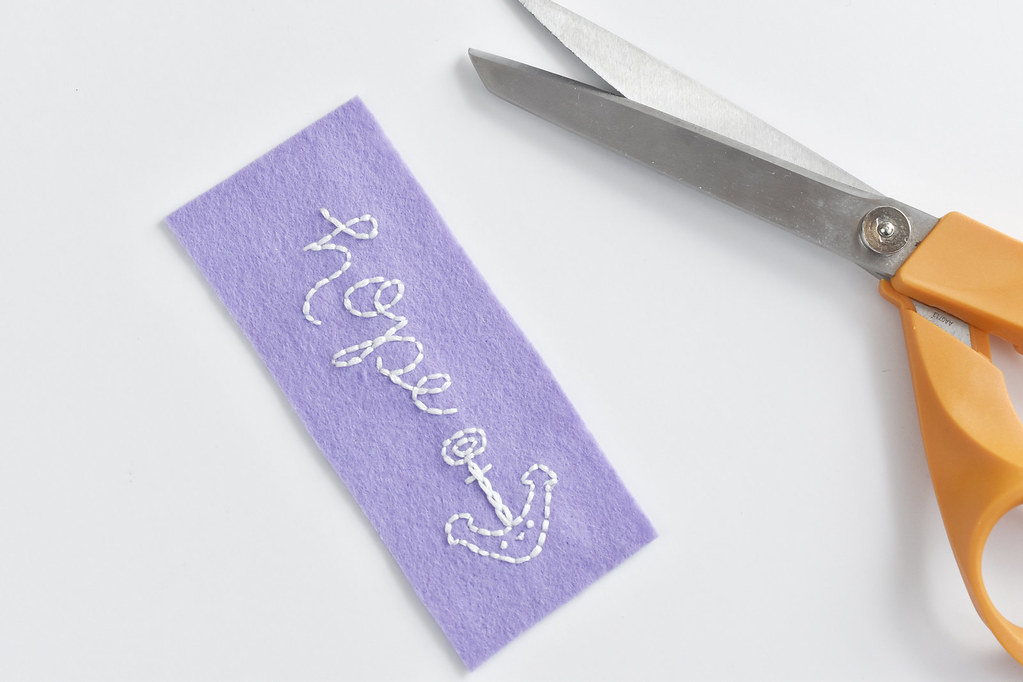
Tear away the paper and trim the felt down to 2"x5". You may find that it's simpler to cut the felt to size before you stitch from the previous step.
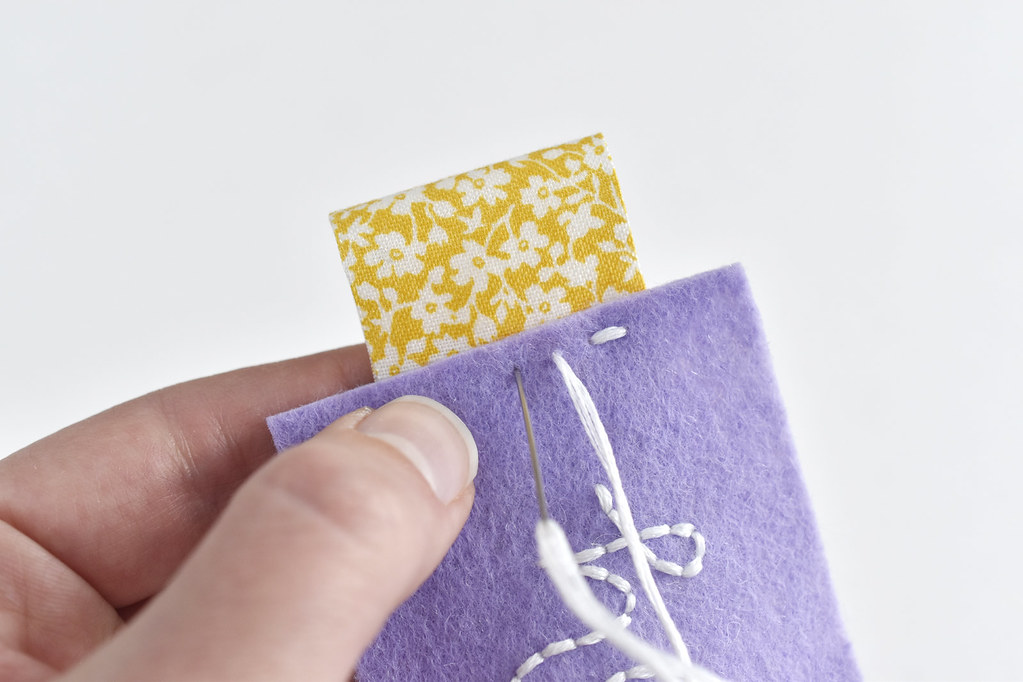
Cut a small rectangle of yellow fabric and fold it in half. Hold it behind the top of the felt piece and stitch it in place. I stitched with running stitch, then went back and filled in the gaps with running stitch, which, by the way, is called holbein stitch.
Thread a hanging string through the candle tab/flame. Tie a loop in each end and add candles each Sunday in Advent!
I'm working on this project week by week, but this gives you an idea of where we're going. Normally I'd feel bad about not having a finished project to show, or even having all the patterns ready! But Advent is about waiting, so this is probably okay!