about shop patterns projects printables extras sponsorship wild olive twitter flickr pinterest subscribe
Showing posts with label patterns. Show all posts

pattern // stitch all the time, disco occasionally

Disco Ball Embroidery Pattern

My sister Grace is a big fan of Harry Styles, so in honor of his album "Kiss All the Time. Disco Occasionally." I thought it would be fun to update an old design I made of a disco ball embroidery pattern. Instead of just stitching this, I asked Grace to assist by painting in all the little squares. The result is something truly special, if I do say so myself. That's all thanks to my sister's talent. (Goodness knows I had no intention of filling these in with satin stitch!)

This is a free pattern, and there are lots of ways you can stitch it. Metallic thread would be a-MAZ-ing, it would look cute on a t-shirt, or if you're brave you can satin stitch the sections. We used acryic paint on linen, then added back stitch and a few sequins. It's one method of embroidery tinting!


Want to see how this all came together? Here we go!

Disco Ball Embroidery Pattern

The fabric here is white Essex Linen. You can use any fabric you like, but natural fibers are a good idea. When in doubt, test some paint on the material.

Trace with a regular pencil.

Disco Ball Embroidery Pattern

Place the fabric in a 7-inch embroidery hoop while you are painting.

This part is where you can get creative. Using acrylic paint, each little square gets filled in with different colors. The idea is to have an area that has the highlight, with darker colors around the edges. They aren't supposed to be a perfect gradient and sometimes there can be some random bits of color.

I asked Grace to make this a more pink one, but if you search for disco ball painting, you'll see some great inspiration. Just mix the paint a little at a time, keep it bright, and you'll have something fun.

Disco Ball Embroidery Pattern

After the paint is completely dry, start stitching. Use six strands and a chenille needle so that the embroidery really stands out. The thread color I used here was DMC 02.

Because the paint makes a fairly solid surface, you need to be intentional with your stitches. If you poke the needle through where the paint is, it will leave a hole, so be gentle as you come up through the fabric. Check that the needle is coming through in the correct spot before it fully comes through.

The face and sparkle markings on the disco ball won't show after painting, so you may need to re-trace those. Or just freehand stitch them.

Disco Ball Embroidery Pattern

If you want to add some sequins, use two or three strands. Stitch the sequins down with a little star shape.

I only added the sequins to the sparkles on the disco ball, but I may go back and add some more.

Disco Ball Embroidery Pattern

And you're all finished! This is such a fun project, whether you love Harry Styles or simply enjoy a bit of sparkle in your life.

Happy Stitching!

pattern // it's a small world lyrics embroidery designs

it's a small world!

Love it or hate it, "it's a small world" is a song and Disney attraction that almost everyone has opinions about. Personally, I'm a huge fan. I love the overall vibe, Mary Blair's set designs, and yes, even the earworm of a song. But the meaning behind it all is my favorite. So I decided that it was time for me to make an embroidery pattern (or 3!) to celebrate these lyrics.

I chose a line from each version, including the newest verse that the Sherman Brothers wrote and Disney recently shared and added to the attraction. Then I added a few icons from the ride and the facade.

The designs are sized to fit in a 6-inch embroidery hoop, and I think it would be so cute to stitch all three and hang them as a little grouping. But they would also be perfect for stitching on a tee or hoodie, perhaps to wear on your next park day. Or maybe just for running errands and being around the small worlds we all live in. In times when it feels like things are falling apart, remembering these things can be world-changing, I believe.

it's a small world!
There's so much that we share.

it's a small world!
A smile means friendship to everyone.

it's a small world!
The love we give makes us humankind.

Download the "it's a small world" Lyric Embroidery Patterns

Let's lean into these things. Let's sow love and stitch joy!

PS: If you love "it's a small world" like I do, check out my pattern for making calico goat scrappy hoop art!

pattern // make a cat pillow for cat day!

Cat Pillow

I am always a sucker for fun holidays, so it's fitting that I get to share a pattern for making a cat pillow on National Cat Day. Now, let me start by saying that this is a pattern for making these cat faces that can go on a pillow, but it's not a full tutorial. You can watch how I created this checking out my Instagram Reel that I made with Missouri Star Quilt Co. below.

The idea is really that you can use the mix-and-match templates to not just make a pillow, but maybe some hoop art, or on a quilt. For the easy pillow, I only used fusible web to attach the face pieces, but you might want to sew around them too. Definitely for things that get lots of use or that you would be laundering, like a quilt or a shirt.

I just really had fun making some cute kitties, and I hope you do too.


If you make something with this pattern, I'd love to see! Tag me on Instagram @molliejohanson. Now, I think I'll go give Darcy Cat a little treat on this special day!

pattern // kawaii flower pocket embroidery

Kawaii Flower Pocket Embroidery Pattern

Add some cuteness to your clothes with this easy and free embroidery pattern! Each month I write a column of sorts for Simply Sewing magazine. It's called Stitch Upcycle and I show ways to add embroidery to clothing and accessories or use scraps to make new things (and also stitch on them!). This is a project like that!

While on a trip to my local Salvation Army store, I found this linen Old Navy Boyfriend Shirt for a couple dollars. It was exactly the kind of thing I like to stitch on, so I bought it and waited for a fun idea to come along. And then I had the idea and opportunity!

Recently I was invited to go live with Clover and Amy from Curious Papaya and show how to add embroidery to your clothes. You can watch the entire thing (including my tech going horribly wrong), but I'm sharing the pattern here for you now!

Kawaii Flower Pocket Embroidery Pattern

I printed the pattern at 100% on Sulky Sticky Fabri-Solvy so that the flowers really make a bold statement. And then I used all six strands of floss with a chenille needle.

Because I like things that are kawaii and super cute, I chose colors that match my aesthetic. The colors I used are DMC 899, 3825, 743, 472, 964, and 3608. But you can go with colors that you love or that match whatever you're stitching on. You can also use all one color or just a few. I started with the pink on one side and then changed colors every few flowers to make a rainbow.

Kawaii Flower Pocket Embroidery Pattern

Grab the free pattern below and start stitching! You only need to know lazy daisy stitch and straight stitch, and it's truly a fast and fun upgrade to your clothes!

pattern // a little teapot

A Little Teapot Embroidery Pattern It's National Tea Day, and I'm celebrating with a free embroidery pattern!

The timing of this was too perfect. The other day, I was looking at an old file because I was trying to track down something I made over ten years ago. In the process of doing that, I found a pattern that I made but that never became anything. I had forgotten about it entirely, and it was just sitting there waiting.

The pattern was this "I'm a Little Teapot" design, which I originally intended to stitch on a teapot cozy.

When I heard that it was National Tea Day, I knew that it was meant to be and I pulled out the pattern so I can share it with you now. This is a no-frills pattern, so that means you get to choose which colors and stitches to use. But I know you'll get creative!


Now, go make yourself a cup of tea and enjoy some happy stitching!

pattern // wwjd? kawaii style!

WWJD Embroidery Pattern

The letters of the 90s are back: WWJD. And I'm bringing them to embroidery with this free pattern featuring my kawaii style!

WWJD? or What Would Jesus Do? is a phrase or question that I've kept in my mind ever since I got my first WWJD bracelet way back when. My own bracelet was hunter green, and then I got a black one as well. It was the thing to have, but I never want it to just be a nice idea. I want it to be the very thing I live by.

What WOULD Jesus do? Sometimes it's hard to know exactly, but at the very least I can know some things he WOULDN'T do. I also know that I mess this up all the time and I'm certainly not always living and making choices like Jesus. But bit by bit, hopefully I become more like him in the way I go about my days, months, and years.

So it felt like a good time to make a little embroidery pattern that can serve as a reminder for myself. And if you'd like that reminder too, I offer this free pattern.


I haven't stitched my own yet, but I'll be doing the letters in three strands of chain stitch, just like I did for my Do the Next Right Thing hoodie. The faces are French knots and scallop stitches.

If you print the pattern at 100% it will fit in a 5-inch embroidery hoop, but it would also be great on a t-shirt or hoodie. Just something to show what you believe, while not forgetting how to orient your life.

Simple stitches. A simple idea. But harder to live. And that's okay.

If you're someone who wants to base your life off of Jesus and what he would do in any situation, be encouraged. It's worth pausing to ask this question. And even better if you ask HIM for help. Get to know him and you might just become more like him.

pattern: teeny tiny lanterns

Lunar New Year Lanterns

Lunar New Year is a great time to stitch up some little lanterns. These ones are teeny tiny, which might just be my favorite kind of embroidery! After I did the lantern embroidery, I threaded a bit of floss through the hanger on the lantern, then secured the ends of the thread in the hoop edges. I like that it looks like it's hanging there!

Lunar New Year Lanterns
Lunar New Year

I created this pattern and wrote the original post for this way back in 2012, but I was thinking about the patterns again and I'm going to stitch another...and maybe a few more! I grabbed some adorable fabric that will end up giving my lantern a subtle rain bow on it. Pattern traced, and now I just need to stitch.

And pulling these out again made me think about the shapes and wonder how accurate my designs were from way back when. Thankfully I had a few photos from the Lunar New Year celebration at Disney California Adventure to compare them to:

Lunar New Year
Lunar New Year

The faces weren't on the actual lanterns, but I just HAD to add some Wild Olive flair to them! I also realize that Disney may not be the MOST accurate celebration, but I think it's still a decent representation. And the colors might just inspire my own new stitching!

In the pattern, there are a total of four lantern styles that I've drawn up for you. Embroider just one or a whole bunch of them on a string! They're tiny and quick to stitch!


Lunar New Year Lanterns

If you stitch some of these up, I'd love to see them! Tag me (@molliejohanson) on Instagram, or leave a link in the comments.

pattern // do the next right thing embroidery

DoTheNextRightThing1

In the movie Frozen 2, the phrase Do the Next Right Thing comes up, and Anna even sings about it, and I decided to embroider it! And you can too with my free embroidery pattern!

It's just a little bit kawaii-Mollie, with my signature faces stitched on the crystals around the words.

And I love it's sort of secretly Disney. Only the people who know will know. But the message of Do the Next Right Thing is one that is good for all of us. It's something that I definitely connect with and one that I need a steady reminder of.

I first started thinking about this pattern pretty early in 2024, then decided it would be perfect as a hoodie to wear to Walt Disney World. We had a trip planned for December, so it all felt perfect. Of course, I had all manner of things going on and my Frozen 2 sweatshirt felt like a low priority.

Thinking that I would need to just put this idea off for a while made me sad, but it was fine. And then my mom made a suggestion. What if I were to embroider my hoodie while on the big roadtrip from Illinois to Florida?

And so that's what I did.

DoTheNextRightThing5

Not only did I finish all the embroidery while on the road, but I was able to wear it on our first day of visiting the parks and going to EPCOT, where you can ride Frozen Ever After and walk through spaces that are a lot like Arendale!

Did I take the opportunity to have my photo taken there? Yes, I did!

If you would like to make your own Do the Next Right Thing hoodie (or a tee, or even a pillow or hoop art), you can grab the pattern below. It's sized as I used it for my sweatshirt, but you could print it at a lower percentage to make yours smaller.

DoTheNextRightThing2


For a design of this size, I recommend using Sulky Stick n' Stitch (also called Sticky Fabri-Solvy). It's especially helpful on a thick material like a hoodie.

The colors I used are DMC 964, 958, 156, 211, 3609, and 310. I just tried to space out the colors in a way that wasn't too much of a pattern, but still felt like they were balanced. You could, of course, stitch this in other colors, or all in one color.

DoTheNextRightThing3

For the words, I used three strands and chain stitch, while for the crystals, I used three strands and back stitch. The faces are three strands with French knots and scallop stitch. Like with all my patterns, if the kawaii faces aren't for you, you can just skip stitching them.

DoTheNextRightThing7
DoTheNextRightThing4

Real talk here. Some days life can feel a lot like it did for Anna during the moment of this song in Frozen 2. When I feel that way, I remind myself to do the next right thing. Whatever that might be. Sometimes it's big and sometimes it's small. But do the next right thing.

DoTheNextRightThing6

Happy stitching, friends!

pattern // disney gingerbread cookies

Disney Gingerbread Cookie Felt Ornament

At my house, everyone's favorite treat for the holidays, but also any day, is a Mickey Gingerbread Cookie. And I HAD to make an embroidery pattern of not just Mickey, but some of his pals. But as gingerbread.

The first time my mom had a gingerbread cookie at Walt Disney World, she was hooked. I also had a gingerbread piece from one of the resorts where they have gingerbread displays and it was just so yummy! So I found a copycat recipe and we started making them at home. Simply because we don't want to wait until a trip to the parks to enjoy them!

Along with loving the cookies themselves, we've become big fans of a game called Cookie Swap. It's a simple card game that requires a good memory and a bit of luck, and it's filled with favorite Disney characters all in the form of gingerbread cookies!

With all this love of Disney gingerbread, and with all the Disney Eats patterns I've made this year, I couldn't wait to bake up some new patterns.

You can download the pattern below, which is really four embroidery patterns: Mickey, Minnie, Donald, and Daisy. You can stitch them on anything you like! I made mine into felt ornaments, so I'll show you how to do that too.

DOWNLOAD THE DISNEY GINGERBREAD EMBROIDERY PATTERN PDF

Disney Gingerbread Cookie Felt Ornament

For my ornaments, I used Benzie Design's cinnamon wool blend felt. (affiliate link)

I'll share most of this as a regular tutorial, but first, let me tell you about how this started. I tested out using an iron-transfer pen on felt and my test went great! So I ironed the full pattern and the transfer was uneven and hard to see. So I sort of went over it with pencil.I can't recommend this method, but it is what I did.

I'd probably suggest pre-soaking your felt and then letting it dry, ironing it, and then use Sulky Stick n' Stitch for the pattern. Or you could use tracing paper, but that's a bit harder.

Now for more traditional instructions!

Disney Gingerbread Cookie Felt Ornament

Use three strands for everything. Embroider the outline with chain stitch. Stitch the eyes with scallop stitch (and straight stitches on Minnie and Daisy!). Embroider the mouths and other details with back stitch. Embroider the solid noses, rosy cheeks, and Mickey's large buttons with satin stitch.

Use French knots for small buttons. Stitch the zig zags on the arms and legs with zig zag chain stitch.

Disney Gingerbread Cookie Felt Ornament

Trim around the outside of the embroidery, leaving about 1/4" of felt showing. This makes it look more like a decorated cookie!

Disney Gingerbread Cookie Felt Ornament

Apply a thin layer of craft glue on the back of the embroidered cut out.

Disney Gingerbread Cookie Felt Ornament

Cut a 6-inch piece of string or embroidery thread and tie the ends together with a knot. Glue the knot at the top center of the ornament.

Disney Gingerbread Cookie Felt Ornament

Press the glue side down onto matching gingerbread felt and let it dry. Be sure it's drying flat!

Disney Gingerbread Cookie Felt Ornament

Cut around the cookie, holding the ornament hanger out of the way.

Disney Gingerbread Cookie Felt Ornament

Now Mickey is ready to hang on your tree!

You can, of course stitch the layers of felt together instead of gluing them. But what I like about the glue is that it also gives the felt some stiffness and that's nice for a cookie like this.

Disney Gingerbread Cookie Felt Ornament

Now I just need to stitch up more of the characters...and then design even more cookie patterns!

pattern // felt applique thanksgiving turkey

Thanksgiving Turkey Felt Applique Pattern

It's the time of year when we think about turkeys much more than any other time of the year. At least here in the United States. Thanksgiving and turkeys go together, even if you don't eat them. And so I made a felt applique pattern that is definitely too cute to eat.

This pattern was originally going to be included in my It Felt Like Fall ornament set, but I decided to use another design instead. But as I had received a request for a turkey AND because I think this was a fun pattern, I kept it and am sharing it here for everyone!

As this was going to be a felt ornament, I kept the turkey in felt. And you can make this as a felt ornament like my other patterns, both free and in my Etsy shop. In fact, the pattern PDF includes the circles you would use for that. But I decided to do something different and stitch the pieces down onto fabric. It may still become an ornament in a hoop like this, or I might use it in another way. But it's stitched and cute like this for now!

Thanksgiving Turkey Felt Applique Pattern

If you're familiar with my other felt ornaments, you can just run with this and use the pattern as you like. One thing to note is that there's a lot of thickness at the center of this. It gives the turkey some puff, but you just need to watch where you stitch the belly down. I made the stitches on either side of the overlap with the feathers so that there was room for it to span the thickness.

For those who haven't made a felt applique ornament or other project, here's the basic process:

Cut out the pieces (I recommend using freezer paper for this), and embroider the lines on the feathers and the turkey's eye.

Embroider the legs on whatever backing you're using. Layer the pieces and stitch them down with tiny whip stiches along the edges.

I embroidered the mouth on the beak after finishing the applique.

If you're making this as an ornament, you would stitch everything onto the smaller circle, and then layer and stitch around the two circles. Add some stuffing (it isn't Thanksgiving without stuffing!) and finish it off.


If you wanted to make this a lot flatter, you could make the applique with fabric instead of felt. You could even use the pieces to cut and layer paper. Wouldn't that make an adorable Thanksgiving card?

However you use this, I wish you happy Thanksgiving turkey stitching!

pattern // autumn cuties cross stitch

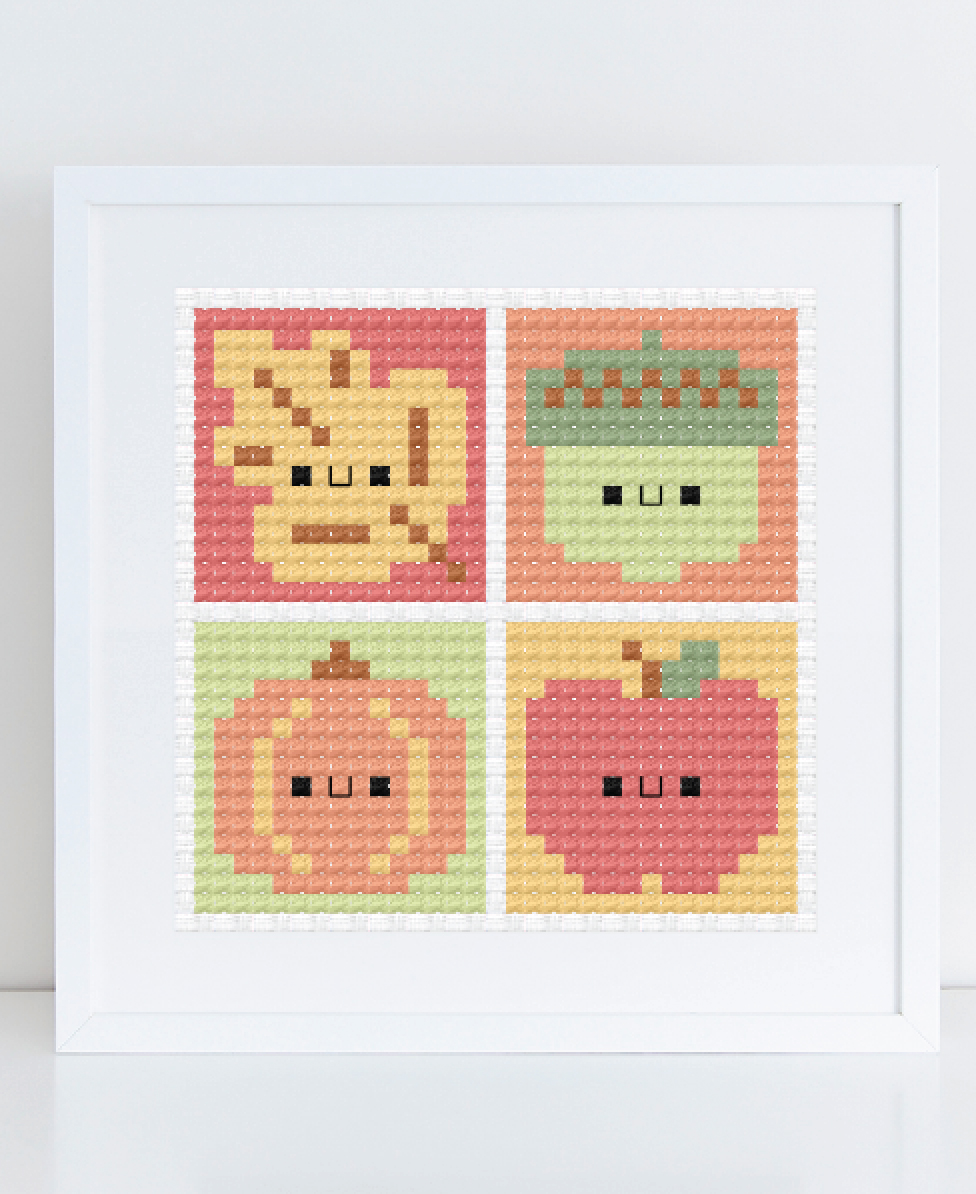
Autumn Cuties Cross Stitch

We are officially in the season of autumn here, and I couldn't resist making a new mini cross stitch pattern! This really is a small pattern, but it's a fun way to celebrate my favorite season of the year in a big way. Best of all, it's free!

The chart itself is technically 33x33, but each block with a design is just 15x15 stitches. They are baby charts! This is designed to stitch all together as one mini pattern, but you could very easily stitch each section just on its own. Because they would make ADORABLE pins or magnets.

You can also easily adapt the colors. For example, if you wanted to make the pumpkin on its own, you could use black in the background for more of a Halloween look. Love yellow apples? Swap the yellow and red in that block, and maybe do the same in the leaf block!

Because the design is square, it would be so cute in a tiny frame, but you could also make it into a little ornament like this tutorial from Caterpillar Cross Stitch.


I can't wait to see how YOU make your Autumn Cuties cross stitch!

pattern // finding nemo cross stitch

Finding Nemo Cross Stitch Pattern

If you love Finding Nemo and cross stitch, you've found the right place. Because today I'm sharing something a little different and also very much who I am and what I love. Disney, crafting, and free patterns are very much my vibe.

I'll start by saying the pattern I have for you is kinda big. As in, there are about 12,000 stitches. It makes a design that is a little over 14 inches wide by 4 inches high when stitched on 14-count fabric. That's sort of a weird size, yes, but that's because this wasn't originally a cross stitch pattern.

Back in the spring, I had this idea for making a giant mural that lots of people could work on together. It would feature Finding Nemo characters because the disability ministry at my church would be presenting Finding Nemo Jr. It needed to not be messy (no paint!) and it also needed to be a size and shape that would allow for lots of people working at one time.

Finding Nemo Mural

I was inspired by the murals they have at EPCOT during their Festival of the Arts, because they work on a paint-by-number grid of sorts. Which I saw and thought "I can do that because it's like a cross stitch pattern!" Instead of paint or stitches, I opted for squares of colored cardstock.

So it started out looking like this.

And while I was confident it would work, I really had no way of knowing for sure until it was in progress and eventually finished. In fact, shortly after it got started I found a few mistakes in how I set it up to print. Thankfully, I could fix them.

But the real magic for me was watching people work alongside each other. Most had never met, but they chatted and worked together. Sometimes adding a single square, and sometimes working for a long time to fill in an entire area. Take a look:

Finding Nemo Mural
Finding Nemo Mural
Finding Nemo Mural
Finding Nemo Mural
Finding Nemo Mural

Even a therapy dog paw-sed to help! And I think people had a good time doing this. I know that I did!

Finding Nemo Mural

When the weekend of the musical production was over, we had to move the mural (which, by the way, measures 16 feet long and 5 feet high). It's still hanging out and looks pretty good, but soon it will end up in the trash. But I knew that it could live on as a cross stitch pattern.

There's pretty much zero chance that I'll be stitching this any time soon. Maybe someday though, because it was so special for me to work on this project. In the meantime, you can visualize what the finished cross stitch version will look like by taking in the finished mural:

Finding Nemo Mural

Slight changes have been made to the pattern, such as using symbols instead of the numbers for the mural. I also added in one color and updated the colors to what I think will be better for DMC floss shades.

Finding Nemo Cross Stitch Pattern Colors

I don't have estimates for how much floss you'll need, but I can tell you that it's a lot of DMC 958 for the background!

Now, how about that pattern! It's shown on one page so you can see it all together, but the real chart is spread out over six pages so you can actually read it.


This is, as I said, a bigger pattern that I typically design, but it was too fun not to share. It would make my crafty Disney heart swell to see folks stitch it up, so be sure to tag me or email me so I can see photos if you do!