about shop patterns projects printables extras sponsorship wild olive twitter flickr pinterest subscribe
Showing posts with label embroidery basics. Show all posts

printable // embroidery stitch punch card

Printable Embroidery Stitch Punch Card

It's the beginning of January so you might be thinking of learning something new this year. Embroidery, perhaps? I'm always a fan of helping people learn how to embroider or try out new stitches. So I made a fun little printable punch card to motivate and track your progress!

My sister showed me some adorable punch cards that people were making and I immediately thought of embroidery stitches for this. Rather than listing specific stitches on the card, I used little hoops as the punch spots. This way you can use the card if you're just starting out with the basics, but it's also great if you already know 25 stitches and want to learn 10 more. Because there are so many stitches you can learn and try in embroidery!

I ususally use the same four or five, so this might get me working more special stitches into my work.

Printable Embroidery Stitch Punch Card

For optimal punch card experience, I recommend printing this on card stock. To make the best use of a sheet, I put two of these on a sheet. Now you can learn 20 stitches OR share one with a friend so you can stitch together!


Wondering which stitches you should learn or practice? If you're just starting out, these are the ten of the most common embroidery stitches you'll find in patterns:

• Straight Stitch
• Running Stitch
• Back Stitch
• Split Stitch
• Stem Stitch
• Chain Stitch
• Lazy Daisy
• Fly Stitch/Scallop Stitch
• French Knot
• Satin Stitch
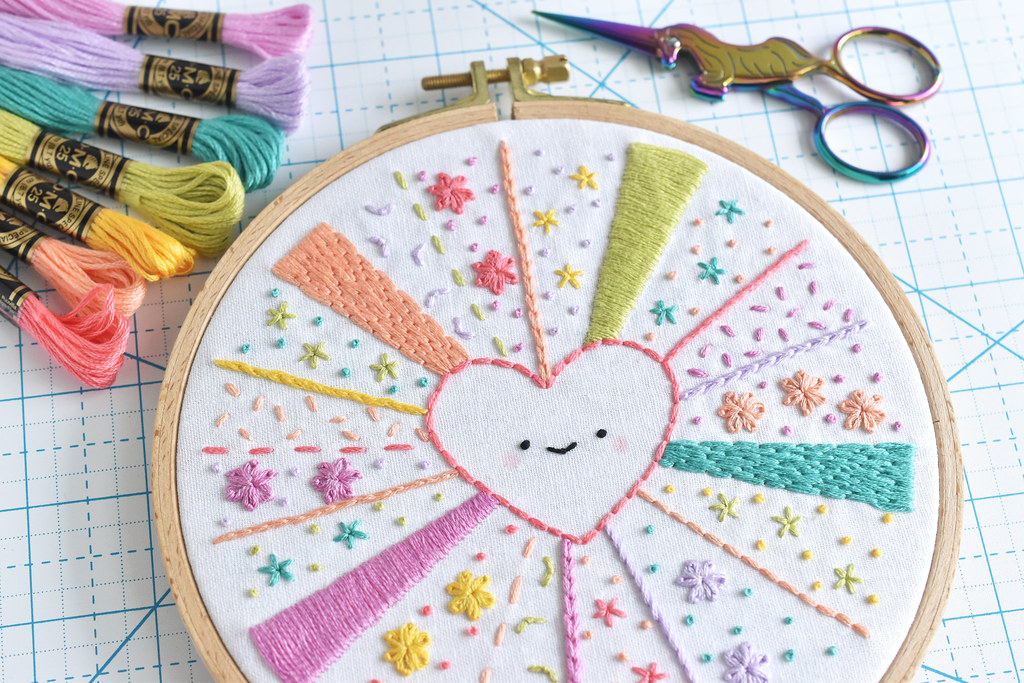
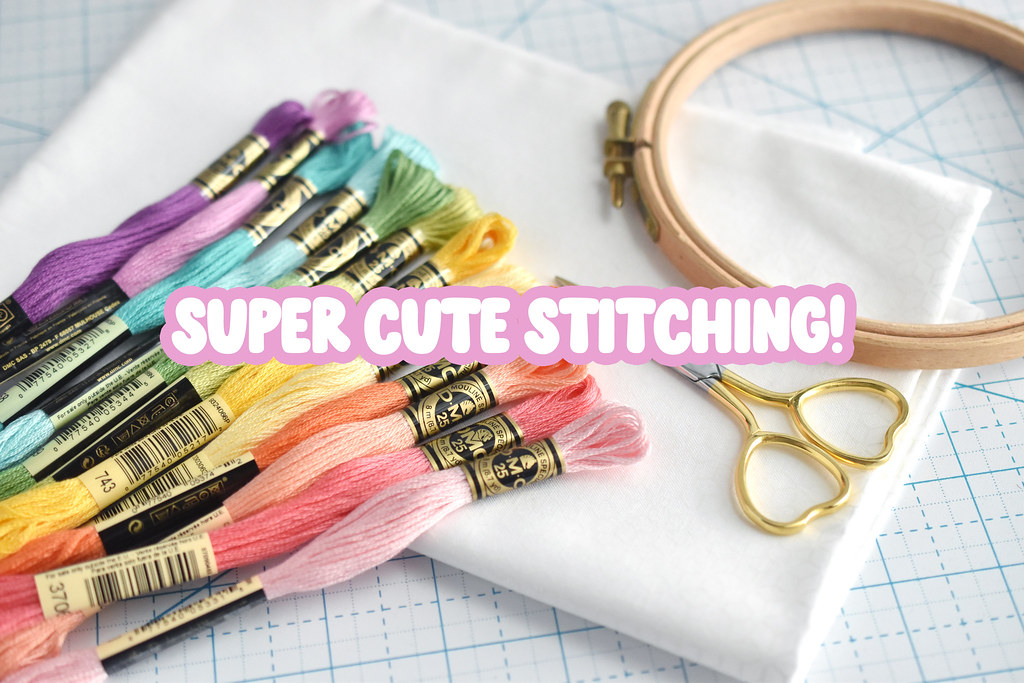
Super Cute Stitching Sampler There are lots of ways for you to learn these stitches, and I have some embroidery basics posts here on my blog. But if you'd like to learn with videos, all of these stitches and a few others are included in my Super Cute Intro to Embroidery eBook and video course. I recently updated the course to now be a PDF, available in my Etsy shop.

You can practice all ten of the stitches in that list (plus a few more) while making the adorable sampler shown above!

Printable Embroidery Stitch Punch Card

If you want to learn more advanced stitches, these are ten more stitches to start practicing:

• Blanket Stitch
• Pistil Stitch
• Feather Stitch
• Herringbone Stitch
• Fishbone Stitch
• Woven Wheel Stitch
• Couching Stitch
• Long-Short Stitch
• Bullion Knot
• Turkey Work Stitch

As I said, there are still many more stitches that I could list, but these are a good bunch to work on. Find the stitches you want to learn and then don't stop! You can just keep printing out punch cards until you feel like an absolute expert.

learn to embroider in a super cute way!

Super Cute Stitching Sampler If you love kawaii cute things and want to learn how to embroider, I'm here for you. In fact, I have an all-new course that's designed for beginners.

There are lots of embroidery courses and I've certainly made plenty of embroidery tutorials here on my blog and some on YouTube. But I wanted to make something that would take you from start to finish. From what materials to use all the way to how to soak, iron, and frame your stitching, all in one place.

Super Cute Intro to Embroidery is just that. It's an online class filled with videos to each you all the embroidery basics. But it's not just about learning some stitches. It's also a way to do that while making things super cute.

Super Cute Stitching Sampler

I created a special sampler pattern that allows you to practice all of the stitches and use adorable candy colors, while learning how to get ready to stitch and finish off the project. Actually, there are two version of the sampler so you can choose if you want to stitch a heart or a star in the center of your design! In the lessons you'll also learn several ways to stitch faces and add some extra cute details.

In 2+ hours of video, plus written instructions, with stitch diagrams, you'll learn:

• What supplies you'll need
• How to prepare your fabric
• Multiple ways to transfer a pattern
• How to separate strands of embroidery floss
• How to hoop your fabric
• The Basic 3 stitches I use (back stitch, scallop stitch, and French knot)
• More stitches: straight, star, running, split, stem, chain (2 ways!), lazy daisy, satin, and long-short
• A bonus stitch for making faces
• How to strip embroidery floss
• How to soak and iron your embroidery
• A simple way to frame your finished stitching
• How to add a bit of extra cuteness to embroidered faces

Super Cute Intro to Embroidery will prepare you for all kinds of embroidery, whether you're stitching my kawaii-style embroidery patterns or designs from other creators. Super Cute Stitching Sampler

My goal is to teach more people to embroider. Which is where there is a low, one-time cost for registration. And then you get full access to all the class content.

I want to make all my favorite stitching techniques accessible, enjoyable, and super cute. Even if you've never picked up an embroidery hoop and needle, YOU CAN DO THIS!

Now, if you're already an experienced embroiderer, this course may not be for you. But if you've just dabbled a bit and want to feel more confident, this will help get you there! It would also be a great class to assist you as you teach a young crafter how to embroider. It's not designed for specifically kids, but I think they would love it!

Super Cute Stitching

You can find my Super Cute Intro to Embroidery course at SuperCuteStitching.com, where you'll also find some other fun stuff. And more to come soon!

video // stitching faces with french knots and scallop stitch


Something's happened that I didn't expect to happen. I started a YouTube channel. At least, sort of. Right now it looks like a first video on how to stitch the little Wild Olive faces we know and love.

I've wanted to add to, update, and upgrade my stitching tutorials for a while. It's time for a refresh on my Embroidery Basics, but I also don't have any basic guides for cross stitch (which has become a favorite) and English paper piecing. That last one is especially dear to me, and I barely have anything here on my blog that just covers the process of basting and piecing.

If you have any techniques or other kinds of things you'd like to see and hear from me (on video!), let me know in the comments.

My goal is to keep this short and simple, but also fun.

With that in mind, this isn't a grand announcement, but I also thought you'd like to know that, well, I'm officially now on YouTube.

working with sublime stitching fine tip transfer pens

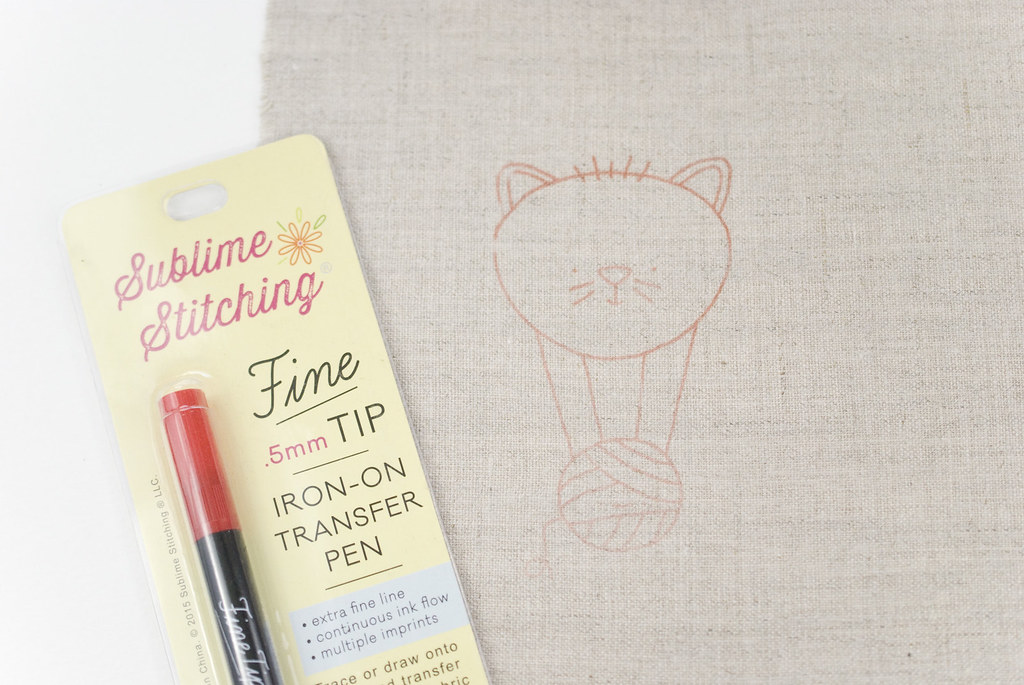
Sublime Stitching Fine Tip Transfer Pens

When you do a lot of embroidery, I think it's important to have a variety of pattern transfer methods available to you. Even if you have one that works for you most (or all!) of the time, you should know what other options there are and how they work.

You never know when a project may come along where your favorite technique just isn't working, or it may be that in exploring new-to-you techniques you find one that you love even more. To that end, today I'm showing you a tool/method that is still fairly new for me.

Transfer pens have been around for a while, but I've shied away from them. Especially after my transfer pencil experience. You see, transfer pens are mostly permanent. If you mess up the process or don't stitch over the pattern completely, you'll see the markings. And it used to be that you could only get transfer pens with tips that were similar to working with a Crayola marker.

Sublime Stitching Fine Tip Transfer Pens

But then last year Sublime Stitching came out with transfer pens with fine tips. And in a bunch of colors too!

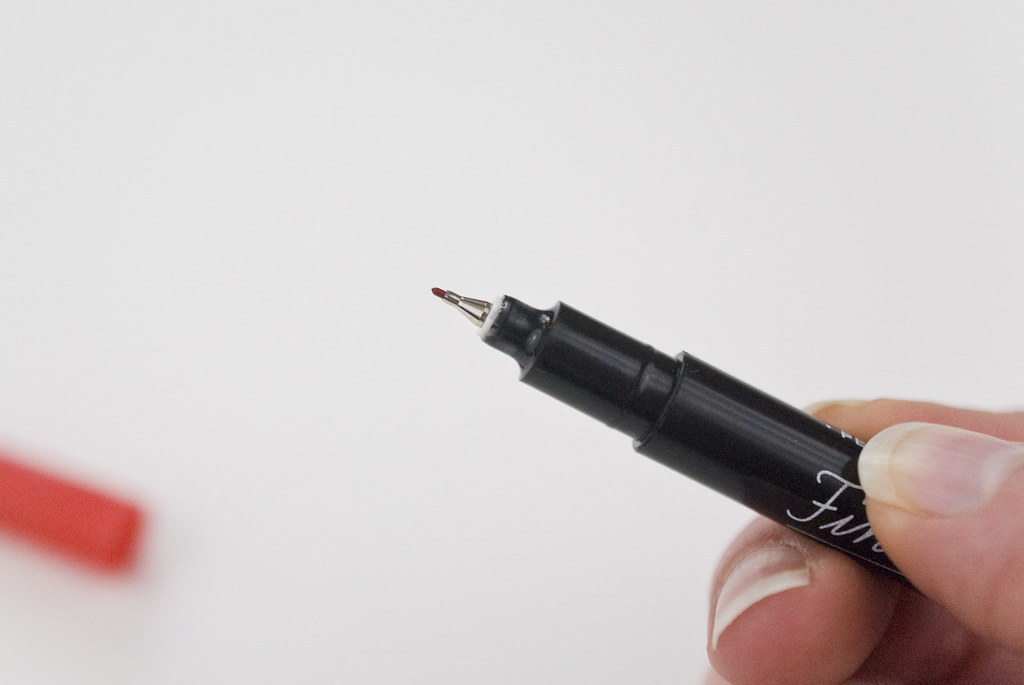
These really do have a fine tip. It's more like working with a Micron pen, and I'll tell ya...I feel 100% better about this than the thicker kind. (Full disclosure: Jenny sent me this pen to try.)

Sublime Stitching Fine Tip Transfer Pens

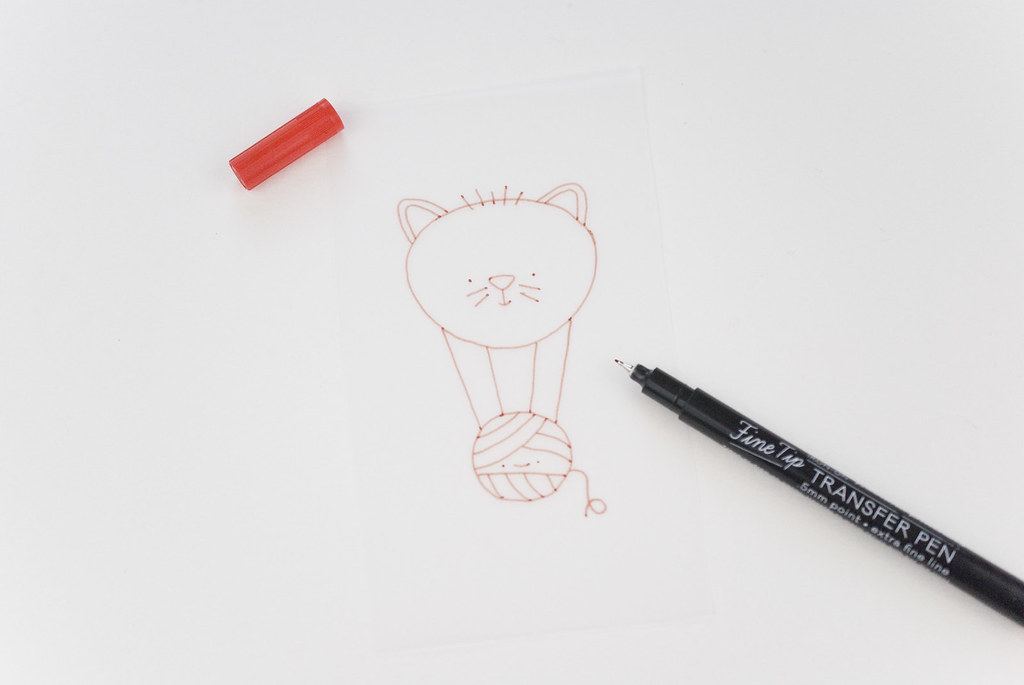
To use these, you draw or trace your pattern on a separate piece of paper. I used heavy tracing paper, but regular paper works too. Whatever you put on the paper is going to transfer, so if you mess up a line, you probably want to start over (or plan on stitching it that way). That's a little intimidating for tracing large patterns, but we'll come back to that.

Also, whatever you trace will flip when you transfer it, so you need to have your pattern reversed first. Okay, so you don't NEED to reverse every pattern, but if it has words, it's a must. Good news for you? Wild Olive patterns come with patterns pre-flipped for you!

Sublime Stitching Fine Tip Transfer Pens

After the pattern is traced, it's time to transfer. (By the way, Jenny Hart has a great tutorial on her blog for this whole process.)

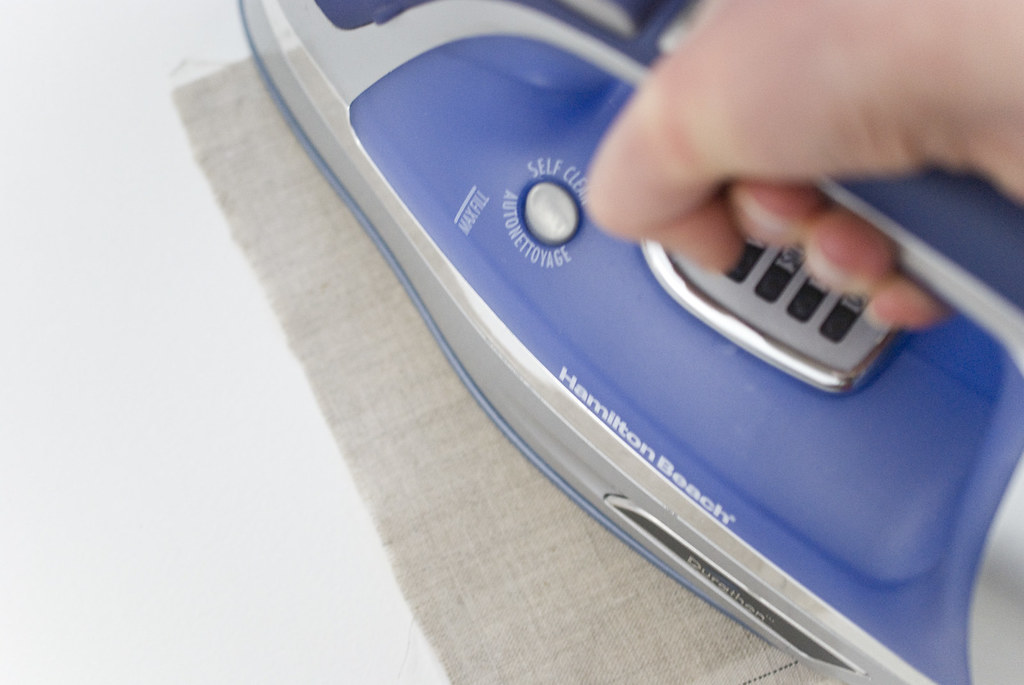
Iron your fabric, then place the pattern face down on the fabric. Press the pattern for a couple seconds. This is different from ironing, because you really don't want to be moving the iron around like crazy. It will shift the pattern and mess up the transfer.

Sublime Stitching Fine Tip Transfer Pens

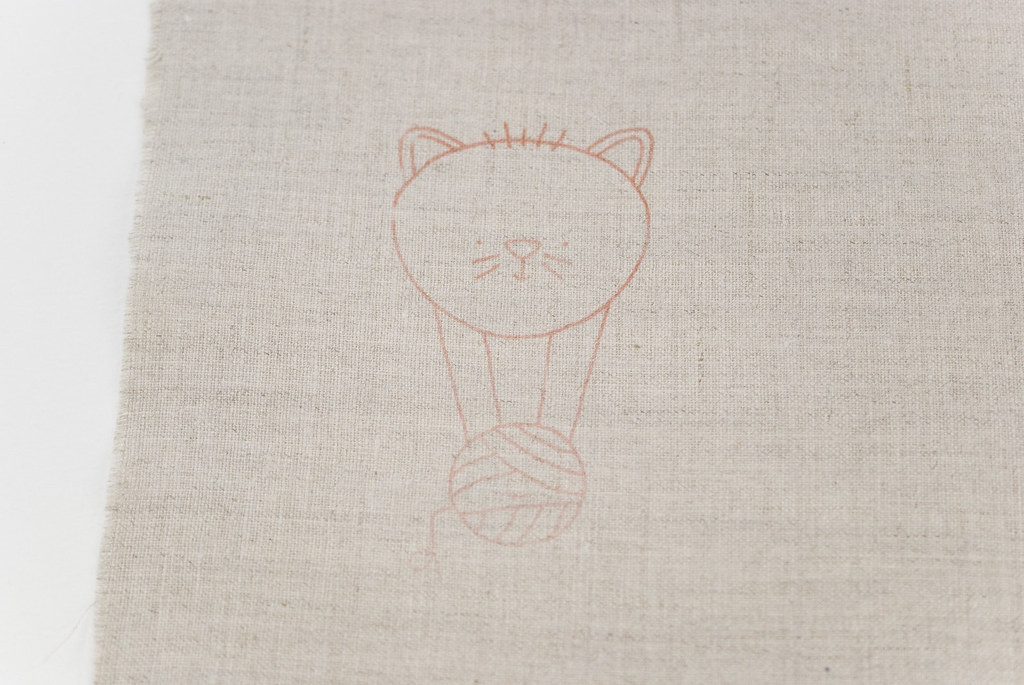
And here are my results. At the top of the pattern, the lines are darker, and even a little thicker. I think I must have pressed a little harder at that end. And there's a missing spot which must be where one of the holes in the iron plate landed.

Things like inconsistent transfer due to my own lack of finesse with transfer patterns is one of the reasons I don't use them often. Which of course perpetuates my issues! But really, these are easy to use, and I'm generally happy with the way the transfer came out.

Sublime Stitching Fine Tip Transfer Pens

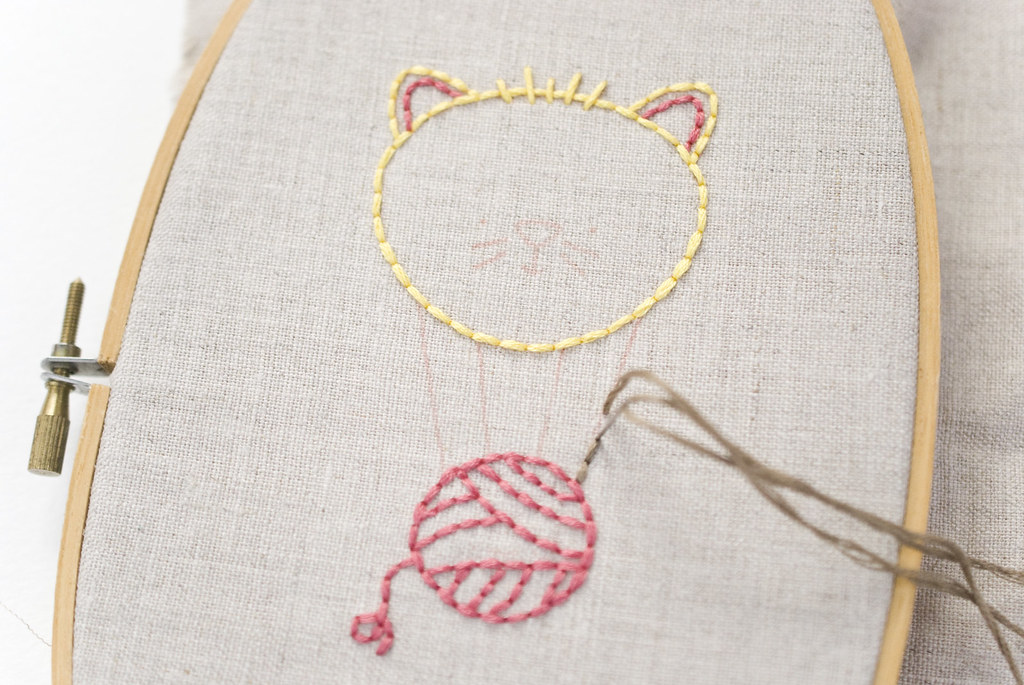
The real test comes in stitching. Even with the fine tip, I felt like I needed to use six strands of floss to cover my darker, thicker lines. Not that it's a bad thing, because six-strand embroidery looks pretty awesome! But if I needed to use fewer strands, I'd definitely want to press with a lighter touch, or maybe even trace with a lighter touch.

UPDATE: After using this more often, I've been able to transfer with finer lines that I can cover with just three strands of floss. I've even purchased a black one so I can color options!

So...getting back to larger designs. If I were doing a giant pattern, or something with lots of detail, trying to trace the entire thing by hand and not messing it up at all would make me so nervous. In that situation, I'd want something like a water-soluble pen so the markings vanish. Or even better, water-soluble stabilizer which can be printed on, avoiding the tracing entirely.

But all that said, this is a REALLY great way to use one pattern on a page of motifs without wasting a page of Sulky stabilizer. And tracing a pattern out of a book would be another perfect use for a pen like this.

Yep...I'll be pulling this out more often. How about you? Have you used these? Do you have any thoughts or tips to share?

PS: The pattern you see here is part of a new set coming very soon to the Wild Olive shop!

embroidery basics // i heart tidy embroidery // part 3

Keeping the back of your work tidy


Here we are at the last post of a 3-part series on keeping the back of your embroidery tidy. I happen to think that working towards neat and pretty embroidery on both sides is a good habit and practice all the time. But it becomes especially important when you're stitching something that will be seen from both the front and back. Tea towels and other linens are one example of embroidered items that should look as nice on the reverse as they do on the front.

It was with this in mind that the I Heart Tidy Embroidery series came to be. An email from Reene prompted it, and she brought up a brilliant question: what stitches look best when the back is going to be seen occasionally?

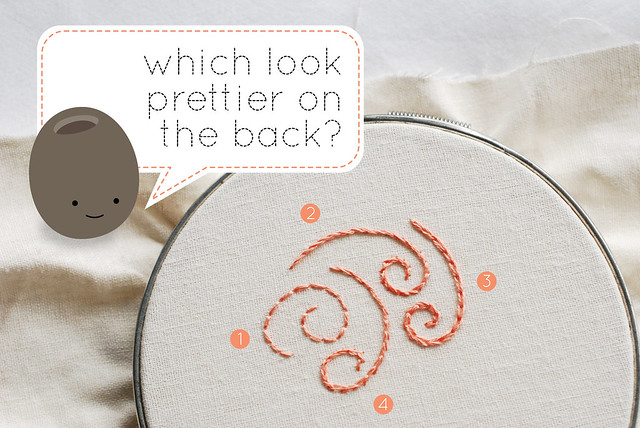
I Heart Tidy Embroidery // Pretty on the Back

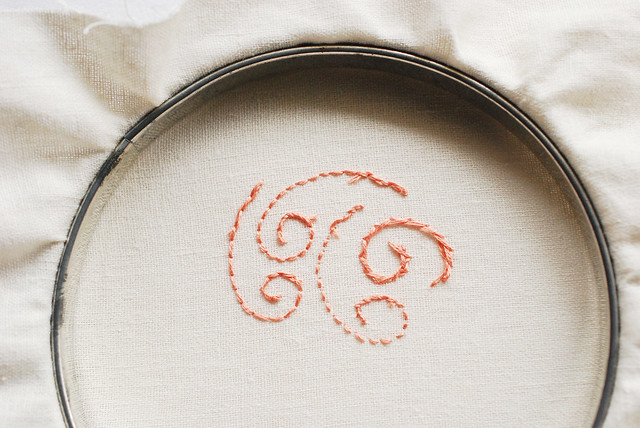
Here are some swirls that I stitched up for an example. Each was stitched with 3 strands of DMC floss.

1: Back stitch - my favorite!
2: Stem stitch - I can finally do this stitch!
3: Chain stitch - stitched with the reverse method...love that!
4: Split stitch - most of the time, I think it's ugly!

How your embroidery looks on the front should be your first concern. Obviously. And don't let my love for back stitch or disdain for split stitch sway you from what you like. But this is about the back of your work so let's flip this over.

I Heart Tidy Embroidery // Pretty on the Back

If you look at vintage embroidery, you'll find certain stitches that show up more than others. Back stitch, for example, rarely makes an appearance in the table linens that I have in my collection. It never really occurred to me that one reason could be how the stitches look on the reverse. Maybe that had nothing to do with their stitch choices (and frequent use of stem stitch!), but maybe it did.

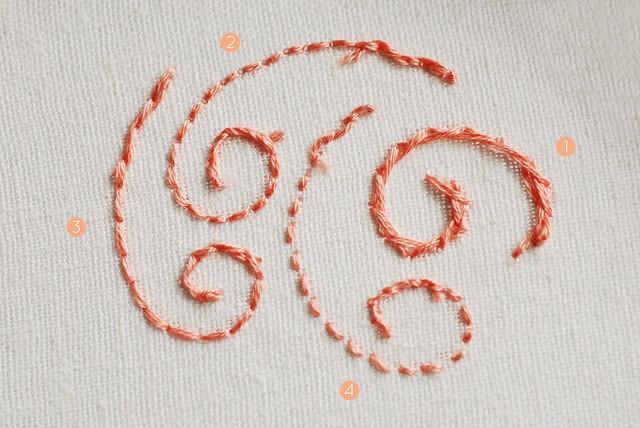
Look a little closer and you'll see what I'm talking about.

I Heart Tidy Embroidery // Pretty on the Back

1: Back stitch - the least tidy!
2: Stem stitch - even and pretty!
3: Chain stitch - long, lovely stitches!
4: Split stitch - it looks better on the back than on the front!

Do you notice that some of these look like the front of the swirl of back stitch? That means that if you use stem or chain stitch, the back of your work will indeed look nearly as beautiful as the front of the embroidery design! Of course, your stitching may look slightly different than this, depending on the stitch spacing, but you've gotta admit, if you choose your stitches wisely, it makes a huge difference when it comes to tidy embroidery.

The next time you're stitching something and you want your backside to look mighty fine (yes, I did just say that), follow these three guides and you'll be sure to impress:

Begin and End Well
Watch Your Back
Choose Your Stitches Wisely

Find more embroidery help in the rest of my Embroidery Basics series, and if you have any specific questions or would like me to cover additional techniques, let me know in the comments!

embroidery basics // i heart tidy embroidery // part 2

Keeping the back of your work tidy


Do you ever watch action movies? Very often there'll be a scene where someone is being chased, and as they run, they frequently look over their shoulder. Honestly, this drives me crazy. Do they not realize that they'd be better off to just look forward and keep running? The more they look back, the more likely they are to mess up their getaway.

The opposite is true for stitching with a pretty backside. Wait...that came out wrong.

The point here is that keeping the back of your embroidery neat and tidy is a very good thing. It can make your work more secure, and yes, it does result in a pretty backside (of your stitching). To accomplish this, watch your back.

Keeping the back of your work tidy

Here's a tiny tulip-ish design that I stitched up. (I'm showing this in a small way, but you'll get the idea, because even small, you can see the difference.) Unlike our runner in the action movie, I stayed focused on what was in front of me and only worked on what I could see on the front.

Keeping the back of your work tidy

This is the result. It's not too bad really, but consider that this tulip is less than 1 inch tall. What if it was twice that size? Instead of being just pretty, my stretch of thread would be pretty ugly. Like this:

Ugly backs

This is something that I was stitching not too long ago, and it seems that I started stitching in a different place than where I thought I had left off. And I didn't notice it until I had finished the rest of the embroidery. Seriously? I should have watched my back.

Keeping the back of your work tidy

To avoid a big line of floss across the back of your work, weave the thread into the back of your stitches as you travel to the place where you'll start stitching. I'm working all in one color here, but very often this is something you'd do when moving to another area that needs the color you're working with. Instead of jumping, slither.

Keeping the back of your work tidy

While we're at it, watching your back means looking for the most efficient way to stitch. Take the path that will show less stitches on the back. Think ahead and start in an area that will lead your stitching where you want to go.

Had I started at the bottom of this tulip, I would have ended there, and not needed to slither my needle through the backs of the stitches.

Keeping the back of your work tidy

Let's go back to that jumping idea. Part of watching your back means not just hopping over to a new section of stitching. Could you do this? Sure. Is starting a fresh spot of embroidery a bit of a pain? Sometimes. But wouldn't you rather have tidy embroidery with woven tails and no stretches of floss lines? Yes.

Depending on how exposed the back of my embroidery will be, or how sheer my fabric is, my general rule is that I won't jump more than 1/4 inch. Some patterns make this difficult or impossible to follow, but I try to stick to this.

Ugly backs

And just to more fully convince you to watch your back, I present this knot. Does this ever happen to you? I've never worked with embroidery floss that doesn't do this at least sometimes.

If you are in the habit of looking at the back of your embroidery as you work (not every stitch, but often), you'll spot these early instead of after you've stitched three inches of beautiful stem stitch. There's nothing quite so disheartening to my embroidery as finding this nasty surprise on the back, because it usually has an extra loop of floss hanging there too. Watch your back and you'll find these as they happen...so much easier to fix!

So there's my big tip that can change the way you stitch. I don't want you thinking that embroidery is a villain chasing you through crowded streets, but I do hope that you'll stitch like an action star and watch your back!

embroidery basics // i heart tidy embroidery // part 1

Keeping the back of your work tidy


Not too long ago, someone asked me for advice on keeping the back side of her embroidery neat and pretty. She was going to be stitching some tea towels and wanted the back to look nice. This made me very excited that she was thinking about this. When the back of your work will show, you really get self-conscious about this sort of thing. But I think that tidy embroidery is a good idea all of the time, so I've created a three-part series to focus on this very thing!

It's been a while since I asked my friend Olive to help out, but since she loves tidy embroidery, I thought it would be a good idea to invite her along. Let's get started by, well, talking about getting your embroidery started! (by the way, going forward, all of these photos are of the back of the embroidery.)

Keeping the back of your work tidy

Calm down, Olive! Yes, that is a knot. There was a time that I was a no-knot kind of gal. In fact, I sort of looked down on them. But then I read in one of Jenny Hart's books that she chooses to be okay with knots and it sort of opened my mind.

Now, that's KNOT to say that working without knots is a bad idea. Alyssa of Penguin and Fish has a great technique to share for securing your thread without a knot.

But I've been using a few options for secure stitching that's tidy (and doesn't have much waste).

This first one starts with a knot. But not just any knot...it's a knot with a tail that's about 1 inch long.

Keeping the back of your work tidy

As you work, use the backs of the stitches to hold down the tail coming off the knot.

Keeping the back of your work tidy

Sometimes you need to hold the tail in place, or move it into a good position so it can be held down, but you'll end up with it sort of weaving around back and forth between the stitch backs.

Keeping the back of your work tidy

And now you've got the security of a knot, but the tail is all tidied up!

Keeping the back of your work tidy

How about another way to start your embroidery? This one doesn't use a knot and doesn't require any weaving! Susi taught it to me when we started working on patterns together, and I love it! The only thing is that you'll always end up stitching with an even number of strands.

Cut a piece of embroidery thread that is longer than you'd usually use. In fact, cut it twice as long as you want. Pull out half as many strands as you want to stitch with. What you see here is 2 strands, which will stitch as 4. Fold them in half and thread all of the ends through the needle as you normally would.

Keeping the back of your work tidy

Go up from the back of your fabric, then back down for your first stitch. You don't want to pull it all too tight yet, because you want that fold of the thread to form a loop on the back of your work.

Keeping the back of your work tidy

Take the needle and go through the loop!

Keeping the back of your work tidy

As you pull it tight, it forms a cow hitch, which isn't going to come undone.

Keeping the back of your work tidy

Stitch along as you normally would, and as you can see, it's very tidy.

Keeping the back of your work tidy

Those two methods are good for when you're starting from scratch, but if you already have some stitching in place, you can weave in the floss to get it started. Let's pretend that I needed to start another thread on this tiny bit of embroidery. Take your needle back and forth through the backs of the existing stitches to help secure your tail of floss.

Keeping the back of your work tidy

As you weave, don't pull too much though, because you might pull it right through! Work your way to where you want your stitching to start. If you want to add an extra level of security, you can tie a knot close to the fabric here. This way you have a woven tail plus the knot, so if what you're making will be washed repeatedly, you can launder without worry!

Keeping the back of your work tidy

Now, let's talk about finishing this off. When you are ready to be done with a thread, you can tie a knot. Yes, another knot. I like to tie it as close to the back of the fabric as I can, without causing it to tug at the stitches on the front.

Keeping the back of your work tidy

Then, weave in the floss again. Think of this as doing what we did with that first method, but in reverse.

Keeping the back of your work tidy

Wrap it, weave it, and give it as least an inch of this woven tail.

Keeping the back of your work tidy

Cut off the thread close to the back of the work (don't snip any stitches!), and you've got a very tidy bit of embroidery!

Next week I'll share a super important tip for keeping the back of your embroidery looking pretty as you work. And I'll show you a little glimpse at a recent time that I forgot to follow that tip!

embroidery basics: looking back and instructions for lefties


Over the last three months, I've been sharing my Embroidery Basics series. I don't have any more posts planned for this right now, but you never know...I may get some more together down the road. In the meantime, here's a little overview of the posts with links to each!
Embroidery Basics pics


And...someone asked me about instructions for lefties. I wasn't planning on it, and wasn't even sure how that would work. But I read about flipping illustrations, and thought that might work for my photos too. So, I tried it. The written instructions aren't direction specific, so I think these may work! If you're a lefty, download the PDFs below and let me know if they are helpful.

Thanks to everyone who has been following along! Please remember that you are always welcome to ask questions, and I'll do my best to help you out with an answer!

embroidery basics: fill stitches • part 2


Last time around, we talked about some different fill stitches, but there are still more. In fact, today you’ll see the more common fills. We’ll continue using the raindrops from the previous lesson, so if you started that, you’re already set to go!

The first stitch today is called a long and short stitch. Personally, I think the title is deceiving. Only at the edges are you using long and short, the rest of the time you are creating all long stitches.
Long and Short Stitch
Think of this stitch as laying bricks (I’ve even seen this referred to as a brick stitch...which makes a lot more sense!). The stitches are all the same length, but they overlap each other.
Long and Short Stitch
You can work them in rows going across, which is especially nice if you want to blend colors (use similar shades for this), or you can stitch them end to end, like I’ve done here. This is basically a backstitch.
Long and Short Stitch
Oh, and you don’t NEED to have an outline around the whole thing. In fact, in the next stitch, you aren’t supposed to have that one! (I just happen to like the outline look.)

This next one is a satin stitch, and is one of the most popular fills for small-ish areas, and it’s easy to see why. It’s smooth and beautiful!
Satin Stitch
To satin stitch, come up on one side of the area, and go down on the other side.
Satin Stitch
Come back up on the first side, just next to your first stitch, and back down on the other side, just next to your first stitch. It’s like you’re wrapping the area on the front and back.
Satin Stitch back
Satin Stitch
Repeat this over and over until the area is filled in. The trick is to keep the edges smooth, and the area solid. The weave of some fabrics can make this difficult sometimes, but with practice, you’ll get a nice smooth fill.
Satin Stitch
As I mentioned, traditionally, a satin stitch doesn’t have an outline around it. But why be traditional? I like an outline for two reasons:

1. It looks cute.
2. It hides a multitude of stitching sins. Now no one needs to know that my edges aren’t perfect!

Stitched with pearl cotton, like I’m doing here, a regular satin stitch already has some dimension, but for even more, especially with regular floss, you can add some padding.
Puffed Satin Stitch base
An outline and/or some rice stitches in the middle of the area will help with this, so start with that.
Puffed Satin Stitch
Now you can do a regular satin stitch over those stitches. You just come up and back down right on the outside of the outline.
Puffed Satin Stitch
Nice and puffy!
Modified Satin Stitch
The last fill stitch is a modified satin stitch. Come up on one side of the area, and go down on the other side. Now, here’s the big difference...
Modified Satin Stitch
Come up on the same side as you went down, and then down on the other side of the area.
Modified Satin Stitch
You’re working back and forth more, and the back of your work will be open, not wrapped. The result is more open and casual on the front as well. I like it!

Fill Stitches
Hey! That’s all of the basic fills! And if you're like me, you still have a few raindrops to go. Come up with some ideas of your own, or practice the stitches that gave you the most trouble. Now, get practicing and you’ll never want empty areas again!


This is the end of the stitch posts that I have planned for the Embroidery Basics series, but if you have any questions about this, or other embroidery techniques, I'd be happy to answer them to the best of my abilities. Leave a comment, and I'll answer all questions in one more Embroidery Basics post in 2 weeks.