about shop patterns projects printables extras sponsorship wild olive twitter flickr pinterest subscribe

printable // happy apple and acorn friends

Happy Apple and Acorn


Everybody needs a good friend, even an apple or acorn. In fact, I'm pretty sure that it's because they are friends that they are looking so happy!

Seriously though, there's nothing serious about this silly little project. And I just know that your refrigerator is begging to have these hanging on its doors like my fridge was. All is right in my refrigerator's world now.

Happy Apple and Acorn

Download the Happy Apple and Acorn People PDF, and print them out. I used Astrobrights for these bright and bold colors, but the PDF is in black and white so you can print them like I did, or let your kids color them.

Happy Apple and Acorn

Cut out the printed shapes, then cut some 1-inch strips for the arms and legs. I used extra pieces cut from the pages. You can make them as long or short as you'd like, and for springy-action limbs, accordion fold the pieces.

Happy Apple and Acorn

Use a glue stick to attach all of the parts. Follow my example, or put yours together in a wacky way!

Happy Apple and Acorn

My sister also made a baby happy apple! Isn't it just the cutest? I love that she appreciates this sort of thing as much as I do.

Happy Apple and Acorn

The acorn is probably my favorite. I just love his cap, and I think it would be cute done in lots of different colors. Try it!

Print these out for your kids or your classroom and enjoy the season with these happy friends!

how to craft great photos // editing and more

how-to craft great photos : equipment

In the blogging world, eye-catching photos are a must. As an amateur photographer (most of us bloggers fall into this category!), you might not suddenly have perfect, magazine quality pictures, but you can learn to craft great photos with some simple tips.

For this last part of my craft photo series, I was going to show you how I edit images before posting them. However, my process isn't too different from others. So why not direct you to a really well written, easy to follow post?

Babble Dabble Do walks you through five tools to get your pictures ready to share with the world. And the reason I like this post is that she tells you how to do these things in both Photoshop (which I use) and in Pic Monkey (which I don't use, but know that many folks do). While you're there, check out the other tips she links to!

One tip that I think is important to add: once you start taking great pictures and pairing them with fun, original ideas, it's possible that more people will find your blog, and if you're lucky, your project could end up in print! For printing, images need to be larger than they are online. Always keep your original photos. Always.

Usually, I save the original, a copy of the edited image at full size, and a copy at a smaller, web size. (My blog layout is 640px wide, so that's the smallest I would ever make them.) Keeping copies eats up computer memory, but it's better than the sinking feeling of not having that larger version that a magazine, or even another blog with a wider layout, needs.

Before I officially wrap this up, I mainly take step by step photos, but for some inspiration and help with lifestyle photography, check out Justina Blakeney's helpful post. I want to step right into these pictures!

The most important thing is practice. Take lots of photos and try out different ideas until you find what works for you.

project // flying squirrel needle minder

Flying Squirrel Needle Minder


Do you misplace your needle as much as I do while stitching? Usually it's not while I'm actually stitching, but more like, when I set my hoop down or am between colors, and then I get distracted and come back to no needle. It's a dangerous habit, and needle books don't help when I'm mid-project.

Enter the needle minder.

This genius little gadget is a magnet that connects through your hooped fabric and holds your needle. No need to stick the needle through your fabric, only to poke yourself on it later because you just didn't quite see it there (yes, this happens to me all the time), because it will be stuck tight on the magnet. And with the DIY version that I've recently made, it will be fiercely guarded by a flying squirrel.

This is really fast to make, and I think these are both fun and super cute, so expect to see more needle minder patterns in the future.

Flying Squirrel Needle Minder

Here's what you need:

Felt (go for wool felt so it stays pretty!)
Embroidery floss
2 Strong, thin magnets (I used 1/16" thick neodymium disc magnets)
Fabric glue (optional, but helpful!)

Flying Squirrel Needle Minder Pattern [PDF]

Flying Squirrel Needle Minder

Cut out two flying squirrel shapes from the felt.

Flying Squirrel Needle Minder

On one of the shapes, embroider the face and fur. On the other squirrel shape, place one of the magnets. I used a small dab of fabric glue to hold this on there, but you wouldn't really need to. I wanted mine to stay in one spot instead of moving around inside.

Flying Squirrel Needle Minder

With the magnet sandwiched between the layers, stitch around the squirrel shape with running stitch, and hide the knots between the layers.

Flying Squirrel Needle Minder

To use your needle minder, lay the flying squirrel on top of your hooped fabric, then place the second magnet on the back of the fabric. It will hold together and stay there as you work!

Flying Squirrel Needle Minder

Then, just set your needle on your squirrelly friend and you won't have to worry about losing that needle!

Of course, if you're going to stow your project while traveling, or if you need to put it away for a while, it's a good idea to remove your work from the hoop and place that needle somewhere more secure, like a needle book. You wouldn't want it to get pushed around and fall off the magnet. But for as you stitch, this is the way to go!

Happy squirrel crafting!

design it, stitch it hand embroidery class giveaway from craftsy

Design It, Stitch It


I love stitching. If you have never done embroidery before, you should start. If you've been doing embroidery for a while now, you should continue. And either way, it's safe to say that you'll never reach the end, because there is just so much you can learn and do with this skill. Even with only a handful of stitches you can create complex works of art, so imagine all you could do if you learned nearly 30 stitches!

Think that sounds overwhelming? It could be, but I've just been watching Jessica Marquez of Miniature Rhino as she teaches 29 embroidery stitches, plus all of the basics of transfer, hooping, starting and stopping, and more. And she makes it easy. Design It, Stitch It Hand Embroidery is an online class from Craftsy, and like all of their classes, it's high-quality, and highly educational.

If I'm being totally honest, I thought that I would pretty much know all that this class would be teaching, but I was happily surprised to learn some really great new things. So don't think that this is only a class for beginners. I would classify it a being perfect for beginner–intermediate level stitchers. Even simple tips for things like separating floss were so helpful to me!

Design It, Stitch It

Jessica walks you through every stitch you could possibly need for everyday embroidery, and she explains them really well. You're up close and personal for these lessons, and if you happen to miss anything, you can easily replay what you need to see. There were a few stitches in the lessons that I've never done, or haven't done in a while, and watching the video a few times really helped me be clear about where the thread should go, how to place the needle, and so on.

For each type of embroidery stitch, Jessica shows samples that she's made using some of the stitches. They're great inspiration, especially if you usually stick to just a handful of stitches! As you make your way through learning all of the stitches, you can make a sampler mini quilt too. A PDF with instructions and all of the patterns is included with the class.

And don't forget, Craftsy classes are yours forever. That's perfect for when you've not used a stitch for a while and need a refresher!

Design It, Stitch It

One of the sections that I loved the most was on embroidering on knits. It can be quite a task to get nice stitching on stretchy fabrics, but Design It, Stitch It Hand Embroidery makes it far less daunting. Not only that, but you'll learn how to get pretty stitches without scratchy stabilizer inside your tee!

Design It, Stitch It

The "Design It" part of the class really shows up in the last lesson, as Jessica tells about how you can create your own patterns using photos and other things as a starting point. I love that mint plant she stitched!

Design It, Stitch It

And now for something completely lovely. Craftsy is generously giving away a free registration for one lucky winner! If you already have a Craftsy account, all you have to do is click to visit their site, then sign in. (If you don't have an account yet, get one! It's fast and easy.)

What are you waiting for? Go enter to win a free registration for Design It, Stitch It Hand Embroidery! A winner will be randomly selected in one week.

This post was sponsored by Craftsy, but the words and thoughts are all mine.

papa and me

Papa and me.

This is Papa (my grandpa) and me when I was about 2 1/2. In August he turned 98 and yesterday he went to see Jesus. He gardened, raised chickens, built furniture, made wood crafts, and most important, he fervently studied God's Word. We were quite close, and I'll miss him so much.

I'll be sharing some planned posts throughout the week, but if I disappear for times, this is why.

unfinished and unstarted

Embroidery colors

This week started with me thinking I was ahead. I was getting things done! My blog would be scheduled, writings would be written, samples would be sewed, and more. And really, a lot of things did get done. (I finished a quilt, for goodness' sake!) But I also have plans that remain unfinished or even unstarted. And yes, I did just make up that word.

In the midst of it, I've been thinking about writing a post about how to do it all (or not). This isn't that post, but I would love to hear your own personal thoughts or plans for accomplishing much without pushing yourself to the brink.

And for now, I'll be choosing pretty floss colors for a mega project that may surprise you... stay tuned in!

project // quilted fall warm pads

Fall Warm Pads


In cooler seasons, my family likes to eat a lot of soup. And leftovers. Although, leftovers know no season. For casual meals, folks sometimes grab a plate or bowl and, rather than sit down at the table, we'll sit near the fireplace. Since dishes can get very warm, you'll often see a hot pad held under the dish. Which is fine. I'm good with all of this.

But why not make those hot pads pretty and matching?

This project solved two problems for me. The first is the pretty factor. The second is that I've been wanting to try out making some quilt blocks without a giant project commitment. Fall warm pads took care of these!

I'm calling them warm pads because they only have one layer of batting inside, and I really, really don't want you to remove things from the oven with them. But they are perfect for a layer of protection between your chicken noodle soup bowl and your hand.

Supplies:

Fabric (scraps plus 6-1/2" square for the back)
Batting (6-1/2" square)
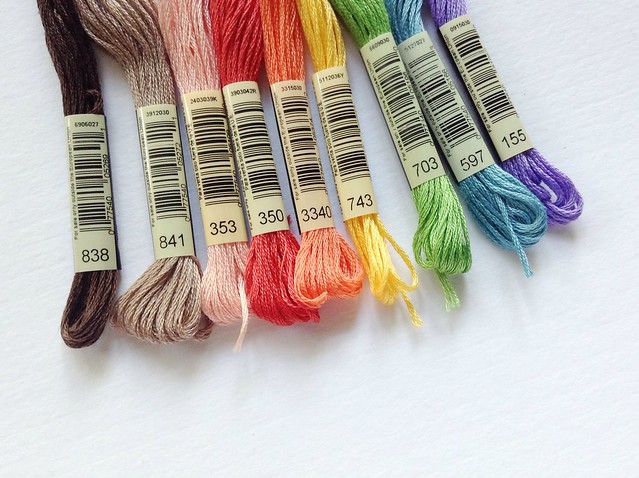
Perle cotton
Sewing tools: Scissors, pins, sewing machine, iron, needle, thread, rotary cutter, mat and ruler.

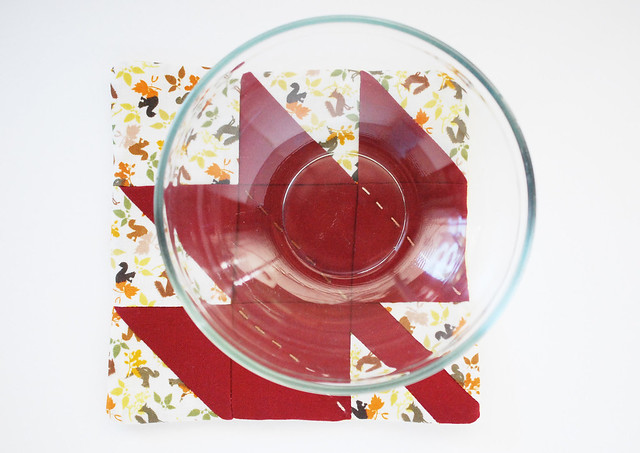
You can use any 6-inch finished block (6-1/2" when it's just the block) for the front. I'm using a combination of maples and some other designs, but I'm doing them all in the same grouping of fabrics. Here's how the maple block goes together:

maple quilt block

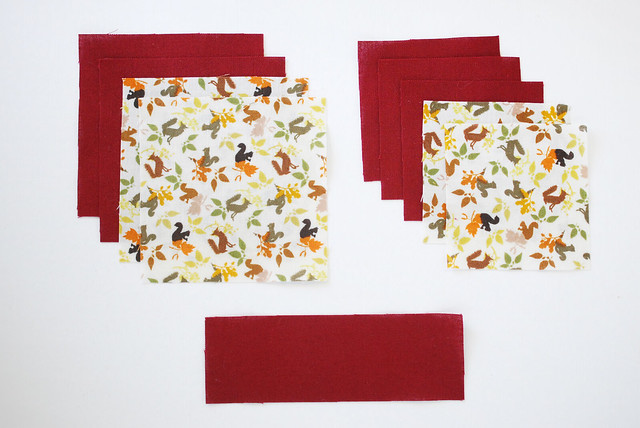
From Fabric A (squirrels) cut:

2 3-1/4" squares
2 2-1/2" squares

From Fabric B (burgundy) cut:

2 3-1/4" squares
3 2-1/2" squares
1 4-1/2" x 1-1/4" rectangle

maple quilt block

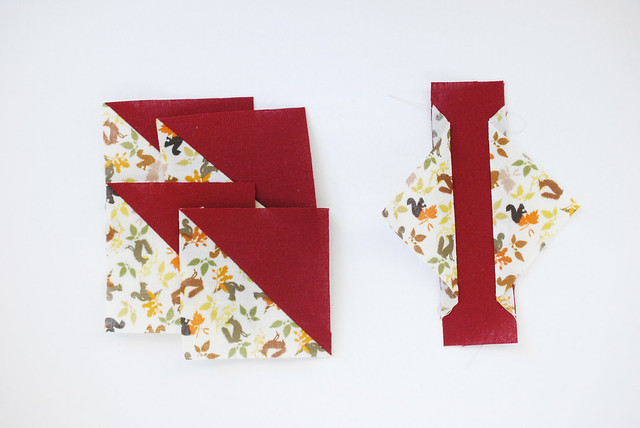
Make the larger squares into four half-square triangles and trim them to 2-1/2".

Trim one of the Fabric A small squares into two triangles. Sew them onto the sides of the Fabric B rectangle as shown. Trim to a 2-1/2" square.

maple quilt block
maple quilt block
maple quilt block


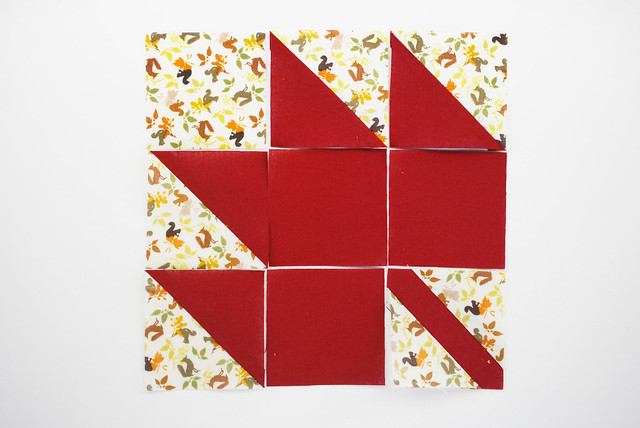
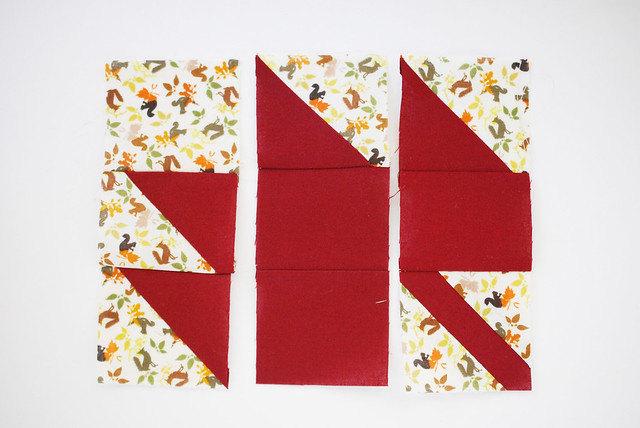
Arrange the pieces to form a maple leaf, sew the rows, then sew the rows together. Ta-da!

By the way, I've used 1/4" seams throughout, and if you're new to this patchwork thing, be sure to check out my review of the free Craftsy class Piece, Patch, Quilt!

Fall Warm Pads

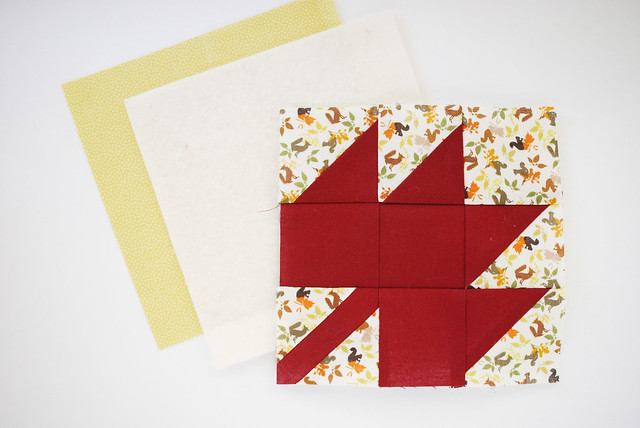
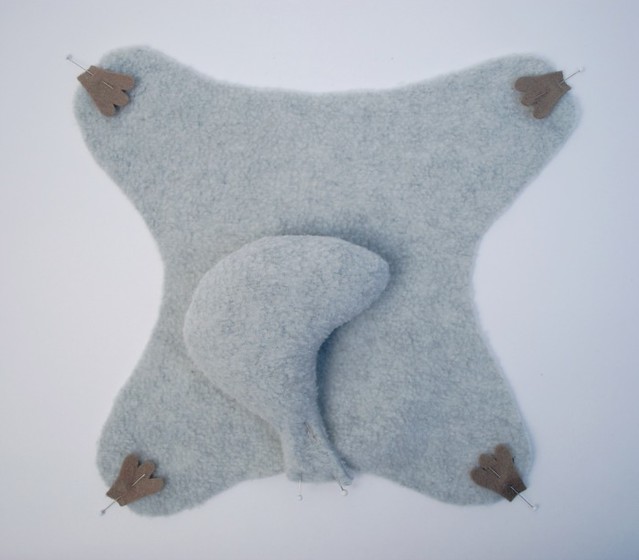
Grab your 6-1/2" squares of backing fabric and batting. Layer them with the front and back right sides together, and the batting on top. At least, this is the way my sewing machine does the best. You may find that having the batting on the bottom of the stack is better.

Fall Warm Pads

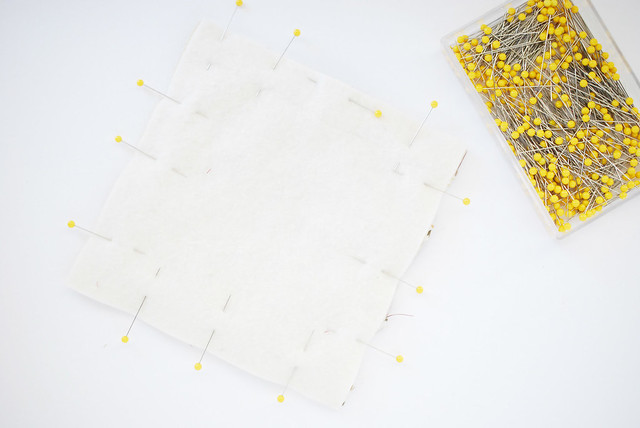
Pin and sew around the edges, leaving an opening for turning. And be sure to back stitch at the beginning and end. Trim the corners before you turn it right side out.

Fall Warm Pads

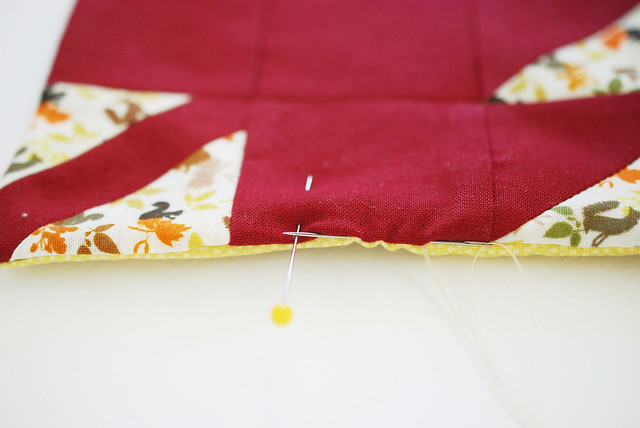
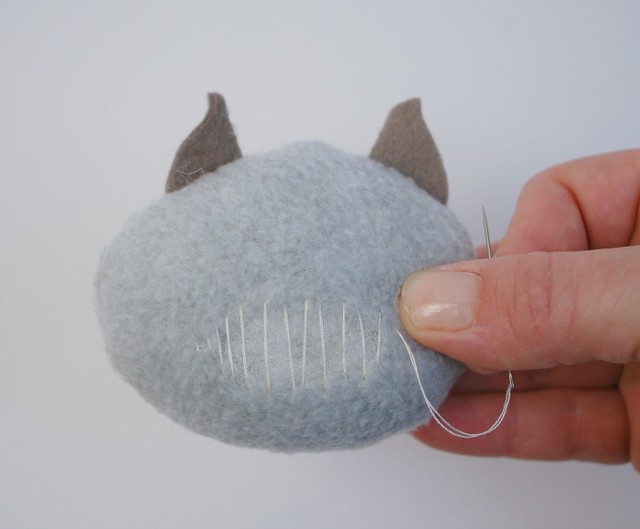
After you've turned it right side out and made sure those corners are poked out nicely, sew the opening closed with ladder stitch.

Fall Warm Pads

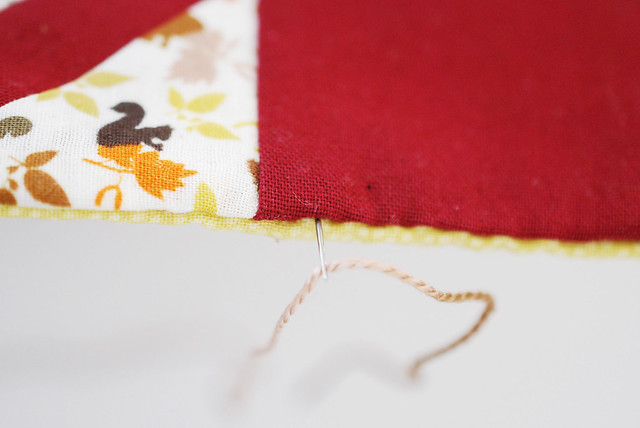
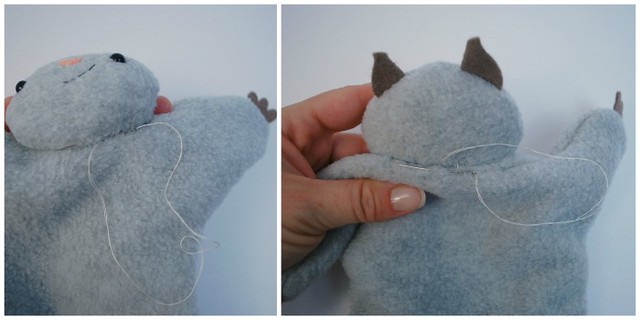
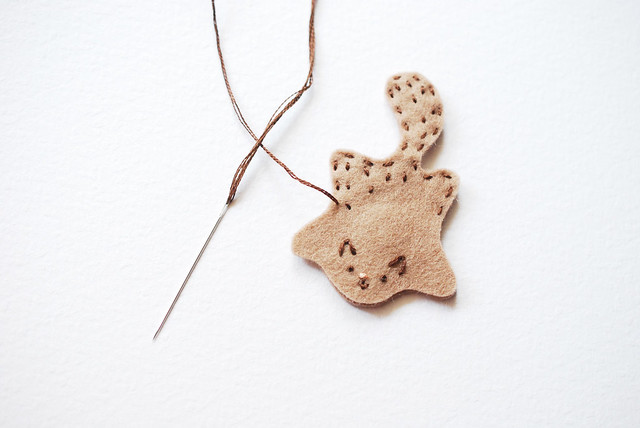
To hold it all together and add some fun detail, thread a needle with perle cotton and knot the end. To hide the knot, I like to go in through the seam, making sure that I'm not catching any fabric. Then you can gently tug the knot into the middle of the warm pad.

Fall Warm Pads
Fall Warm Pads

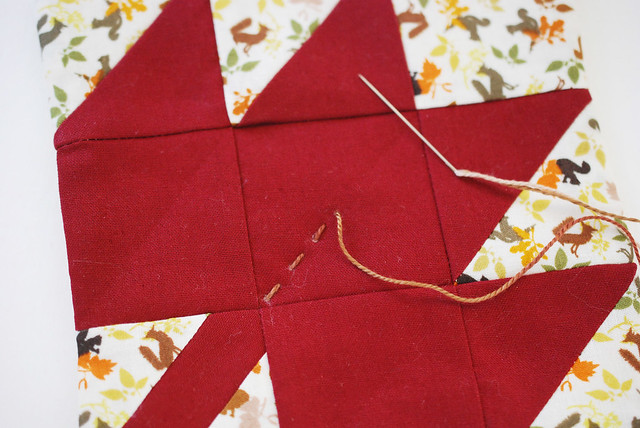
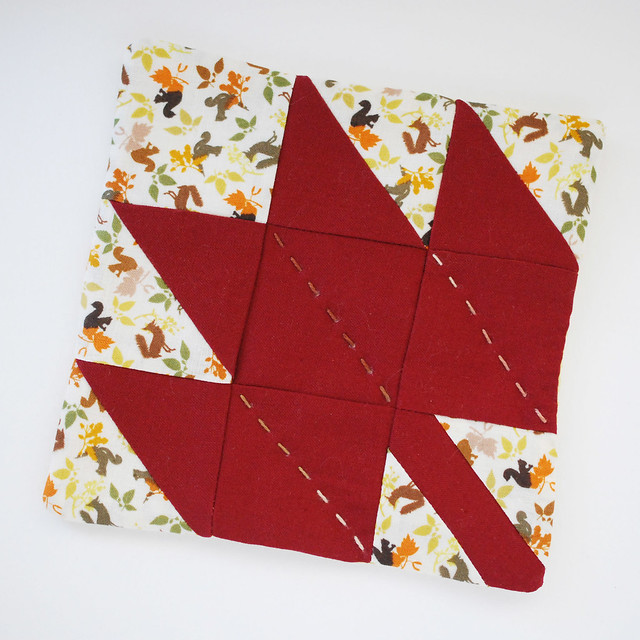
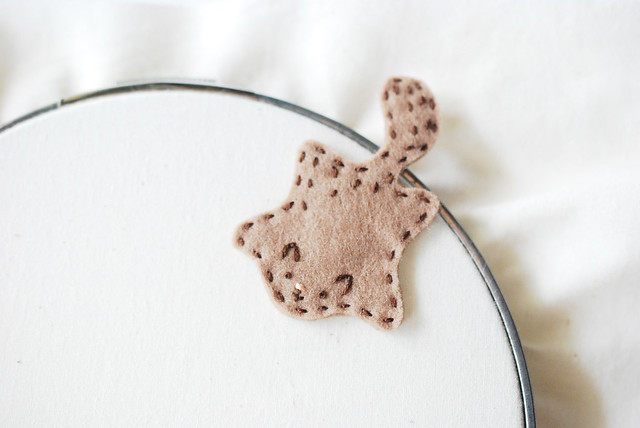
Stitch some quilty lines of running stitch, then be sure to bury the knot(s) between the layers.

Fall Warm Pads
Fall Warm Pads

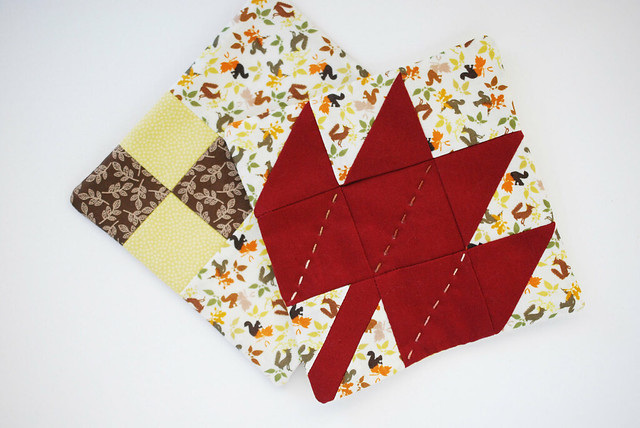
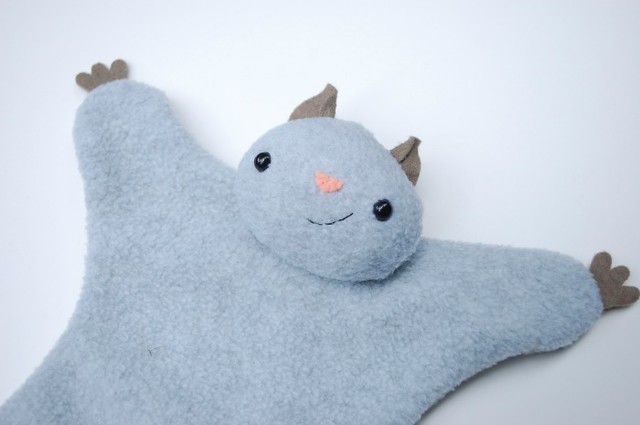
Then make a bunch for your whole family or friends when they come over! I've got maples all over the place and I might even end up making more.

Fall Warm Pads

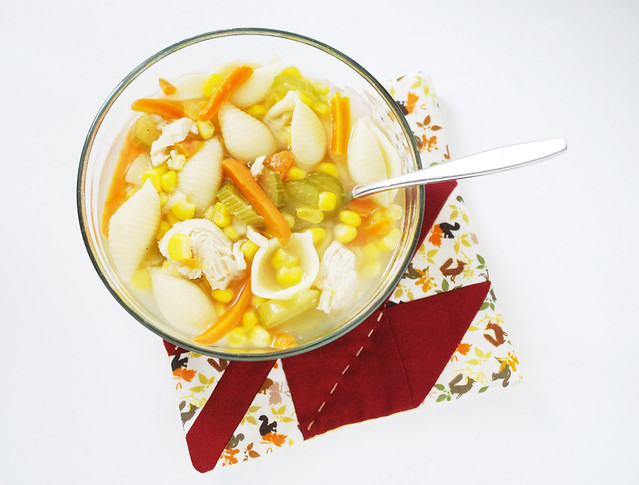
The best part is using these. So, get a bowl...

Fall Warm Pads

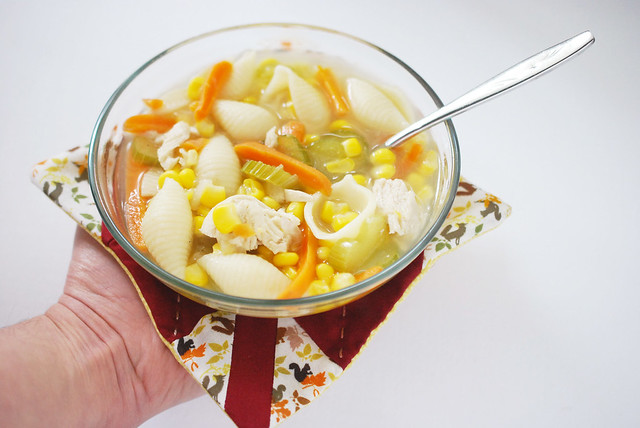
And fill it with something warm and yummy!

guest project // abby glassenberg's flying squirrel softie

Squirrel in Bush


When I think of cute soft toys, the first person who comes to mind is Abby Glassenberg. She has an amazing talent for creating adorable softies to hug and love, as well as passing that talent on to others through her blog and shop. In her book Stuffed Animals: from concept to Construction, Abby shares just about all you need to know to get making soft toys. Her designs are as thoughtful as she is, and I simply love her passion!

I'm quite giddy to say that she has designed something special for this month of the flying squirrel here on Wild Olive. I squealed when she sent me the pictures! And now, I'll turn it over to Abby.


Flying squirrels make excellent softies, mostly because they’re so cute! Here’s a simple pattern to make your own flying squirrel. You can sew him in about an hour and I think you’ll agree that this is one huggable squirrel.

The finished squirrel is 13 inches long (from the tip of the ears to the tail).

Squirrel Complete

First, gather some materials:

1/4 yard of light gray fleece (you could also use flannel or a felted wool sweater)
a small scrap of dark gray felt for the feet and ears
a small scrap of pink felt for the nose
a pair of 8mm safety eyes
black embroidery floss, 12 inches
fiberfill stuffing, 1 ounce
coordinating all-purpose thread
an embroidery needle
a pair of small scissors
chalk or a disappearing fabric marker

Download the Flying Squirrel Templates.

Let’s get started! First, cut everything out.

From light gray fleece cut:
• 2 Bodies
• 2 Heads
• 2 Tails (reversing 1)

From dark gray felt cut:
• 4 Feet
• 2 Ears

From pink felt cut:
• 1 Nose

Transfer all of the markings to the pattern pieces using chalk or a disappearing fabric marker. Note that a 1/4 inch seam allowance has been added to all of the pattern pieces that require it. Cut on the solid lines and sew on the dotted lines.

Sew and Stuff the Tail

Now, we’ll sew the tail. Place the two tail pieces right sides together. Pin. Stitch around the tail, leaving the straight edge open as marked. Clip the curves and turn the tail right side out. Stuff the tail lightly, leaving the inch closest to the opening unstuffed.

Make the Face

Next, prepare the face. Poke a small hole for each eye using the tip of a pair of small scissors. Insert the safety eyes and slide the washers on the backs of the posts until they’re secure.

Whipstitch the nose in place. Stitch the mouth with black embroidery floss using backstitch.

Flip one ear over so that you have two mirror image ears on your worktable. Fold each ear along the fold line and press. Place the ears on the face, folded side down, as marked, and pin in place.

Cut a Hole

It’s time to sew and stuff the head! Place the two head pieces right sides together and pin well. Sew around the entire head, catching the raw edges of the ears in the seam. On the back of the head toward the bottom pinch one layer of fabric and cut a small slit. Clip the curves and turn the head right side out through the slit.

Ladder Stitch the Hole

Stuff the head firmly, being sure there are no hollow spots or lumps. Ladder stitch the hole closed.

Place Everything on Body

Now let’s sew up the body. Place the feet on the right side of one body piece, as marked. Pin in place. Place the tail on the body piece and pin. Now place the second body piece on top, right sides together, and pin well. Stitch around the body, leaving the opening at the neck as marked.

Clip the curves and turn the body right side out. Ladder stitch the opening closed.

Attach the Head

We’re almost done! Place the head on the body, as marked. Pin from the back to hold it in place. Ladder stitch the head to the body, going down the marked curve and then across the neck portion of the body. You might want to stitch around twice just to be sure the head is secure stitched in place.

That’s it! Give your flying squirrel a big hug!

Squirrel Close Up

Thank you so very much, Abby! Is it safe to say that everyone needs a flying squirrel in their life? I have a feeling that as soon as I make one, I'll need to make three or four more, because folks at my house will be fighting over them.

Be sure to visit While She Naps for more from Abby Glassenberg.