about shop patterns projects printables extras sponsorship wild olive twitter flickr pinterest subscribe
Showing posts with label plush. Show all posts

project // a critter to stitch & love // plus a milo and tina version

Milo and Tina DIY Plush

Eleven years ago, my first book, Stitch Love: Sweet Creatures Big & Small came out, and I shared a fun little pattern to make a stuffed otter or ermine, or in today's update, a stoat. Why a stoat? Because the Winter Olympics have some adorable mascots that are brother and sister stoats named Milo and Tina. I love them, and decided to use my pattern to make cute little Wild Olive versions of these two siblings.

Milo and Tina DIY Plush

Tina is the official Olympic mascot and Milo is the mascot for the Paralympics because he was born with one paw and uses his tail in its place. How sweet are they?

Now, I admit that my version is not quite like the official plush (which are apparently very difficult to find), but they are very "me." I'm also basically adding just a few small changes to an existing pattern I made. I decided to sew my new version with raw edges (no turning), which I've done a bunch of times for other stuffed toys, even though that's different from my original critters.

You'll also notice that I didn't include things like the different colors on their paws, tails, and inside the ears. This is intended to be a simple project!

Milo and Tina DIY Plush

So here's what you'll find in this freshly updated post:

The original post showing the otter and ermine I made, along with that pattern, the supply list, and the instructions. After that, I've added the process for making Milo in a simplified form because it's still fairly similar in process to the original.

Are we ready? Let's hit the slopes! Er...sewing machine...
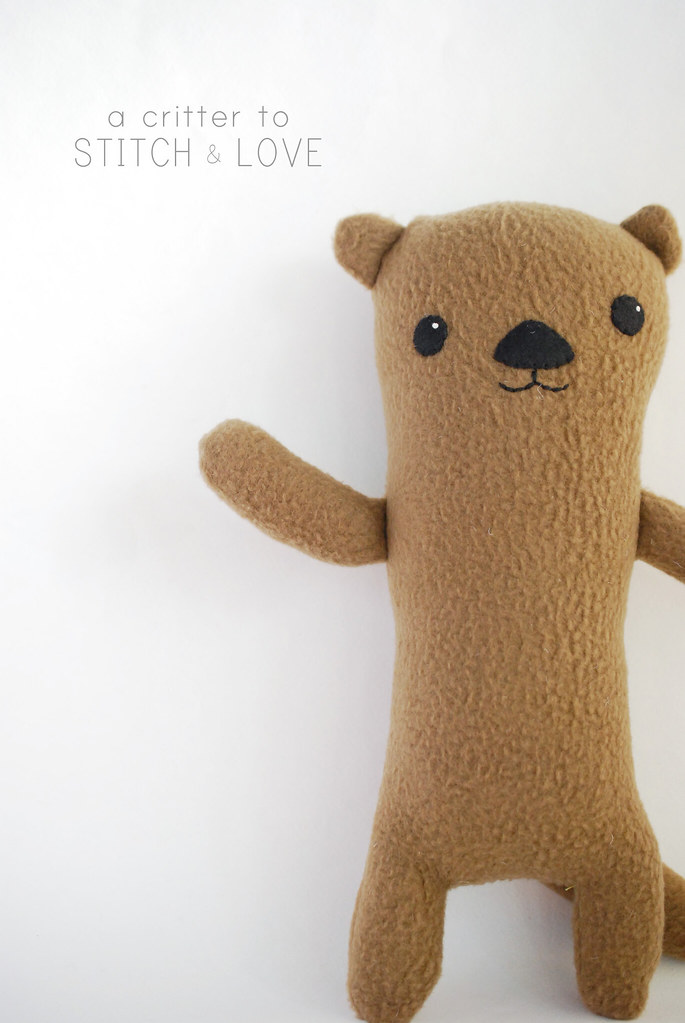
A Critter to Stitch & Love


Today's project tutorial is brought to you by my little sister's birthday, and a random web search. Since that's a little confusing, let me explain.

We got into a discussion at my house about ermine. That's the kind of fur you often see around king's robes. It's also an animal in the weasel family, and if you do a Google image search, you'll see some photos that are the cutest thing you've ever seen, and some where the ermine looks like it wants to eat your face. I highly recommend taking a look.

Anyway, my little sister saw the photos and insisted that I make her a super cute stuffed ermine for her birthday. I couldn't resist, and as I was making it, I realized that the same pattern could look a lot like other animals too. An otter. A meerkat. A cat. And if you use your imagination, probably a lot more things too. Just a few small adjustments of color, size, and placement make the difference!
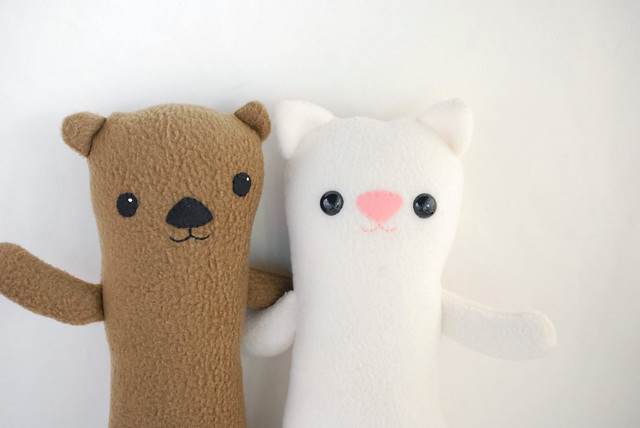
A Critter to Stitch & Love

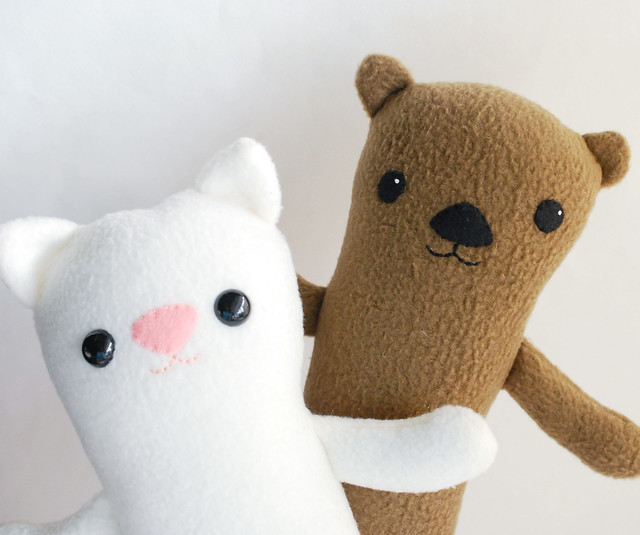
So once her ermine was done, I made my own otter, and now you can too! I'll admit, the ermine (which really does look like a cat, but I promise you, also looks like an ermine) is cuter. But I find that these things each have their own personalities, and I just have to see what shows up.

Ready to make a critter to stitch & love? Here's what you need:
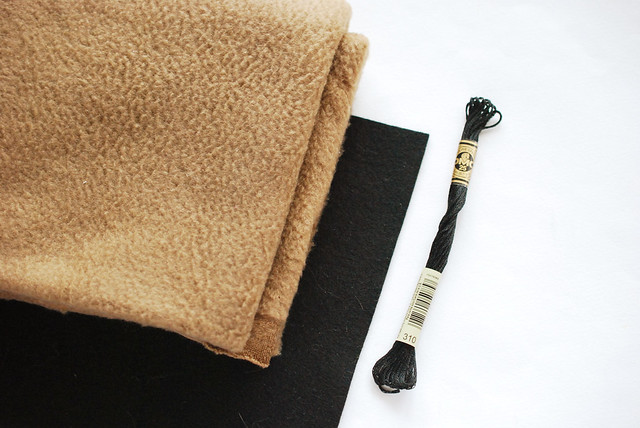
A Critter to Stitch & Love

Fleece - 1/3 yard
Felt - scraps
Embroidery floss
Stuffing
Optional: Safety eyes

You'll also need:
Scissors
Pins
Needle and thread
Sewing Machine
Pencil or chopstick for turning pieces.

A Critter to Stitch & Love Template PDF
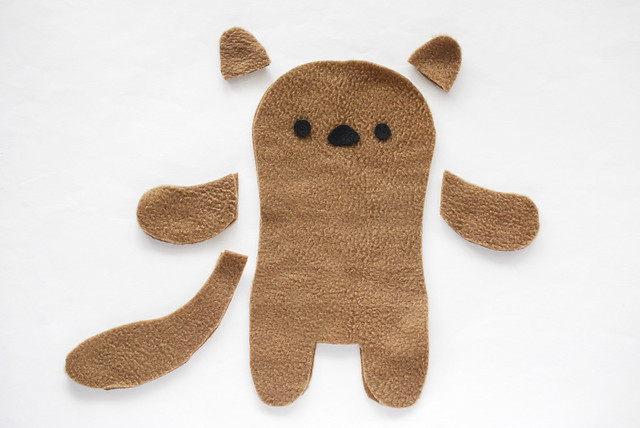
A Critter to Stitch & Love

Following the stretch arrows, cut 2 bodies, 2 tails, 4 arms, and 4 ears from fleece. Be sure that you're cutting two layers, so you have a right- and wrong-facing piece. Cut a nose and two eyes from felt. (Skip the eyes if you'll be using safety eyes.)

IMPORTANT: One of the ways to adapt your animal friend is to alter the size of the tail, arms, and ears. For example, I added a generous seam allowance to the ermine's ears. You can also rotate the pattern piece for the body so the stretch goes the other way, that will give you a shorter, plumper animal.
A Critter to Stitch & Love

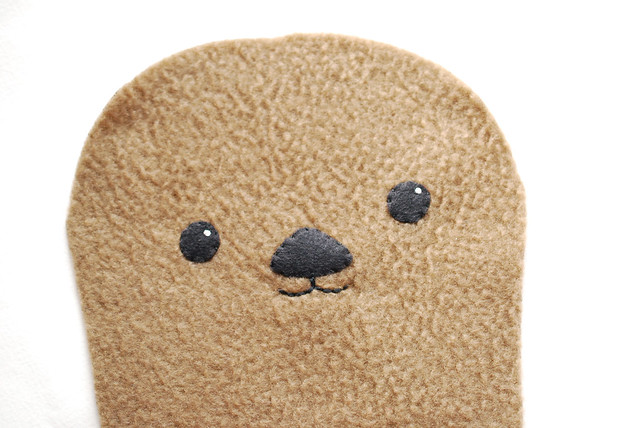
Stitch the nose and eyes in place with three strands of matching embroidery floss. Stitch the mouth with six strands of embroidery floss and backstitch. For the highlight on the eyes, add a white french knot.

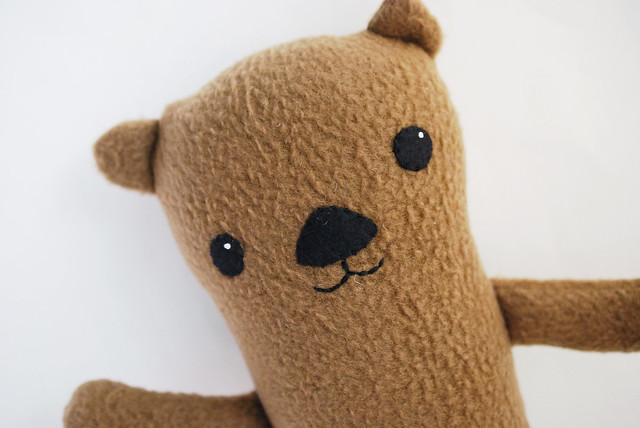
Otters have differently shaped noses, so I used the nose upside down. Or maybe it's right side up? The ermine has the nose the other way, and she also has large safety eyes.
A Critter to Stitch & Love

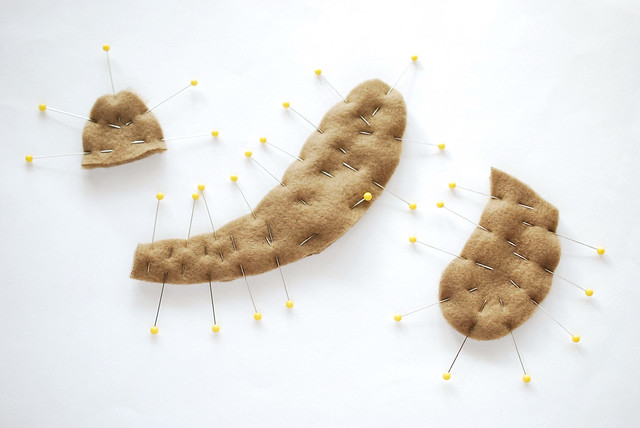
Place the tail, arm, and ear pieces right sides together and pin them well. Note that on the tail, I've placed a pin across the side, because that's a good place to leave it open for turning. We'll come back to that later.
A Critter to Stitch & Love

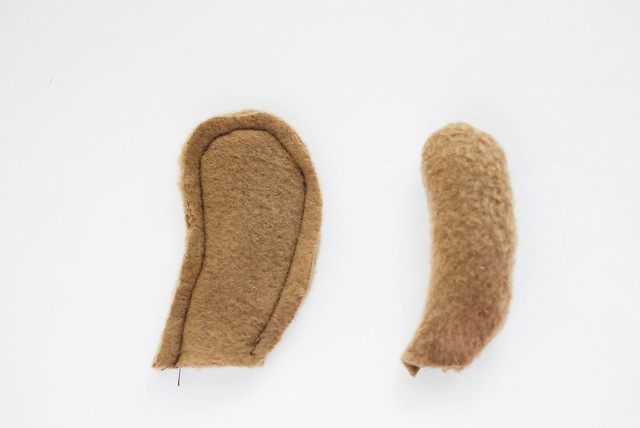
Sew around the arms and ears, leaving the straight edge open for turning. Turn the pieces right side out and add some stuffing to the arms. Leave the ears without stuffing.
A Critter to Stitch & Love

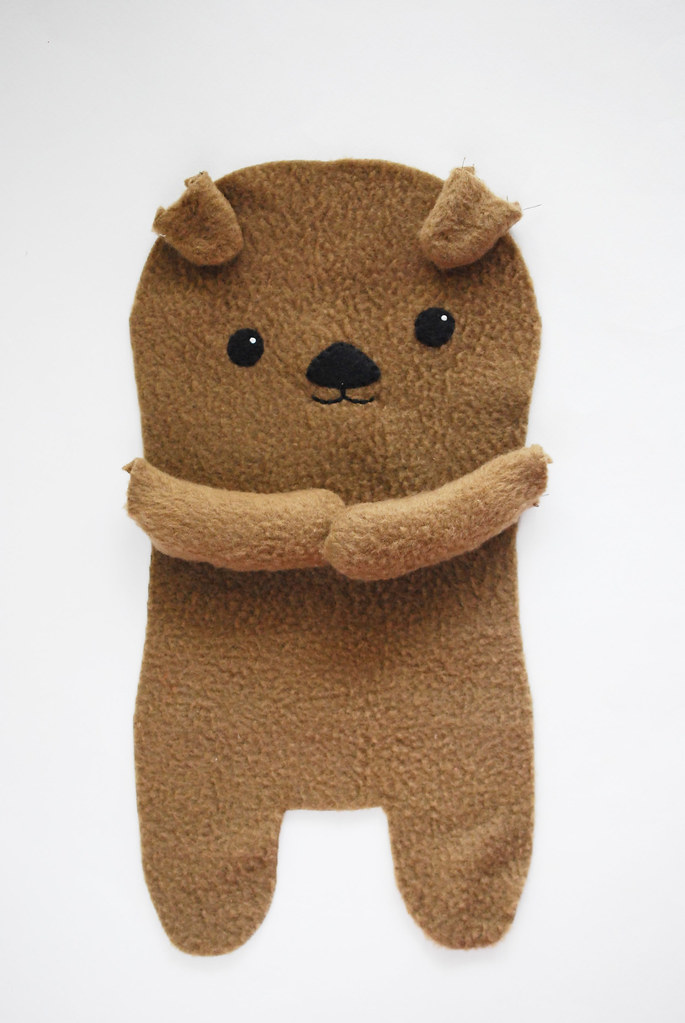
Place the arms and ears on the right side of the critter body with the raw edges facing out. You can make the arms high or low, and the ears can be up on top, or off to the sides more. Just make sure that you have the edges overlapping the body piece enough so that they will get caught in the seam.
A Critter to Stitch & Love

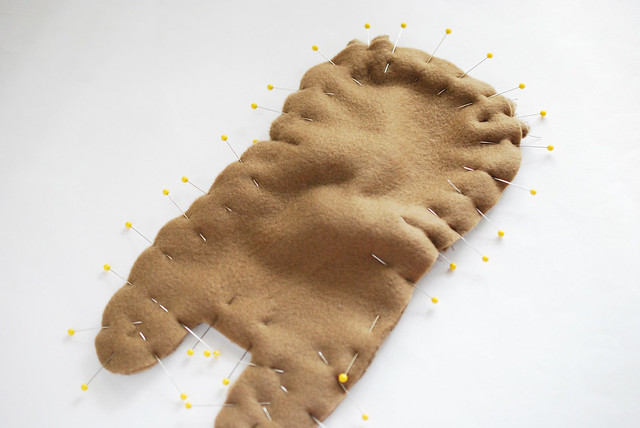
Lay the second body piece on top, right sides facing, and pin, pin, pin.
A Critter to Stitch & Love

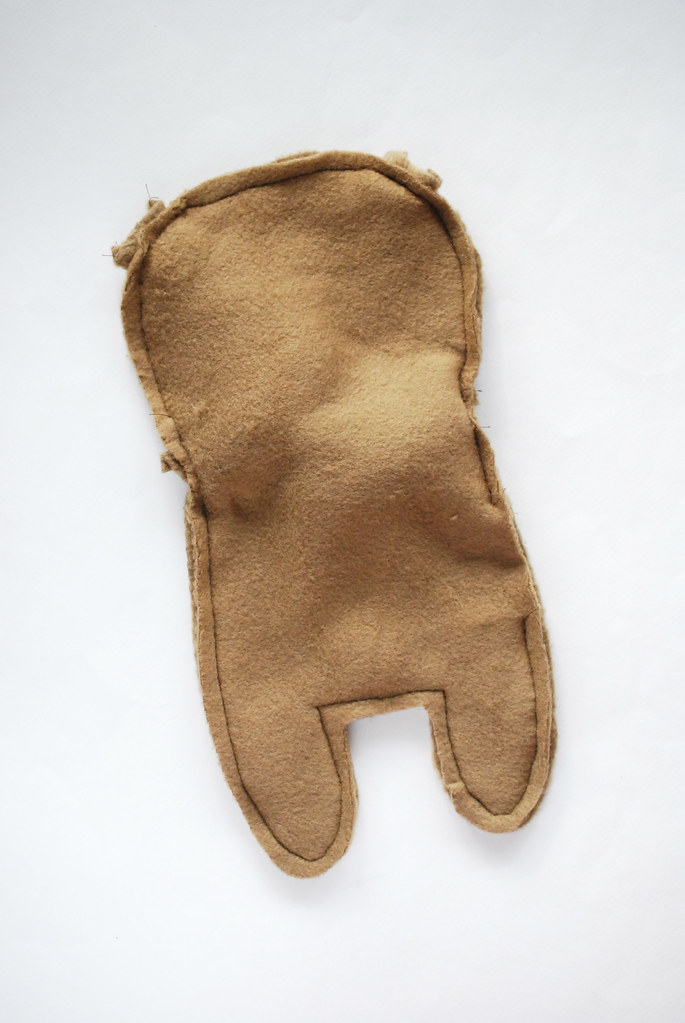
Sew around the outside, leaving an opening for turning. Before you turn it right side out, make sure that all of the seams are secure and that the ears and arms are caught in them. Also, clip those corners between the legs.
A Critter to Stitch & Love

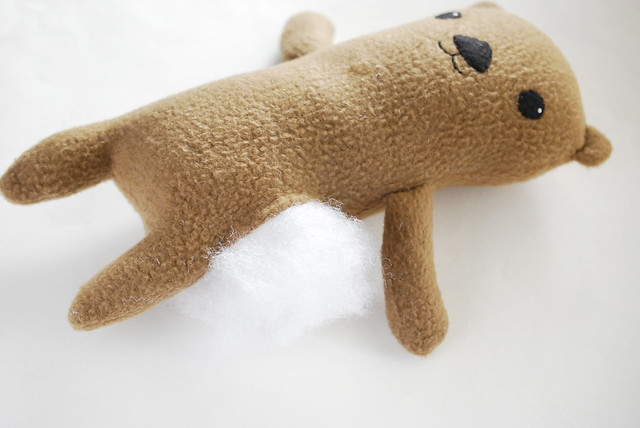
Stuff the critter really well. Go on, add a bit more stuffing. See how the stretch of the fleece made this get a lot taller than before? Now, stitch the opening closed with ladder stitch.
A Critter to Stitch & Love

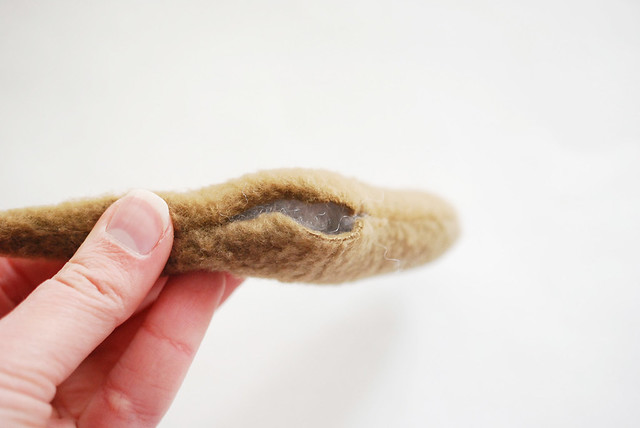
Let's go back to that tail. Sew around the sides, leaving an opening in the middle. Trim the corners at the top, then turn it right side out. Add a bit of stuffing in the lower part, then stitch it closed with ladder stitch.
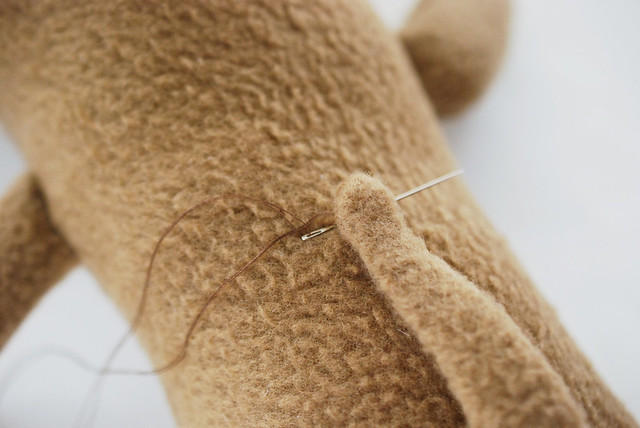
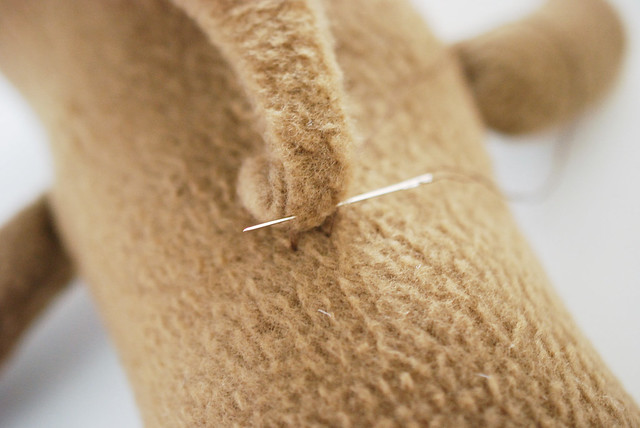
A Critter to Stitch & Love

Stitch the tail onto the back of the body with some ladder stitch.
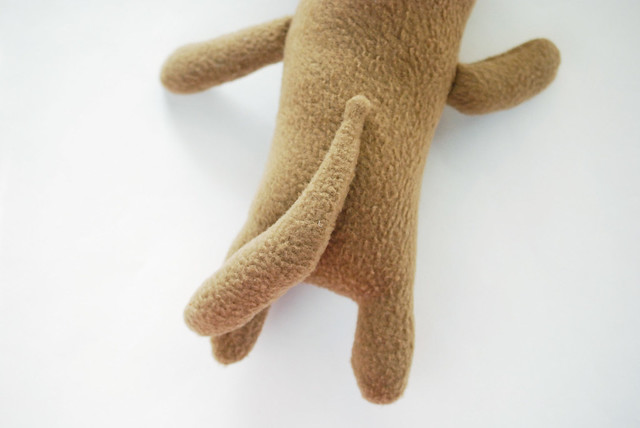
A Critter to Stitch & Love

I attached the top inch of the tail, and gave it a tug to make sure it's secure.
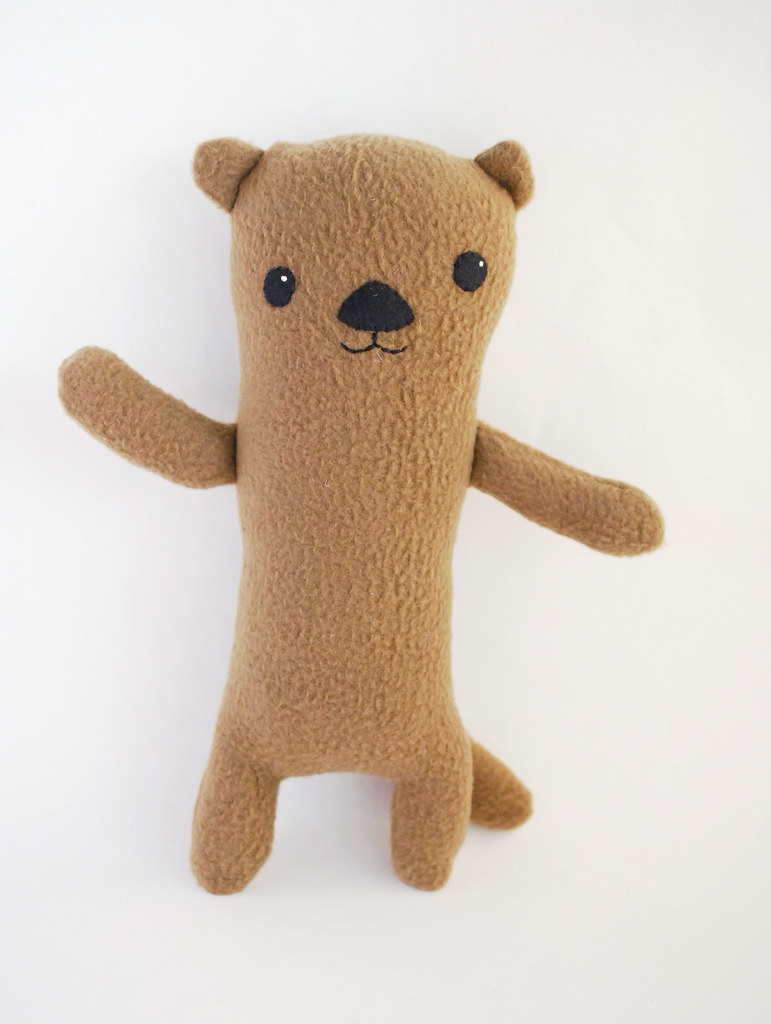
A Critter to Stitch & Love

Give your new friend a hug, because it's all finished! And is it just me or does this otter look like he's ready for some disco fever?
A Critter to Stitch & Love


Now, let's make a Milo version!

Here's the add-on pattern PDF that has the extra pieces you'll need for both Milo and Tina:

Milo & Tina Add-On Template PDF

Milo and Tina DIY Plush The template piece for Milo needs to be assembled. Be sure to cut the front as shown on the template and the back piece reversed. Tina usese the original template.

Cut out the belly piece and sew it to the front. This is the same for Milo and Tina.

Milo and Tina DIY Plush

Cut the nose from pink felt and sew it in place in the indent at the top of the belly piece. Use six strands and back stitch.

Embroider the mouth with six strands and back stitch.

Add safety eyes or felt eyes, like in the original critter version.

Milo and Tina DIY Plush

Make the tail, leaving the opening in the side like with the original.

Sew the tail to the back piece, lining it up so Milo can use his tail for stability. I also tacked it in place farther down to help hold it in position. For Tina, I made her tail stick up, and also tacked it further up to hold it.

Milo and Tina DIY Plush

Make the arms and ears.

My sewing machine was NOT HAVING IT when sewing the ears, so I stitched them together by hand with embroidery floss and running stitch. They don't have any stuffing in them.

Layer the arms and ears between the body layers and pin them well. Sew around the outside, leaving an opening under one arm for stuffing. Watch out for the tail as you sew!

Stuff your Olympic stoat friend and sew the opening closed. I did this on the sewing machine, so the stitching lines aren't perfect, but they still match the rest of the seams.

Milo and Tina DIY Plush

Tina and Milo both wear cute little scarves, and for these, I just cut strips of fleece and tied them in the back. They are about 2-1/2 inches wide by 18 inches long. You'll need to adjust them slightly so you can see their faces.

I just want to hug them and cheer them on!

Milo and Tina DIY Plush

By the way, you can absolutely make Milo and Tina in the same way that my original version was made. Turning the pieces and the body will make them more tall and thin, which is closer to the illustrations, real-life, and plush versions of these characters. I just thought it would be fun to make mine this way. What kind of critter will you stitch & love?

project // rainbow stuffie (a stitch squad bonus pattern!)

Kawaii Fleece Rainbow Stuffie Do you ever have a day where you could use a rainbow? Me too. Instead of waiting for one, make your own! And in this case, you can hand sew your rainbow and give it a cute face too.

Along with being a fun way to make a smiling rainbow, it's also a bonus pattern that goes along with the August Stitch Squad box! If you've never heard about Stitch Squad, it's a new subsription box for crafty kids and tweens. And I had the privilege of desgining these weather stuffies!

Stitch Squad Weather Stuffies

Inside the box it has everything you need to make them, plus a bunch more super cute stuff. There's still time to get this box, but it will change to the next one (with a new craft technique) soon.

BUT, if you have the Weather Stuffie box, you might just want to add to the cloud, lightning, and raindrop so you also have a rainbow. And you probably have almost everything you need to make this bonus pattern.

Depending on how you cut the fleece the comes in the box, you should have enough white, aqua, and yellow to make the rainbow. You'll just need some pink (or another color) fleece. I bought 1/4 yard for under $2 on sale.

Making this rainbow is a little more complicated than basic stuffies, but it's not that much different. Are you ready to make one? Let's do this!

Kawaii Fleece Rainbow Stuffie Here's what you'll need:

Small amounts of pink, yellow, aqua, and white fleece*
Pencil
Scissors
Sewing clips
Sewing thread
Needle
Black felt
Black and white embroidery floss
Stuffing

*You can actually use any color for the back. White is just a suggestion.

DOWNLOAD THE RAINBOW STUFFIE PATTERN PDF

Kawaii Fleece Rainbow Stuffie

Print and cut out the pattern pieces, then trace them onto your fleece. Do this for all the pieces except the face.

I made the top bow pink, the middle yellow, and the bottom aqua. The back hafl-circle piece is white. But you can mix it up and use any colors for your rainbow!

Kawaii Fleece Rainbow Stuffie

Fold the top and middle pieces in half to find the exact middle and then clip them together like shown. The right sides of the fleece should be facing each other.

It looks weird now, but it'll get where we need it shortly.

Kawaii Fleece Rainbow Stuffie

Bring the ends of the yellow down to match up with the ends of the pink. Keep the right sides facing each other. Use sewing clips to hold them. Then clip the sections between the middle and the ends.

Hand sew along the clipped edge with back stitch about 1/4-inch from the fabric edge.

There will be some areas where it seems like there's more fabric on one edge than the other. That's okay! Just keep sewing, but keep the clips in place until your stitching is right up to it.

Kawaii Fleece Rainbow Stuffie

Follow the same process to add the blue bottom section of the rainbow. When you're done, it should look like this!

Kawaii Fleece Rainbow Stuffie

Cut out two eyes and a mouth from the felt. I used freezer paper to cut mine out, but you can cut the paper templates and hold them onto the felt with a tiny dab of gluestick. It will peel right off when you're done cutting them out!

Kawaii Fleece Rainbow Stuffie

Stitch the face onto your rainbow with whip stitch on the edge of the felt.

You can also use white embroidery floss to stitch a little twinkle on each eye.

Kawaii Fleece Rainbow Stuffie

Place the rainbow front on the half circle back with the right sides of the fleece facing each other. Use sewing clips around the edges.

Sew around the edges with back stitch and doubled sewing thread. I suggest starting on the bottom edge so the opening is in the blue area.

Kawaii Fleece Rainbow Stuffie

Turn the stuffie right side out and add some stuffing inside. Don't add too much because it can make the rainbow a funny shape.

Kawaii Fleece Rainbow Stuffie

Sew the opening closed. I used ladder stitch for this.

Kawaii Fleece Rainbow Stuffie

And your rainbow stuffie is all finished!

I'm pretty sure that when things are feeling hard and you're stuck with a day that's gray and lonely, hugging a rainbow will help. Even just a little.

Kawaii Fleece Rainbow Stuffie

By the way, this rainbow uses hand sewing because that's what the August Stitch Squad box is all about. BUT, if you like using a sewing machine, you can use that to sew this together too!

And if you're a Stitch Squad member, hello! I'm so glad you're here and I hope you have fun making all your weather stuffies!

project // sew a softie magic rabbit

Magic Rabbit Softie

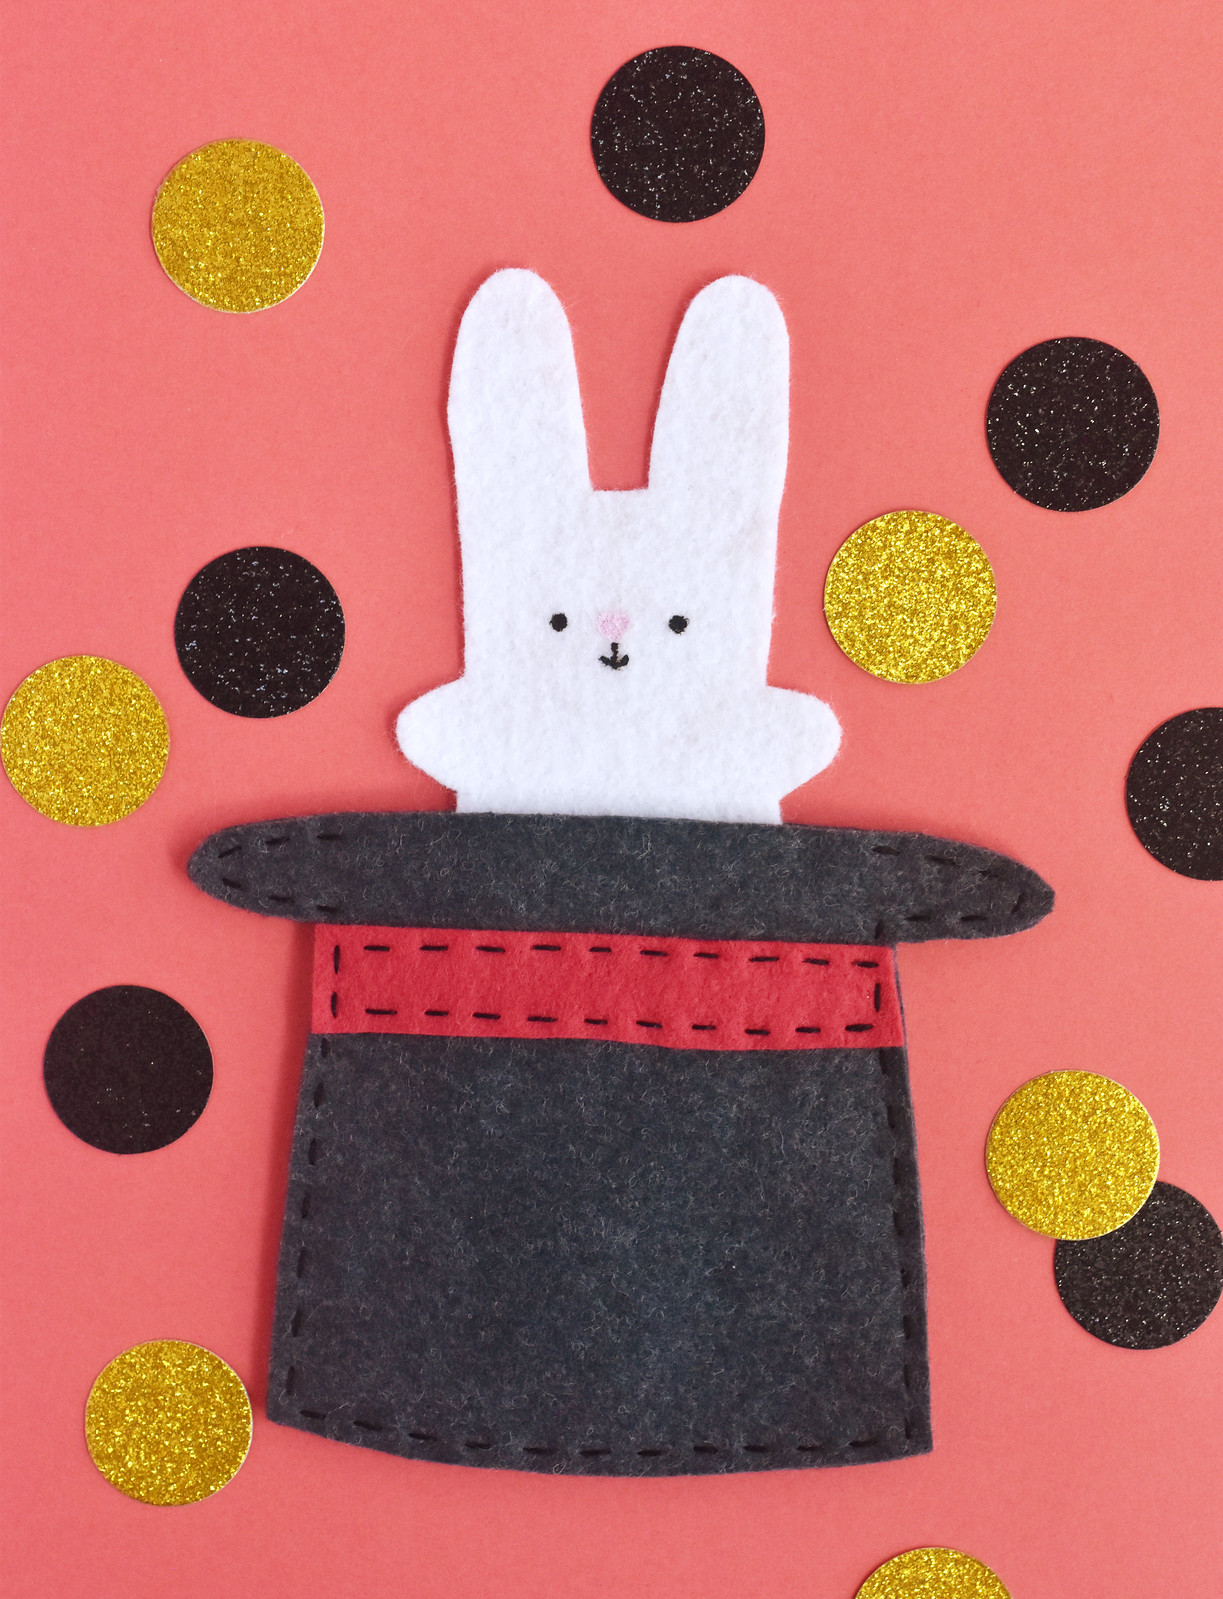
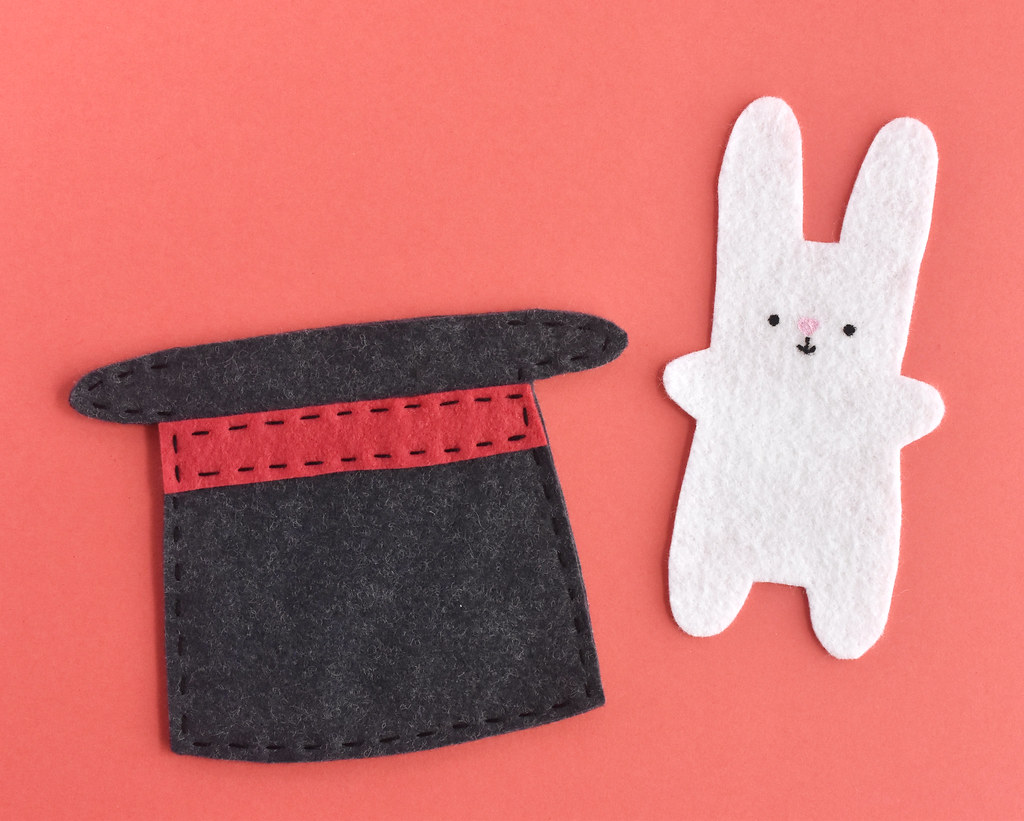
Ta-da! Become a magician with a needle and thread when you make this adorable felt rabbit and magic hat. But this isn't just about sewing a hat with a cute bunny. Nope! This is a real magic trick that you can use to entertain your famiy and friends.

I created this little project for this year's edition of Sew a Softie. If you've never heard of this before, Sew a Softie is a global initiative to inspire kids and grown-ups to sew together. The best way to see all of the free projects is by following along on Instagram, but there will be a full round-up coming soon to their site. This year's theme is Magic, and I couldn't be more excited. You see, my dad is an actual magician.

We're talking, has done many a birthday party, special event, and even big conventions. I've often been asked if I was ever his assistant and the answer is yes! When I was a kid I had a set of matching tails with a bow tie and everything so I could go and help him. What can I say? We're an unusual family.

Magic can mean a lot of things to a lot of people, but a magic rabbit and an actual magic trick is where my head went with this theme. So here we are! If you're ready to pull a rabbit out of a hat that you made yourself, let's get started!

Magic Rabbit Softie

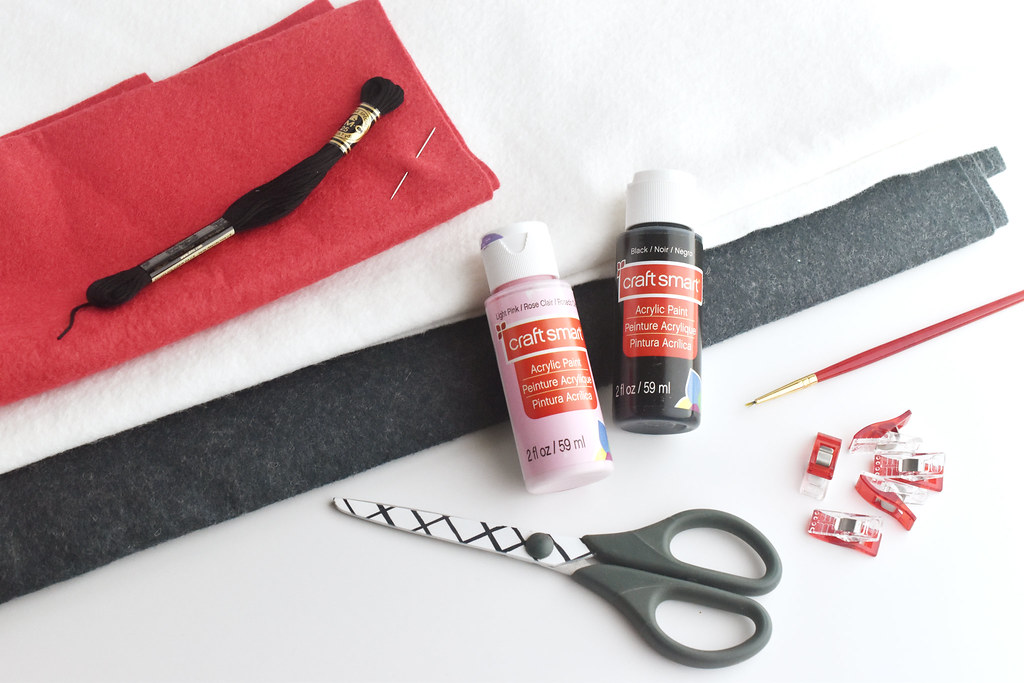
You will need:

Felt (I used white, dark gray, and red)
Scissors
Acrylic Paint (I used black and pink)
Tiny Paintbrush or Toothpick
Sewing Clips or Pins
Embroidery Floss (I used black)
Embroidery Needle

Magic Rabbit Softie PDF Template

Magic Rabbit Softie

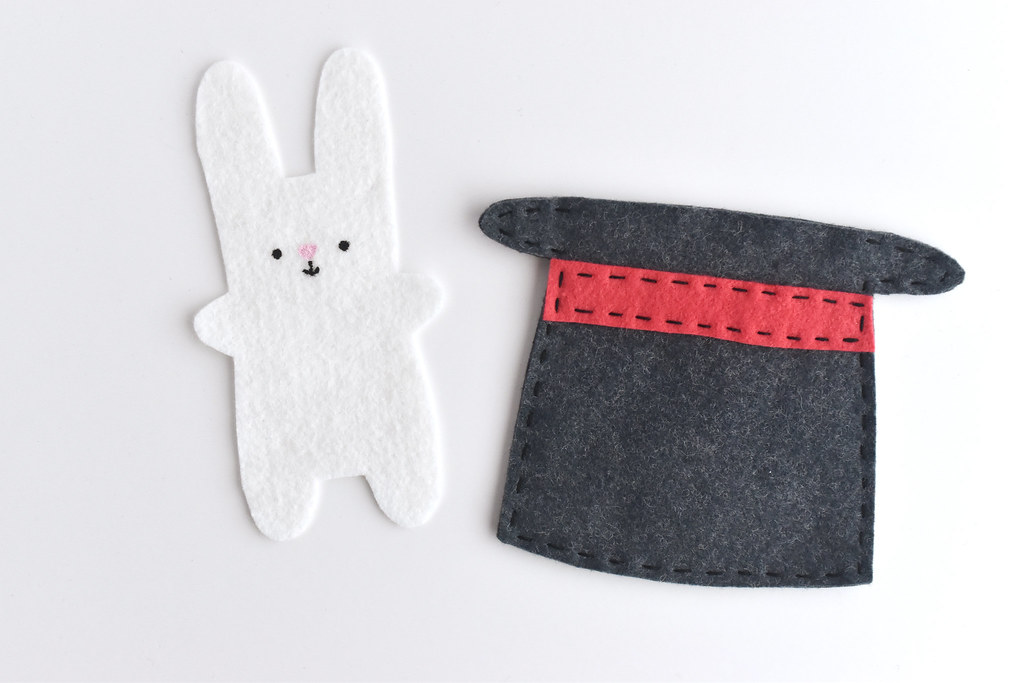
Use the templates to cut out one rabbit, one hat band, and three hats.

I used more classic magic colors, but you can use whatever you like! A dark color for the hat and a light color for the rabbit are a good idea because it will make it more obvious that the hat is "empty" when you perform the trick.

Want an easy way to cut felt pieces? Check out my video on using freezer paper!

Magic Rabbit Softie

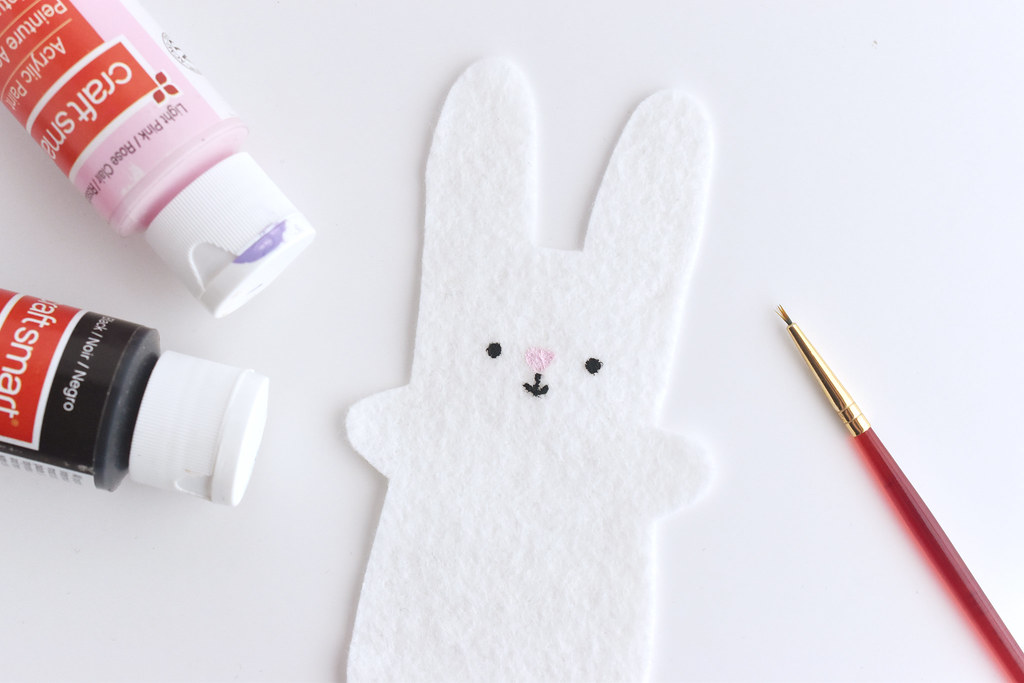
Paint the face on the rabbit. You can use the template as a guide or create your own face design! Let the paint dry as you make the hat.

Painting on felt is a little unconventional, but as long as you carefully dab the paint on, it works great! If you've never done this before, practice on a scrap of felt first.

Magic Rabbit Softie

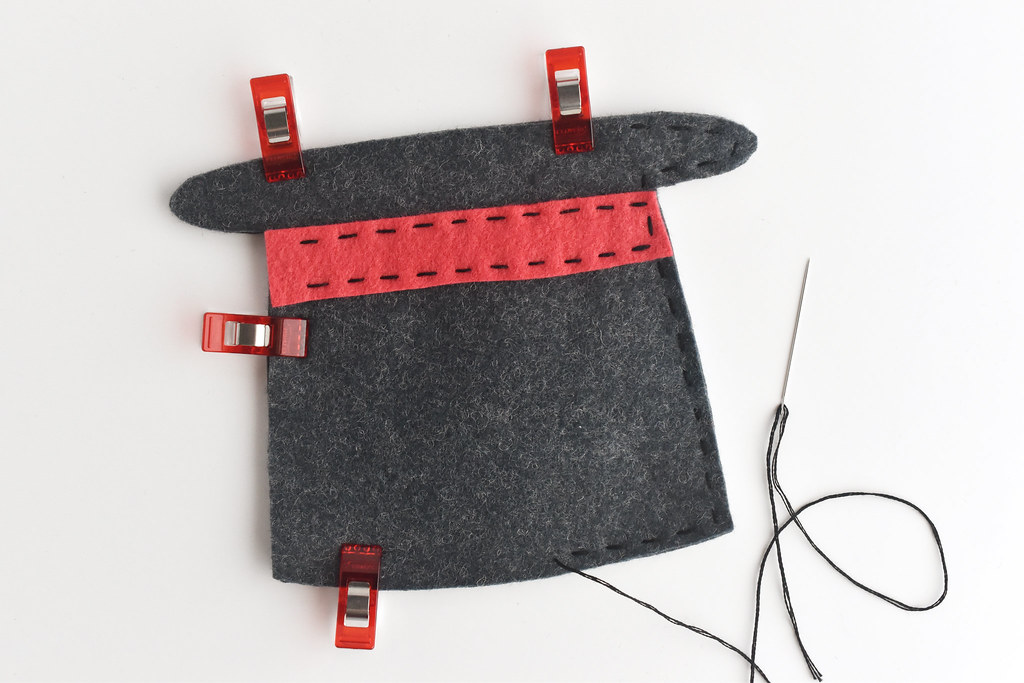
Place the hat band on one of the hat pieces. The ends are slanted, so make sure that it fits correctly. Use sewing clips or pins to hold it in place while you sew it.

Stitch the hat band with running stitch and three strands of embroidery floss. You don't need to stitch the ends because those will get stitched in the next step.

Magic Rabbit Softie

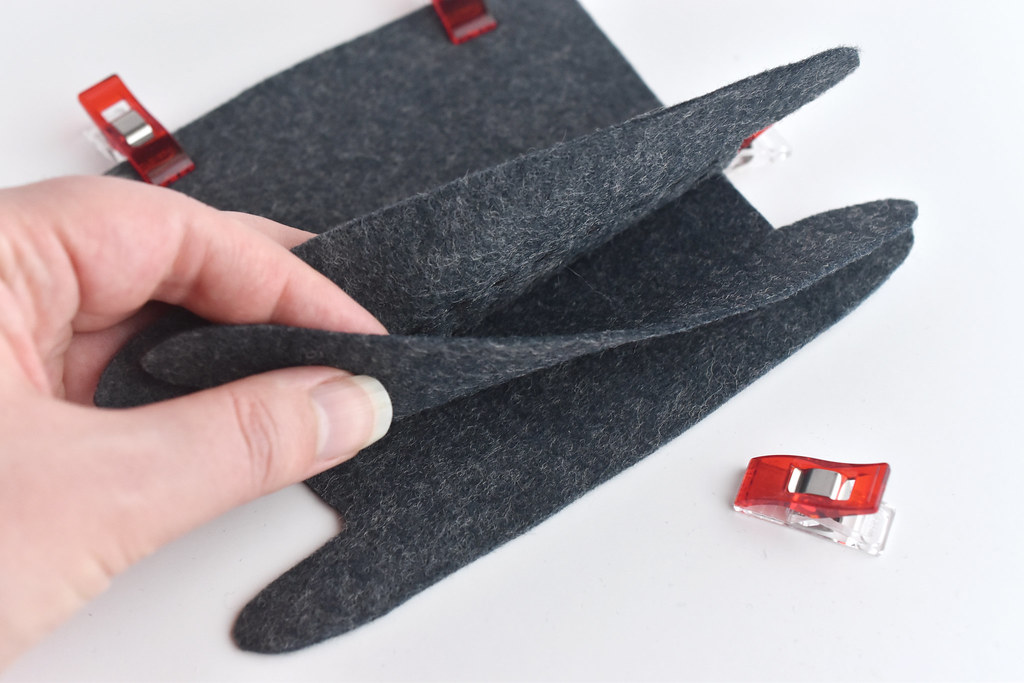
Layer the three hat pieces together and clip or pin the layers together. Make sure that the hat brim all lines up so the middle layer doesnt' stick out.

Magic Rabbit Softie

Sew around the hat with running stitch and three strands of embroidery floss. Stitch the extending ends of the brim, the sides and the bottom. Keep the top open so you can reach into the hat!

Magic Rabbit Softie

Now that you have your magic rabbit and hat, it's time to get ready to perform your magic trick!

Magic Rabbit Softie

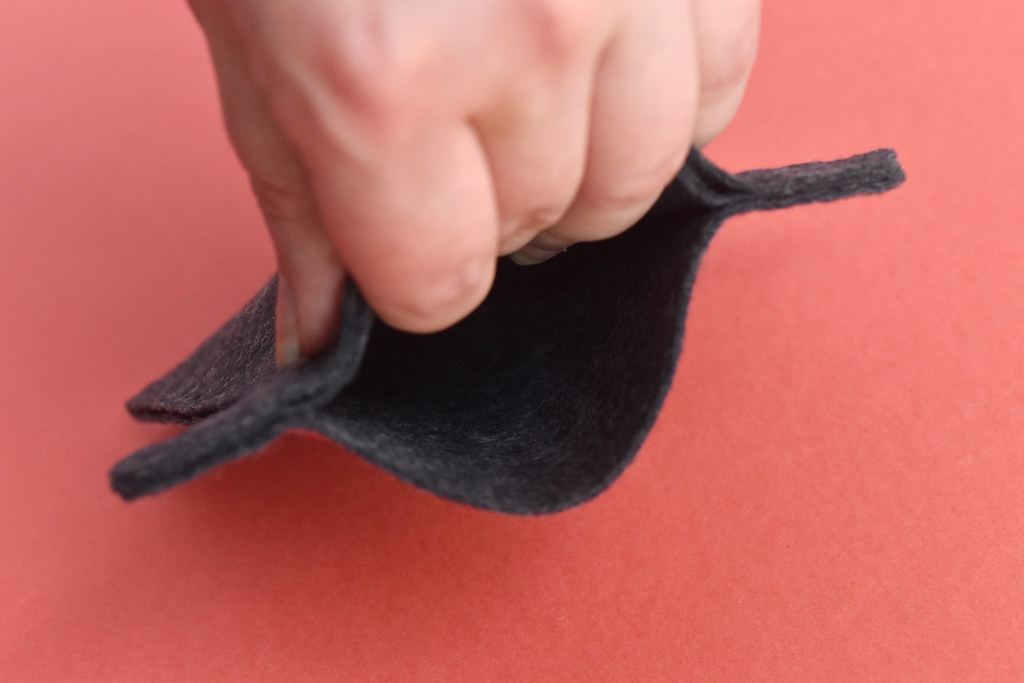
The hat has two sections. The front section has the hat band, and that will stay empty. Before you start your magic trick, without anyone around, tuck the rabbit into the back section.

It helps to push the middle of the rabbit down into the back section with three or four fingers.

Magic Rabbit Softie

The rabbit should be snug down inside without the ears sticking out. But they should also be easy to grab!

Magic Rabbit Softie

The hat should look flat like there's nothing in there. Now it's ready to perform the trick!

Magic Rabbit Softie

Hold the hat with your hand inside the front section of the hat. Tilt it toward your audience to show that it's empty. By holding your fingers over the middle layer of hat, it will be hidden.

Close the top of the hat and start the magic! Some people like a magic wand and a magic word like Abracadabra, but my dad always wiggles his fingers and asks the audience for a magic word. Sometimes he uses magic words like "Happy Birthday!" or "Razzle McDazzle!" You can have a lot of fun with this part!

Magic Rabbit Softie

Now, reach into the back section of the hat and grab the ears. Slowly pull out the rabbit.

Magic Rabbit Softie

Because it's taller than the hat, this part is really impressive!

Magic Rabbit Softie

Your family and friends will be amazed and amused by your new magic and sewing skills!

The rabbit is a single layer of felt so that the magic trick works. Having it flat in a flat hat means you can't really tell that it's in there. If you want this to be a toy instead of a trick, try this:

Cut out two bunny pieces and sew them together with some stuffing inside. For this, you only need to cut two hat pieces so it's a pocket for the bunny instead of a secret compartment. It's still cute even without the magic!

Magic Rabbit Softie

Want to see me perform this little trick? I have a video on Instagram so you can see it in action!