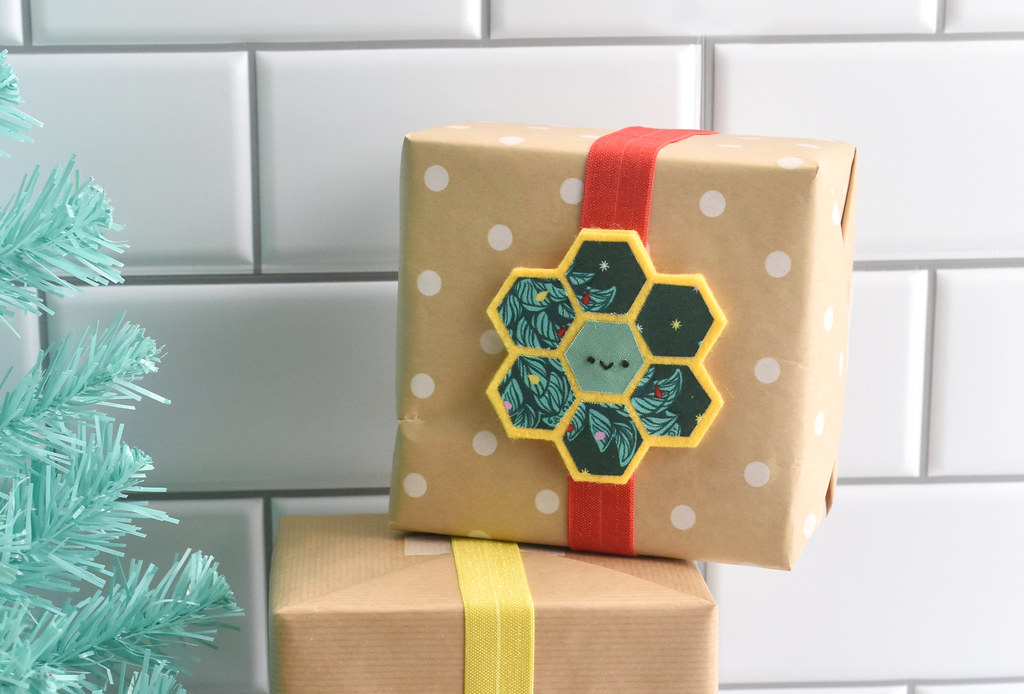
I love giving gifts and I especially like finding ways to make the outside special. This is made even better when the gift wrap (or at least part of it) can be used again! That's what I had in mind with this reusable gift bow that also features my favorite shape ever: Hexagons!
Back in August I made an elastic book band with a felt and fabric quilt star. One of them I made Christmas-themed with a little Santa Claus in the middle. That made me think that I could also make another style of this that's more bow-like. But I still wanted to keep the quilt look, and a flower of hexagons reminds me of the shape of those traditional peel and stick bows.
So here we are.

You can make these with different lengths of elastic to fit on different box sizes. You can even enlarge or reduce the pattern to make different bow sizes! If you make a bunch, you'll have options for all your gift wrapping.
Then after the presents have all been opened, be sure that these bows don't get tossed in the trash. Because you can use them each year or even use them in other ways!

Here's what you need:
Fabric (scraps work well, but so do cute prints you can fussy cut)
Felt (wool or wool blend so you can iron it)
Wonder Under paper-backed fusible web
Black embroidery floss and a needle
Colorful elastic
Pencil
Iron
Scissors
Freezer paper
Craft glue
DOWNLOAD THE REUSABLE GIFT BOW TEMPLATE PDF
These adorable fabrics and the foldover elastic came from Missouri Star Quilt Co. I partner with them, which means if you use my affiliate link you can save 15% on your order. They have so many wonderful fabrics to choose from, plus lots more sewing supplies!

Trace the hexagon templates onto the paper side of the fusible web, then iron it to the back of your fabric. If you want to, you can place the templates over specific areas of the fabric so they are featured. I did that with the pink bow I made.
Cut out the hexagons.

Trace the larger shape (the bow!) onto freezer paper and iron it to the felt. You'll need two of these, but you can reuse the template.
Cut out the shape, then peel the freezer paper off of the felt. Now you can iron the cut shape onto the felt again and cut closely around the template.

Peel the paper backing off of the hexagons and arrange them on one of the cut felt pieces. I find that it's best to start with the outside hexagons, making the margin of felt even on all sides. Then add the center hexagon.
Iron the hexagons down onto the felt.

Embroider a face onto the center hexagon if you like. I used three strands of black embroidery floss.
There are three face styles shown in the template. I just freehanded this one, but you can also draw or trace it onto your fabric. It's best to add the embroidery AFTER you iron the fabric down, so keep that in mind as you plan out the face part.

On the second felt bow shape, cut two slits that are about the width of your elastic. To do this, fold it in half and cut the slits half the width of the elastic.

Slide the elastic through the slits in the felt and glue, sew, or tie the ends together.
I used a piece of elastic that's about 18 inches long for this, but you can adjust this based on the size of the boxes you'll be using these with.

Glue around the edge of the felt and then attach the piece with the fabric hexagons on top. Keep the glue away from the elastic at the center so you can still slide the bow when it's glued together.

After the glue is dry you can slide the bow around your wrapped gift or even a plain box!


I love how these look on brown paper packages, but they're also great on any plain color or simple design. It really helps the bow itself to pop.


Since I'll be using these for family gifts, I'm going to collect them as the wrapping gets cleaned up and they'll get stored in our gift wrap container. But if you're giving these away, you can let the recipient(s) know that they can reuse them as bows, but they also make good book bands (like a book mark!) or headbands depending on the size!
Some years ago I also made another reusable elastic bow, but this time it was with embroidery. You can find that here!
Very cute! Plus it uses up things I already have!
ReplyDeleteThese are so flippin’ cute! I made one but it took a bit of time. Wondering if it would work to print the pattern onto the interfacing instead of tracing? I’d probably need to create a template that fills the page up. Any other time saving tips? 🙏
ReplyDeleteThank you! I've never tried printing on this type of interfacing, so I'm not sure how well most printers would handle it. Even though it still involves tracing, making a cardstock template for the hexagons (you'd only need one!) and tracing around that might go faster. You can also iron all the hexagons on uncut felt and then just cut around them as I did on the Quilt Star version.
Delete