


'Tis the season to make felt ornaments! This is one of my favorite things to make and I'm especially excited to share this free Christmas tree ornament pattern.
The basic supplies are simple and so is the stitching. There's even a low-sew option you'll find as you read on. That makes these fast and easy to make!

I've made lots of ornament designs, and this one follows the basic process that I use in almost all of them. In fact, it's kind of like an extension to my most recent set of felt ornament patterns, the Cozy Quilt Block set. It's also based on my friend Kristin's Enchanted Forest Quilt, making this an extra quilt block-inspired ornament design!
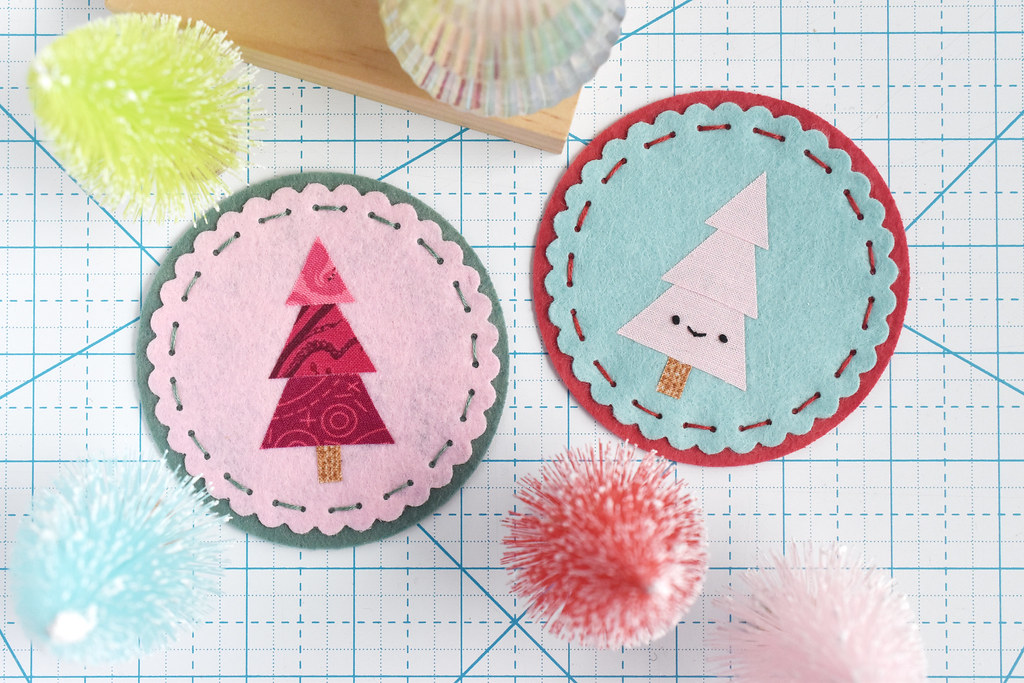
Every time I look at my fabric stash, I keep finding new ideas for making Christmas tree quilts, but I just don't have time to make them all. However, making these trees super tiny and as ornaments is much faster, so that inspired me to make some fused fabric versions. And I love them. They capture the feeling of the Enchanted Forest quilt blocks, but literally take 10 minutes to make. You can even make them scrappy to show off several fabrics!
And ou can use this same technique with my other Cozy Quilt Blocks. Consider this a whole new way to use the Wild Olive Felt Ornament patterns you already have!
Now, let's start making some ornaments!

Here's what you need:
• Wool or wool blend felt
• Embroidery floss
• Stuffing
• Freezer paper and Pencil
• Iron
• Tracing paper
• Scissors
• Scallop Shears (optional)
• Needle
For a low-sew option, you will also need:
• Fabric scraps
• Wonder Under paper-backed fusible web
DOWNLOAD THE COZY ENCHANTED FOREST QUILT ORNAMENT PATTERN
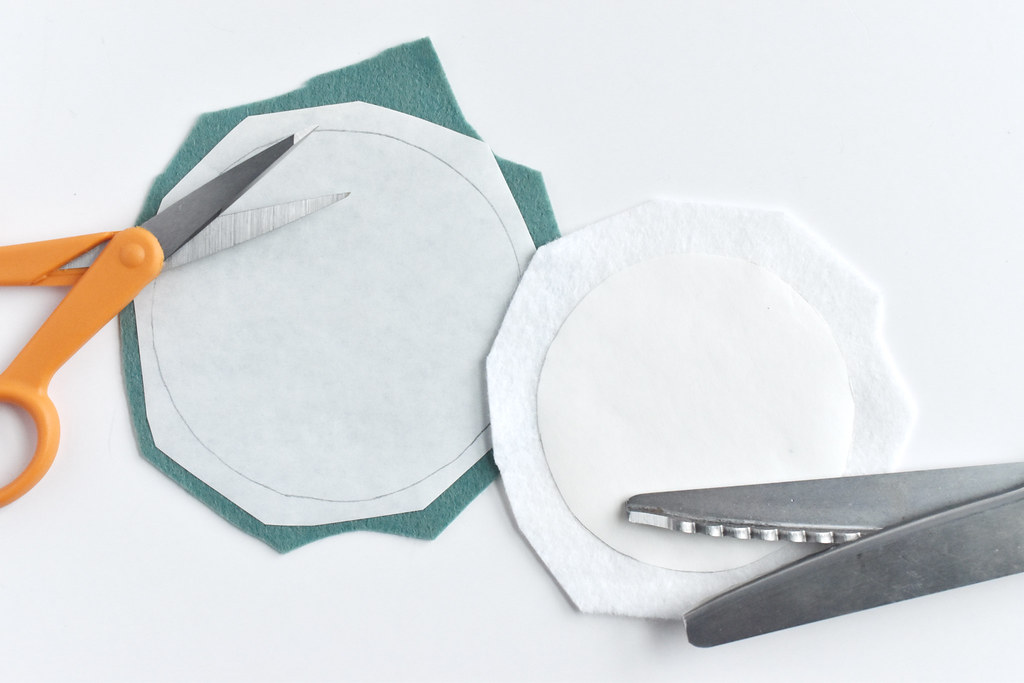
Trace the two circle templates onto freezer paper. Cut out the smaller one. Iron the larger, non-cut circle onto the felt for the back of your ornament and the smaller, cut circle onto the felt for the front of the ornament.
Cut out the larger circle with regular scissors and the smaller circle with scallop shears. The scallops should extend outside the freezer paper templates. This is optional, but so cute.
Peel off the freezer paper.

This year I also worked with Benzie Design to create deep-etch dies that perfectly cut the plain and scalloped circles. They are sold out at the time of this post, but you can get notified when they are available again. Go check out the Circles and Scallops Dies.
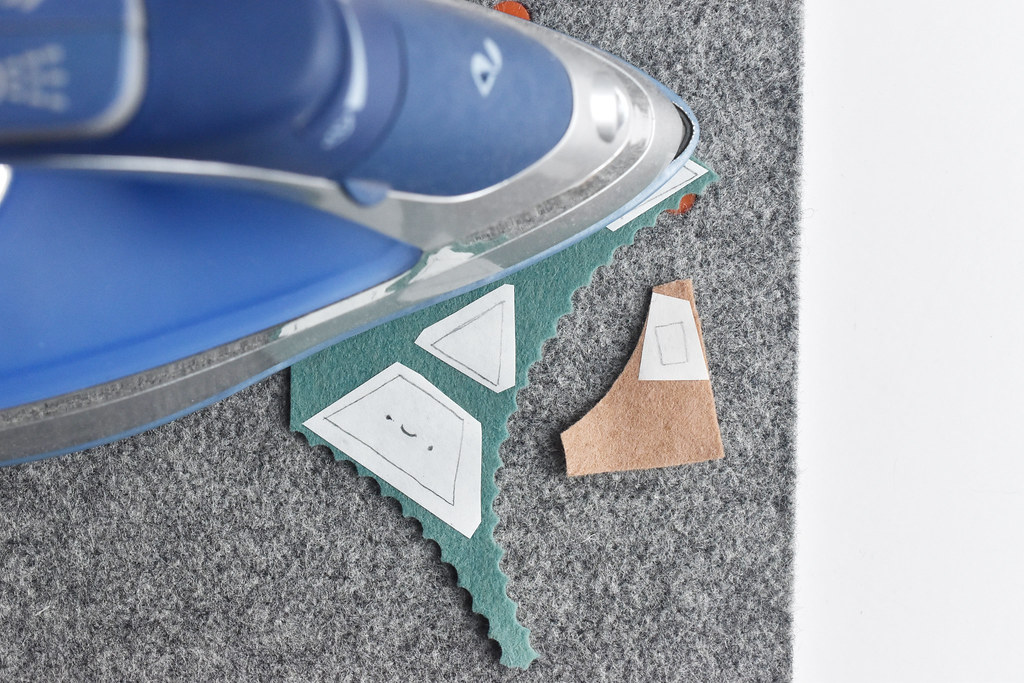
Trace the tree pieces onto freezer paper and iron them onto the felt for your tree and stump. I made my main tree pieces all one color, but you can make them different too.

Embroider the face on the tree using three strands of black embroidery floss. Need help? Check out my video for how I stitch faces!
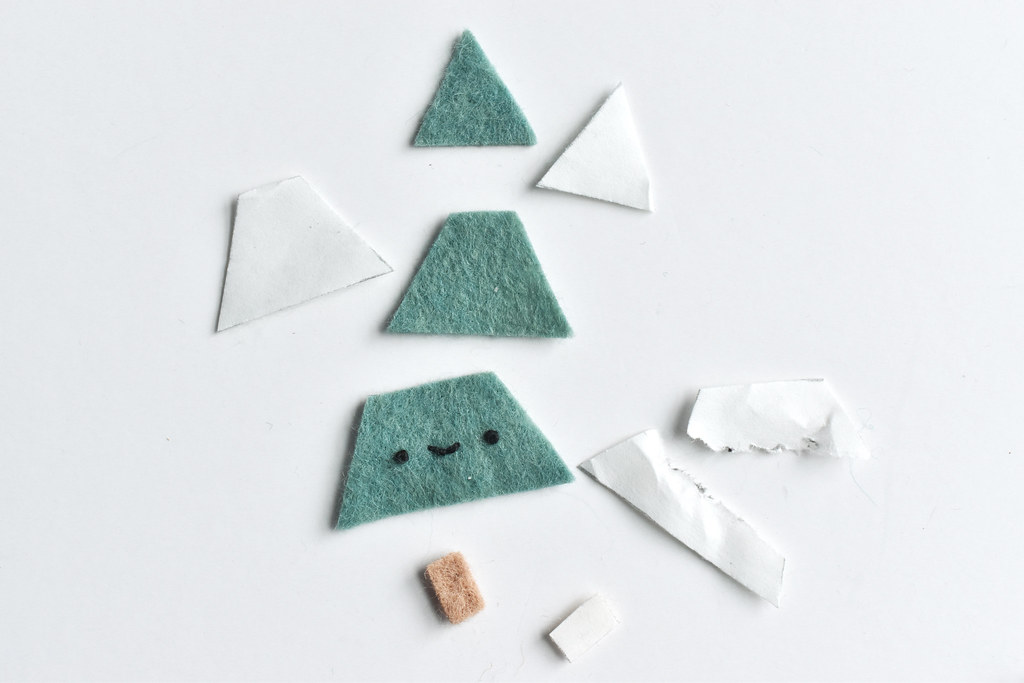
Cut out the shapes and then peel off the freezer paper. For the piece with the face, peel and tear away the paper.

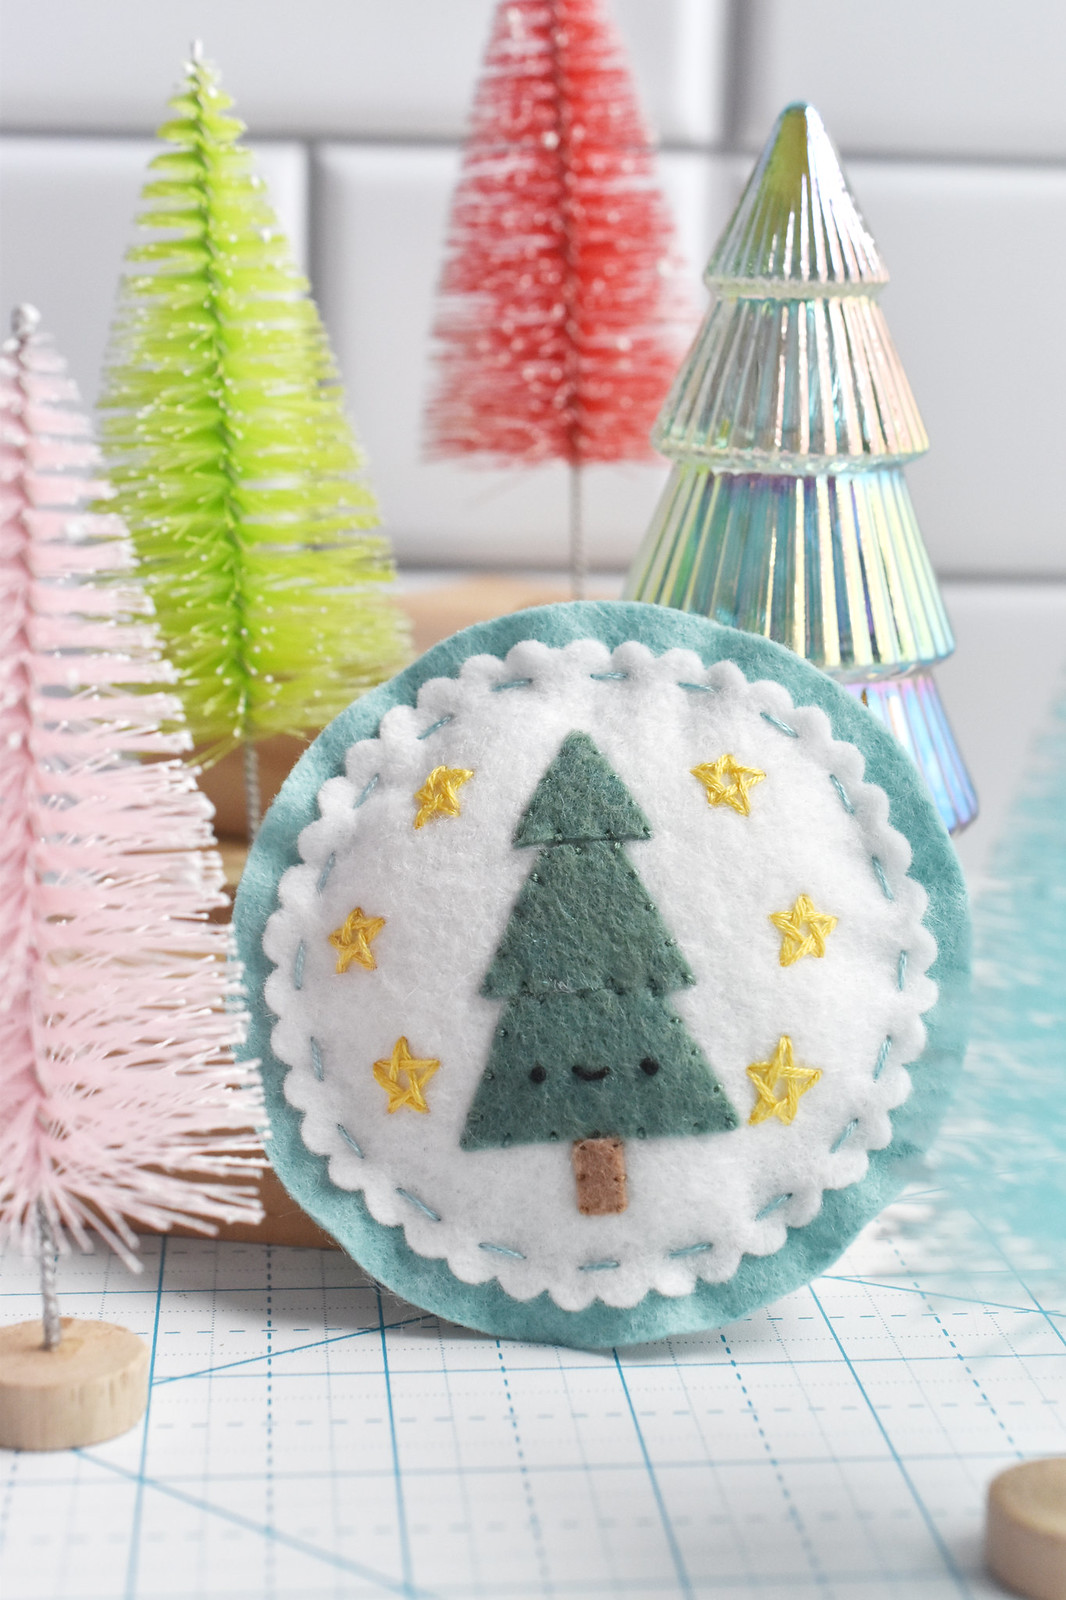
Trace the wonky stars onto tracing paper and lay it over your top circle. Embroider the stars with three strands of embroidery floss. I used back stitch, with one stitch per line of the star. I also wove the stitches!
Carefully tear away the tracing paper.
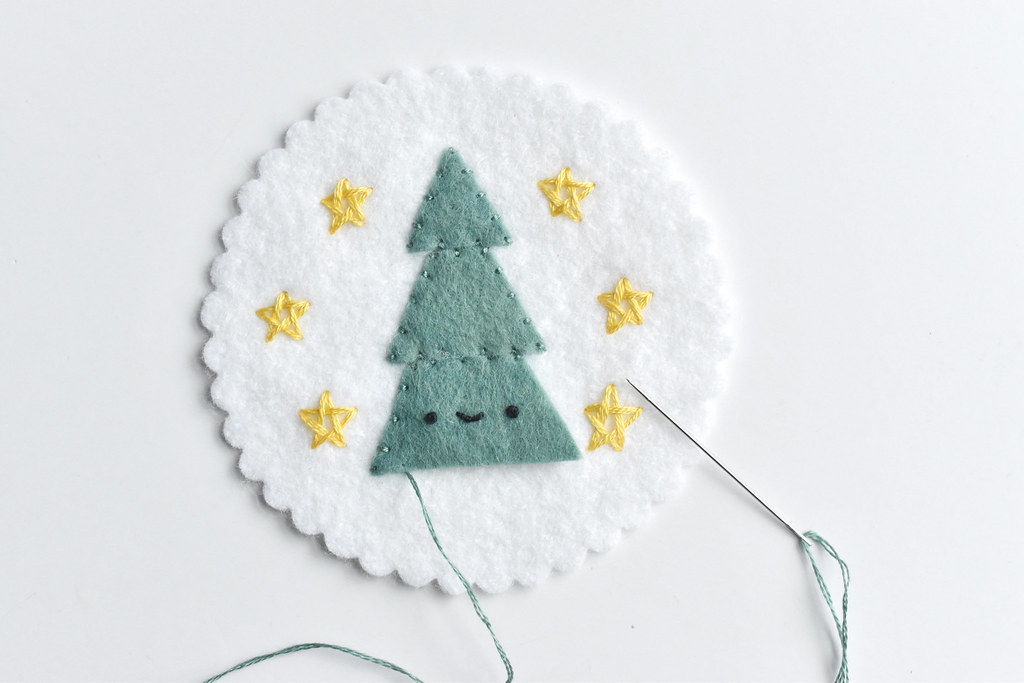
Lay the felt pieces out on the scalloped circle and then use two strands of matching embroidery floss to stitch around the edges with whip stitch. You can see how I do that in this video!

Layer the two felt circles and stitch around the edge with running stitch and three strands of embroidery floss.
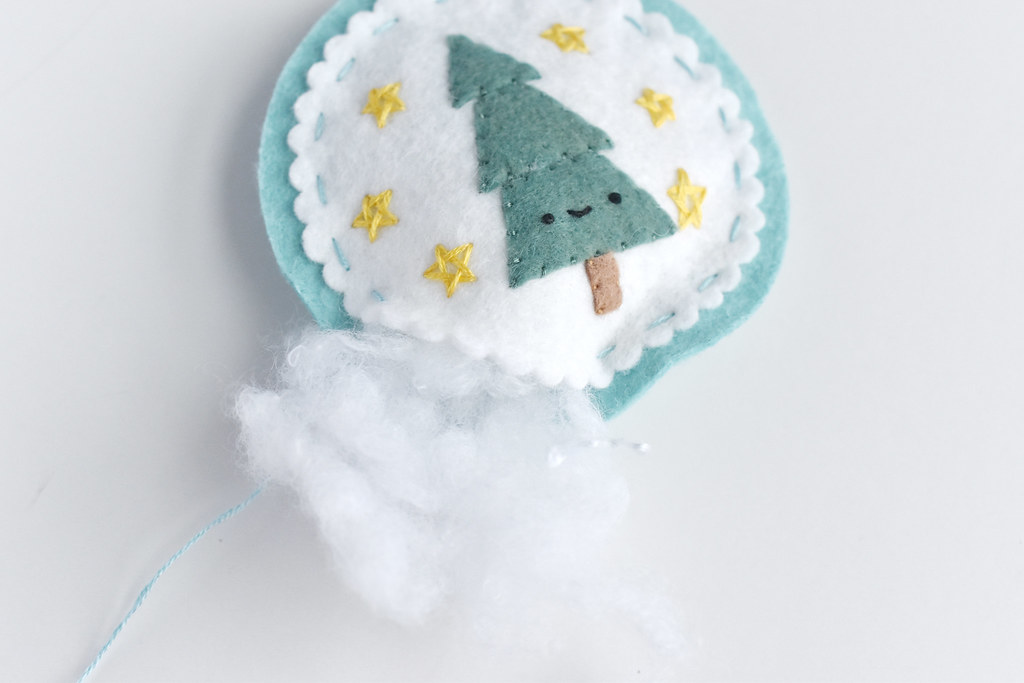
Pause when there's a small opening and add a bit of stuffing to your ornament if you'd like. Finish stitching around the ornament to close it up.
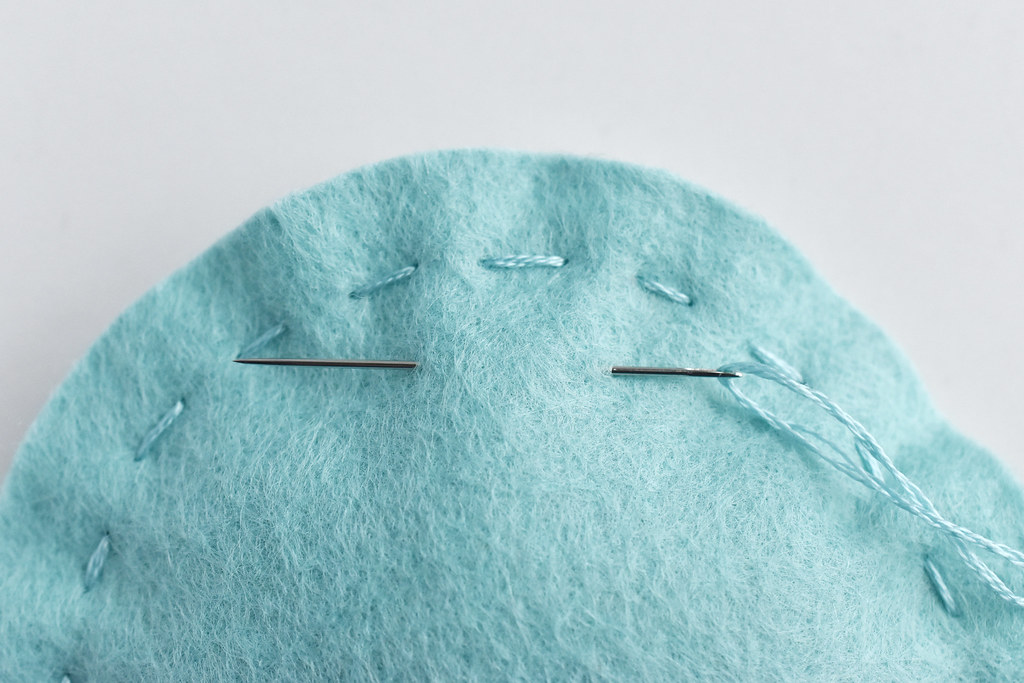
With three strands of embroidery floss, take a stitch through the back of the ornament near the top. Tie the ends together to make a hanger!

It's a cozy Enchanted Forest Quilt tree all ready to add to YOUR tree!
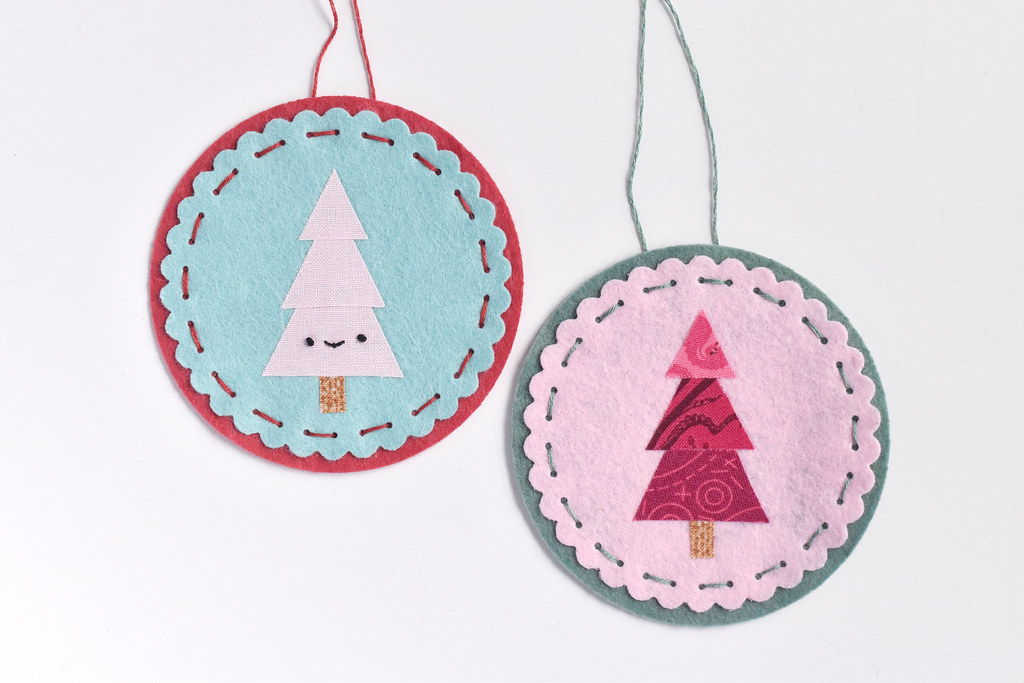
If you want to make one of these with a little less stitching (which makes it faster), you can do that! I'm showing these with the Enchanted Forest tree, but you can use this same technique with my other ornament patterns. I'm currently working on a Dresden ornament from my Cozy Quilt Block set, but with vintage fabrics.

Trace the tree pieces onto the paper side of Wonder Under and iron them to the wrong side of your fabric. This is a great way to use up tiny scraps!
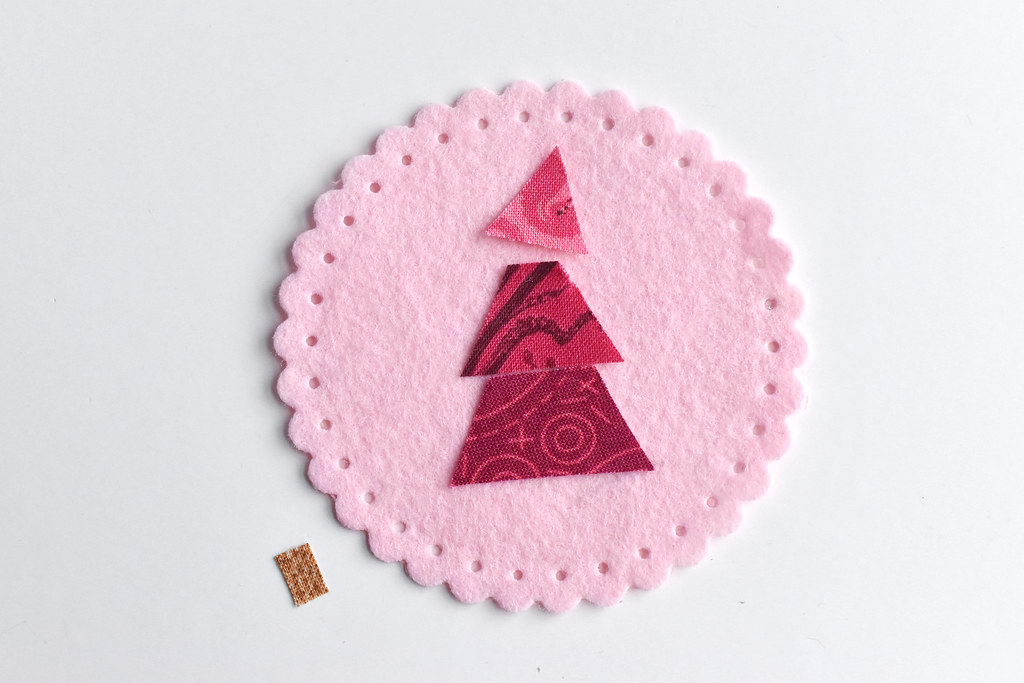
Cut out the pieces and peel off the paper backing. Arrange them on the front felt circle.

Iron the pieces in place.
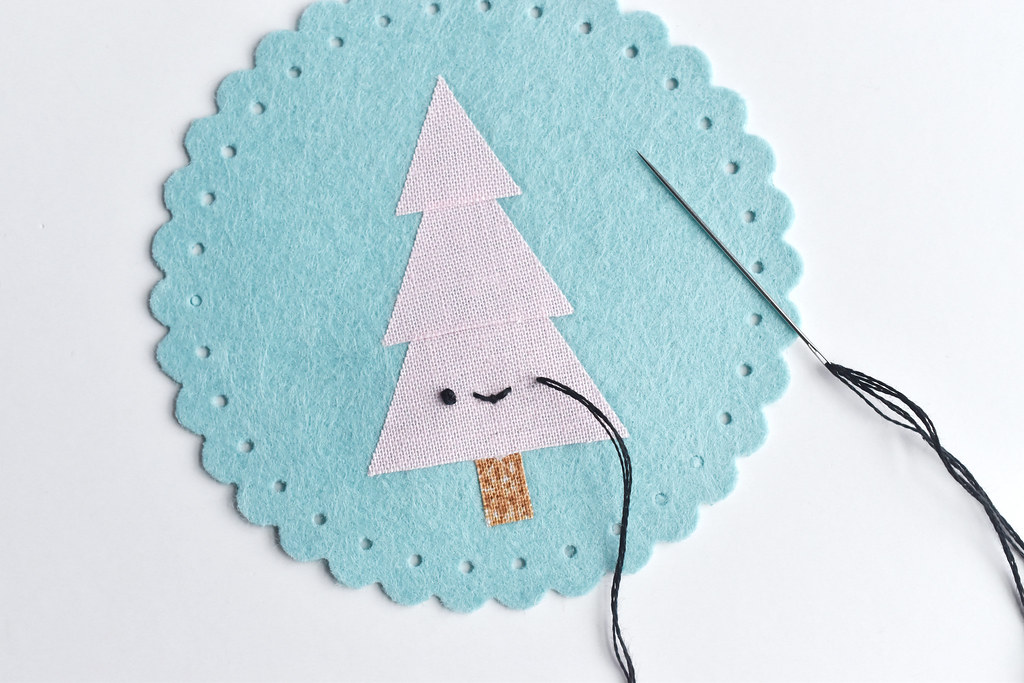
If you want to embroider a face on your ornament, now's the time to do that. If you embroider before you iron the pieces down, the fabric will be lumpy.
Also, if you want to add the wonky stars embroidery, you can do that at this step. Then finish the ornaments just like the all felt version. I left the stuffing out of these for a different look and I still love it!
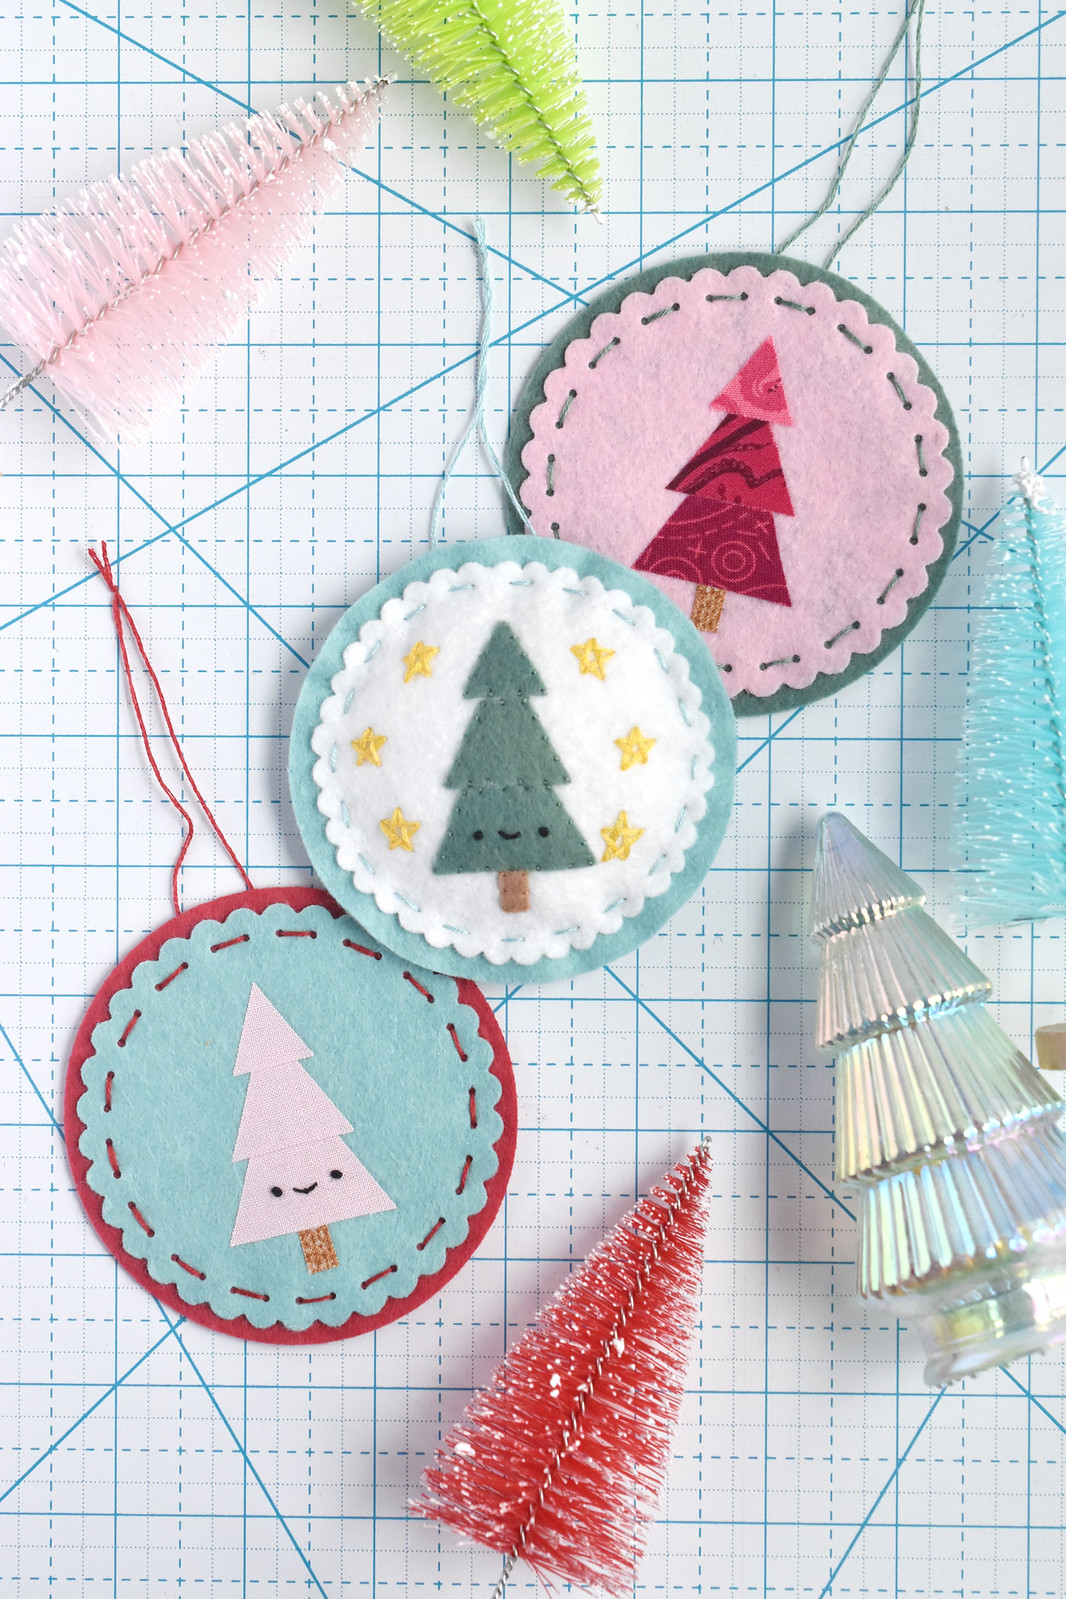
I have already made even more of these little ornaments to give to folks and I see myself making more still. Using special fabrics for the trees feels like a great way to preserve memories or celebrate favorite fabrics.

Whether you are making one little felt ornament or dozens, I hope you find this tutorial helpful! And if you want to make a bunch of quilt block ornaments, be sure to check out the Cozy Quilt Blocks pattern set!
0 comments:
Post a Comment
I often reply to comments in the comments...check back if you have a question!