


I love using English paper piecing to make large panels of piecing, but also for smaller designs that can be appliquéd. Last year I made some fruity placemats using this technique, and now I've got a little cactus design for you!
This happy little gal (yes, I've decided that she's a she) is made up primarily from hexagons, and goes together pretty quickly. You can stitch the finished cactus onto a placemat like the fruit, add it to a tote bag, or even make a mini quilt. Mine is becoming a mini table runner.
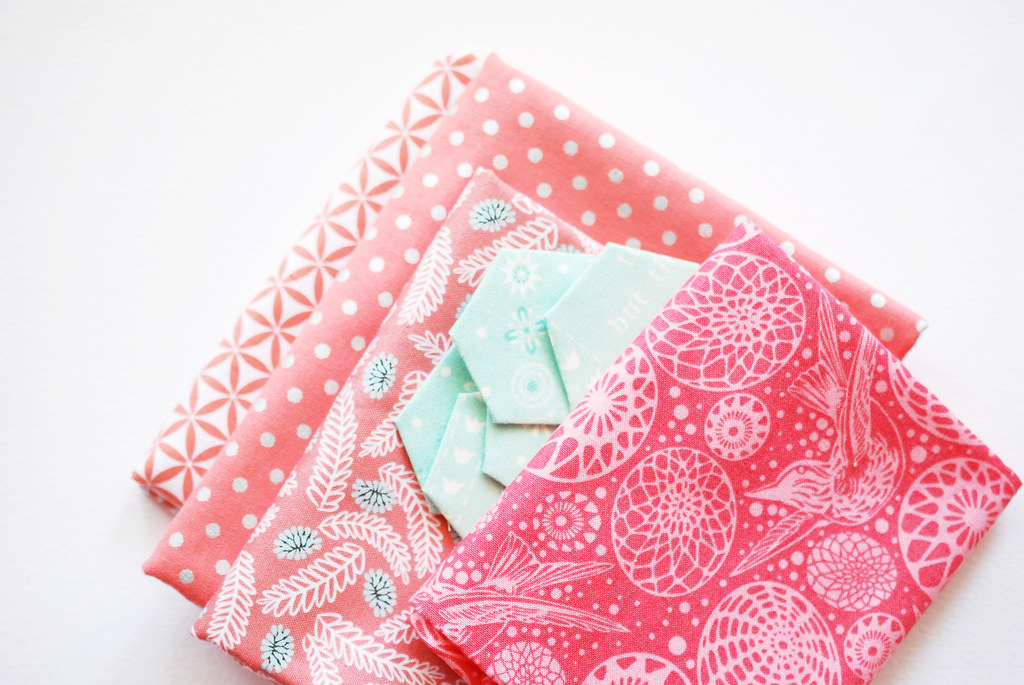
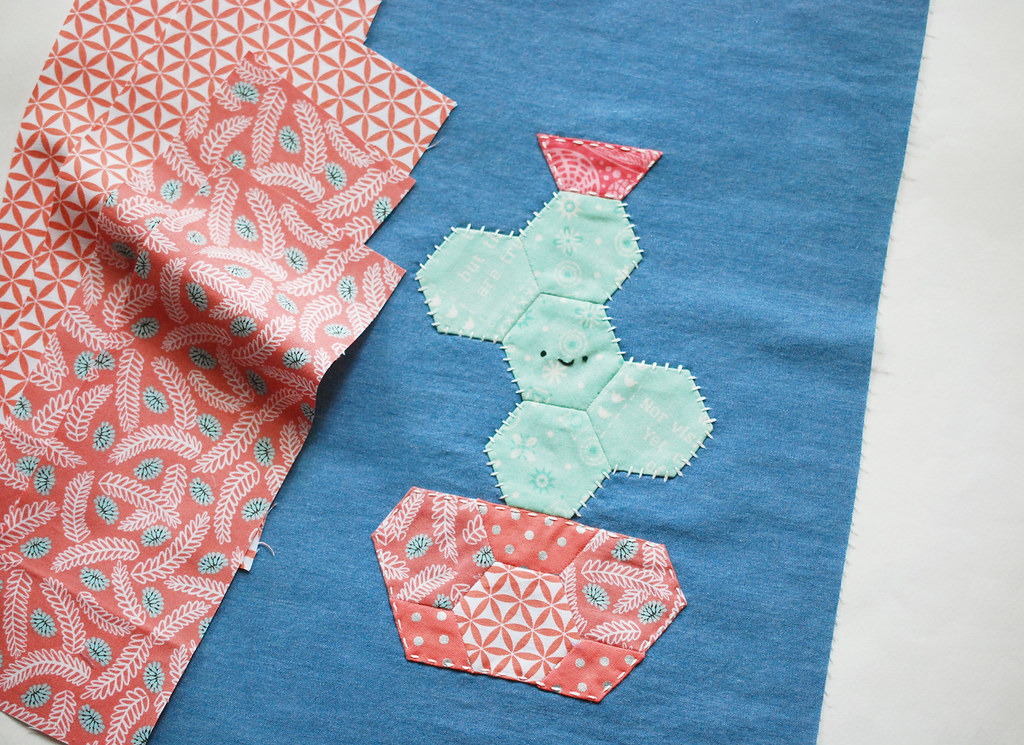
My cactus is a sort of minty green color, with terra cotta for it's pot base, and a pink for the flower. I can imagine this looking great in all sorts of colors. Grab a mix that you like, and mix up the sections as much or as little as you like.
Download the Happy Cactus PDF
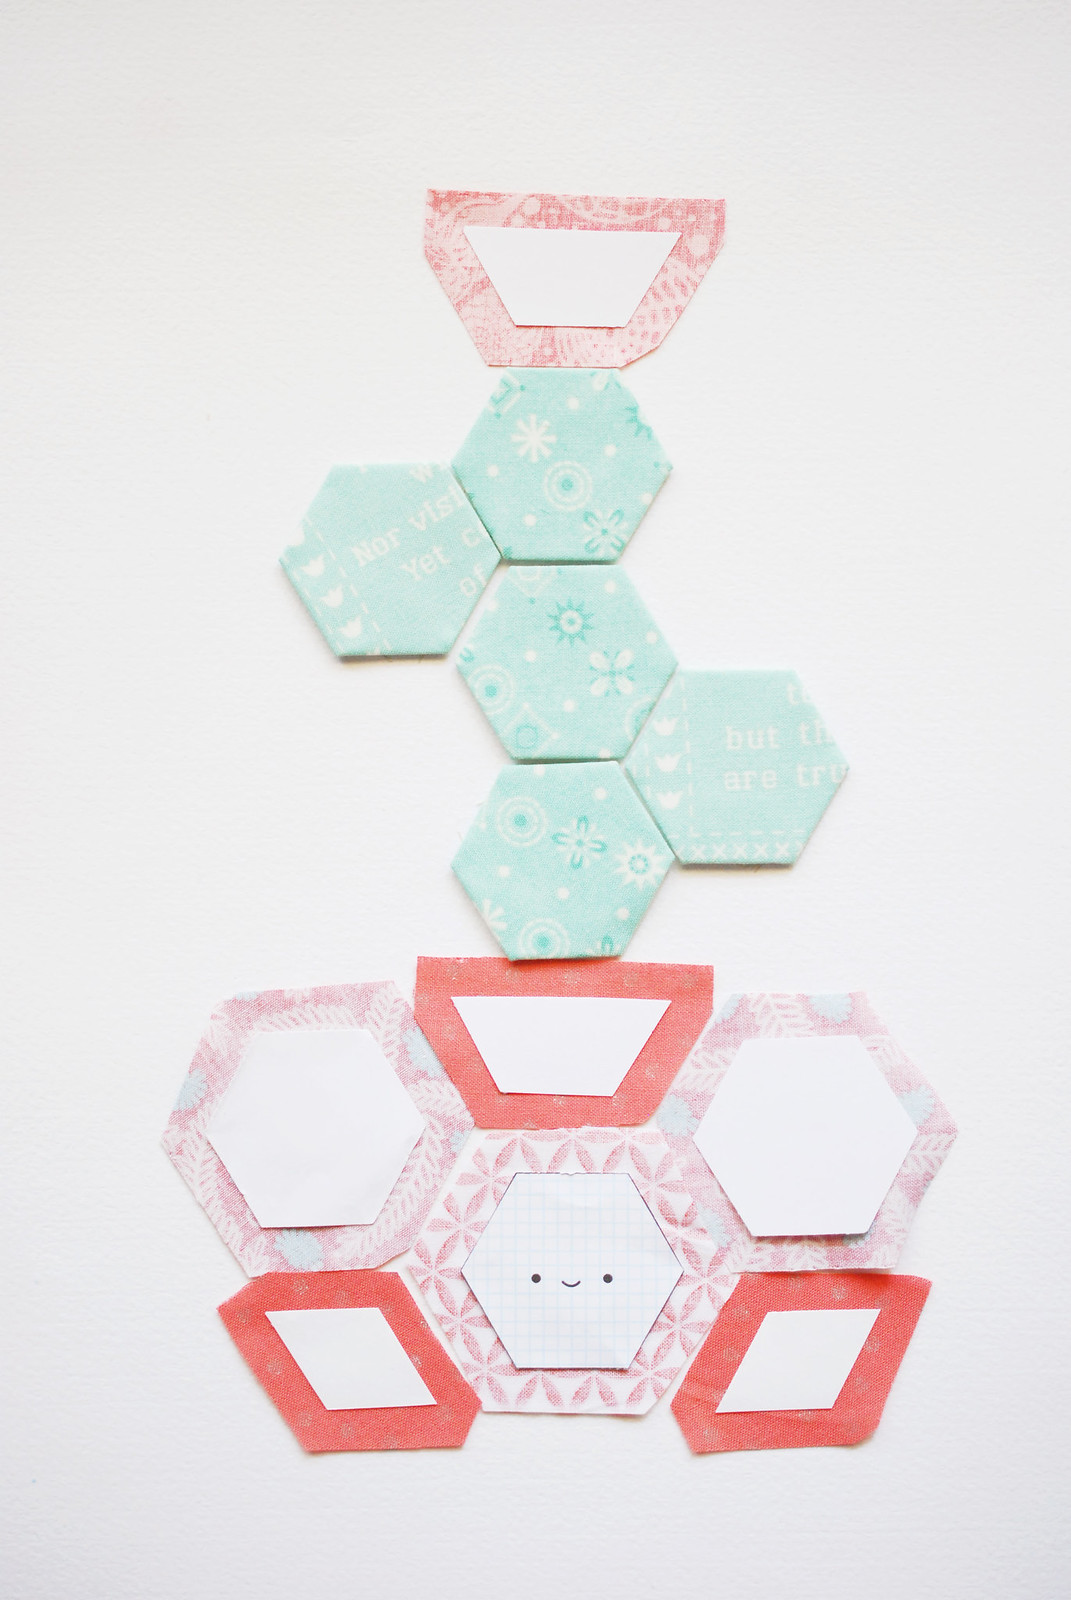
Print the template on card stock and cut the pieces apart. Attach the templates to your fabric, then trim and baste the pieces using your favorite method.
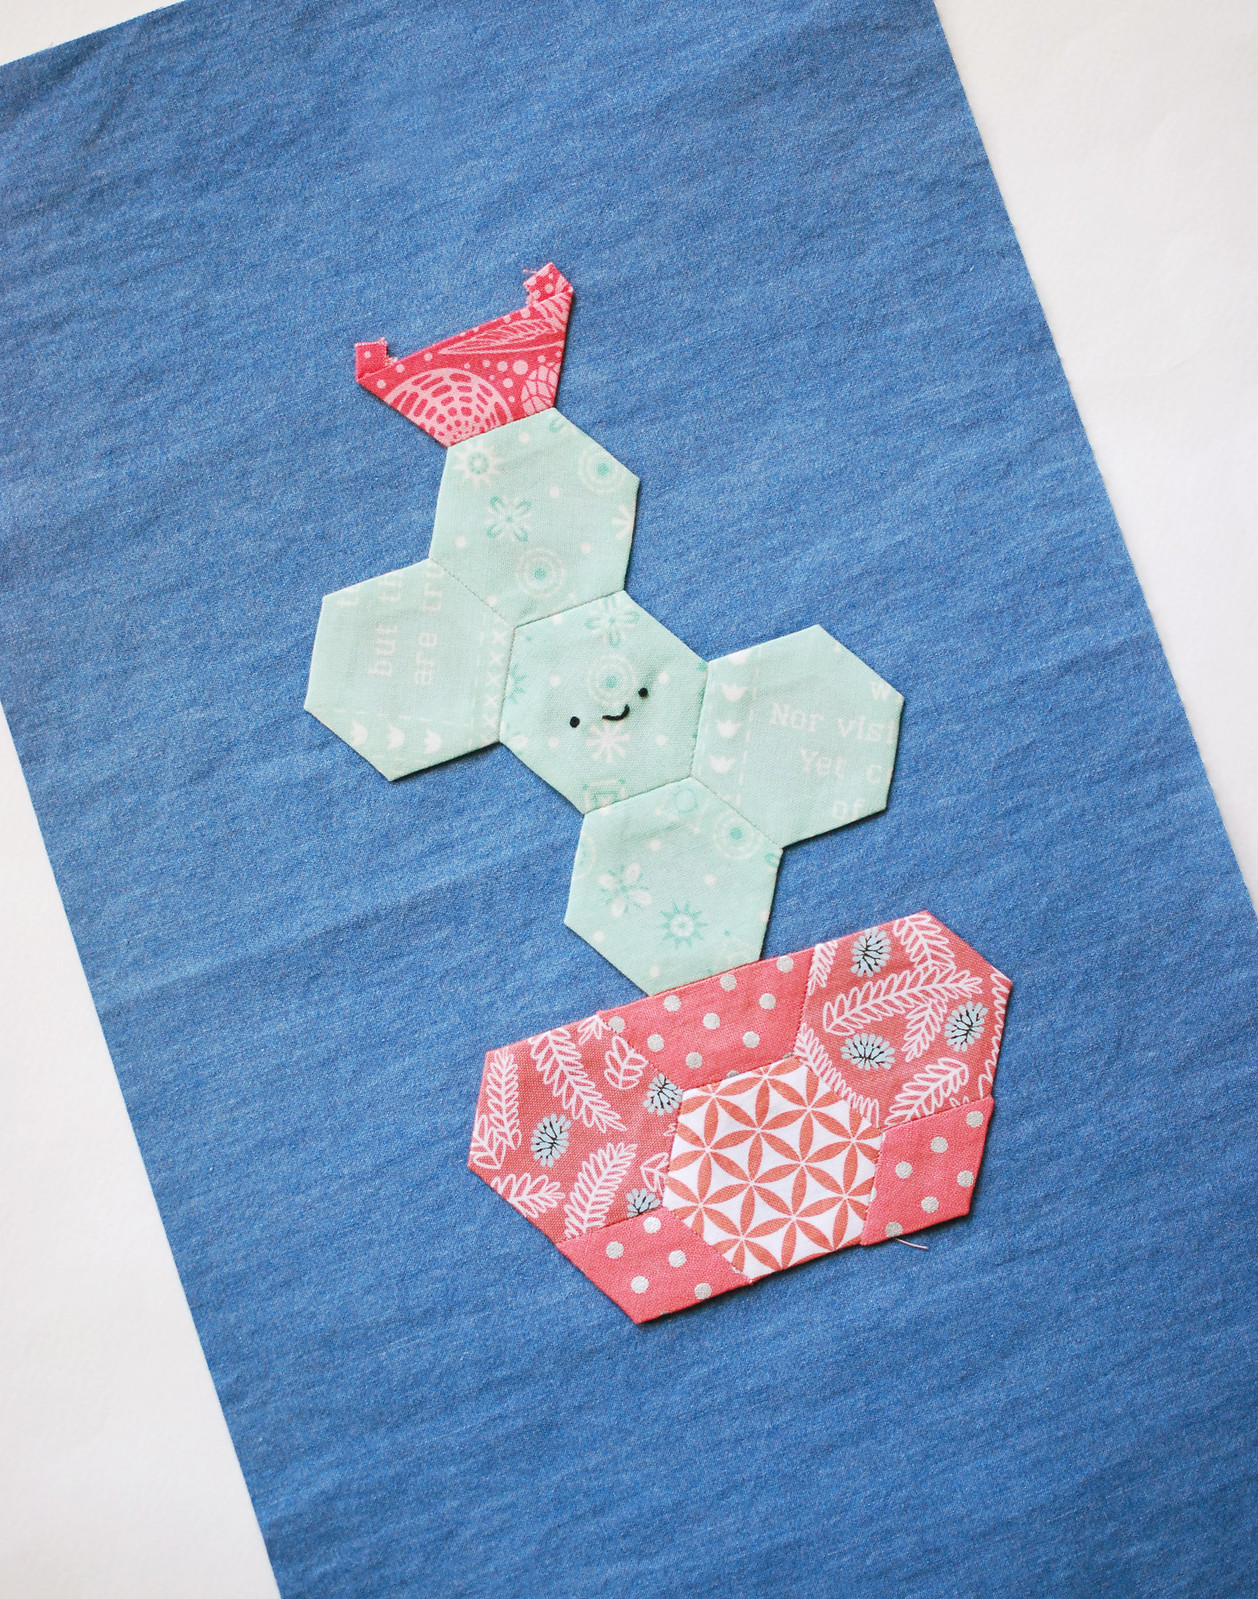
Join the cactus in two sections, following the layout shown here, which is also in the PDF.
The diamonds and half-hexagons will have little flags that poke out. You can see them showing at the top of the flower. You can tack them down at the back as you stitch.
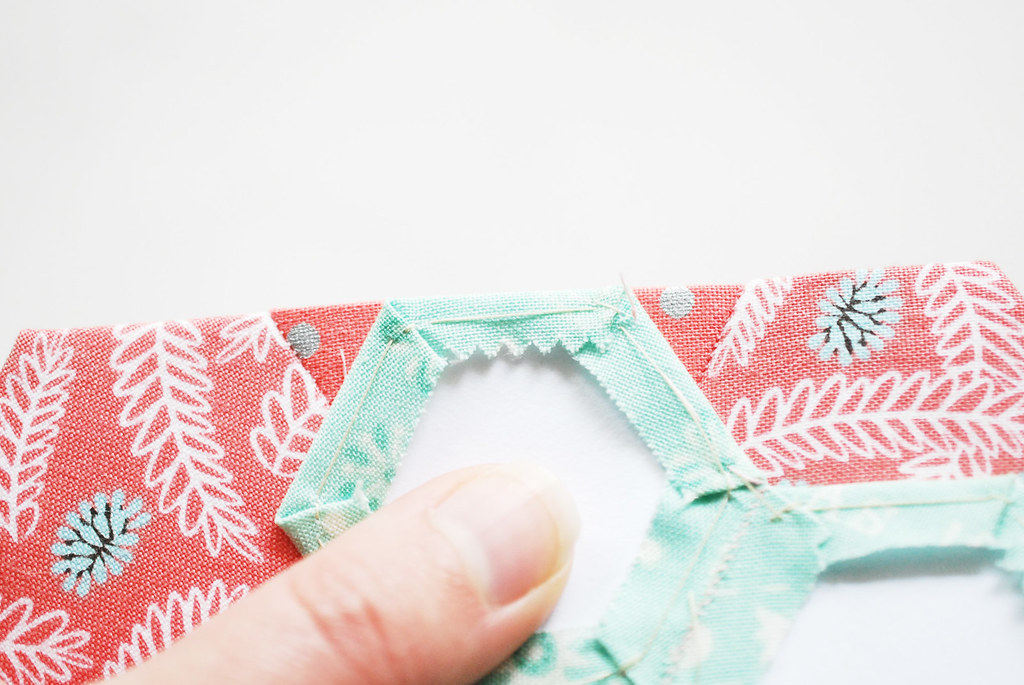
If you want a face on your cactus (why wouldn't you?), remove the paper hexagon and embroider the face with two knot stitches (french or colonial) and a scallop stitch.
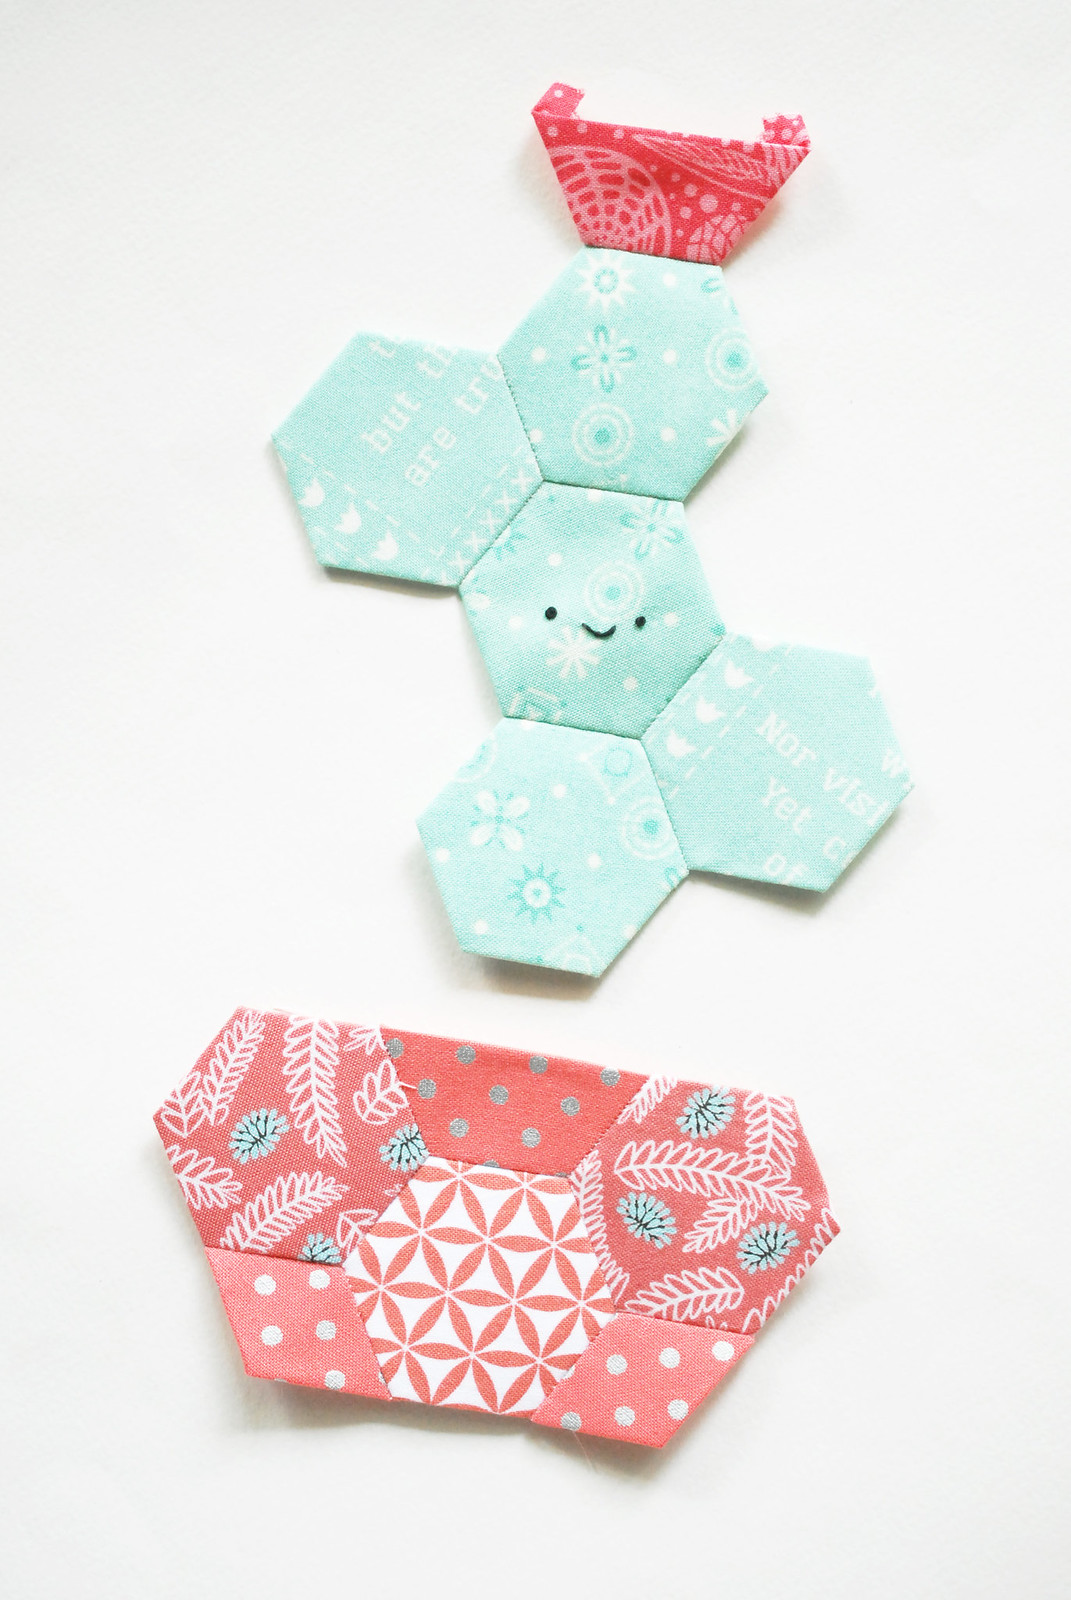
Center the bottom of the cactus on the top of the pot with right sides together. The edges and seams won't line up; the cactus will just be in the middle of the wide part of the half-hexagon. Join these two sections together.
Give the cactus a pressing with your iron, then remove the paper templates. Now you can appliqué.
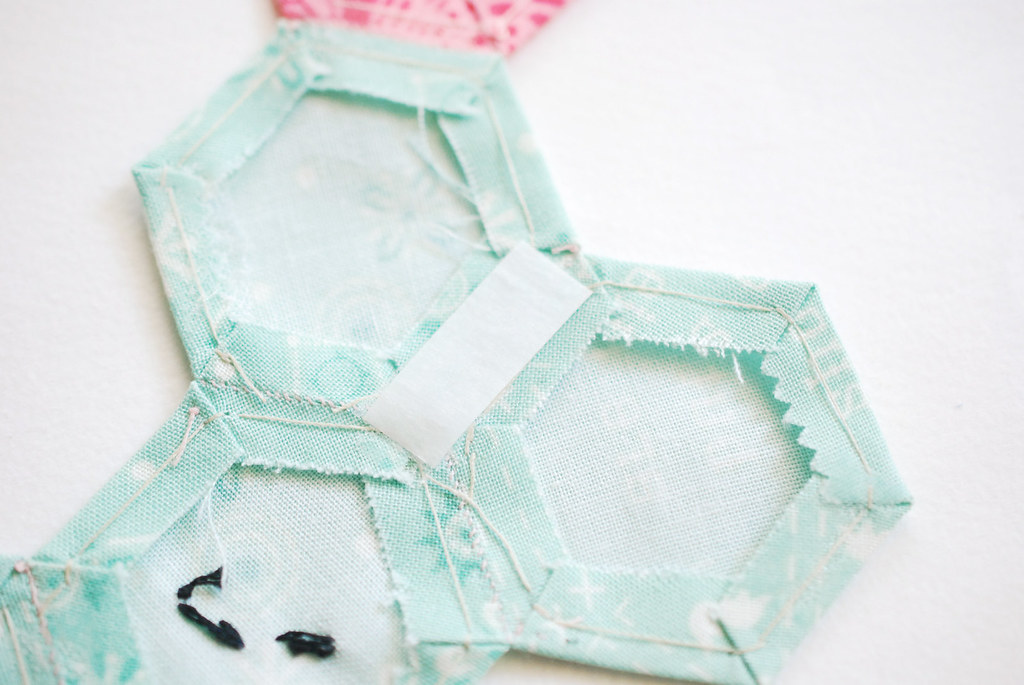
To help hold the cactus as you stitch it down...and to hold it some after, cut some strips of paper-backed fusible interfacing. Iron them along the seam allowance on the back of the cactus.
Peel off the paper on the interfacing, then iron the cactus to your backing fabric.
I still hadn't tacked down those flower flaps yet, so I took care of that in the next step: stitching around the appliqué.

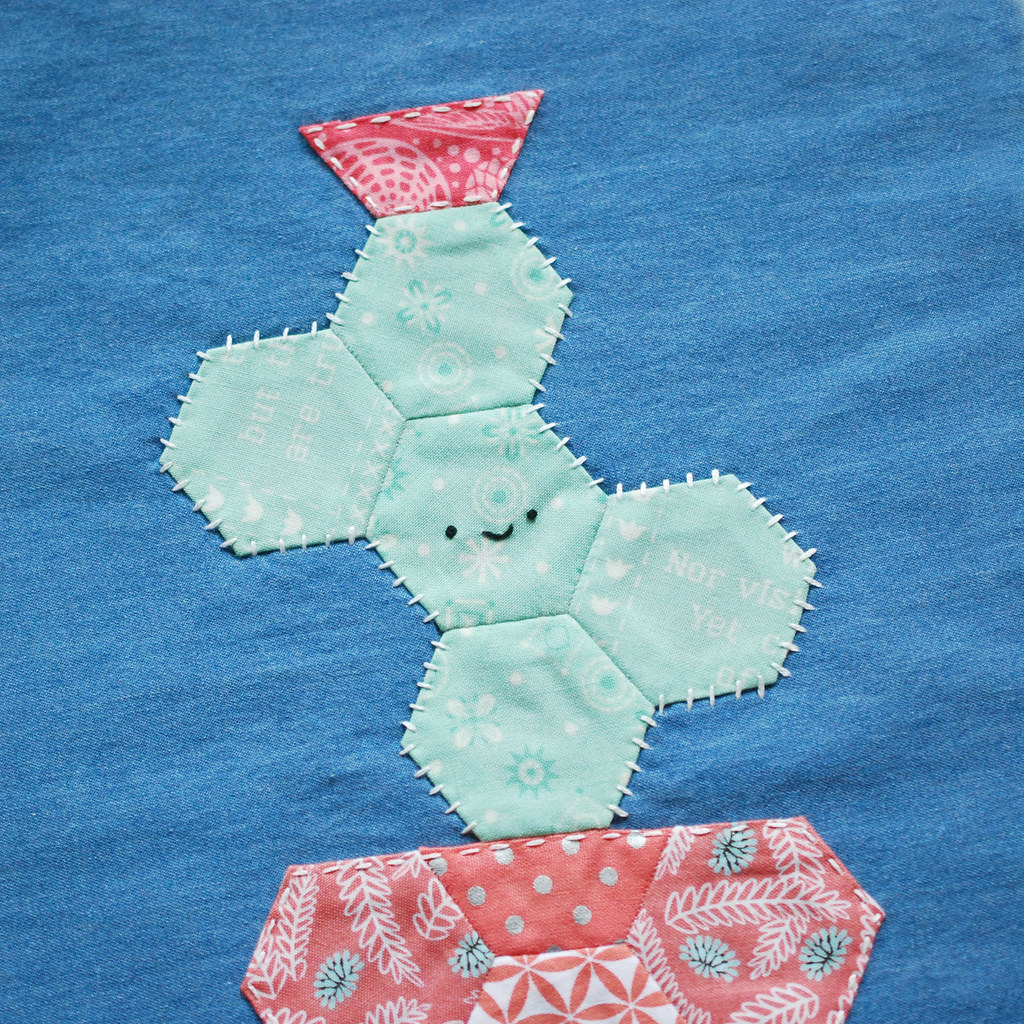
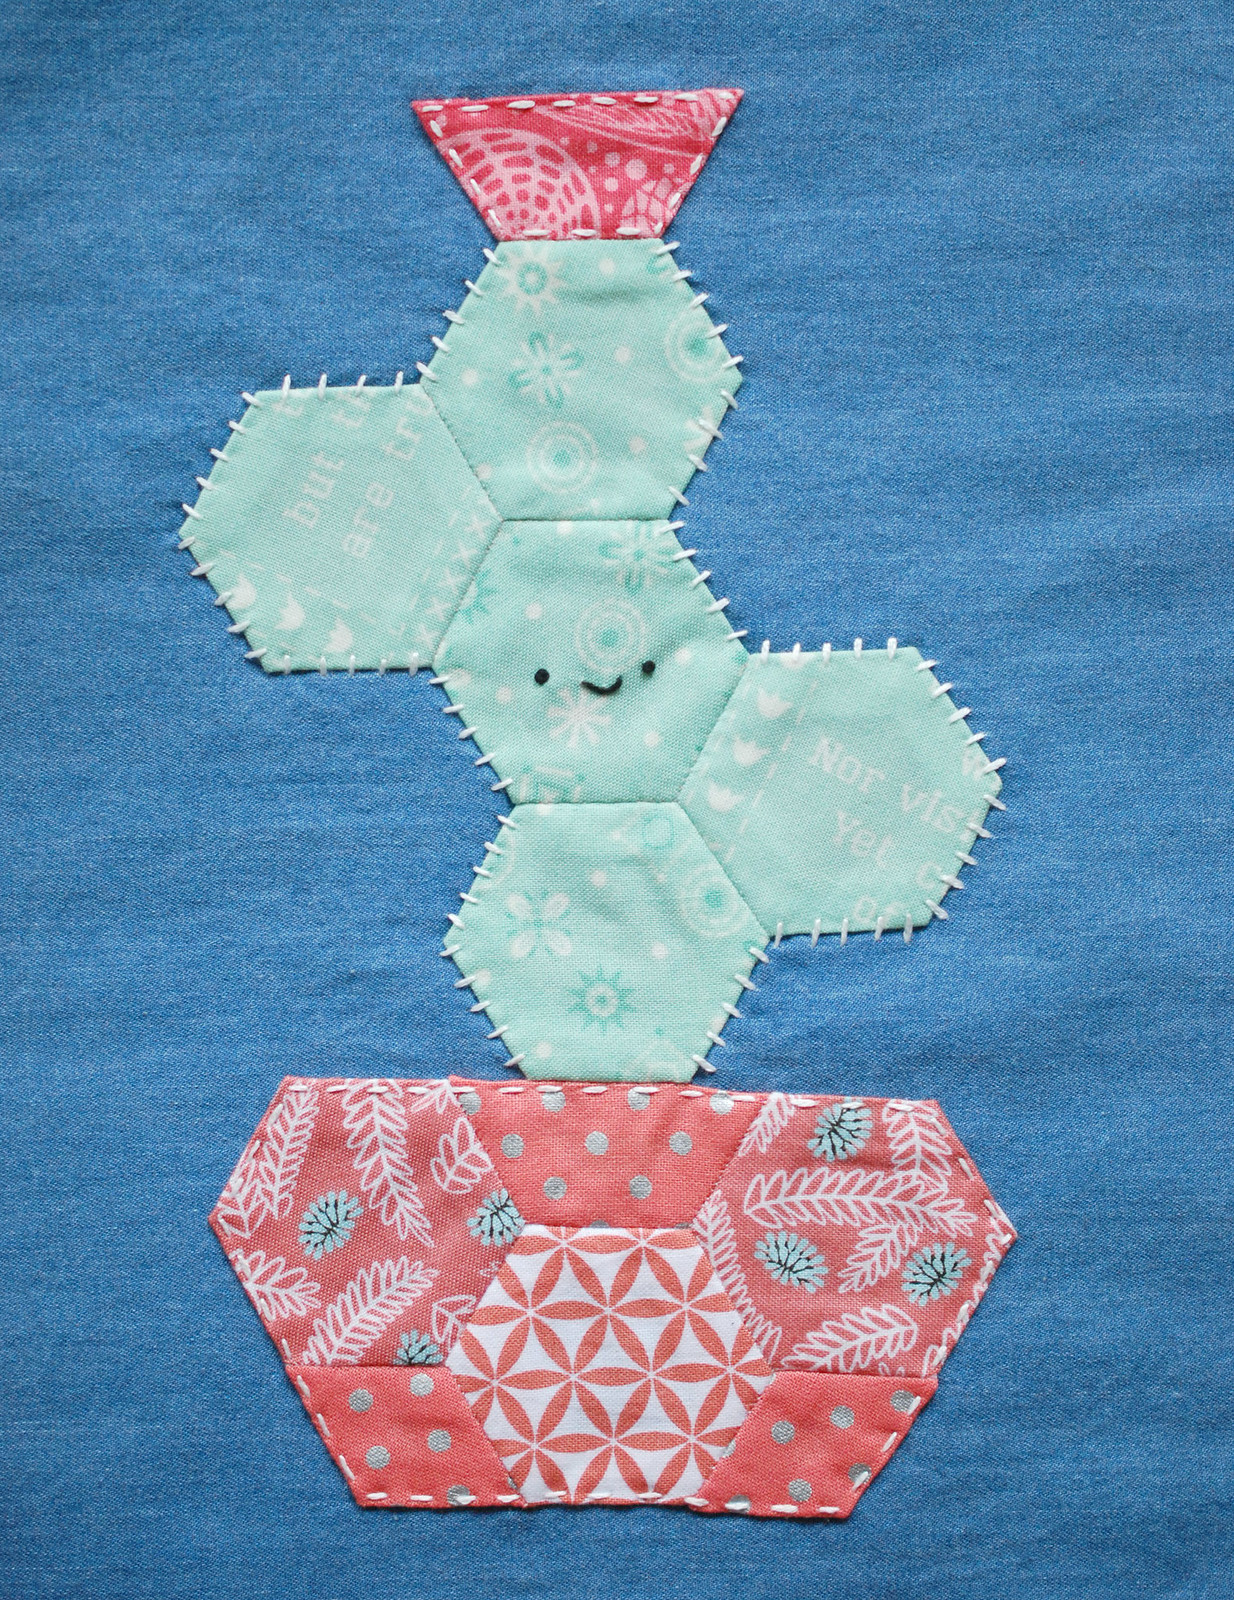
Stitch around the flower and the pot with running stitch (or use a blind appliqué or machine stitch). Any bits of fabric or threads that are sticking out should be tucked under as you stitch.
To give the cactus a bit of spikiness, use straight stitches running perpendicular to the edges of the green cactus. You could also use blanket stitch!
Now your cactus is ready for whatever else you might want to make it into!
I'm adding some strips to the ends of this lightweight denim to make a mini table runner. I've been sharing my progress on Instagram (come follow me!), and tagging my pics #CactusEPP
If you make one, I hope you share your work!

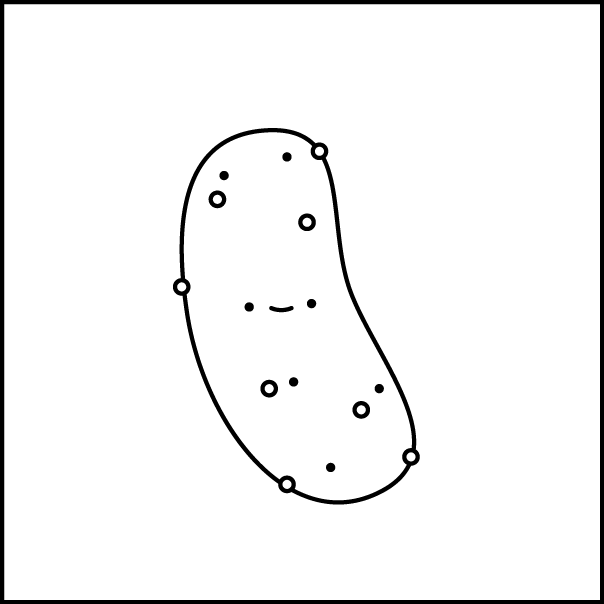
And let's not forget today's free Hexagon Tinies pattern! Why a pickle, you ask? Well, I already shared a cactus, and without the needles stitched on today's project...I fear it might look like a mutant pickle!
Super cute!! I also love your placemats! I need to get busy!
ReplyDeleteAdorable! Now there's a cactus I can't kill! And it would smile back at me every time I glanced at it!
ReplyDeleteAdorable!
~Kelley
I suddenly remembered that I hadn't seen this finished yet and raced over here. OMG, so adorable. Agreed, she's a she. :-) The little embroidered spines are so perfect!
ReplyDelete