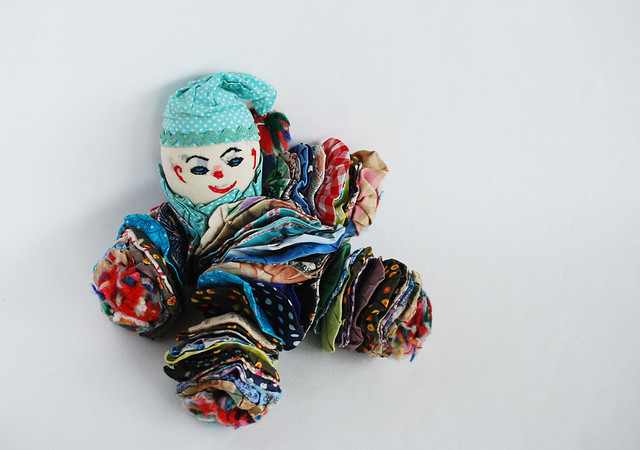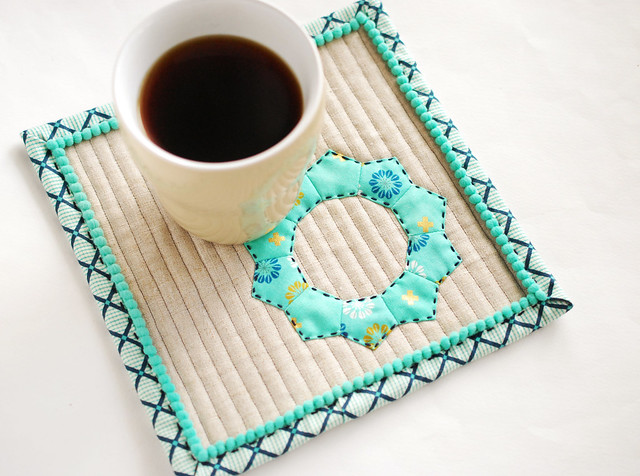

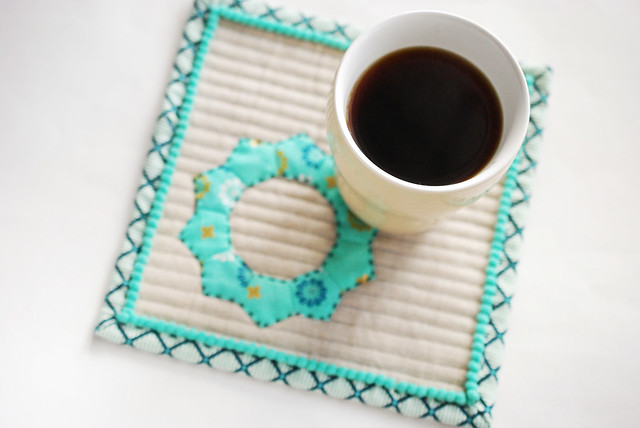
Back in December I decided that I needed to make another mug rug for myself, so I started. It took me a little longer than I had planned to finish, but that happens, doesn't it? I still managed to get it done in less than a month, which isn't too bad. And since it has a circular quality to it, and this January I'm working on circle sorts of things, I thought it worked out well.
I'm calling it a Winter Wreath Mug Rug. The shape that I used for the EPP portion is a pentagon, but what's great about it is that it leaves a circle-ish shape in the center. I plan on playing with pentagons more later in the year, but I like how one shape leads to another.
Also in the circular category, we have pompoms. And these tiny little guys are making me extremely happy. Just sayin'. I found these on Etsy, and if you search for tiny pompoms, you'll find plenty of options.
The overall construction of this is similar to the pot holders I shared in the summer, so for more detailed quilting and binding instructions,
check out that post.
Let's get started!
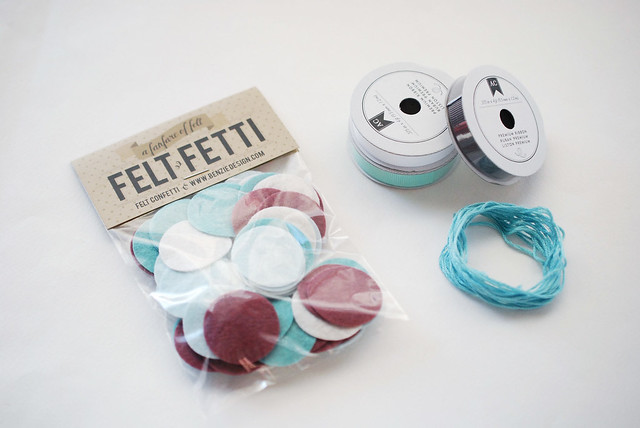
You will need:
9-inch squares of the front and back fabric
2 9-inch squares of cotton batting
40 inches of binding
fabric scraps for the wreath
perle cotton
1 yard of tiny pompom trim
Tools:
sewing machine (a walking foot is helpful!)
rotary cutter, ruler, cutting mat
scissors
needle and thread
iron
fabric glue
Pentagon Templates PDF
First, make a mini quilt sandwich. Layer the front and back fabrics with the two layers of batting in the middle. Pin or spray baste, then quilt the layers. You could do this by hand (I adore hand quilting!), or by machine (I wanted to actually finish this). Space the lines of quilting as close or as far as you'd like. I used my sewing machine foot as my guide.
Even with spray basting, the linen wanted to shift a little, so the lines of quilting aren't perfect. But it's not incredibly noticeable, so don't worry too much. However, with quilting like this, when you go to put the binding on, you will notice if the lines are off by a lot. Go for as straight as possible, or wobbly on purpose.
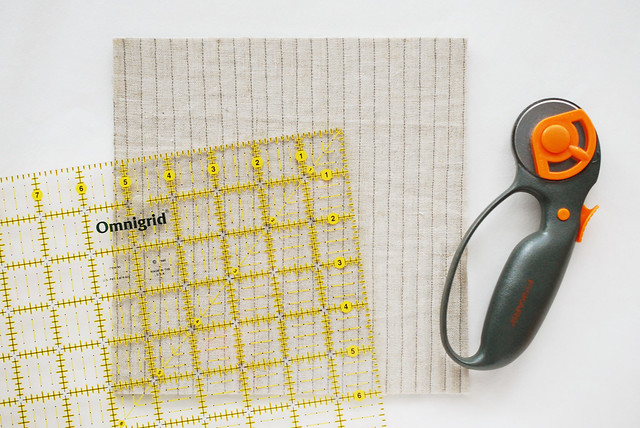
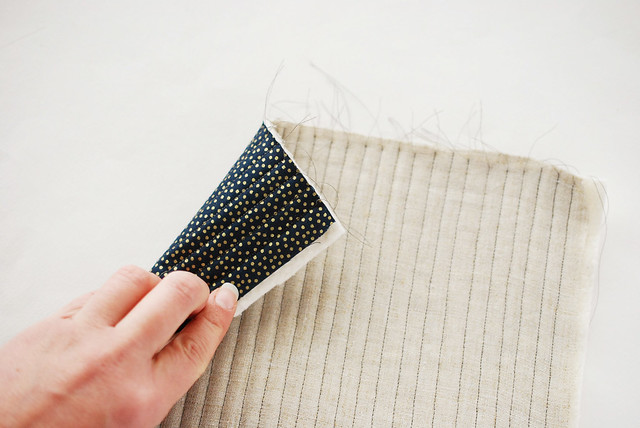
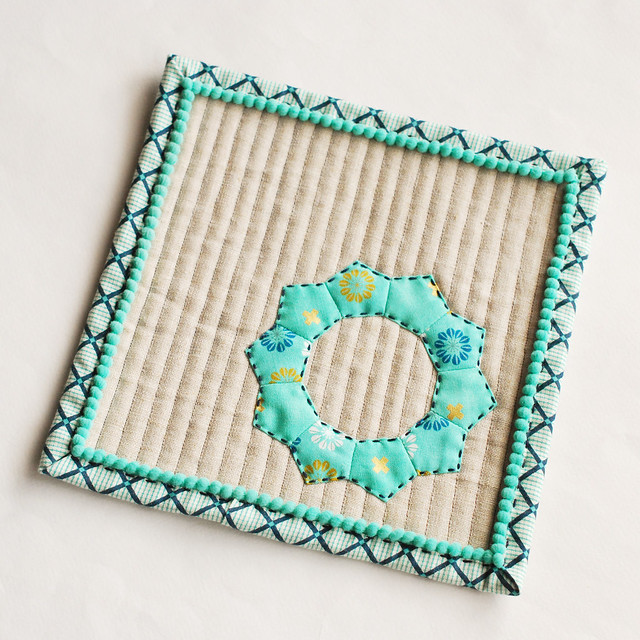
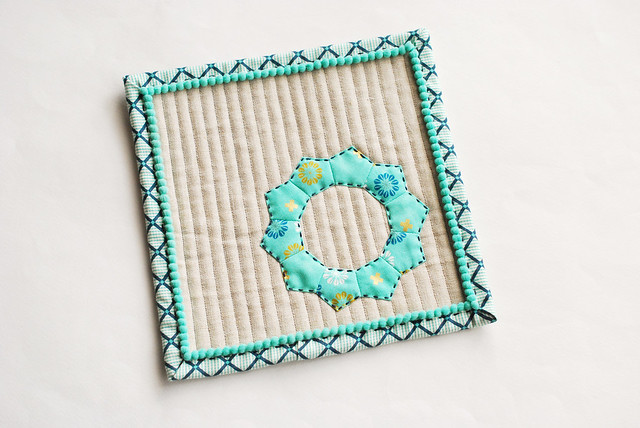
Square up the quilted mat. My finished mat is eight inches square, which is a nice size. Starting larger and trimming it down gives you some room for adjustment in trimming.
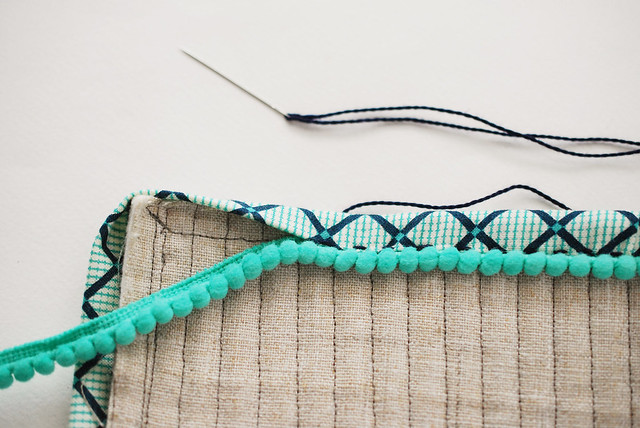
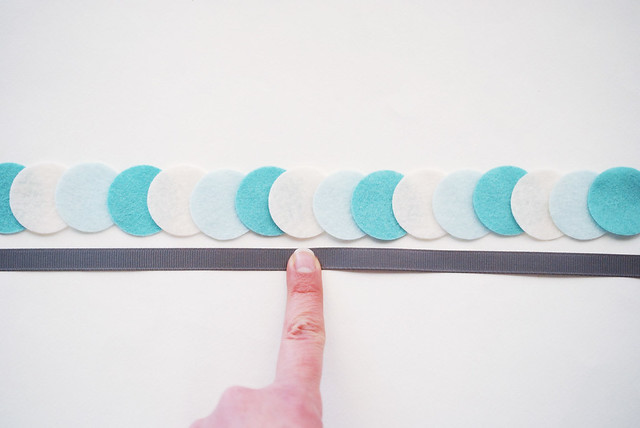
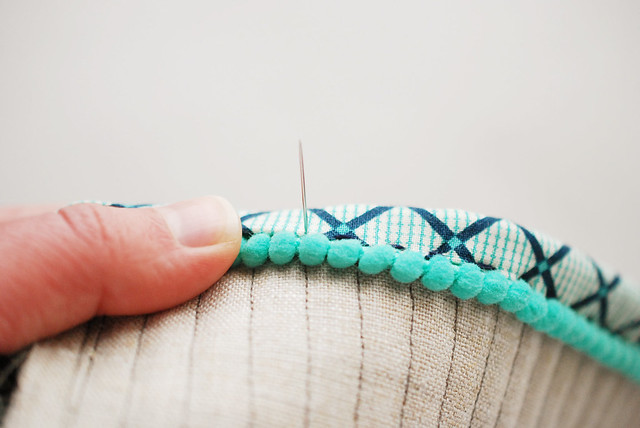
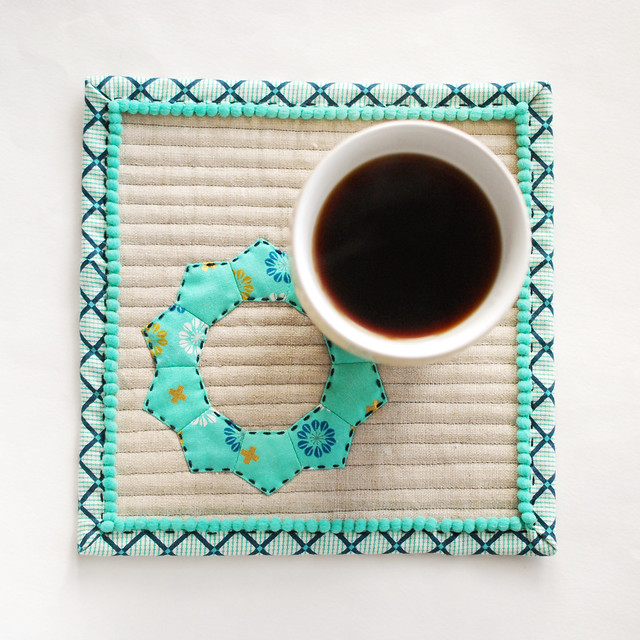
Cut and press your binding fabric, then sew it onto the back of the mug rug with the sewing machine. Wrap the folded edge to the front to hand stitch it in place with the tiny pompoms underneath.

Use perle cotton for the stitching, because it's cute that way. And here are the two really important things:
1) On the front the stitches should be right at the edge of the binding, while on the back they are on the quilted area very close to the binding.
2) MAKE SURE that you are stitching through the pompom trim with every stitch. This means keeping it nice and snug along the binding.
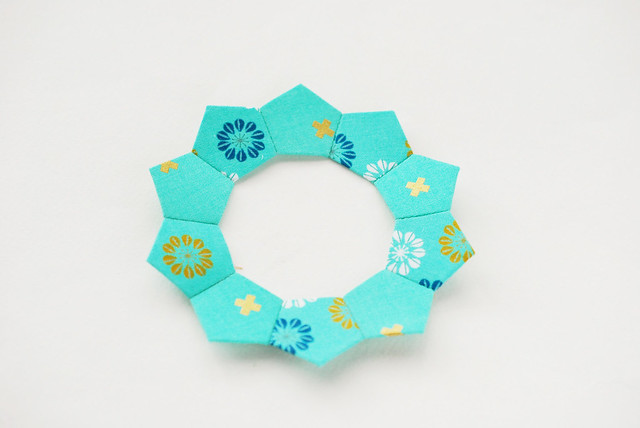
Baste 10 pentagons, then stitch them together using basic English paper piecing. (
CraftyPod has some great video tutorials)
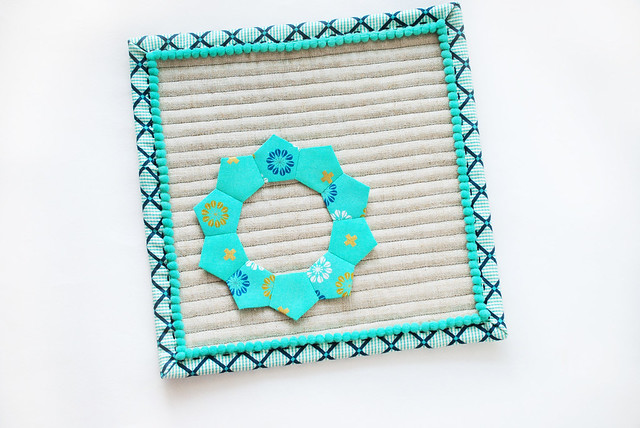

Iron the wreath, remove the papers, then place it on your mug rug to see where you want it. I went with the corner, but the center would look great too!
Use fabric glue to hold the wreath in place. You don't need much, as this is part basting and part extra security. I put a little line on each seam of the wreath. Stick it down on the mat and let it dry.
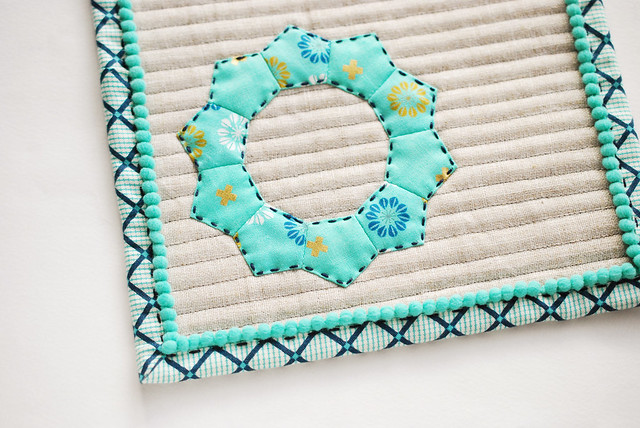
Stitch the wreath down with perle cotton and running stitch. The navy I used matches the backing fabric, so you hardly see these stitches on the back, but they have a nice contrast on the front.
You can add more stitching or other embellishment if you want, but this was just right for me. Only one thing was missing...
Aaahhhh....much better!
Even though I've titled this my Winter Wreath Mug Rug, it's so happy and bright that I might just use it all year round. Or at least until I get the urge to make another!

And can we all agree that tiny pompoms are just a delight? I'm trying my best to resist buying them in a dozen colors. I've had this particular trim for years and never used it. But now I know that I was saving it for this very good reason. They're my favorite part of about this project!
Because they're so happy, I highly encourage you to make your own mug rug. Or at least to get some pompoms in your life.
Want to make something with a Valentine flair?
Check out my EPP Heart Mat!