about shop patterns projects printables extras sponsorship wild olive twitter flickr pinterest subscribe
Showing posts with label quilting. Show all posts

project // wood and felt quilt block stand up

Wood and Felt Quilt Blocks
NOTE: This post contains affiliate links.

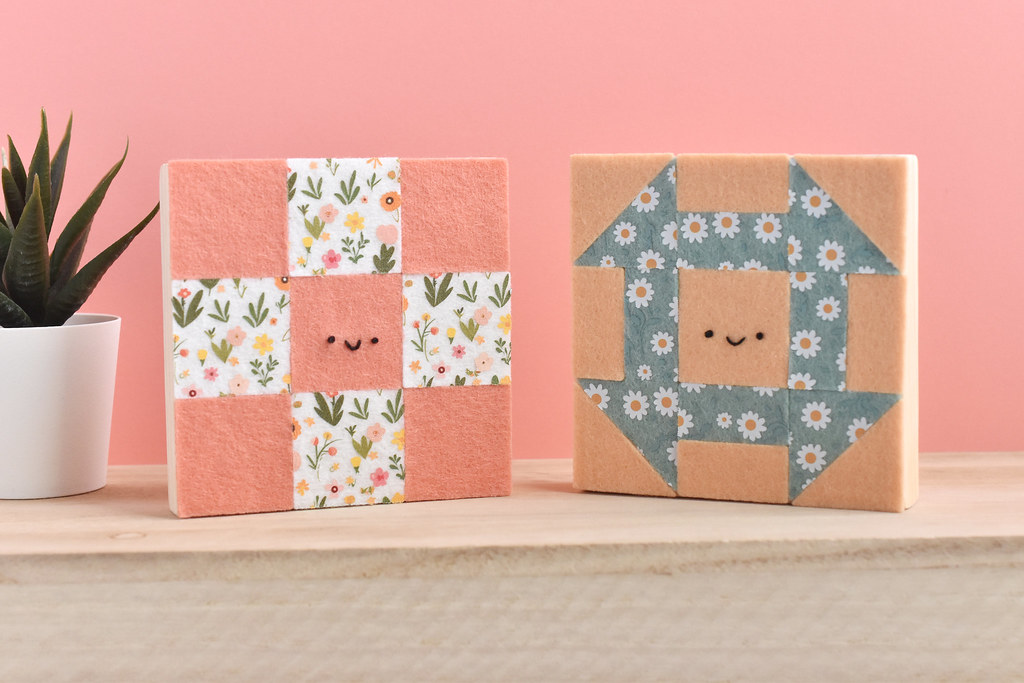
Whether you love making quilts or just enjoy being surrounded by them, this felt quilt block is a fun way to decorate your craft space. And it's super easy to make!

Unlike traditional quiltmaking, this little piece doensn't require any sewing. The pieces are cut from wool felt (yes, that's printed wool felt!) and the cutting was done using deep-etch dies on a manual die cutter. The felt and the dies are from Benzie Design.

Wood and Felt Quilt Blocks

For mine, I used the Sylvia's Cozy Quilt Block die set I designed for Benzie, because it has a center square that I could use to add a cute little face. This is, of course, optional, but if you know me, you know I'll always add a face.

Using the dies is also optional, but it's so fast and easy. Plus the pieces will always be accuarate. That's especially helpful with things like this because all the pieces will fit together perfectly. You can watch a video I made showing how the die cutting works.
Wood and Felt Quilt Blocks

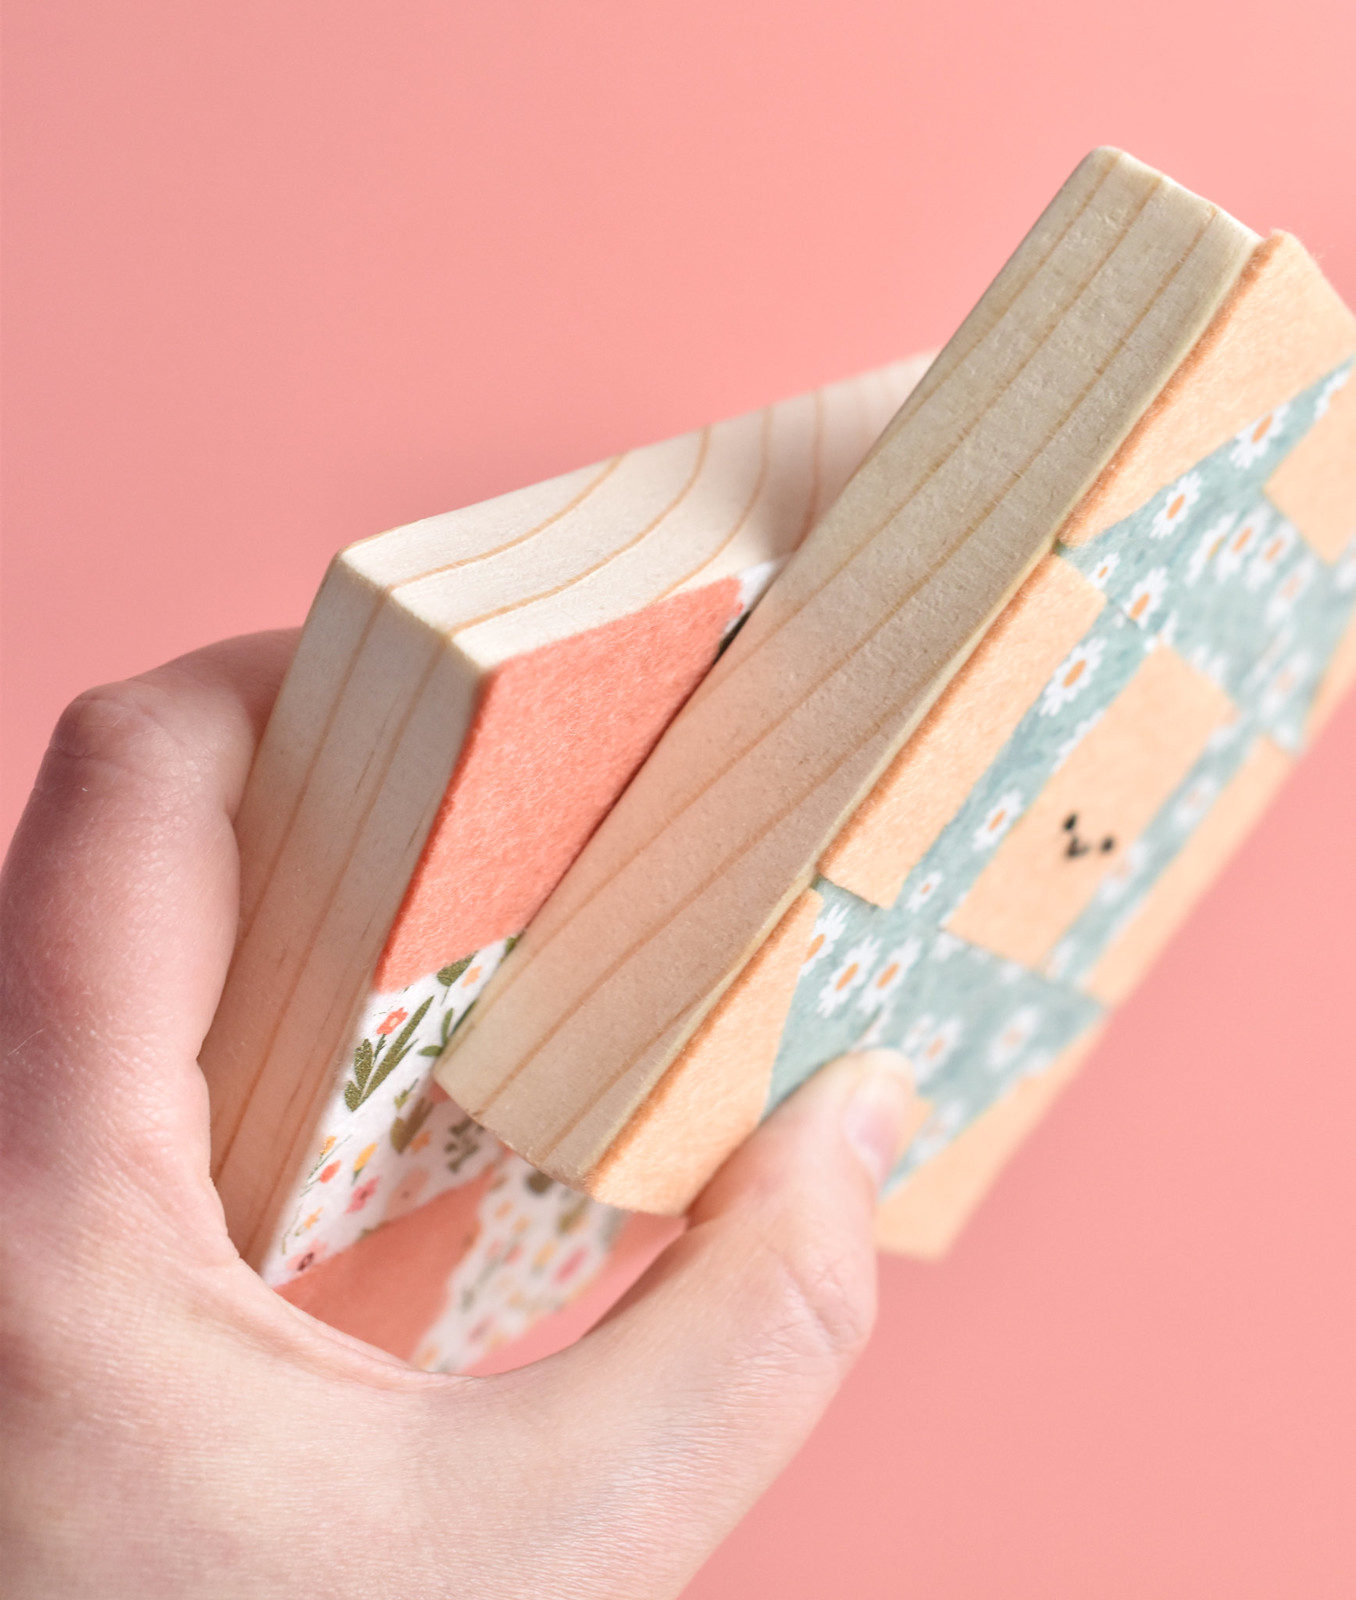
Because these quilt blocks are attached to, well, blocks, they are thick enough to stand on their own. I've made similar pieces to this before, painting on the wood or gluing embroidery to a wood block. These mini art pieces make me smile because you can place tham just about anywhere.

I'm lucky enough to have a dad who has extra boards around, so he cut these for me, and then sanded the corners. If you don't know someone who might be able to help you with this, check your local hardware/lumber store and see if they have any cut offs. They can usually cut them for you too, for a small fee.

Now, shall we make some felt quilt blocks?
Wood and Felt Quilt Blocks

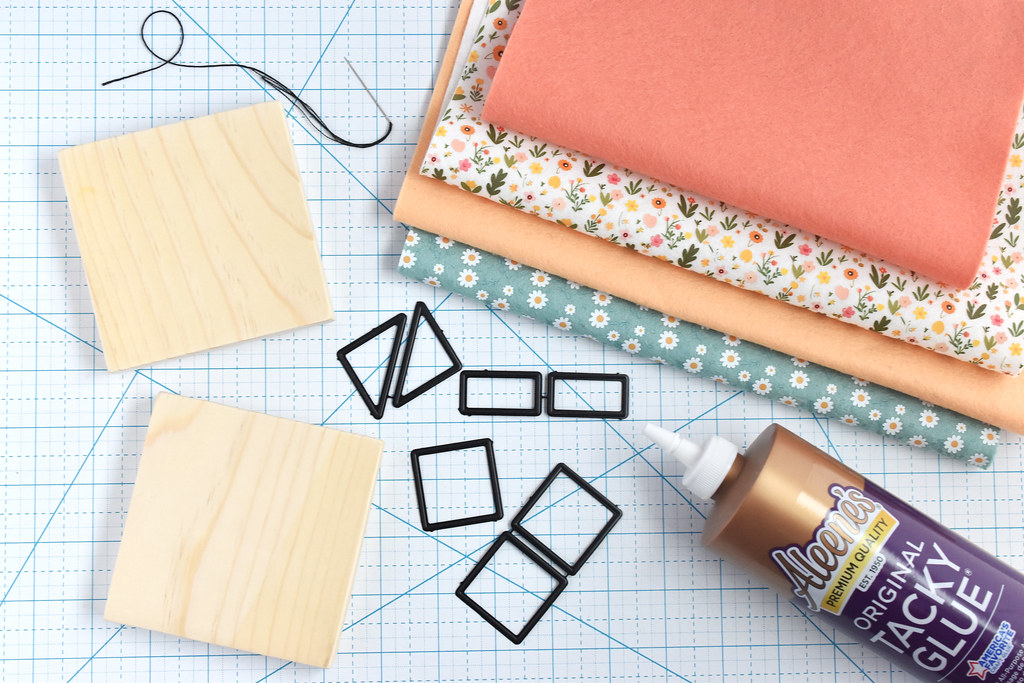
Here's what you need:

4x4-inch Wood Blocks/Slabs - mine were cut from a piece of 1x6 wood trim
Wool Felt (I used Bellwether and Printed Felt)
Sylvia's Cozy Quilt Block die set
Black Embroidery Floss and Needle
Craft Glue

Wood and Felt Quilt Blocks

Choose a quilt block design or two and cut out the pieces from your felt. You can create any quilt block you like!

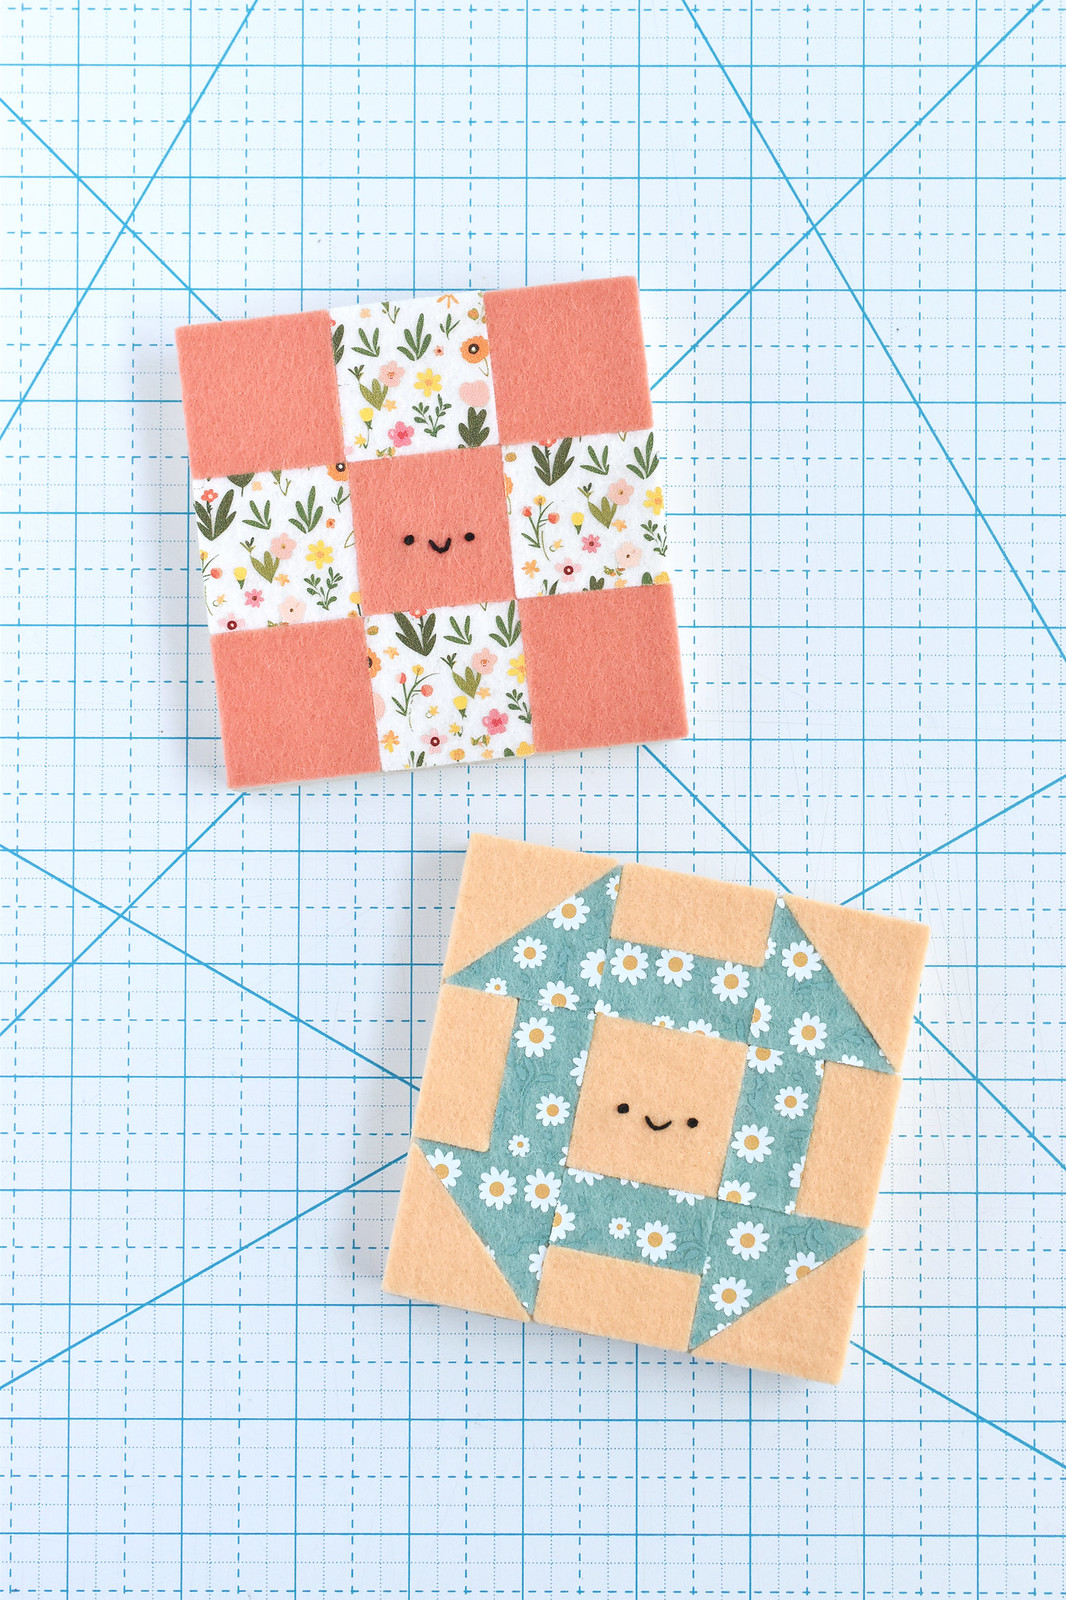
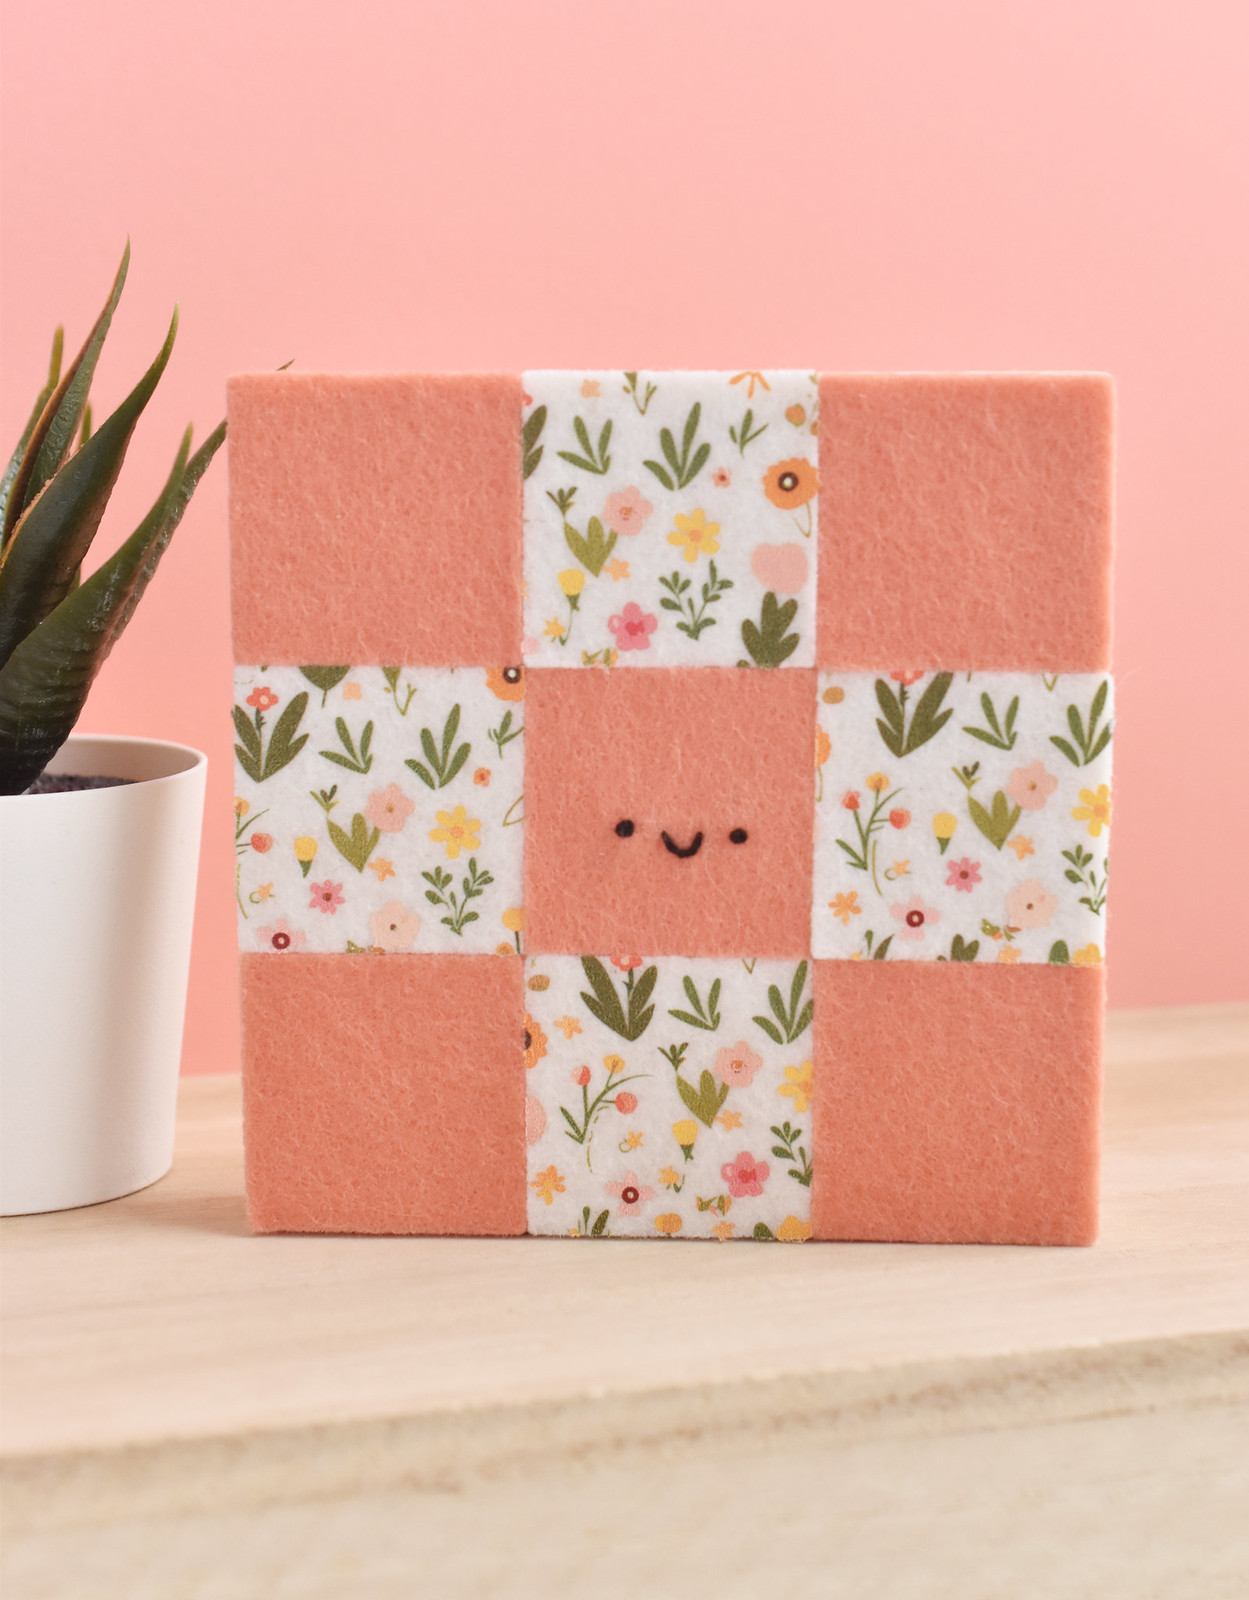
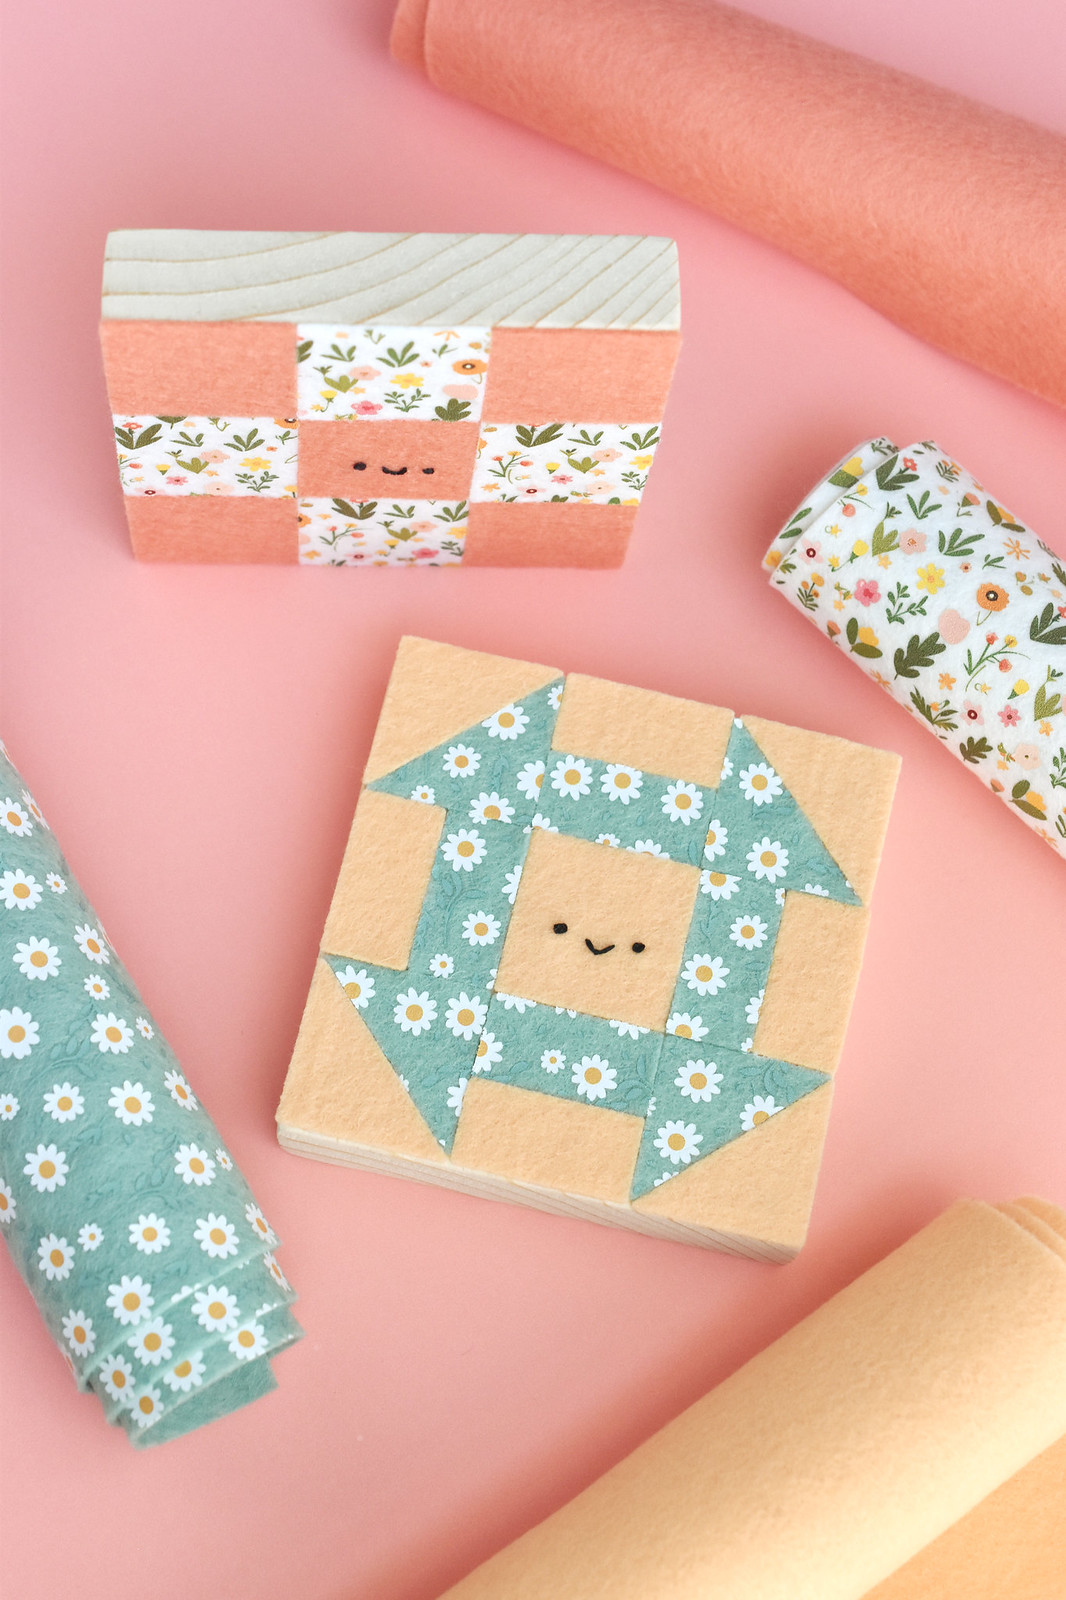
For both of mine, I used just two colors/patterns. For the 9-patch, I used salmon and floral finesse printed felt in white. For the churn dash, I used dreamsicle and and daisy field printed felt in swan.

Wood and Felt Quilt Blocks

To make your quilt block super cute, embroider a face on the center square. The face is just two french knots and a scallop stitch.
Wood and Felt Quilt Blocks

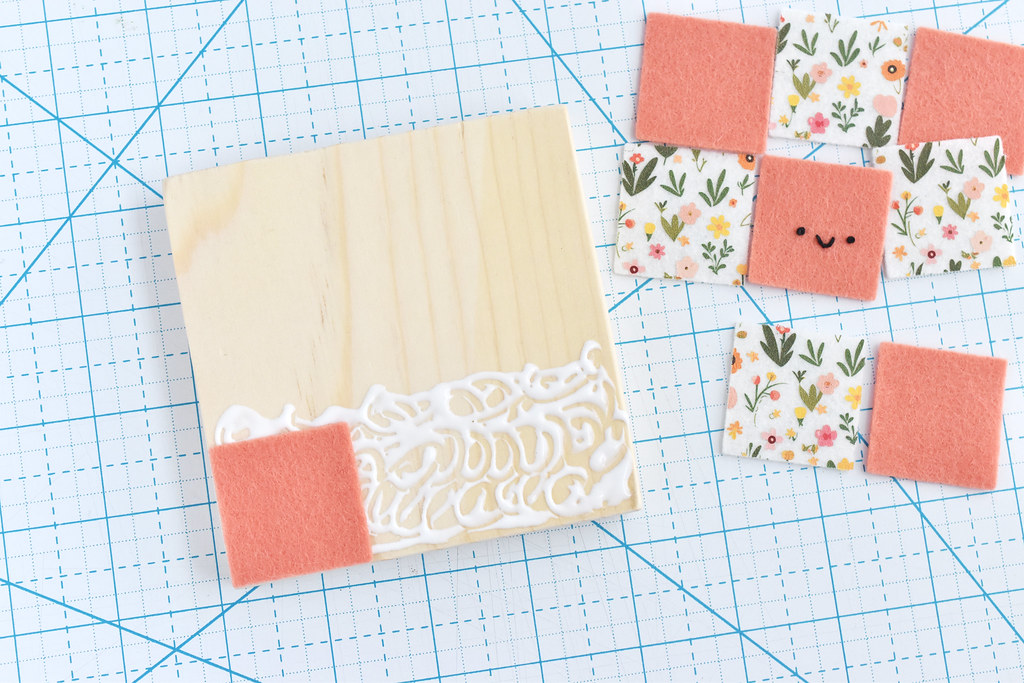
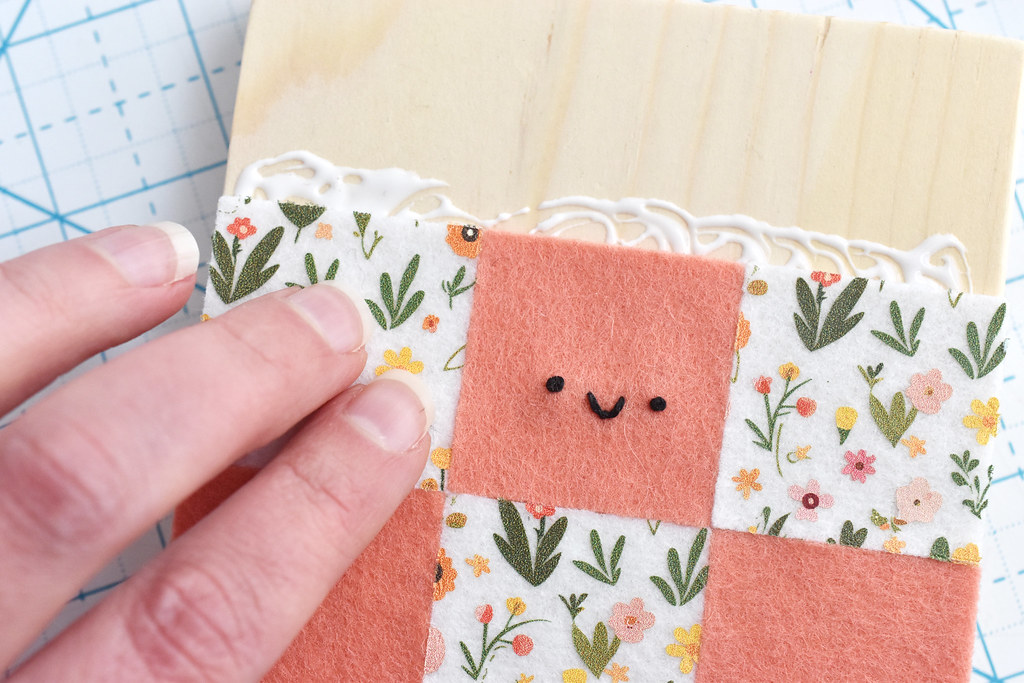
Starting on the lower third of the wood block, spread a thin layer of glue over the wood. Apply the first piece of the quilt block in the corner.

As you add the remaining pieces in the lower third, make sure they are centered horizontally, and ensure that the felt doesn't overlap the bottom edge of the block at all.
Wood and Felt Quilt Blocks

Add more glue and then place the second row of pieces. Repeat with the last row. As you work, you can adjust the placement of the felt pieces while the glue is still dry. You want everything to fit together nice and snug.
Wood and Felt Quilt Blocks

Give the glue time to dry, then enjoy your wood and felt quilt blocks!
Wood and Felt Quilt Blocks

The printed felt really makes these super cute, but if you don't have any or just want to use solids, that's adorable too. I've also used Wonder Under to fuse quilting cotton to felt, and then cut those pieces with a die cutter. It worked great and you could then have any prints you like for your little quilt block!
Wood and Felt Quilt Blocks

Part of me now wants to make more and more of these little blocks. You could practially make an entire mini quilt. And maybe that would even be fun for kids to play with!

Wood and Felt Quilt Blocks
Wood and Felt Quilt Blocks Happy quilting!
project // no-sew tiny pumpkin quilt

No-Sew Tiny Pumpkin Quilt

Have you ever wanted to make a little quilt but you don't know how to sew? Or maybe you just want to have a cute bit of fall decor finished in a hurry? Then you should consider making a no-sew tiny quilt. I also considered calling this a fabric pixel art project, because that's kinda what it is. I see it as a blend of crafts that I love: quilting and cross stitch. But this takes WAY less time.

I started making these tiny quilts this fall when my friend Kristin of Woolly Petals announced her Ghost Party Sew A Long. I love her quilts (and even collaborated with her to make embroidery patterns for one!), but I knew that making a quilt was not gonna happen before Halloween. But I still LOVED those little ghosties made of so many fabrics. And an idea materialized.

No-Sew Tiny Pumpkin Quilt

What if I made just one ghost and made it tiny? Now, Kristin has an add-on to make her pattern much smaller than usual, but that would still require sewing and I'm not fast at that. So instead of sewing, I fused the tiny squares to felt. No sewing!

By the way, when I say tiny, I mean the squares on my finished project are 5/8". Because I'm fusing them, there's no seam allowance, so you cut the squares the actual size you want them. You could make them smaller. You could make them bigger. Also because I wasn't sewing, I decided to add some curves to my tiny qhost, which wasn't part of the Ghost Party pattern. They are a little wonky, but that's part of how this how thing goes.

When I made the ghost, I captured the process on video, but really just for fun. Not a whole tutorial. But people asked me more about how I did it, and so I thought I'd make a coordinating pumpkin and show the process better.

No-Sew Tiny Pumpkin Quilt

For this one, I didn't add curves, but kept the shapes more like traditional quilting. So half-square triangles. But I think it still absolutely works. You'll also notice that the backing and way I added a hanger is different from the ghost. That's mostly for variety!

These are hanging out together at my house, and having them not look exactly the same works well. But I also think that having different ways to make, essentially, the same thing is good. But now let's dive in and make a tiny quilt!

No-Sew Tiny Pumpkin Quilt

You will need:

Fabric scraps in orange, pink (or another background color), and a tiny bit of brown
Wool or wool blend felt - at least 4-1/2" for the tiny quilt and 5-1/2 x 6" for the backing
Heavy Duty Wonder Under or paper-backed fusible web - 4-1/2" square
Embroidery floss
Wood or bamboo skewer
Perle cotton
Rotary cutter, ruler, and cutting mat
Iron
Tracing paper
Needle
Scissors
Craft glue

Note: When choosing a color for the felt you'll fuse the fabric to, be mindful that some felt may show through a bit. I used white felt, but pink would blend well with all my colors.

No-Sew Tiny Pumpkin Quilt

Cut the fabric scraps into 5/8" squares. You will need one brown square, 18 orange squares, and 30 pink squares. Cut two pink and two orange squares in half from corner to corner.

No-Sew Tiny Pumpkin Quilt

Iron the Wonder Under to the felt you're using for the tiny quilt. Once it's cool, peel off the paper.

No-Sew Tiny Pumpkin Quilt

Arrange the fabric squares on the area of the felt with the fusible web. Follow the grid pattern below:


Try to keep the pieces all straight and lined up with each other. But also know that it's almost impossible to have them be perfect. That's par of the charm of this.

No-Sew Tiny Pumpkin Quilt

When you're satisfied with the placement of the pieces, gently lay a piece of tracing paper (or the paper backing from the Wonder Under) over the pieces. This is important so you don't end up with adhesive on your iron.

Iron to fuse the fabric to the felt.

No-Sew Tiny Pumpkin Quilt

Trim the edges with a rotary cutter so there's no extra felt showing on the sides. This is also when you can make your tiny quilt more square.

No-Sew Tiny Pumpkin Quilt

If you want a face on your pumpkin (and why wouldn't you? it's super cute!), embroider the face with six strands of embroidery floss. Use French knots for the eyes and a scallop stitch for the mouth.

No-Sew Tiny Pumpkin Quilt

Next, cut the backing felt to 5-1/2 x 6" if you haven't already done so. Cut the skewer to the same width as the tiny quilt. Utility scissors are helpful for this.

No-Sew Tiny Pumpkin Quilt

Stitch the skewer piece to the top of the felt backing. Use perle cotton and whip stitch to make two sets of stitches at each end as shown.

No-Sew Tiny Pumpkin Quilt

Slide your needle under the skewer between the sets of stitches to create a hanger. Make a loop and tie the ends together.

No-Sew Tiny Pumpkin Quilt

Glue the tiny quilt to the backing with a thin layer of craft glue.

No-Sew Tiny Pumpkin Quilt

Once the glue is dry (which doesn't take long!), you can hang your tiny quilt and enjoy pumpkin spice season! This is truly a quilt project you can make in an hour or two. No sewing machine needed.

No-Sew Tiny Pumpkin Quilt

For spooky season, these two tiny quilts are ready to hang out together. And ideas for more fall or Halloween designs are in the works, along with more tiny quilts for other holidays and cute stuff.

No-Sew Tiny Pumpkin Quilt

I think these would look especially adorable on a wall full of embroidery hoops and other artwork. Right? Pull out your scrap bins and start sewing...er...ironing!
project // felt sampler quilt wall hanging

Felt Sampler Quilt

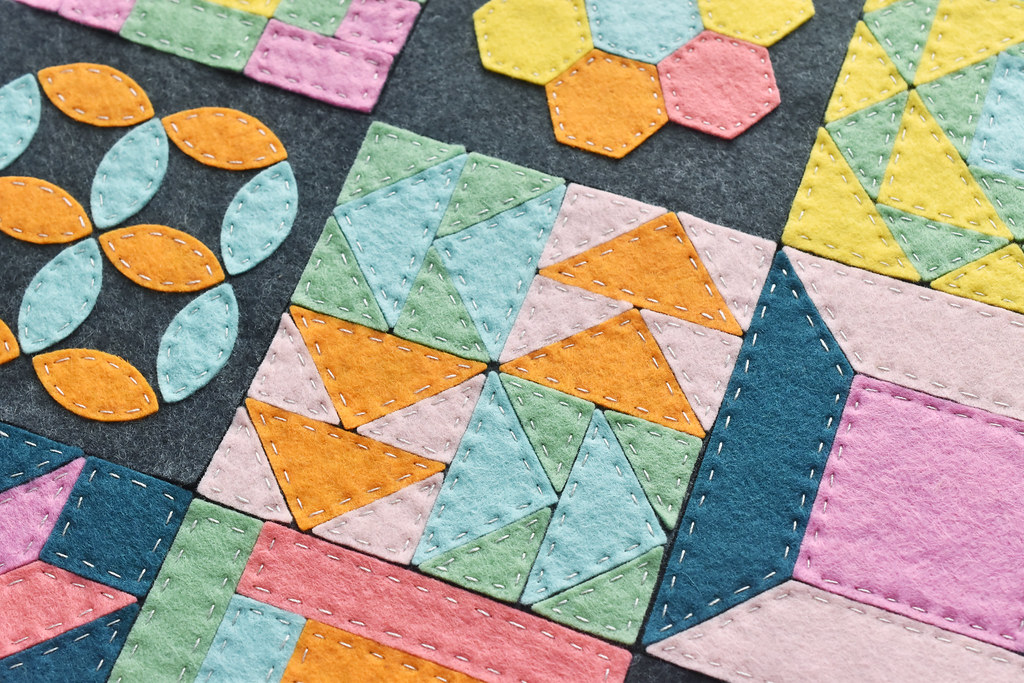
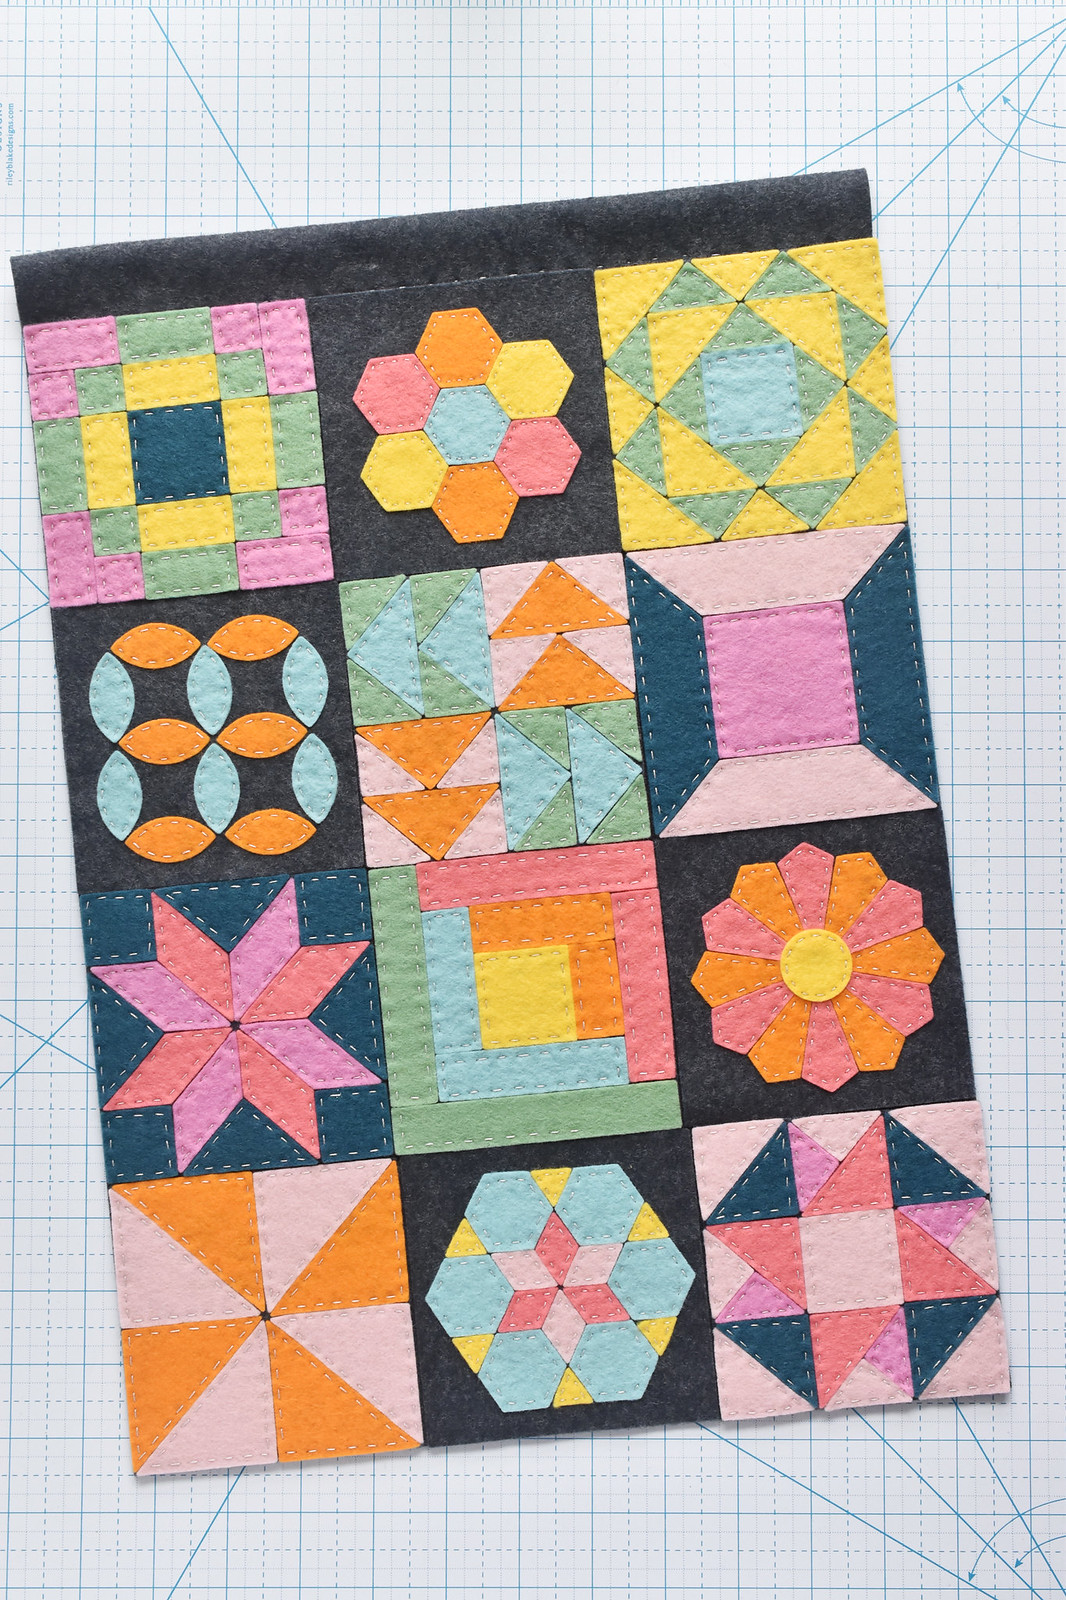
Do you love quilts like I do? Even when they aren't made in tradtional ways, I love their look. Which is why I decided to make this felt sampler mini quilt to hang on my wall! It has 12 different quilt blocks, but I never touched a sewing machine. In fact, you could make this entirely no-sew, but I think a few stitches by hand make it extra special.

Want to see the whole thing?

Note: This post contains affiliate links. If you order items I link to, I may receive compensation at no extra cost to you. Thanks for supporting my work in this way!

Felt Sampler Quilt

For my sampler quilt, I chose quilt blocks that I really like, but you can make this lots of ways. The colors will make a big difference in the overall look, but so will the blocks and placement. You could even choose to make this more like a regular quilt with only one or two different types of blocks, but just repeating them instead of making it a sampler.

And because I can't help but leave room for lots of options on any of the projects I make, there are several ways you can hang your felt mini quilt too. But we'll get to that later.

Felt Sampler Quilt

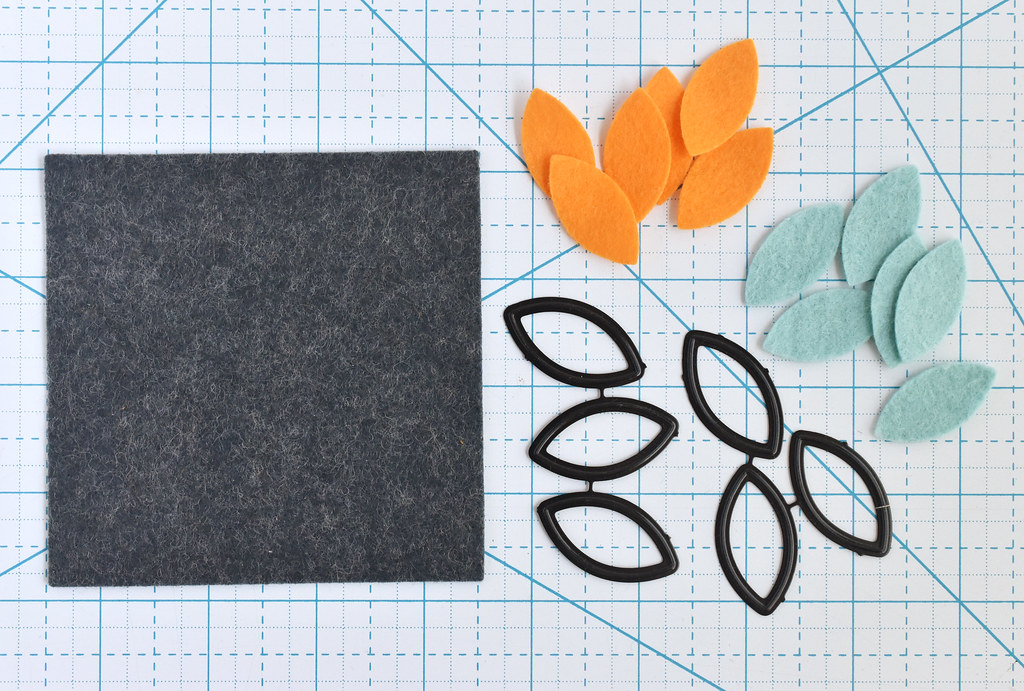
To cut out all the felt pieces for my quilt blocks, I used my three sets of Cozy Quilt Block deep-etch dies, which I designed for Benzie Design. The three sets are Sylvia, Jeanette, and Mollie, all named for my grandmas! If you aren't familiar with how these dies work, I recommend watching my YouTube video that shows the process from cutting apart the metal pieces (and when not to) all the way to rolling the felt through the manual cutting machine.


Now, here's what you need to make your own:

Two 12x18 sheets of felt (see notes on felt below)
Felt in various colors for the quilt blocks
Cozy Quilt Block deep-etch dies and manual cutting machine
Squares and Scallops deep-etch die OR ruler and rotary cutter Craft glue
12-wt embroidery thread/perle cotton
Needle
Scissors
Hanging clip holder OR dowel rod and string

Note: I always recommend wool or wool blend felt, and I used Benzie Design felt for this. Their 12x18 sheets are hand cut, so they may not all be exact. HOWEVER, there's a bit of wiggle room when it comes time to assemble the quilt.

Felt Sampler Quilt

For each quilt block, cut a 4x4 inch square from one of the large felt sheets (keep the other one intact!). Use the deep-etch dies to cut out all of the felt pieces for the each block. Be sure to keep the pieces together so you can tell which block is which.

Each of the deep-etch die sets shows some inspiration for what blocks you can make with each set, but you can make even more than what is shown.

Felt Sampler Quilt

Arrange the quilt pieces on the square and use a tiny dot of glue to hold each one in place. This just keeps the pieces from moving while you stitch them down.

If you want to make your project without any stitching, you can use more glue to hold them more permanently.

Felt Sampler Quilt

You may want to try out some color arrangement on the blocks early on, even more you glue anything down. When you decide how you want everything, take a photo to remember!

Felt Sampler Quilt

To stitch down the pieces, thread your needle with 12-wt embroidery thread. You can also use several strands of regular embroidery floss.

Stitch around the shapes with running stitch, spacing the stitches as evenly as possible. I went for this because I like seeing the stitches.

Felt Sampler Quilt

One quilt block all finished!

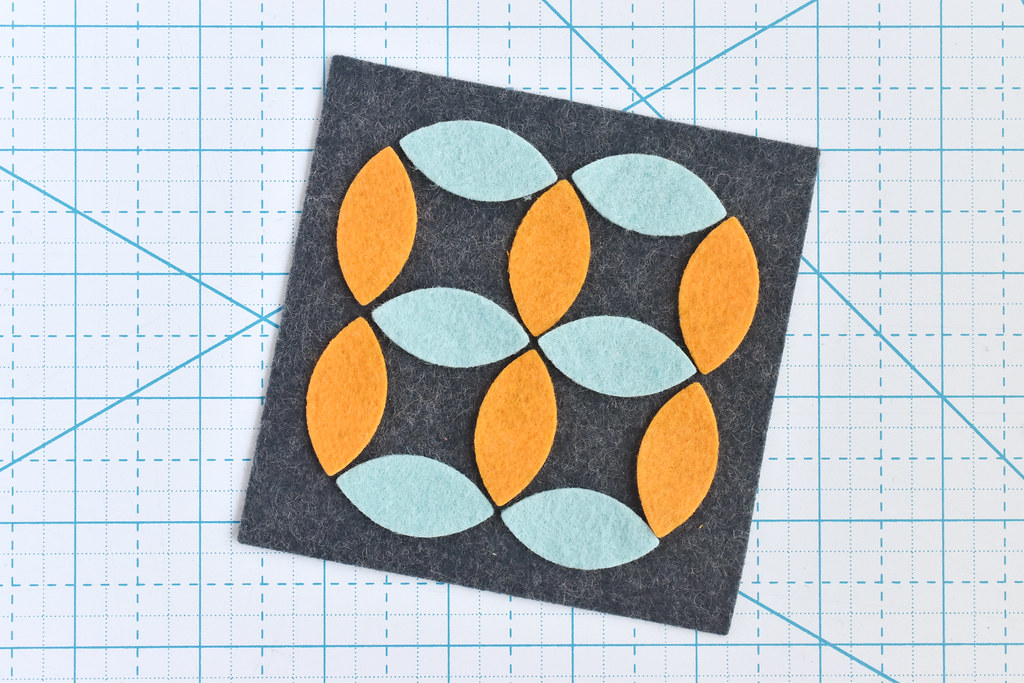
Now, I probably shouldn't point this out, but originally I was going to have this orange peel design turned 45 degrees, which you can see in the phone photo. I DIDN'T look at that before I started gluing and stitching, so I ended up with a different look. But I share that to say that ultimately if the pieces fit together and you like how they look, it's not wrong! Go with what you like.

Felt Sampler Quilt

Make all your blocks following the same steps. Some have pieces that fill the entire square, but some are more open like the hexagons and orange peels. Those ones won't be as thick on your finished quilt, but they all still work together.

Felt Sampler Quilt

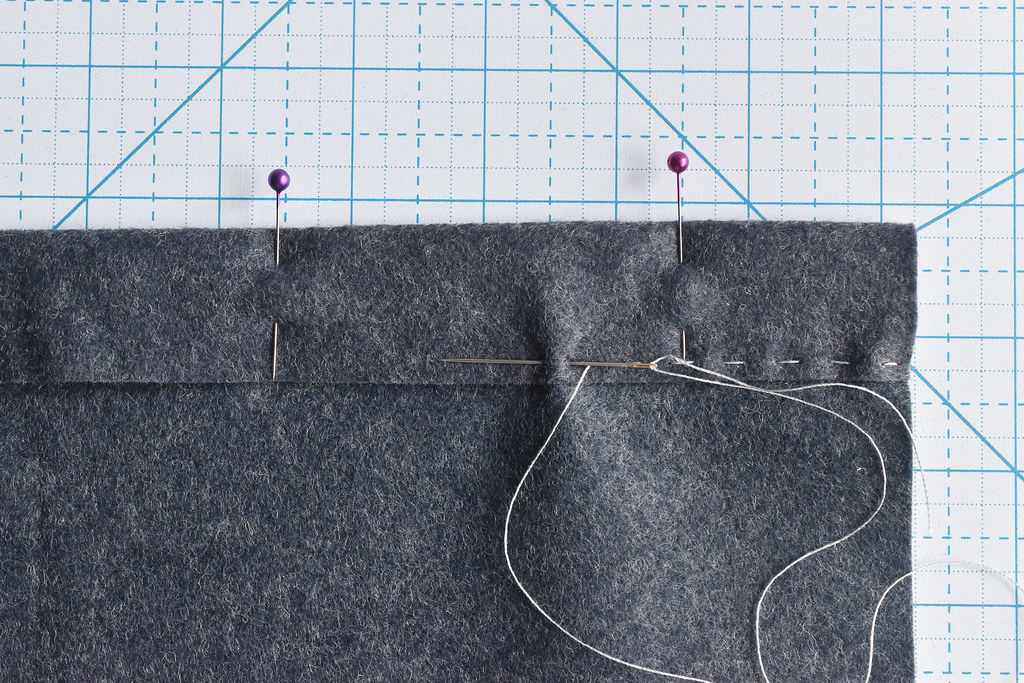
To prepare the backing that will hold all your quilt blocks, fold the top edge down about 1-1/4". Pin it in place and then stitch across the edge with running stitch. This will be the back.

This makes a little channel that you can run a dowel rod through. I did this even though I'm not using a dowel because I wanted an area that I could clip onto without attaching directly to the quilt blocks.

You could also glue this folded channel, as long as you leave room for a dowel (if you're using that).

Felt Sampler Quilt

Starting at the bottom edge, begin gluing the quilt blocks down to the backing. Make sure they are all lining up with each other and the edges. It's okay if the blocks hang off the edge of the back a bit, but you want everything to fit together nicely.

If any of the backing felt shows, you may need to trim it down with a rotary cutter and ruler. Just don't cut your quilt blocks!
Felt Sampler Quilt

And look at that! You have a felt mini quilt! This honestly makes me so happy.

Felt Sampler Quilt

To hang my quilt, I used a ring clip holder, which I received from Missouri Star Quilt Co. It just clips on to each end of the top edge.

Felt Sampler Quilt

It has all the feeling of a traditional quilt, but with colors and materials that give it a cute and modern vibe. But I also love that you could make this lots of ways and get entirely different looks. Just like any kind of quilt!

Felt Sampler Quilt

Speaking of different looks, if you go to Missouri Star Quilt Co. and search for "ring clip holder" you'll find several styles and sizes. I used the 12-inch heart for my wall hanging, but the 8-inch version would hold a mini quilt that has a 2x2 or 2x6 grid of quilt blocks. That would be cute too!

Felt Sampler Quilt

Happy stitching!

project // quilt block hoop art

Quilt Block Hoop Art

This post contains affiliate links. I may receive compensation if you shop via this post.

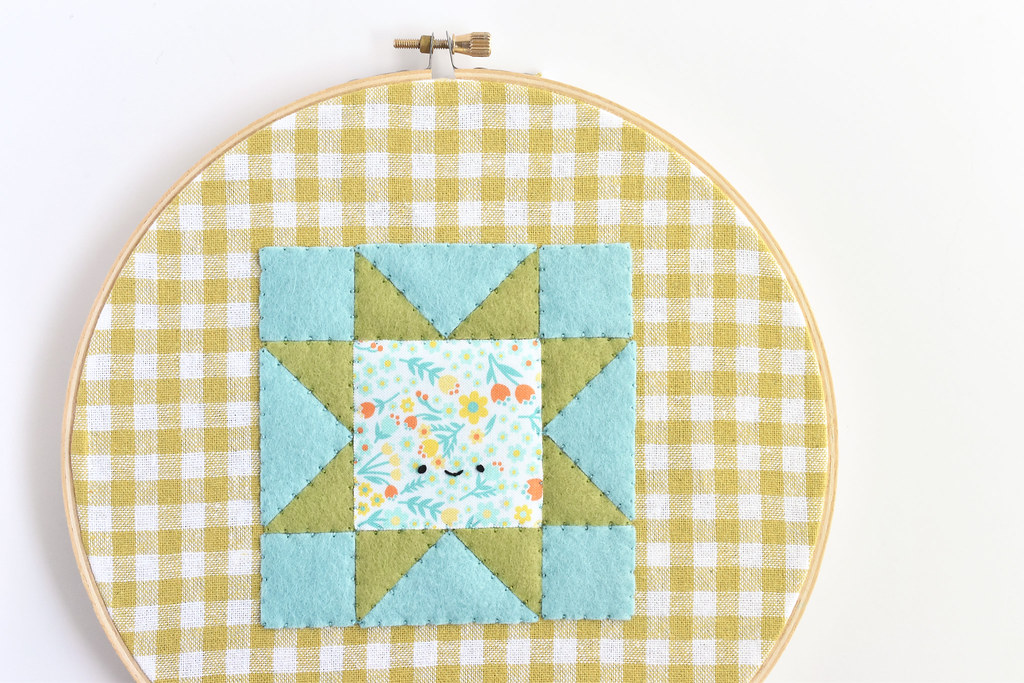
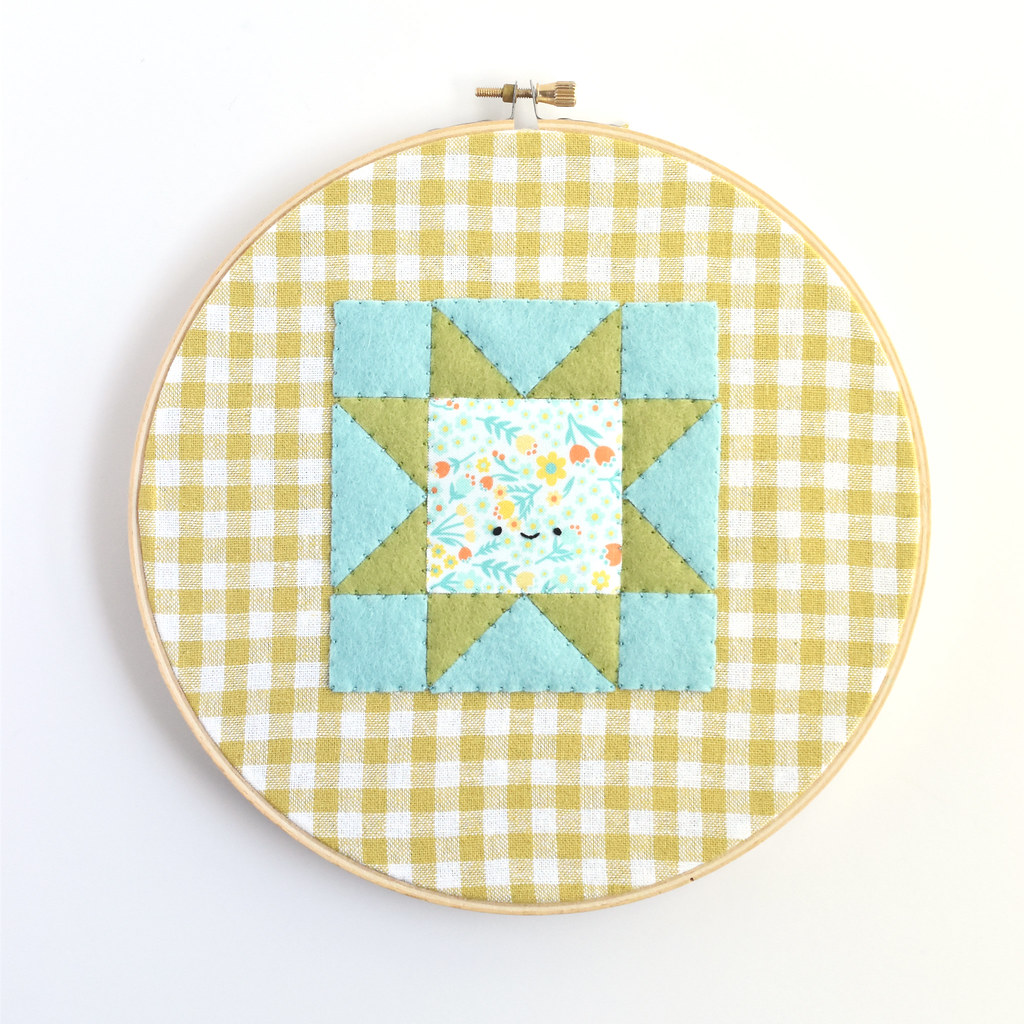
Calling all fan of quilts and quilty things, even if you aren't a quilter. Today I'm showing you how to make a quilt block out of felt and fabric and then hang it up in an embroidery hoop for your wall. It's such a cute way to bring your love of this craft to your decor.

This project starts with inspiration from the felt quilt block ornaments I made last year, which then led to deep-etch dies from Benzie. But also this week I released two new sewing themed patterns: Sew Cute (a sewing machine embroidery pattern) and Sewing Bee (hexagon shaped ornaments with sewing tools). Quilt block hoop art feels like it rounds out the collection.

Quilt Block Hoop Art

Because this is entirely sewn by hand, it's a portable project. And unlike making an actual quilt, you don't have any seam allowances to fuss over. Just fit the pieces together!

One thing that makes this different from my felt ornaments (besides the size) is that I've added some print fabric in there. You don't have to do this for the center piece. Make it all felt if you'd like. OR add the fabric to all the pieces! You'll still need the felt to make applique easier and so there's no fraying. But it would be so cute this way!

Now, shall we jump in?

Quilt Block Hoop Art

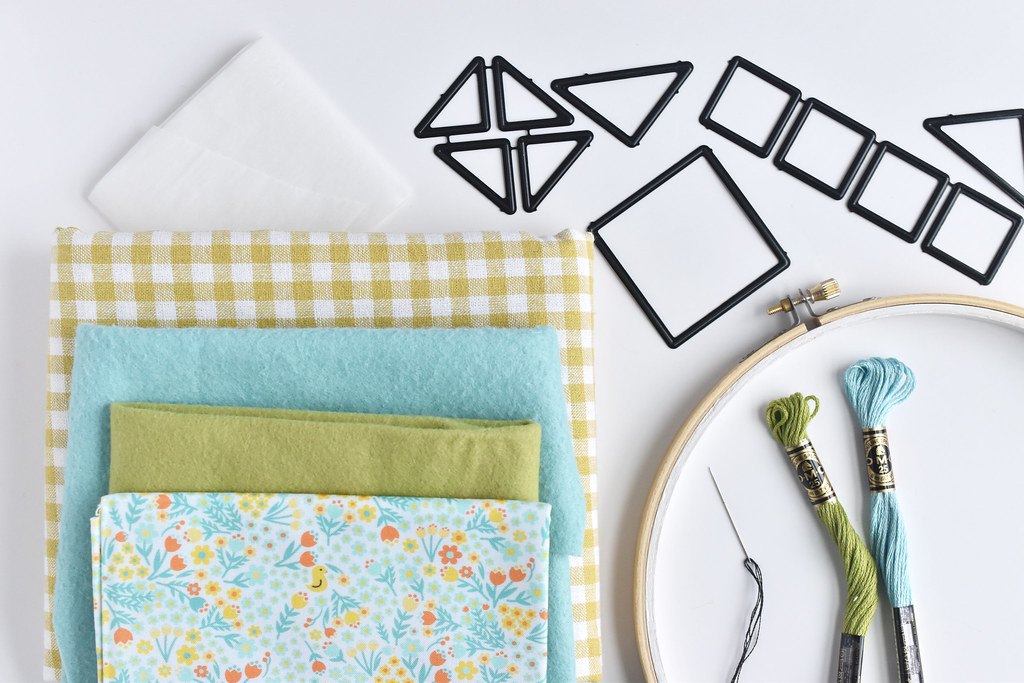
Here's what you need:

Wool or wool blend felt in several colors (I used Swan, Fern, and white from Benzie)
Jeanette's Cozy Quilt Block deep-etch dies and manual cutting machine (optional)
Fabric for the backing (I used Essex Yarn Dyed Classic Wovens in Gingham Mustard)
Fabric for the quilt block (I used Quilt Town Missouri Star Small Floral)
Fusible web
Embroidery floss
Embroidery hoop
Iron
Needle
Scissors

The fabrics I used were courtesy of Missouri Star Quilt Co. You can save 20% on orders of $50 or more when you use my MSQC Partner link! Valid on most items through April 30, 2024 (and probably beyond!)

Quilt Block Hoop Art

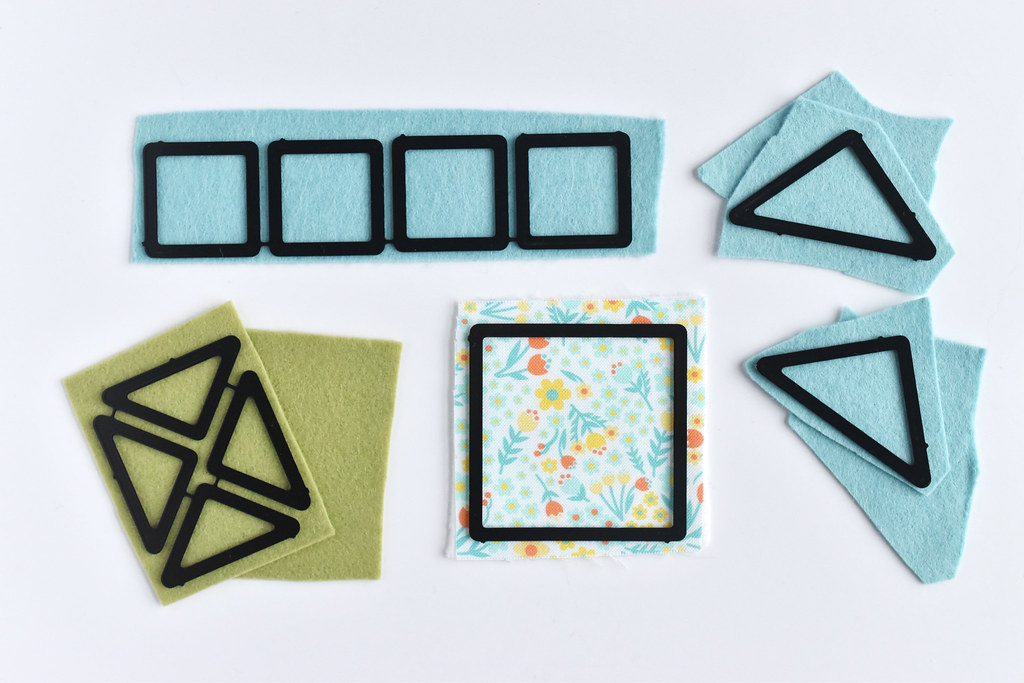
First, you're going to need to fuse the fabric to the felt. For the center, I used a piece that's a little larger than 2 inches square.

Quilt Block Hoop Art

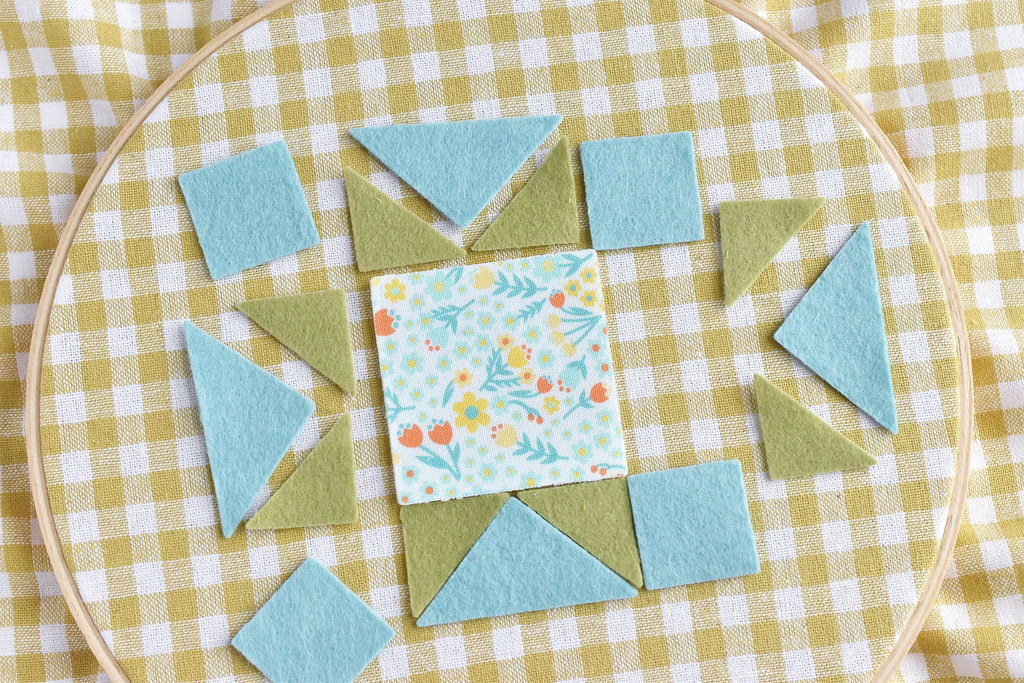
Next, cut out all the pieces.

I used the deep-etch die to make this fast and accurate. I needed to do two runs through my die cutter for the pieces where you see a second piece of felt. It was so great being able to cut the felt and fabric fused piece with the die cutter too. So easy!

If you don't want to use the dies, here's what you'll need to cut:

one 2x2 inch square
four 1x1 inch squares
four 1x1 inch squares cut into eight half-square triangles
two 1-2/5 inch squares cut into four half-square triangles

Quilt Block Hoop Art

Arrange all the pieces to make sure they fit.

Quilt Block Hoop Art

Embroider a face on the center square if you'd like. I just added my signature smile!

Quilt Block Hoop Art

Next, place the backing fabric in an embroidery hoop and start placing the pieces where you want them. I used the gingham as a guide for placement and eventually for stitching.

Quilt Block Hoop Art

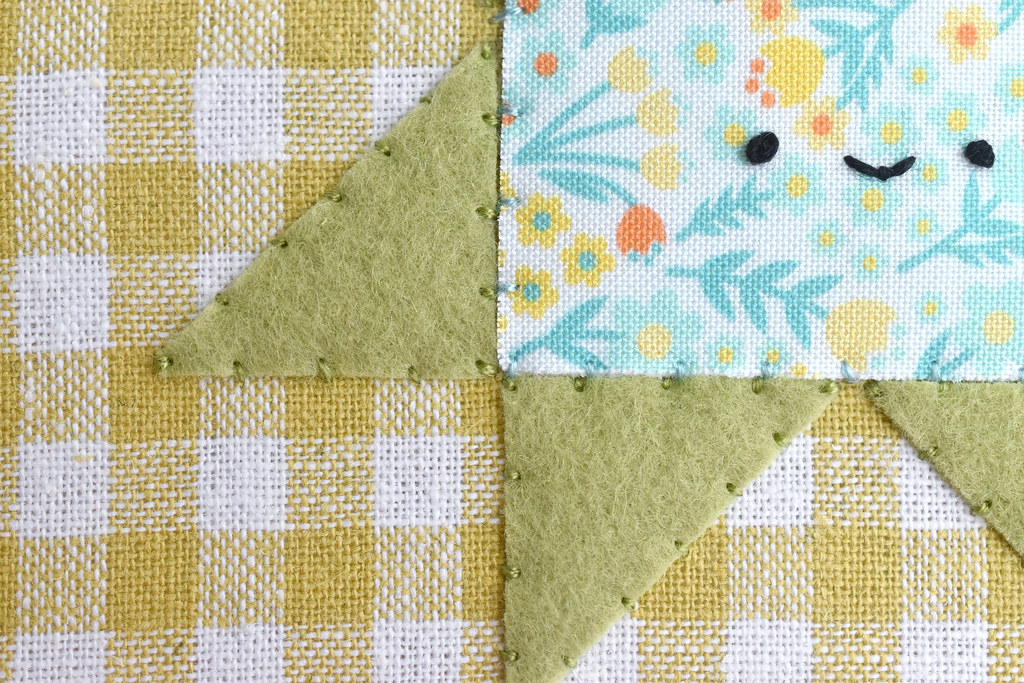
Stitch each piece in place with two strands of embroidery floss and whip stitch. Come up through the backing fabric and down close to the edge of the felt pieces.

Quilt Block Hoop Art

After you stitch the center square, add the small triangles. Align them to the corners of the center square. There will be a small gap where they meet on the side of the square, but that's okay.

Quilt Block Hoop Art

Add the small squares and large triangles last. They should fit in the open spaces just right!

Quilt Block Hoop Art

Now you can finish off the edges of the fabric and bring them to the back of the hoop. Or use this to make something else, like a pillow!

Quilt Block Hoop Art

I love its happy little face and the texture that felt applique brings. You want to reach out and touch it!

Quilt Block Hoop Art

The colors and fabric combination I used for this are a little different than what I would usually do, but I happened to see them together and loved them. And that's another great thing about a small project like this. It's a perfect place to try out something you haven't before. If you like something more unusual, but don't want to commit to a whole quilt, make a mini one for your wall in a single evening!

Happy stitching!