about shop patterns projects printables extras sponsorship wild olive twitter flickr pinterest subscribe
Showing posts with label deep-etch dies. Show all posts

project // wood and felt quilt block stand up

Wood and Felt Quilt Blocks
NOTE: This post contains affiliate links.

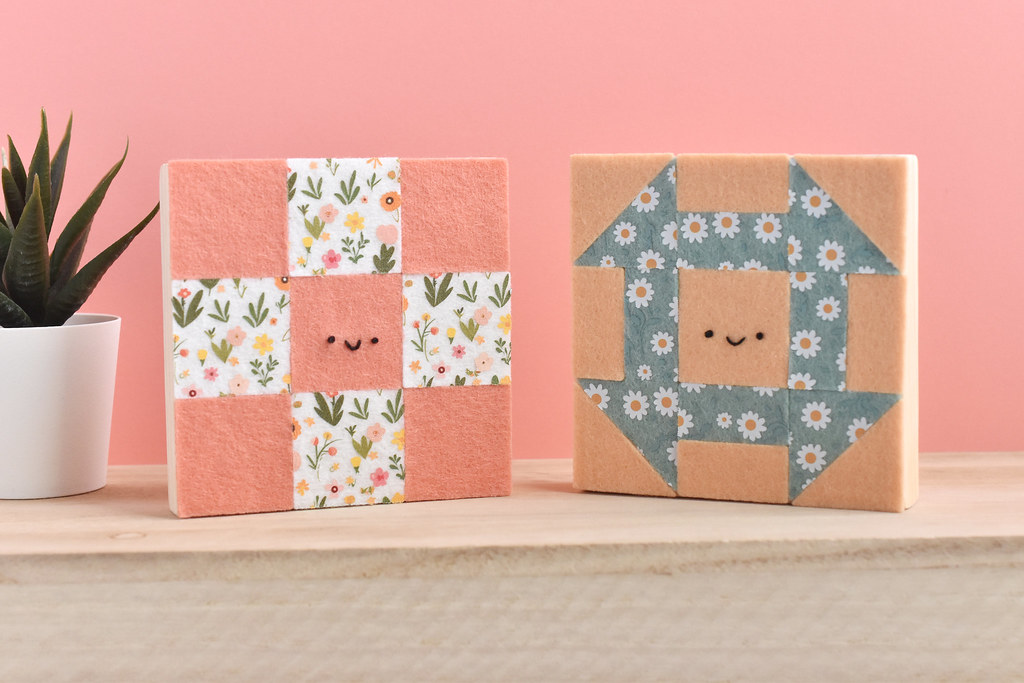
Whether you love making quilts or just enjoy being surrounded by them, this felt quilt block is a fun way to decorate your craft space. And it's super easy to make!

Unlike traditional quiltmaking, this little piece doensn't require any sewing. The pieces are cut from wool felt (yes, that's printed wool felt!) and the cutting was done using deep-etch dies on a manual die cutter. The felt and the dies are from Benzie Design.

Wood and Felt Quilt Blocks

For mine, I used the Sylvia's Cozy Quilt Block die set I designed for Benzie, because it has a center square that I could use to add a cute little face. This is, of course, optional, but if you know me, you know I'll always add a face.

Using the dies is also optional, but it's so fast and easy. Plus the pieces will always be accuarate. That's especially helpful with things like this because all the pieces will fit together perfectly. You can watch a video I made showing how the die cutting works.
Wood and Felt Quilt Blocks

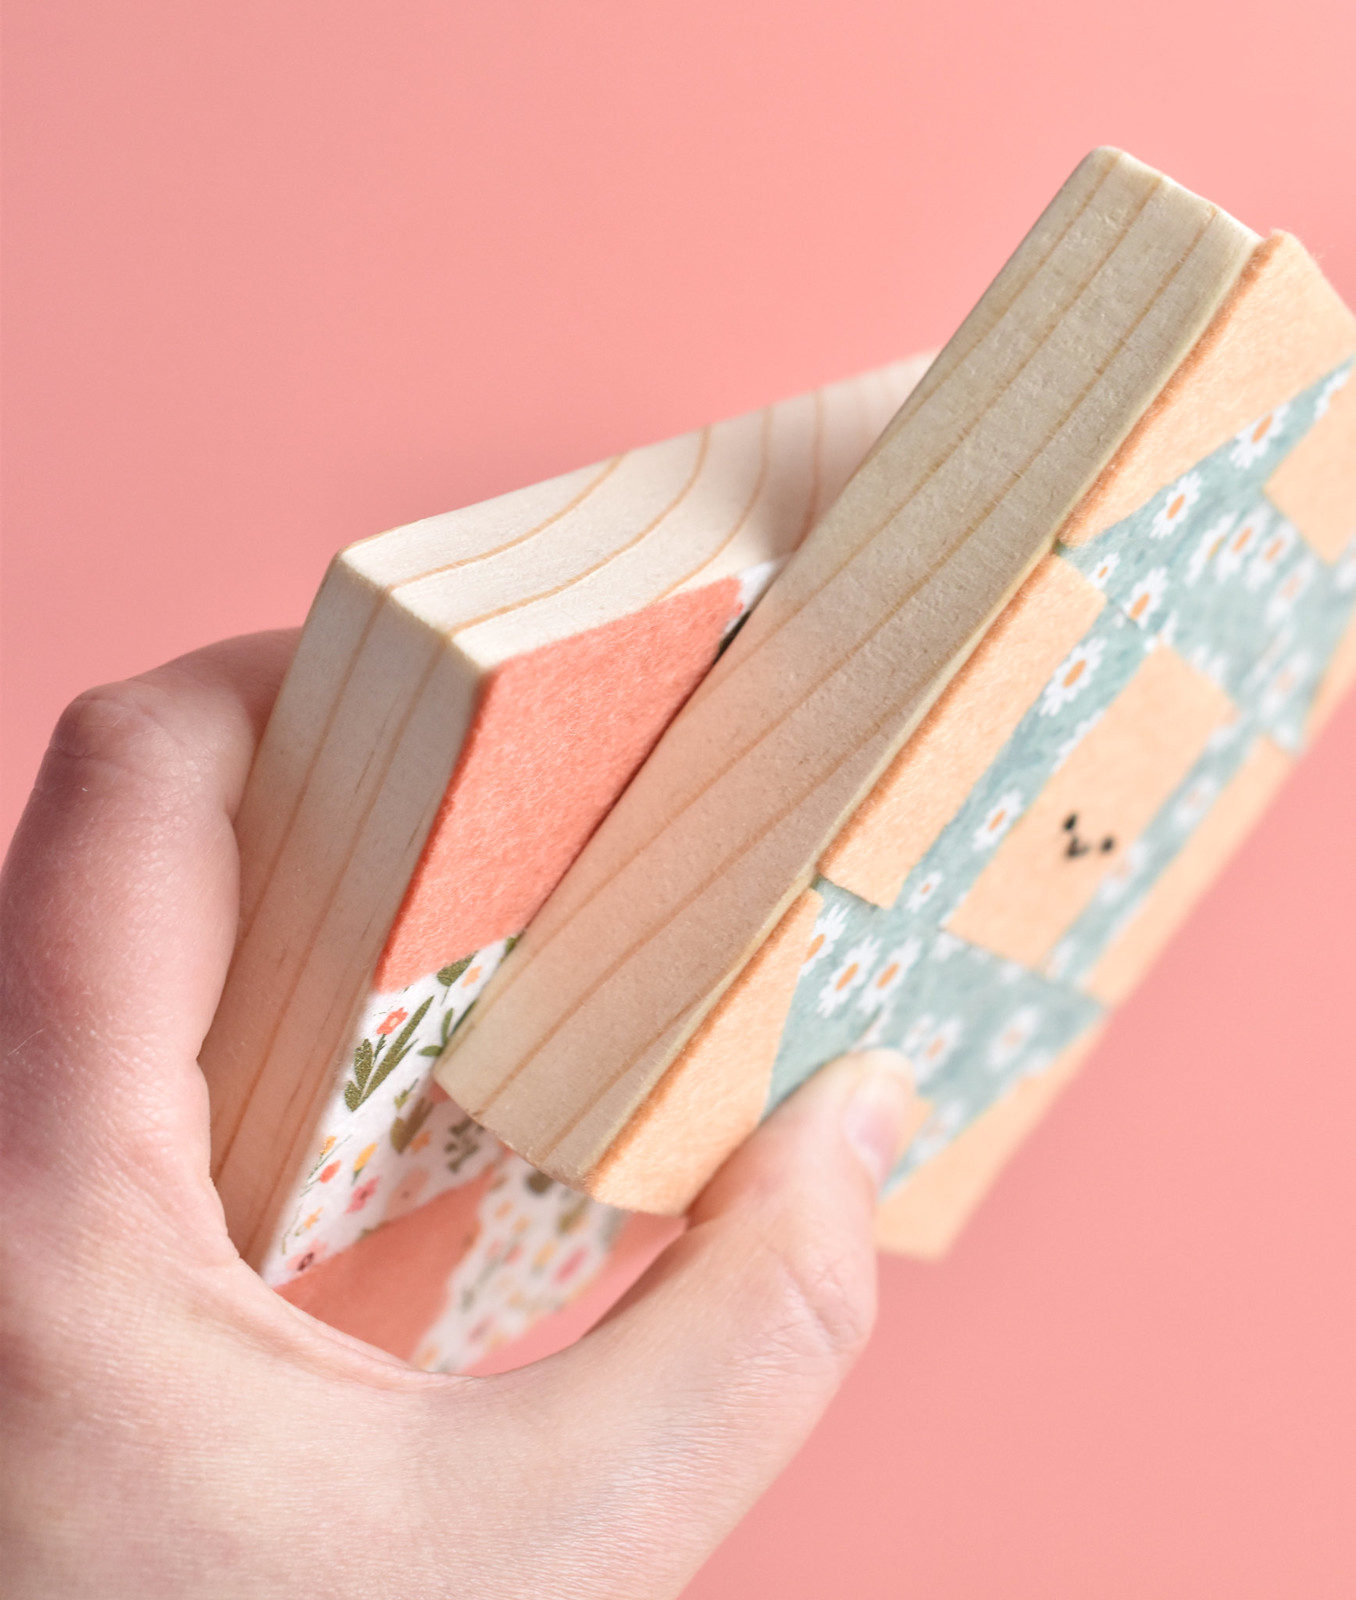
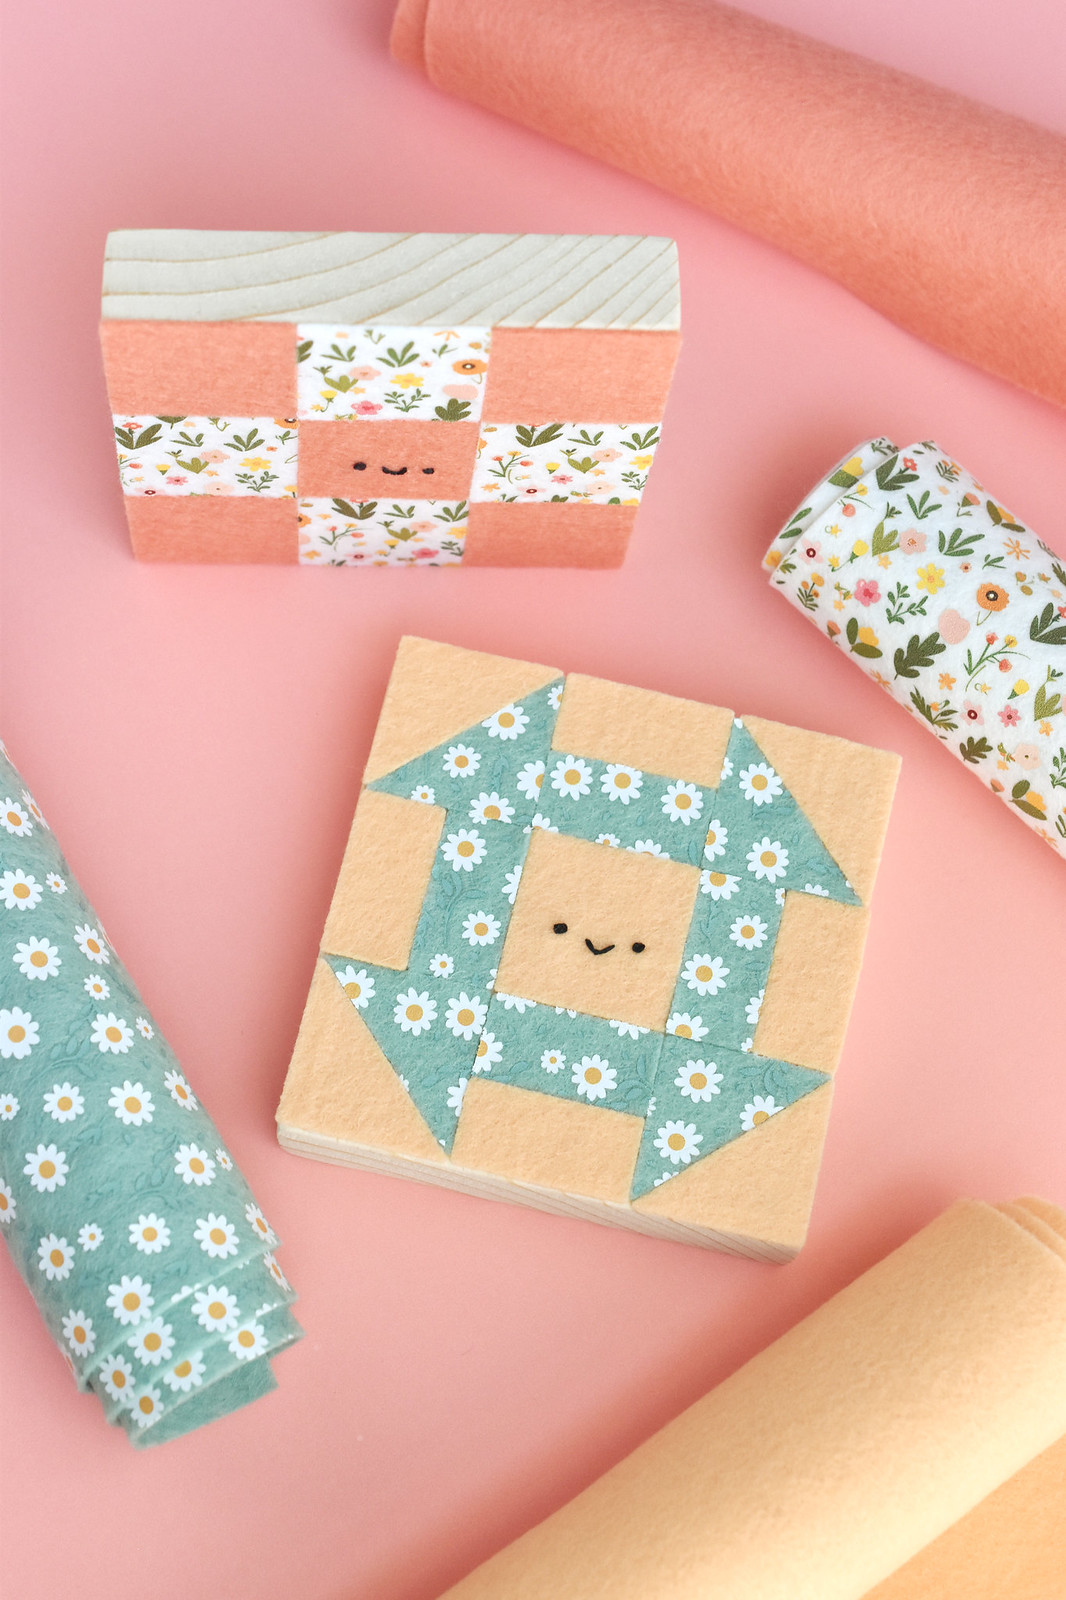
Because these quilt blocks are attached to, well, blocks, they are thick enough to stand on their own. I've made similar pieces to this before, painting on the wood or gluing embroidery to a wood block. These mini art pieces make me smile because you can place tham just about anywhere.

I'm lucky enough to have a dad who has extra boards around, so he cut these for me, and then sanded the corners. If you don't know someone who might be able to help you with this, check your local hardware/lumber store and see if they have any cut offs. They can usually cut them for you too, for a small fee.

Now, shall we make some felt quilt blocks?
Wood and Felt Quilt Blocks

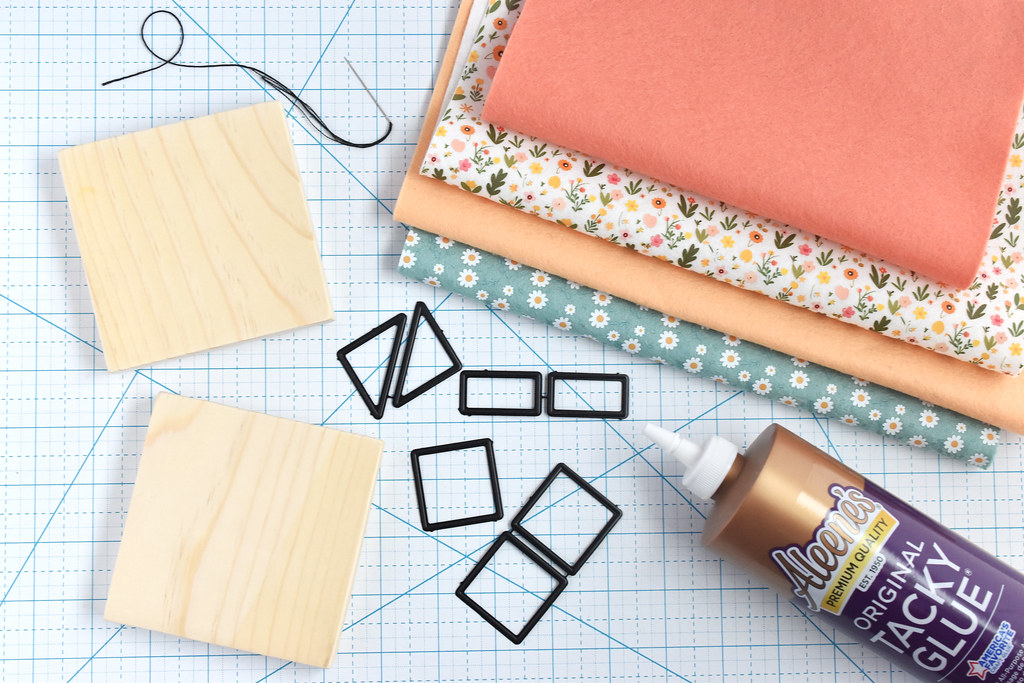
Here's what you need:

4x4-inch Wood Blocks/Slabs - mine were cut from a piece of 1x6 wood trim
Wool Felt (I used Bellwether and Printed Felt)
Sylvia's Cozy Quilt Block die set
Black Embroidery Floss and Needle
Craft Glue

Wood and Felt Quilt Blocks

Choose a quilt block design or two and cut out the pieces from your felt. You can create any quilt block you like!

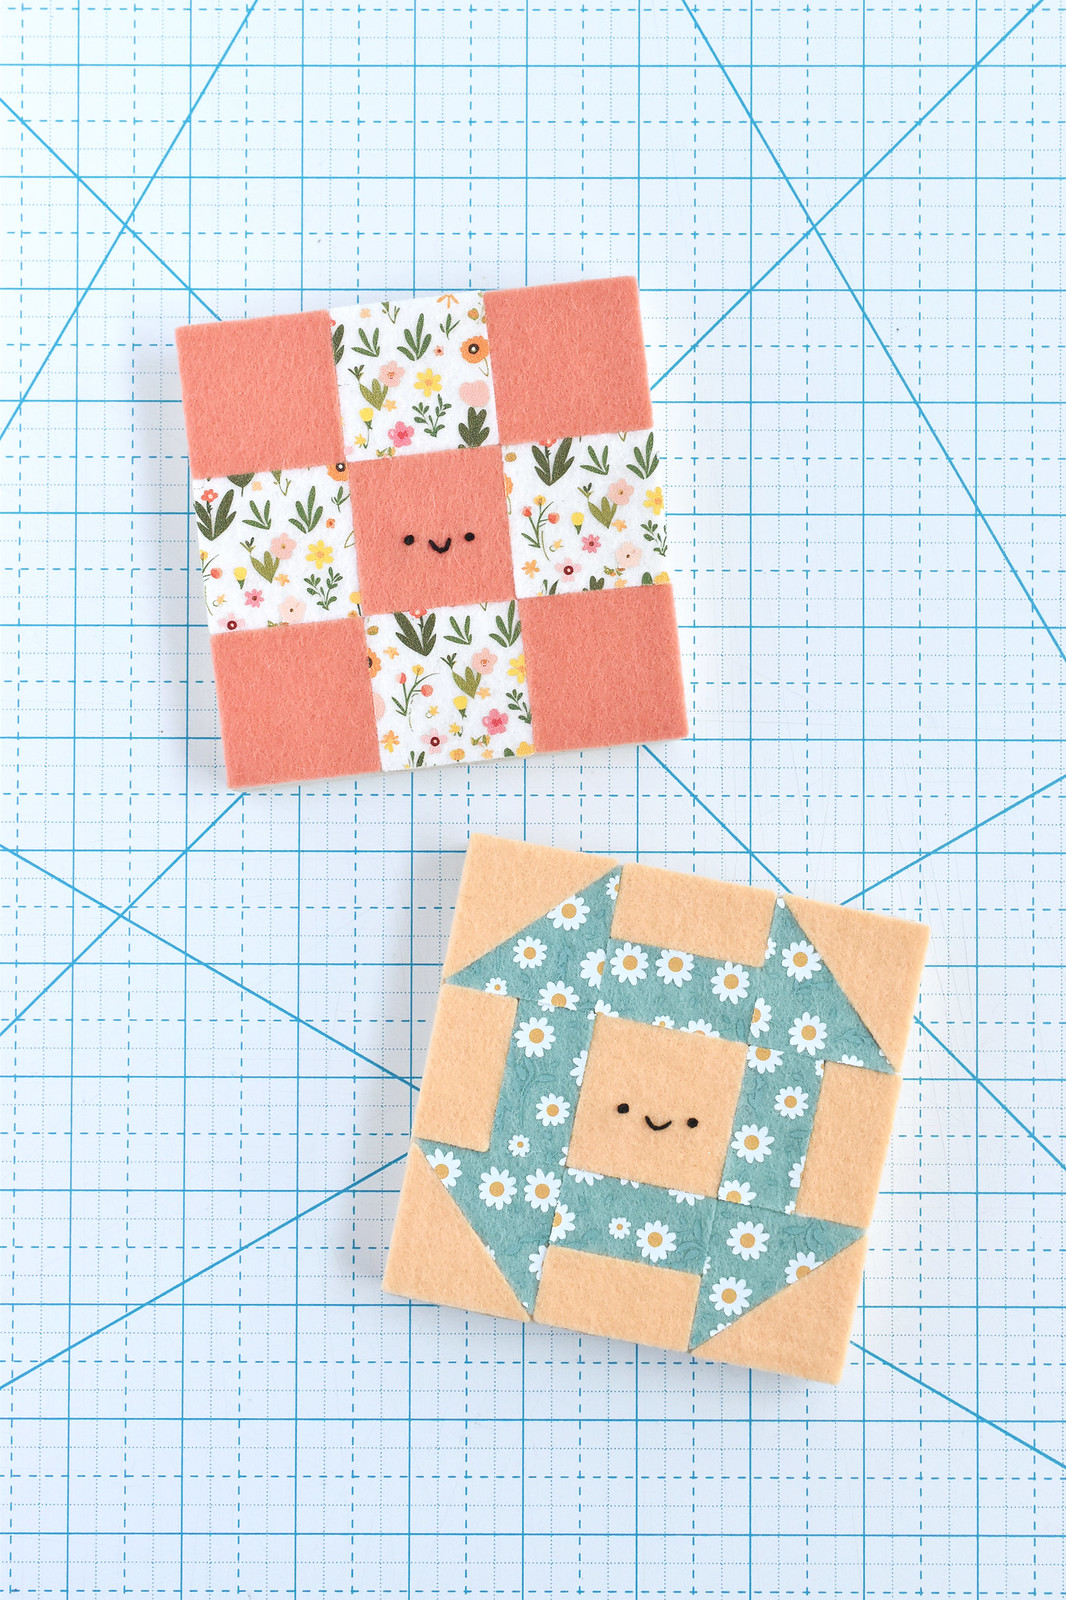
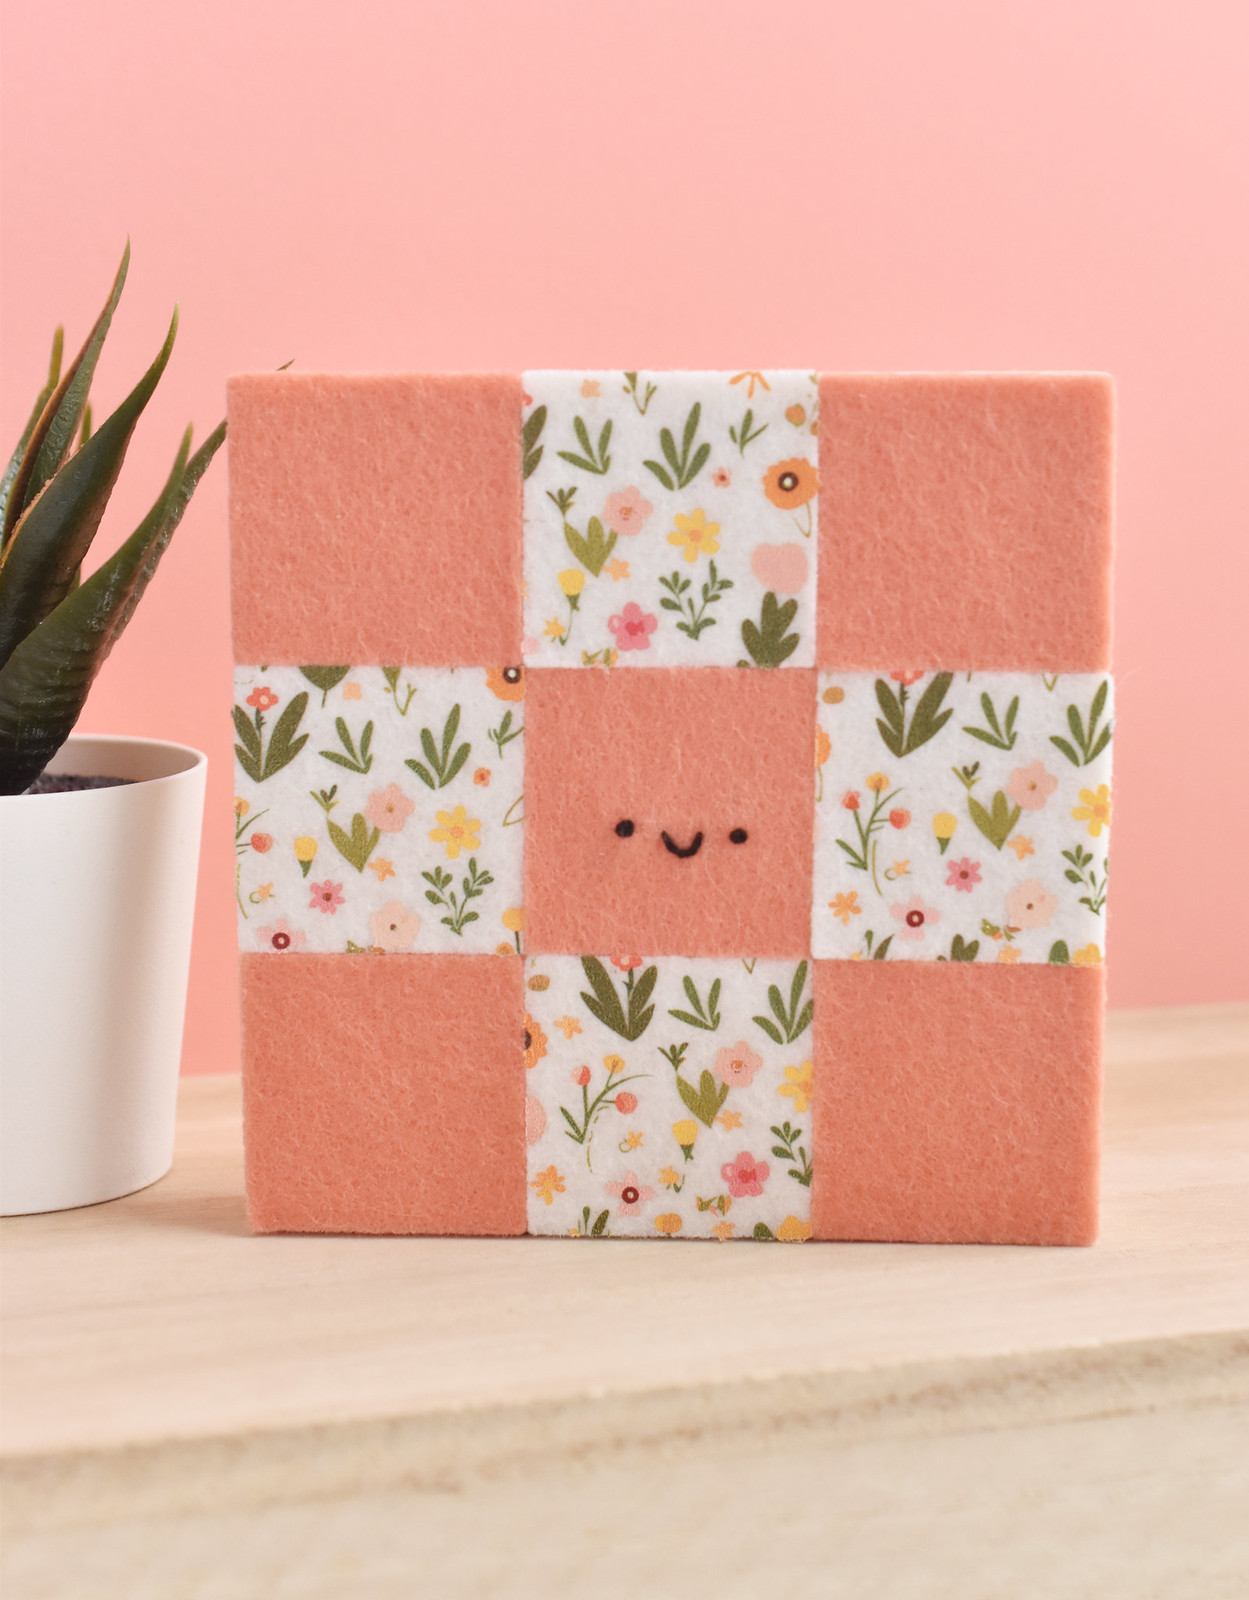
For both of mine, I used just two colors/patterns. For the 9-patch, I used salmon and floral finesse printed felt in white. For the churn dash, I used dreamsicle and and daisy field printed felt in swan.

Wood and Felt Quilt Blocks

To make your quilt block super cute, embroider a face on the center square. The face is just two french knots and a scallop stitch.
Wood and Felt Quilt Blocks

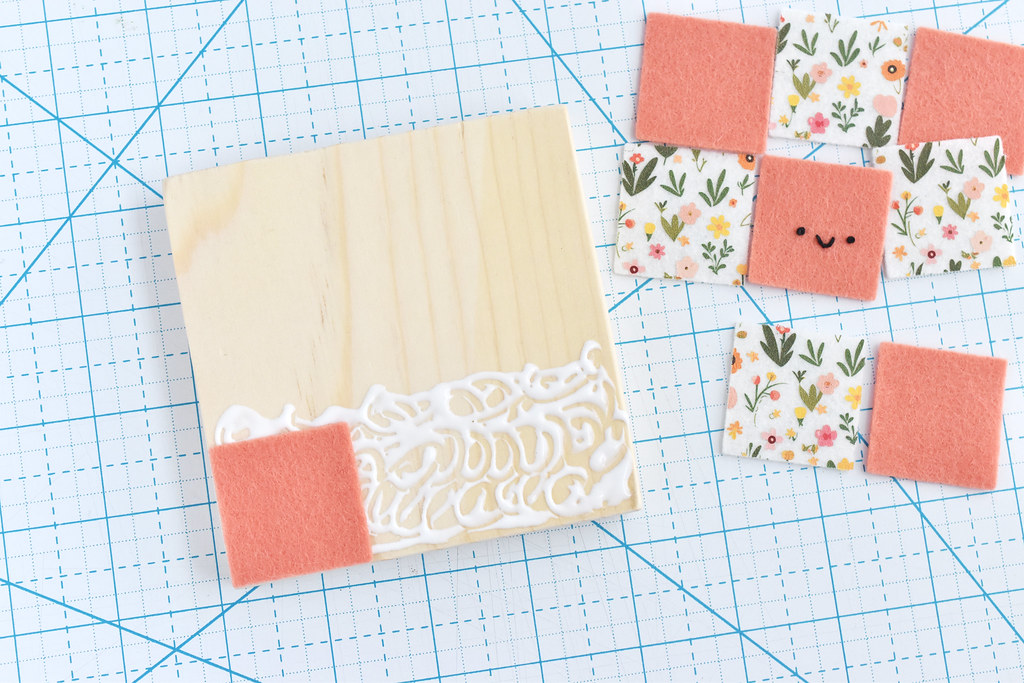
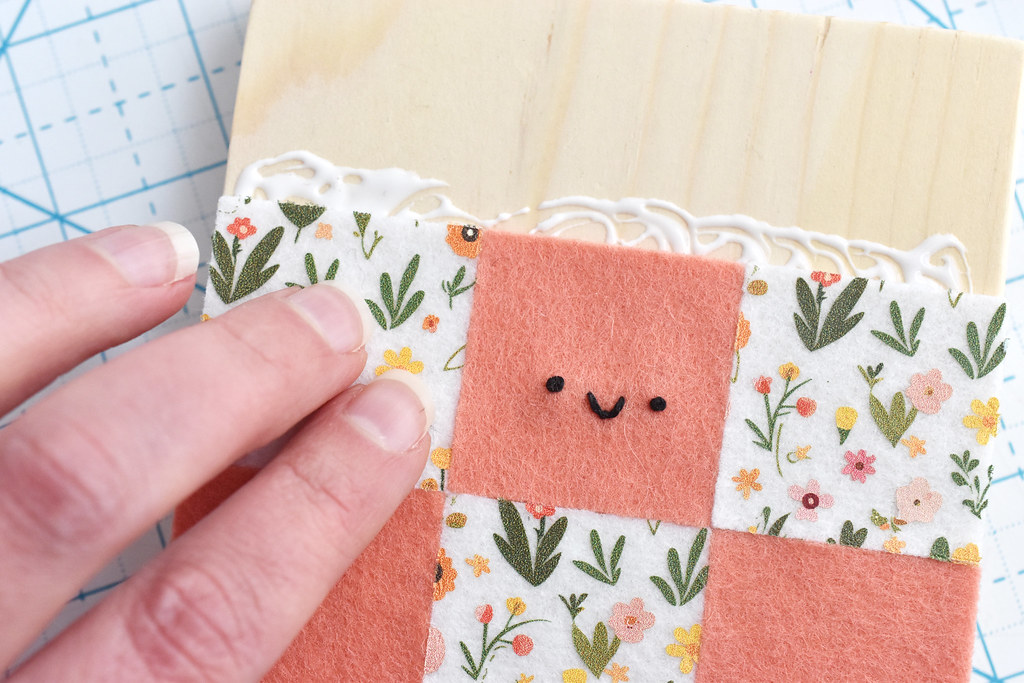
Starting on the lower third of the wood block, spread a thin layer of glue over the wood. Apply the first piece of the quilt block in the corner.

As you add the remaining pieces in the lower third, make sure they are centered horizontally, and ensure that the felt doesn't overlap the bottom edge of the block at all.
Wood and Felt Quilt Blocks

Add more glue and then place the second row of pieces. Repeat with the last row. As you work, you can adjust the placement of the felt pieces while the glue is still dry. You want everything to fit together nice and snug.
Wood and Felt Quilt Blocks

Give the glue time to dry, then enjoy your wood and felt quilt blocks!
Wood and Felt Quilt Blocks

The printed felt really makes these super cute, but if you don't have any or just want to use solids, that's adorable too. I've also used Wonder Under to fuse quilting cotton to felt, and then cut those pieces with a die cutter. It worked great and you could then have any prints you like for your little quilt block!
Wood and Felt Quilt Blocks

Part of me now wants to make more and more of these little blocks. You could practially make an entire mini quilt. And maybe that would even be fun for kids to play with!

Wood and Felt Quilt Blocks
Wood and Felt Quilt Blocks Happy quilting!

project // cross stitch postage stamp pin

Postage Stamp Cross Stitch Pin

When I think about Valentine's Day, I often think about mailing cute envelopes with adorable stamps on them. Making your own cross-stitched postage stamp as a pin is a natural next step, don't you think?

Just imagine wearing this for Valentine's Day or even beyond!

Postage Stamp Cross Stitch Pin
Hearts Day Mini Stamp Cross Stitch Pattern

This simple project is a great way to stitch something small and get in some slow stitching without the overwhelm that can come from large cross stitch projects. The design I used is from a new cross stitch pattern in my Etsy shop.

The Hearts Day Mini Stamp pattern features 20 different mini stamp designs, including the one shown in this project. The full pattern allows you to stitch all the stamps with their little perforated border, but for this pin, I used only the inside part of one stamp. You could use ANY of the designs for this.

Postage Stamp Cross Stitch Pin

Instead of using the perforation in the cross stitch, the backing for this pin is felt cut out using the small stamp border in the Stamp of Approval deep-etch die set (affiliate link) I designed for Benzie Design. The dies create a perfect stamp shape every time, and I knew they'd be perfect for this.

Okay, so the truth is that I knew they'd be perfect because I designed the cross stitch patterns with this die in mind. They are exactly the right size when you stitch them on 14-count Aida!

Now, let's get on to this project!

Postage Stamp Cross Stitch Pin

Here's what you need:

Hearts Day Mini Stamp (no perforation) stitched on 14-count Aida
White Felt Stamp cut with small Stamp of Approval die
Embroidery Floss
Needle
Pin Back
Tacky Glue
Note: The pin back I used was a little longer because my stamp is wide. If you make a tall stamp, be sure your pin back will fit.

Postage Stamp Cross Stitch Pin

Trim the cross-stitched stamp down so there are two rows of Aida on each side of the stamp. Center it on the felt stamp piece.

Use one strand of embroidery floss and fold it in half, threading the cut ends through your needle. Starting at one corner, come up through the felt and Aida one row away from the stitching. Go back down one stitch away on that same row.

Postage Stamp Cross Stitch Pin

On the back of the stamp, slide your needle through the loop of thread and pull to tighten it. This is the loop method, and it will secure your thread without a knot.

Postage Stamp Cross Stitch Pin

Stitch around the entire stamp with running stitch, making each stitch one square of Aida.

Postage Stamp Cross Stitch Pin

Secure the end of the thread with a knot between the layers of fabric and felt. Use Tacky Glue to attach the pin back. Be sure it's facing the right direction!

Allow the glue to fully dry.

Postage Stamp Cross Stitch Pin

Now you have a postage stamp pin that's ready for Hearts Day! Of course, if you're a fan of mail, stamps, or the like, this is a good accessory any day of the year.

Postage Stamp Cross Stitch Pin Do you love stamps? My grandpa collected them, so I kinda feel like the stamp patterns I've made are an ode to him. Now the big question is, should I design more mini stamp cross stitch patterns?

project // crystal ball felt ornament (with benzie deep-etch dies)

Crystal Ball Felt Ornament

This post contains affiliate links. 

The future looks bright thanks to this adorable felt crystal ball! You might not have known that you needed a kawaii crystal ball ornament, but I'm telling you, you do. It's sparkly and cute, and we all need more of that in our lives.

I created this with deep-etch dies I designed for Benzie Design, but I'm using them in different ways. This uses two sets: first, my Circles and Scallops set, which I made to go along with the felt ornament pattern sets I make, and then a new Snow Globe Base, designed to go along with the first set and make snow globes.

Find all the deep-etch Benzie dies here.

As I was making some snow globes (scroll down to see them!), I noticed that they kind of looked a bit like a crystal ball too. And just like that, I could see into the future.

Crystal Ball Felt Ornament

My fortune was that I got to make this super cute ornament that just makes me smile every time I look at it. Plus, I love adding sparkles and this was just a whole new way to do that.

So get your manual die cutter out, grab these dies from Benzie, and let's get stitching!

Crystal Ball Felt Ornament

You will need:

Clear Vinyl
Wool Blend Felt (I used white and pink)
Embroidery floss
Circles and Scallops Deep-Etch Die
Snow Globe Base Deep-Etch Die
Manual Cutting Machine
Sequins and/or Themed Confetti
Iridescent Shred
Scissors
Needle

You will need to cut out one white plain circle and one vinyl scalloped circle. You also need to cut out two pink snow globe base pieces. For mine, I used the largest set of circles and the largest base, but you can also do this with the next size down for each set.

In fact, the smallest base also works with one of the smaller circles in the set, but you probably want to only use the plain circle for that.

Crystal Ball Felt Ornament

Embroider a little face on one of the base pieces. You can use a pencil to mark the placement, but it's fine to just stitch this freehand. Here's my quick video tutorial on these faces!

Crystal Ball Felt Ornament

Layer to felt and vinyl circles and stitch around them with running stitch. Use three strands of embroidery floss and follow the stitch markings on the vinyl piece.

Stop about two-thirds of the way around.

Crystal Ball Felt Ornament

Add some sparkly filling to your crystal ball. Depending on what you're adding to yours, you may need to layer the filling or arrange it a bit before you close up the opening.

Crystal Ball Felt Ornament

Finish stitching the circle and then go back opposite direction and fill in the gaps with running stitch.

Crystal Ball Felt Ornament

Sandwich the circle between the two base pieces so it looks like the ball is resting on the base. Stitch around the base with running stitch, then go back in the opposite direction just as you did to sew around the circle.

Crystal Ball Felt Ornament

To make the hanger, slide your threaded needle under two stitches at the top center of the crystal ball.

Crystal Ball Felt Ornament

Tie the ends of the embroidery floss together with an overhand knot and trim the thread.

Crystal Ball Felt Ornament

Now, let's look into the crystal ball and see what your future holds...I see...cute crafting ahead!

Spooky Snow Globes

This crystal ball is a fun way to use the dies that I designed, but if you want to put them to work more in their intended way, head over to the Benzie blog where you'll find my tutorial for making Spooky Snow Globes! There's even a ghost pattern for you to work with, but you can make snow globes like this with almost all of my round felt ornament patterns.

There will be more of these snow globes popping up in my crafting for the foreseeable future...I know because it was in the crystal ball!

project // felt ornaments with my benzie deep-etch dies

Felt Ornaments with Benzie Deep-Etch Dies

I wanted to do some Christmas in July projects, and it wouldn't be complete without felt ornaments, right? I make a lot of this kind of thing and I'm not stopping any time soon. The ornaments I'm sharing today use some of the deep-etch dies that I designed with Benzie, plus the Cozy Quilt Blocks pattern I have in my shop.

One of the things I love about the dies that I've made with Benzie, but also with their others, is that you can use them in lots of ways. I started with ornaments in mind, then have made felt food, a frame, a needlebook and pincushion, and more. But today I'm coming back to ornaments, but combining elements in different ways. And that's what you can do too!

Felt Ornaments with Benzie Deep-Etch Dies

I made two kawaii quilty ornaments, and two that are much simpler, with a tiny bit of sparkle. Each version has an ornament cut with the Squares and Scallops die (affiliate link) and the Hexagons and Scallops die (affiliate link).

If you want to make the quilty ones (and plenty of other blocks too), grab my Cozy Quilt Blocks pattern. All of the square blocks will fit on the square ornament I'm showing today, and the hexagon/diamond blocks will fit on the hexagon ornament.

Felt Ornaments with Benzie Deep-Etch Dies

The deep-etch dies work with a manual cutting machine. I use a Sizzix Big Shot, but any that use wafer-thin dies will work. I didn't think I needed one, but I make so many things with this now!

In addition to the dies and die cutter, you will need:

Wool Blend Felt
Embroidery Floss
Freezer Paper and Iron (for quilt ornaments)
Sequins (for simple shape ornaments)
Scissors
Craft Glue
Stuffing (for simple shape ornaments)

Felt Ornaments with Benzie Deep-Etch Dies

We're going to start with the quilty ornaments.

Cut out a front and back piece with the two largest hexagon dies. On freezer paper, trace six diamond shapes from the Cozy Quilt Block pattern (remember you can use other designs too). Iron the freezer paper to your felt.

Felt Ornaments with Benzie Deep-Etch Dies

For the square version, cut a front and back piece using the smaller set of square dies that have the stitch markings. Trace the pattern pieces you want for the quilt block onto freezer paper and iron that onto your felt.

Felt Ornaments with Benzie Deep-Etch Dies

Cut out all the quilt block pieces and peel off the paper.

Felt Ornaments with Benzie Deep-Etch Dies

Arrange the quilt pieces on the front ornament piece and use a tiny dot of glue to hold each piece in place. It's much easier to stitch them down if you do this.

Felt Ornaments with Benzie Deep-Etch Dies

Use two strands of matching embroidery floss to stitch the edges of the felt. Come up between the pieces or around the edge and go down through the felt piece you're attaching. Keep your stitches tiny and evenly spaced!

Felt Ornaments with Benzie Deep-Etch Dies

Embroider the face with three strands of black embroidery floss. I just freehanded mine, but the Cozy Quilt Blocks pattern has tips for this.

Felt Ornaments with Benzie Deep-Etch Dies

Stitch the front and back of the ornament together with running stitch, using the tiny holes as a guide. I usually use three strands of embroidery floss for this.

Felt Ornaments with Benzie Deep-Etch Dies

To add a hanger, anchor a length of embroidery floss with a knot hidden between the front and back layers of felt. Make a loop that's as long as you like, then anchor it at the other side. This creates a wider hanging loop.

Felt Ornaments with Benzie Deep-Etch Dies

And there you have two quilty ornaments! My pattern has these on circles, which I also like, but I think they look so cute on different shapes too. It's a fun way to mix it up.

Felt Ornaments with Benzie Deep-Etch Dies

Now let's make some simple shape ornaments. These are inspired by vintage geometric designs.

For the square, which is actually going to be a diamond here, use the smaller set of square dies that have the stitch markings, then all the rest of the smaller scalloped squares. Cut them out in alternating colors.

Felt Ornaments with Benzie Deep-Etch Dies

For the hexagon, which I'm calling a geometric rose, use the largest hexagon scallop die, and all the rest of the plain hexagons. Cut the scallop piece from green and the rest from whatever color you want for your rose.

Felt Ornaments with Benzie Deep-Etch Dies

I also grabbed some sequins for this because to me, vintage felt ornaments always have some sparkle.

Felt Ornaments with Benzie Deep-Etch Dies

Stack up all the scalloped squares. Thread a needle with three strands of coordinating embroidery floss and come up through the center. Thread a sequin on the thread and make a french knot through the middle. Don't pull the knot too tight or it will pull through.

The traditional way of attaching sequins is with a seed bead in the center, and you can certainly do that if you'd prefer.

Felt Ornaments with Benzie Deep-Etch Dies

Stack up the plain hexagons, rotating each one a little bit. Stitch a sequin through the center, then add more sequins around the open spaces.

Felt Ornaments with Benzie Deep-Etch Dies

Layer the front and back of the simple shapes ornaments and stitch around the edges with three strands and running stitch. Leave a gap to add a tiny bit of stuffing. This shows off the loose edges of felt and makes them more dimensional, but the stuffing is optional. Sew the opening closed.

Felt Ornaments with Benzie Deep-Etch Dies

Add a hanger at the corner of each and they are ready to display!

Felt Ornaments with Benzie Deep-Etch Dies

Which ornament will you be making?

Yes, it's a little early, but this is a great time to get a start on Christmas crafting. Plus, you can enjoy this sort of decoration any time of the year. I especially love hanging a single ornament on the wall near other framed art or embroidery. It's a perfect little accent!

Felt Ornaments with Benzie Deep-Etch Dies