


Do you love embroidery, but you don't really want to make another hoop to hang on your wall? Bring some stitching to your porch or sofa with an embroidered pillow cover! The thing that I love about this project is that you don't have to start with a pillow cover. All you need is a piece of piee of fabric with some embroidery on it and some extra fabric (and a pillow form!).
I recently looked at some blank pillow covers that are designed for you to embroider and I may use one of those sometime soon because there's no sewing involved. BUT, if you have some basic sewing skills, you can easily make your own cover with some already finished embroidery. In fact, that's exactly what I did with this because when I embroidered my pattern I wasn't planning anything other than the stitching. That's also one of the reasons that I usually try to make my fabric a little larger than I really need. It gives you options!
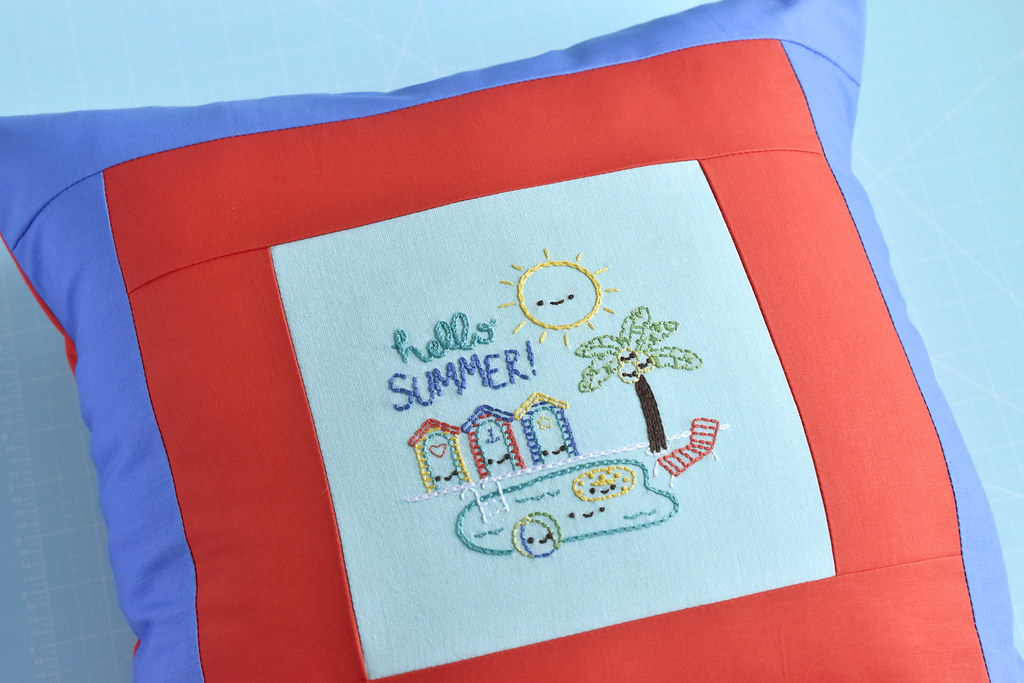 You can use this tutorial with almost any embroidery that you like, but I made my pillow cover with my new Hello Summer embroidery pattern. If you want to see how I embroidered my pattern, I also have a new Stitch Along video on YouTube, which you can watch below!
You will need:
Embroidered fabric
1/2 yard of fabric 1
1/4 yard of fabric 2
18-inch pillow form
Basic sewing tools
Sewing machine
Note about the embroidered fabric: Using the measurements given in this tutorial, you will need the embroidered fabric piece to be at least 7-1/2 inches square with some room around the edges. You can use larger or smaller embroidery, but you'll need to adjust the size of the other fabric strips or make the pillow another size. The overall process would be the same though.

First, cut all the fabric pieces. I recommend using a rotary cutter and ruler on a cutting mat.
Cutting instructions:
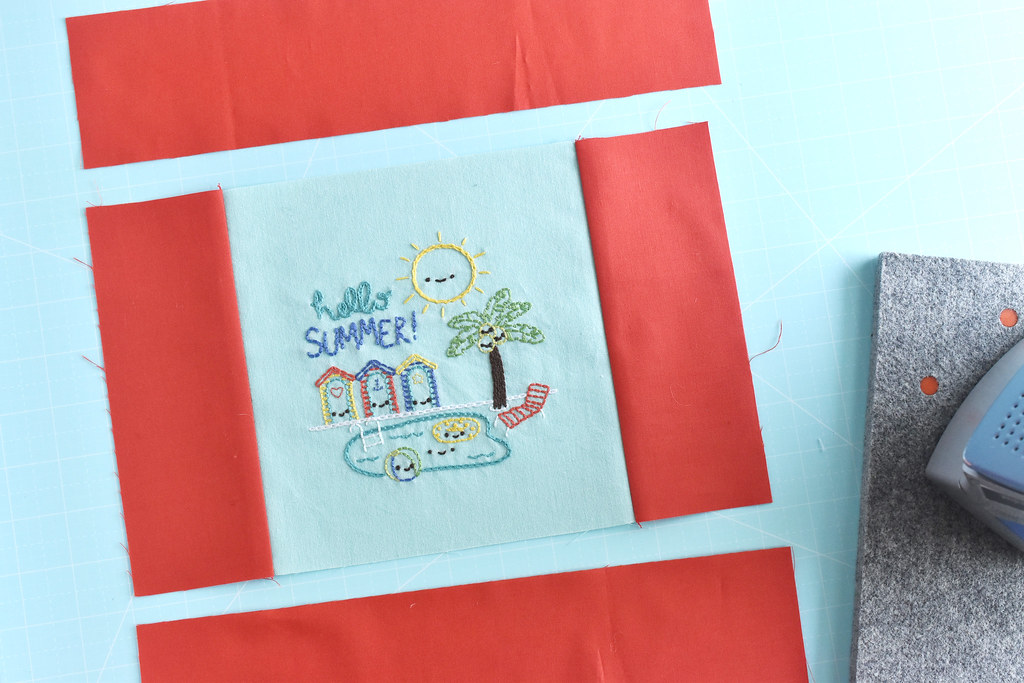
Piece A - embroidery: 7.5 x 7.5 inches (with the stitching centered)
Piece B - Cut 2 of fabric 1: 3 x 7.5 inches
Piece C - Cut 2 of fabric 1: 3 x 12.5 inches
Piece D - Cut 2 of fabric 2: 3.25 x 12.5 inches
Piece E - Cut 2 of fabric 2: 3.25 x 18 inches
Back - Cut 2 of fabric 1: 14 x 18 inches
Sew all seams with a scant 1/4" seam allowance, except where noted. Press seams to the dark side.
Sew the two B pieces to the left and right of piece A. The remaining fabric 1 pieces will go on next.

Sew the two C pieces to the top and bottom of the growing pillow cover front. The next round of color from fabric 2 will come next.

Sew the two D pieces to the left and right of the piecing. Finish the front by sewing the two E pieces to the top and bottom.
At this point, I want to point out that my sewing is not always the most precise and there are a few ends along the way that don't line up. It's entirely fine on this project. If I were to write an all-sewing book, it might be called "Don't Sweat it Sewing." Should you try to be as accuate as possible when sewing this or any other project? Yes. But this is the type of project that won't be affected by things being just a little bit off. I like projects like that.

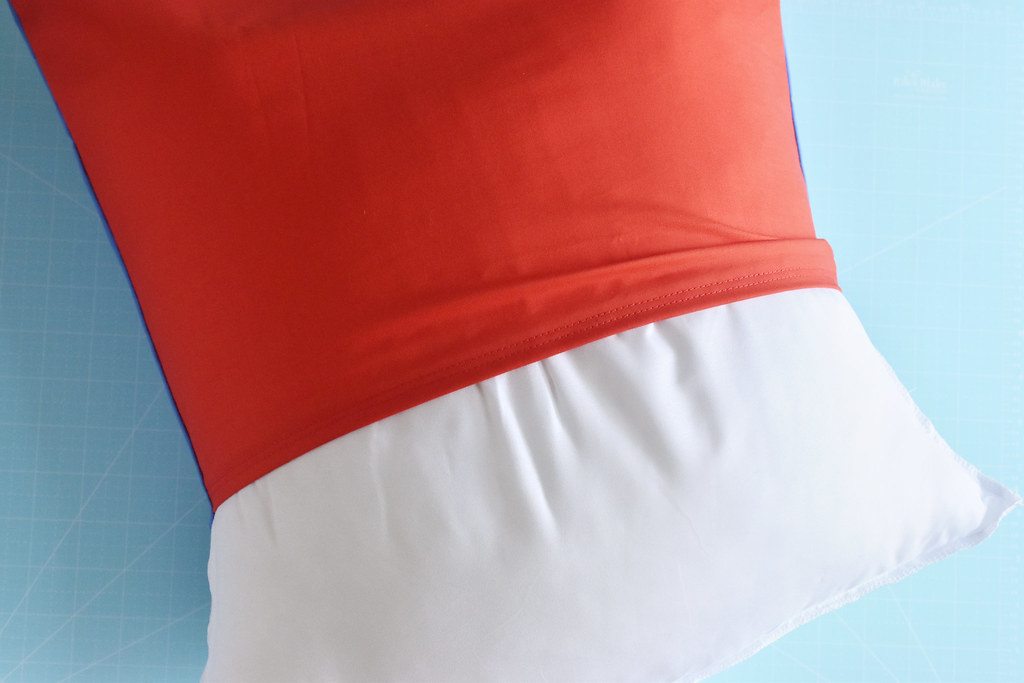
Press a double-fold hem on the 18-inch side of each of the two back pieces. Fold the edge about 1/2 each.

Top stitch the two hems. I sewed two lines, just because I liked how it looked.

Give the pillow front one more press and square up the edges if you need to. Or don't sweat it! But do place the front face up.
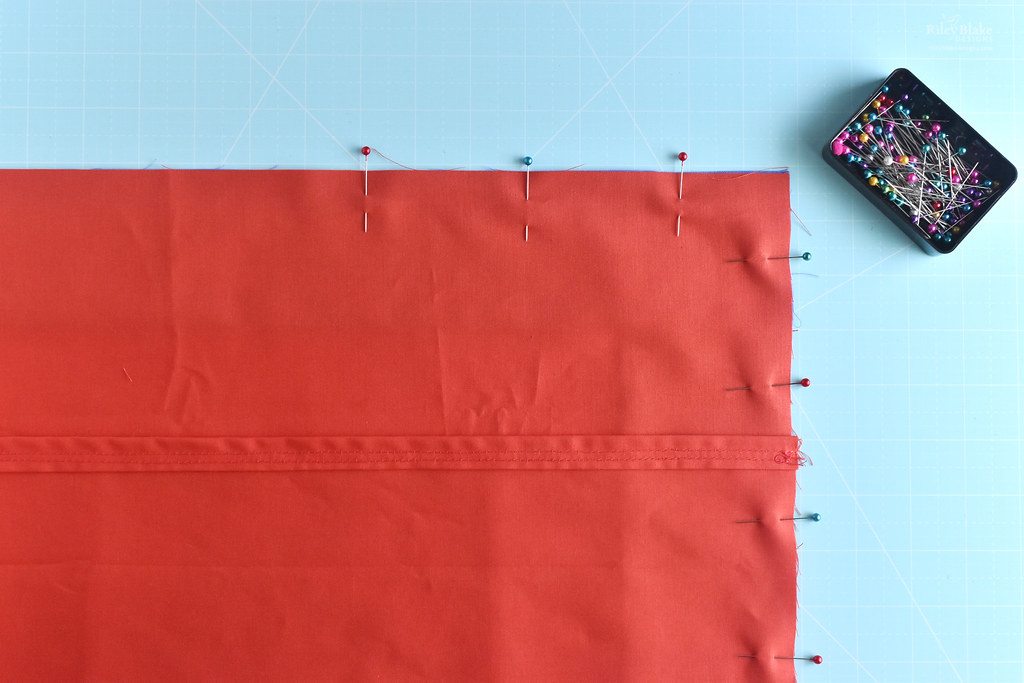
Place the two back pieces wrong side up on the front piece. Align the raw edges with the top and bottom of the pillow front with the hemmed edges overlapping. I like to make the one coming from the top be on the outside, so I place that one first. Pin around the edges.
Sew around all four sides with a 1/2-inch seam allowance.
You don't need to leave an opening because the overlapping back pieces create the opening. The areas where my edges were just a bit off meant that some areas had a smaller seam allowance, but that's okay. The larger overall seam allowance covers this!
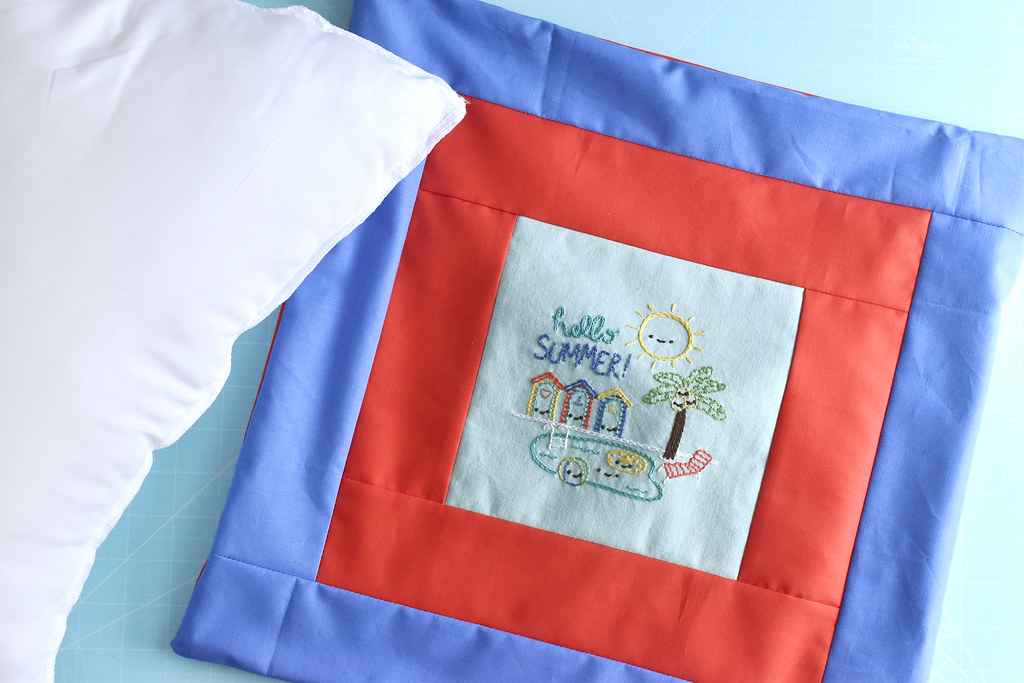
Turn the pillow cover right side out. I didn't trim the corners at all before turning. Now it's time to add the pillow!
Slide the pillow form into the cover. It's a snug fit by design, so just go ahead and squish it in there! (The official guide for pillow cover size is to make it have a finshed measurement of 17 inches for an 18-inch pillow.)
It's all ready to go on your porch, patio, or other seating area! Even better, you can make more pillow covers like this and swap them out on the same pillow form. You get lots of decorating options, but they don't take up much space. I'm planning to make this a set of four covers: hello summer, hello autumn, hello winter, and hello spring!
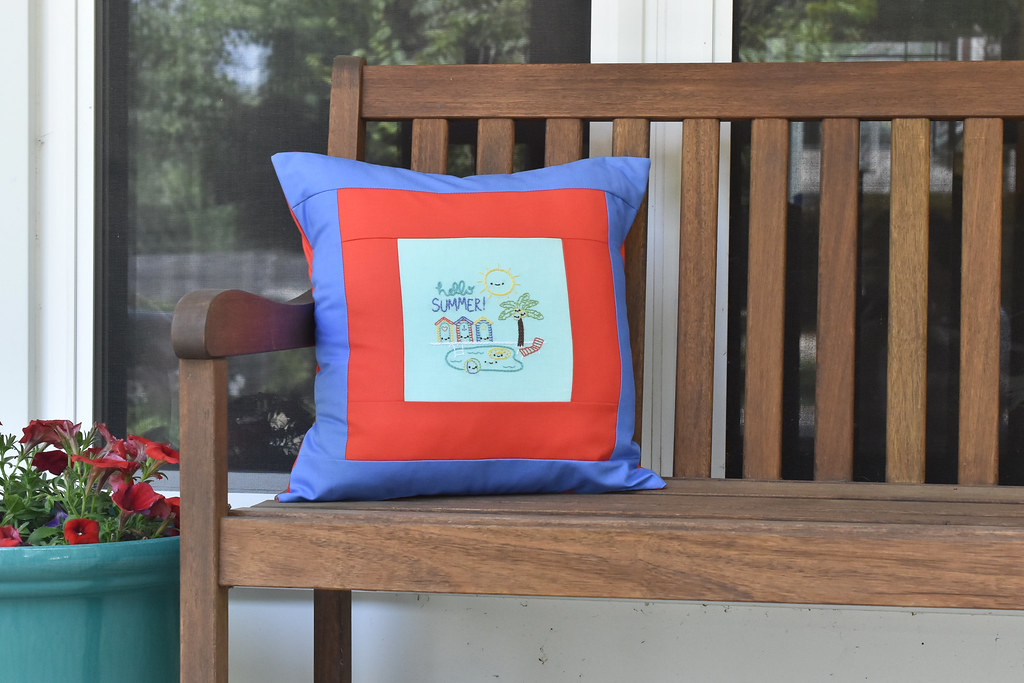
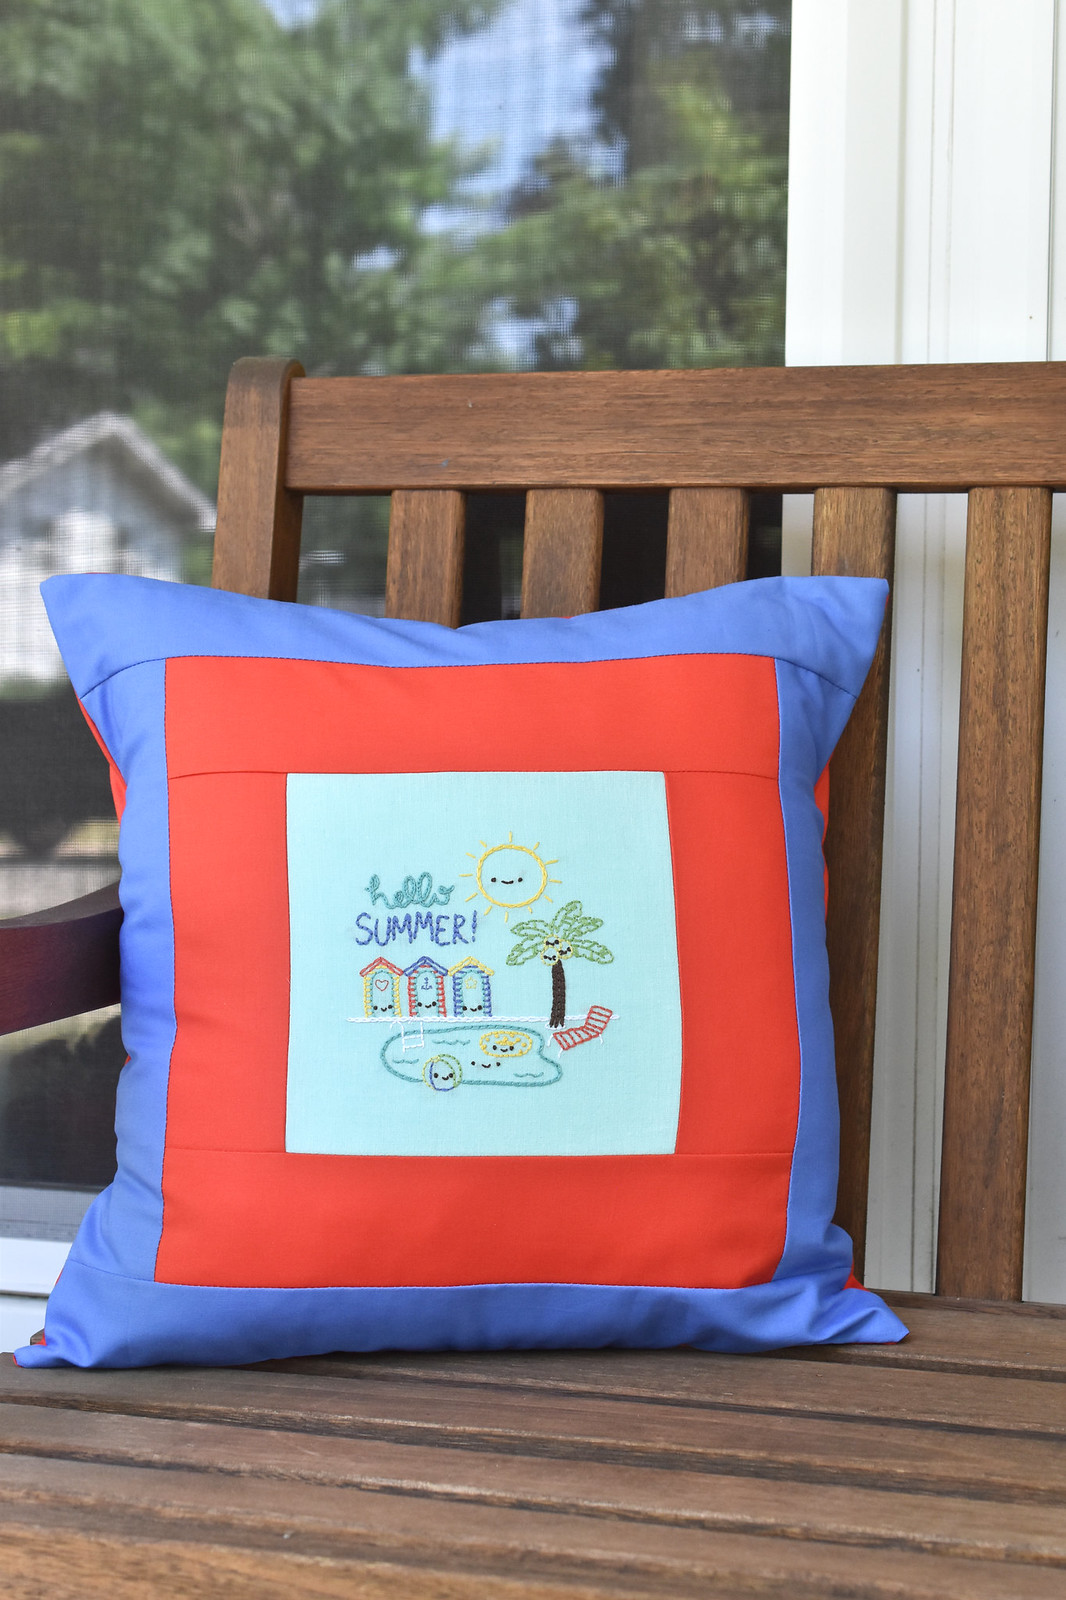
This one went right out on the front porch! We won't leave it outside all the time because of sun and weather, but it will come out when we're welcoming guests or sitting outside.

Where in your home do you need an embroidered pillow?
Love this!
ReplyDelete