


Have you ever wanted an easy way to make your own removeable stickers? This project doesn't require any special equipment...just a basic supply and something you want to stickerize. These stickers are fun to make as a gift or as a craft to do with teens!
So, if you haven't noticed, stickers (much like enamel pins) are everywhere and I love it and hate it. I love it because stickers are amazing and there are so many fun designs and when you make them that gives you even more options. Favorite places for stickers are water bottles, laptops, and I don't know what else.
But I hate it because I generally fail at acutally using stickers. I grew up as a sticker saver because once you use it it's done. If you need to take it off of something, the sticker is ruined and sometimes what you put it on is also ruined. This has haunted me into adulthood.
I am very pleased to say, however, that this DIY version might be helping me form a healthy relationship with stickers. Because A), you can easily remove them and B) you can make more if you want!

If you'd like to give these a go, here's what you need:
Clear, removable shelf liner/laminating paper (like Con-Tact Paper)
Paper with your sticker design printed or drawn on
Scissors
Craft knife (optional)
For my stickers, I used Duck Brand Removable Creative Covering, which might be called something else now. I've had this roll for a while!

Grab whatever you want to make into stickers and cut them out. If what you're using doesn't have a full outline, just cut around the design.
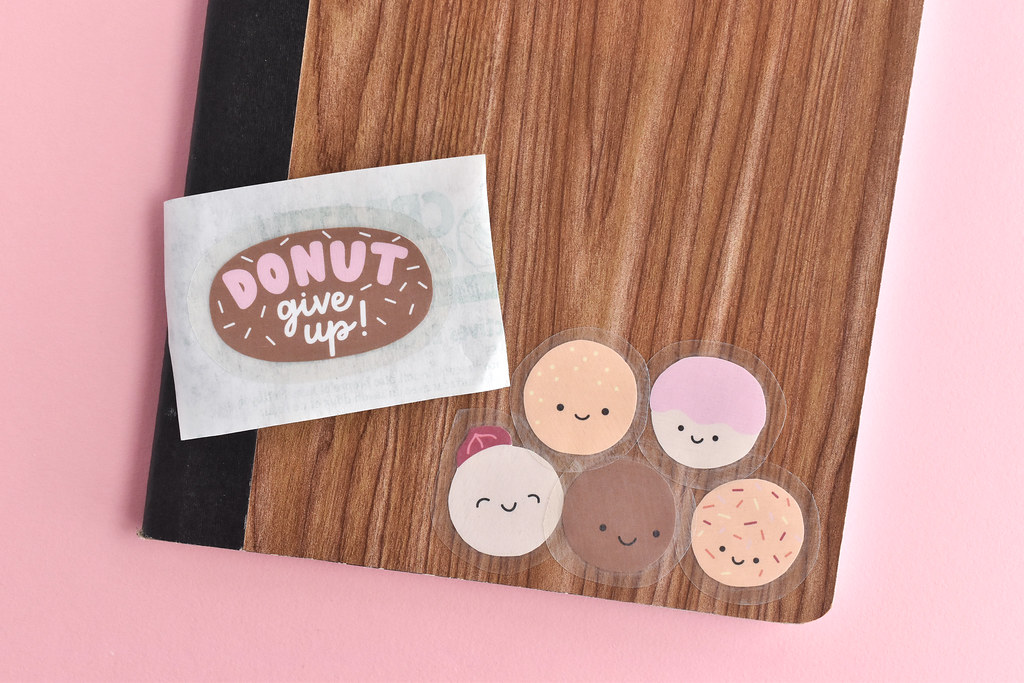
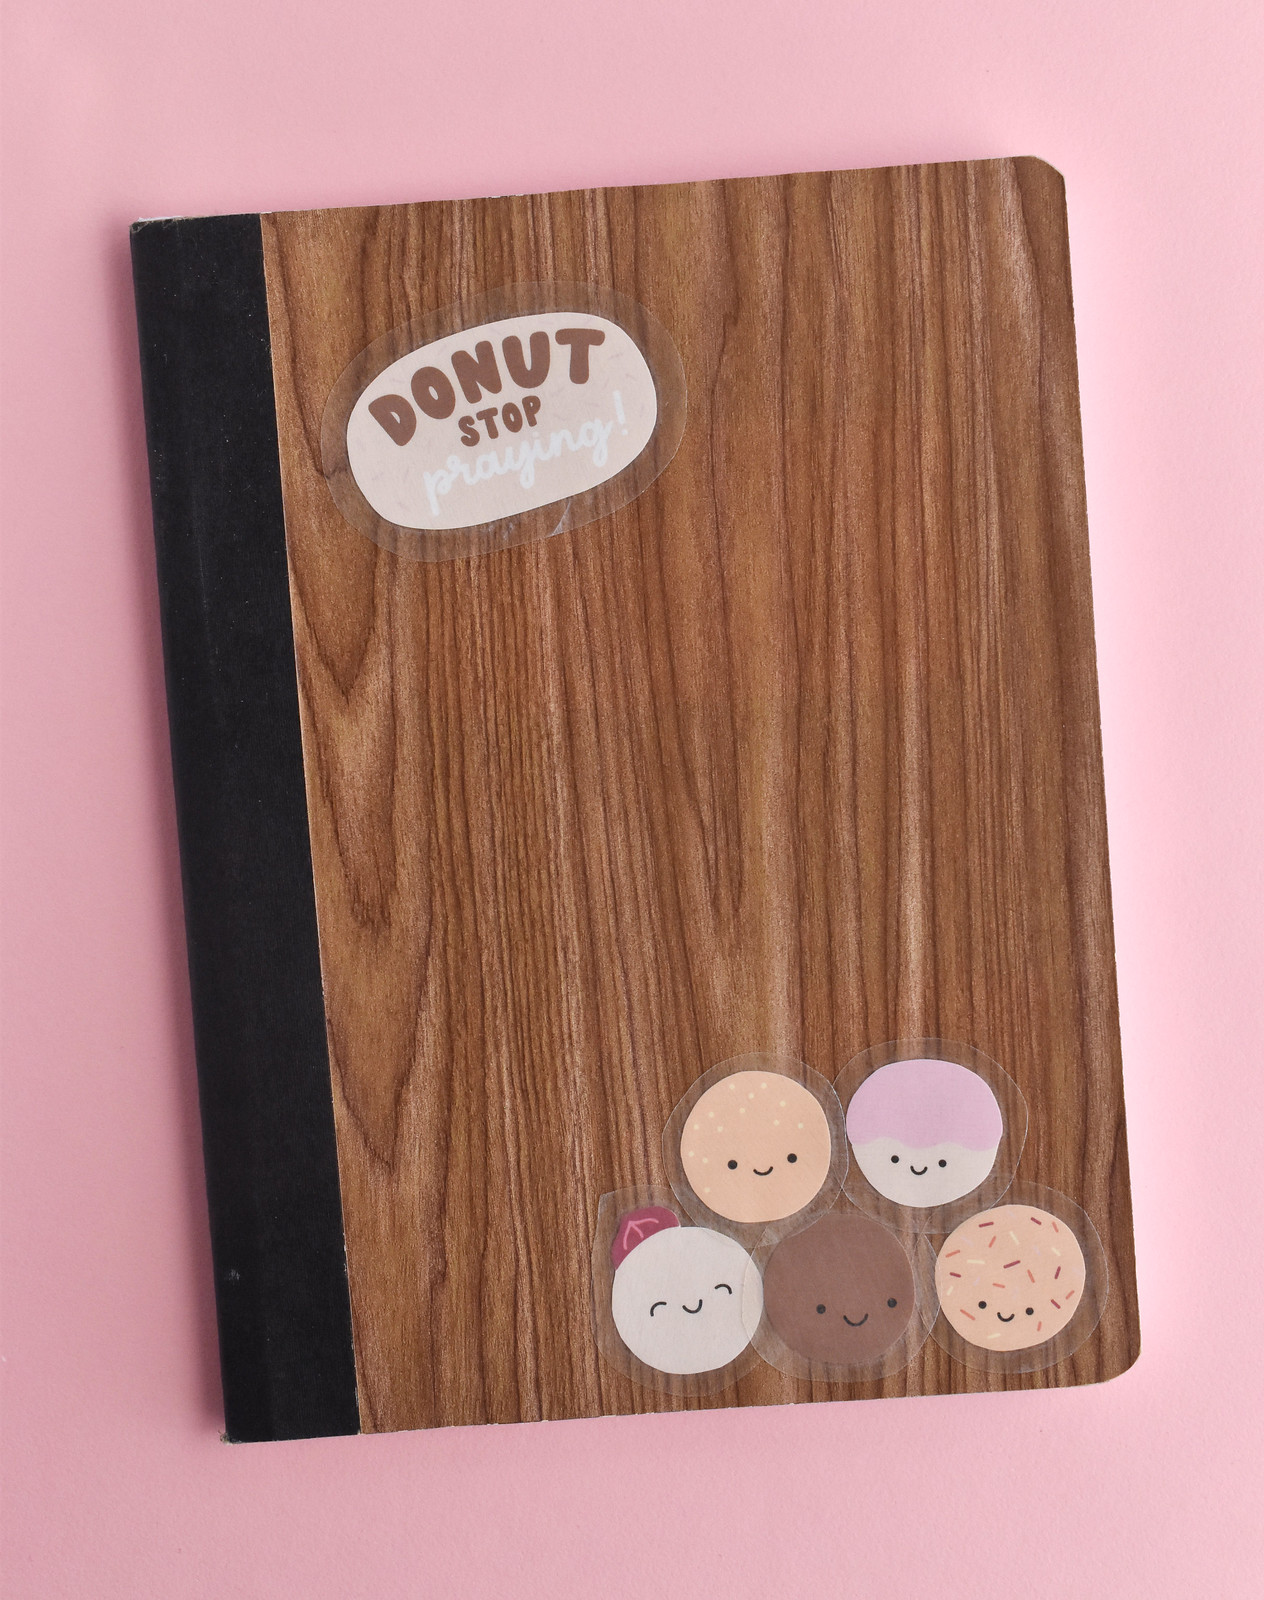
I thought that making some donut hole stickers would be fun and I also made two little reminders to share.

Cut two pieces of the shelf liner sticker film that are the same size and larger than the overall size of your sticker piece. For this, I left about 1/2 inch extra on all sides so there was plenty of room.

Peel the paper backing off of one piece of the clear shelf liner. This is one of the trickiest parts! Next, place your cut out sticker shape face down on the sticky side of the shelf liner.

Stick that down onto the second piece of sticker film that still has the paper backing attached. Be sure to stick it to the non-paper side!

Cut around the sticker shape, leaving a bit of the clear shelf liner all around. This extra part is what seals your paper piece in and holds the sticker together, so it's really important.

When you want to use your sticker, getting the backing paper off is, once again, tricky. One way to make it a little easier is to lightly score the back of the paper with a craft knife. Be careful not to cut through the sticker film! If you're giving your stickers as a gift, this is an especially helpful step so your friends don't get frustrated trying to use them.

To get a little fancier, you can peel the backing off of the cut sticker, then stick it down onto the piece of paper backing from the first piece of sticker film. As long as you stick it onto the non-printed side, you can peel it off and stick it on whatever you want!

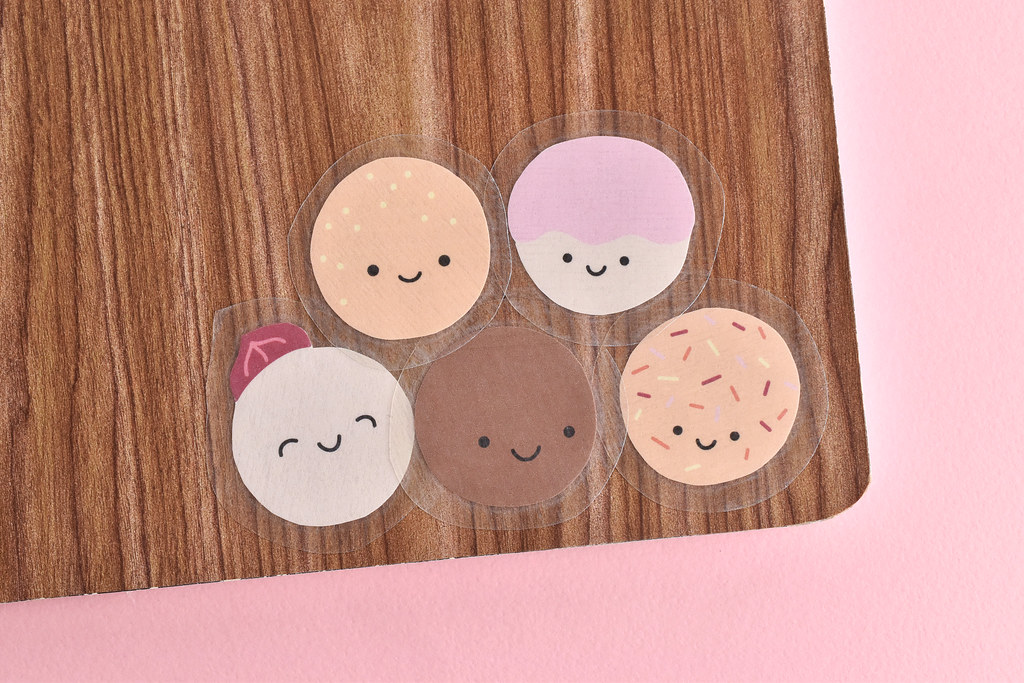
With the donut holes, I layered them up in a pile on the cover of a new notebook (which I also happened to have covered with shelf liner!).

And at the top I added one of the reminders. Always an important thing to remember!
 I probably won't feel the need to remove these stickers from my notebook, but at least I have the option. Next I think I should make some stickers of my guinea pigs...
Speaking of which, you can make stickers out of printed memes, pictures of pets, clip art (Canva, anyone?), and more. So easy and fun!
After a bit of time, it does turn yellow.
ReplyDeleteThat is true! In fact, if you look closely, this older paper has yellowed a bit already. Since I'm making these to be removable, I'm okay with that. If folks want to make something that will last for year or be acid-free, this wouldn't be the best option.
Delete