


I started this year with the hope of making old things new. Picking up long-forgotten projects and giving them new life or using old things in new ways has been the plan. The other thing I wanted to try was to take a vintage pattern or tutorial and make it in a new way. That's what today's project is.
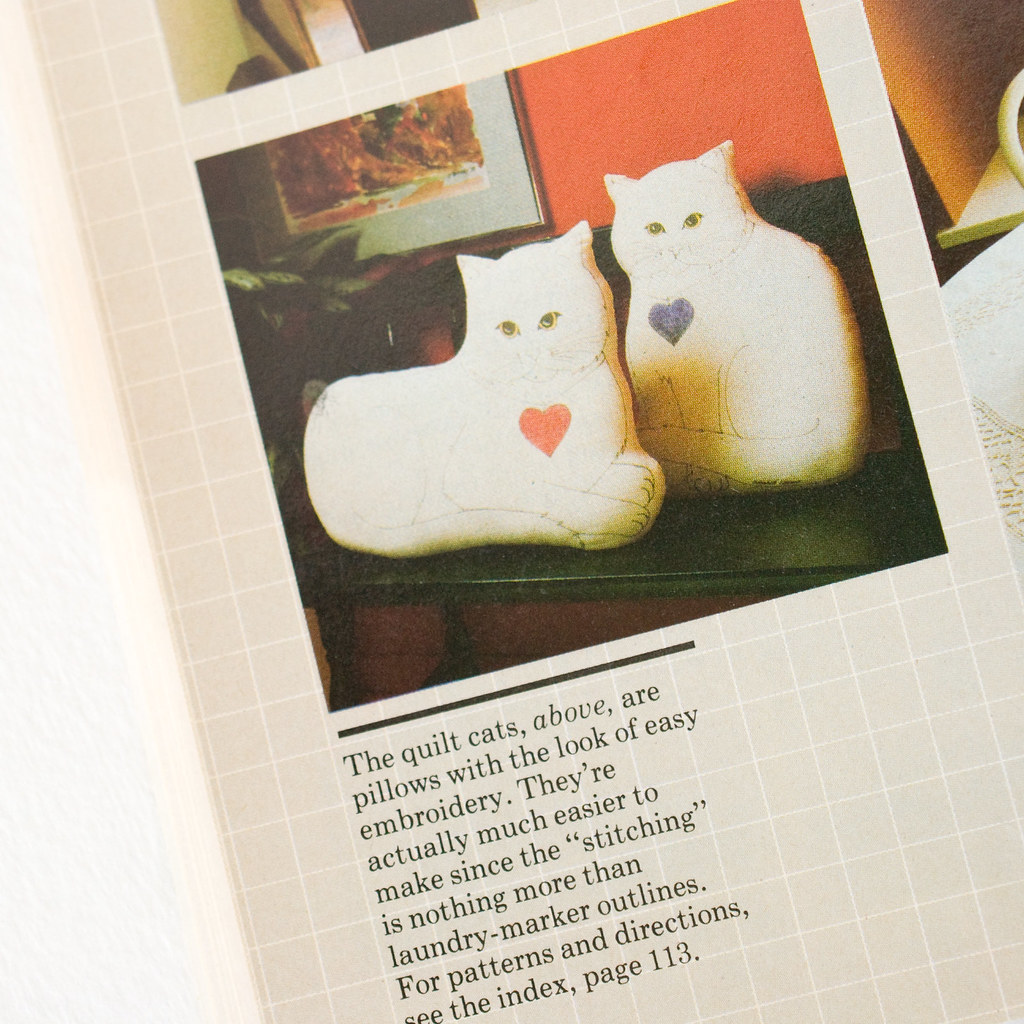
Months ago, I saw these kitty pillows in a craft magazine from the 80s.
I sketched out an idea for how I might make them cuter, and the sketch has just sat there waiting. Until I went to Disney World and saw a mural that got me thinking about a pattern that might work for my kitty pillow. Long story short, even this old idea that was getting new life, now became an even newer idea than I planned.
I love that.
Anyway, the original idea had these cats drawn on the fabric with a laundry marker so that you don't have to embroider. Whatever. We're stitchy people! We stitch! (That said, feel free to draw or paint your pattern on the fabric if you want.) And if you aren't up for a stand-up kitty, the embroidery pattern will work for any sort of embroidery.
You will need:
Fabric to embroider and for the base
Fabric for the back
Fabric for the weighted insert
Embroidery floss
Rice
Stuffing
Basic sewing and embroidery supplies
Kitty Stand Up Plush Pattern PDF
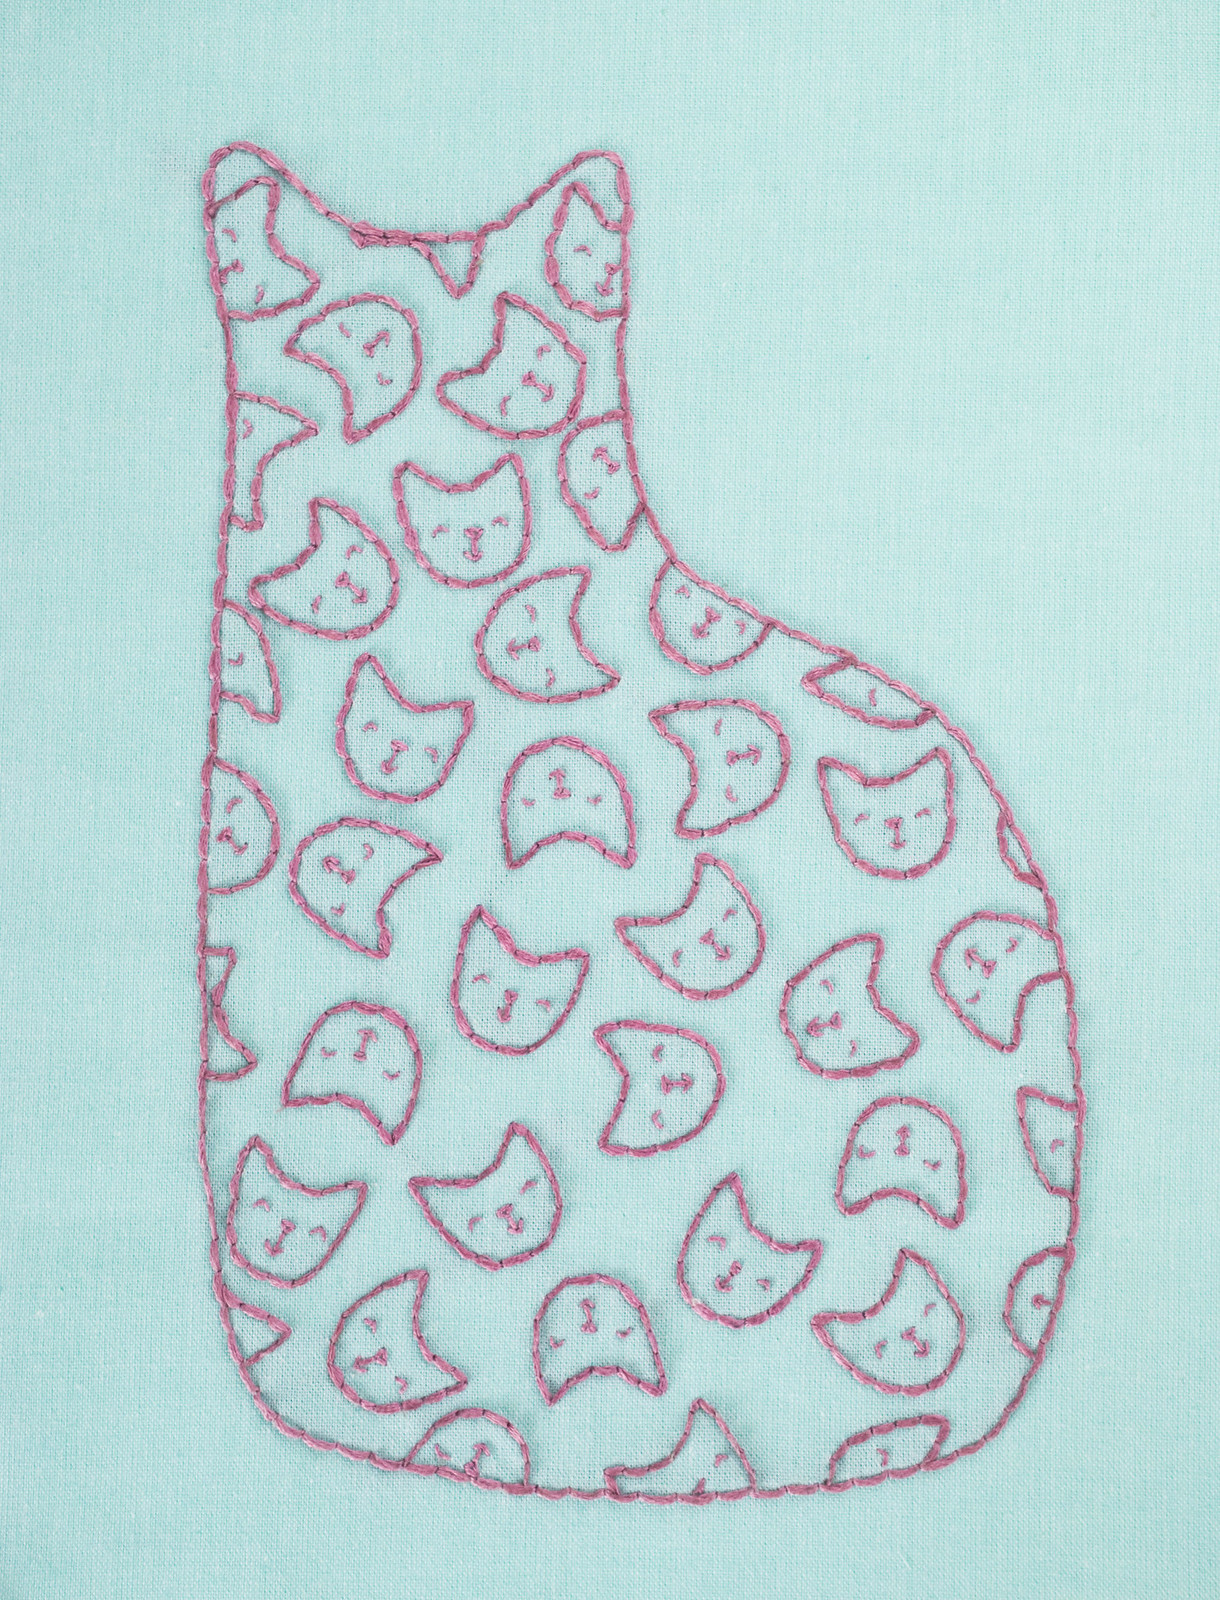
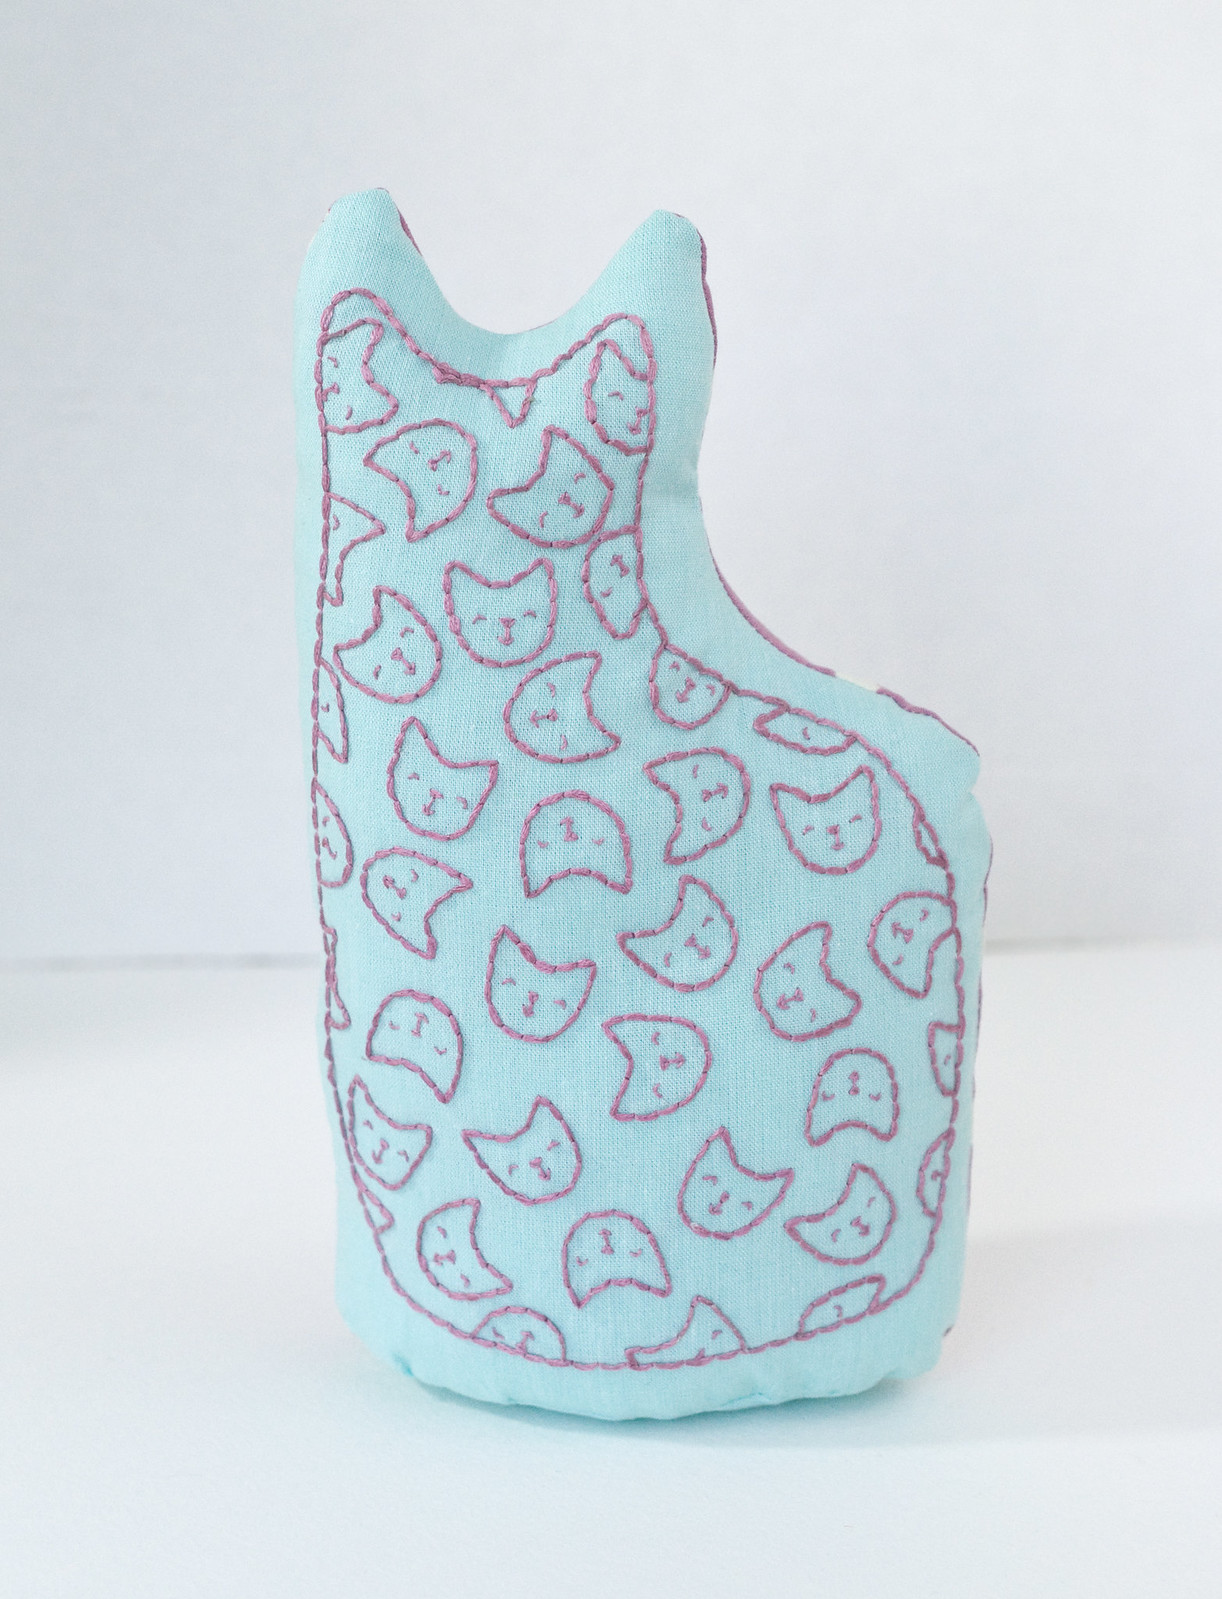
First, embroider the kitty design onto the fabric for the front. I stitched the main outline and the face outlines with six strands of floss. For the face details I used two strands.
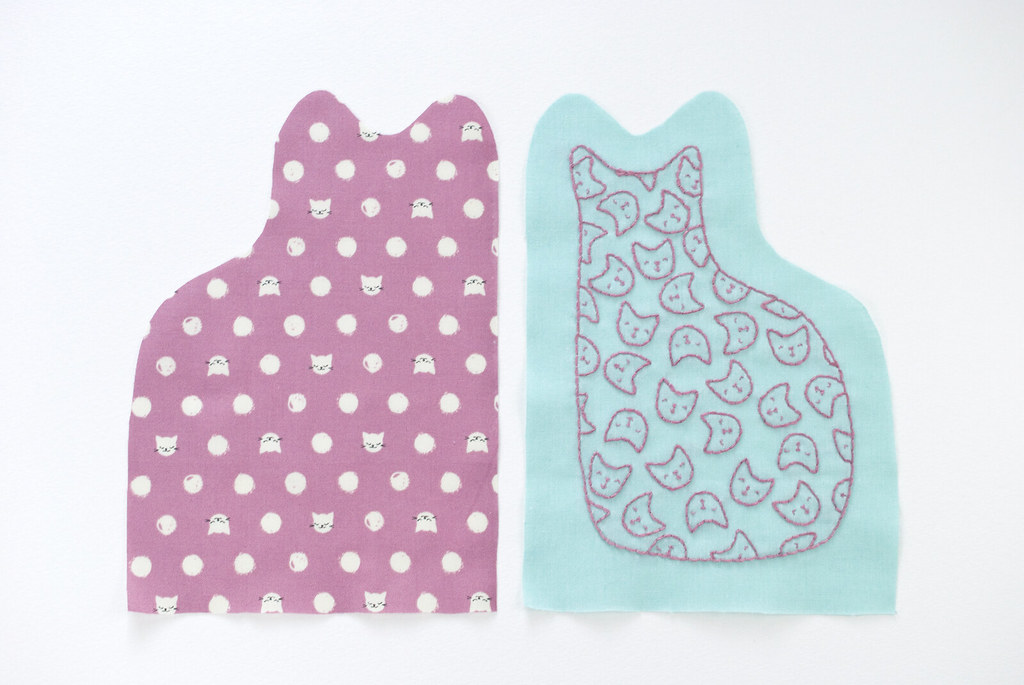
Use the kitty pattern template to cut around the embroidery, centering it within the template shape. Flip the pattern piece over and cut the back piece from your other fabric.
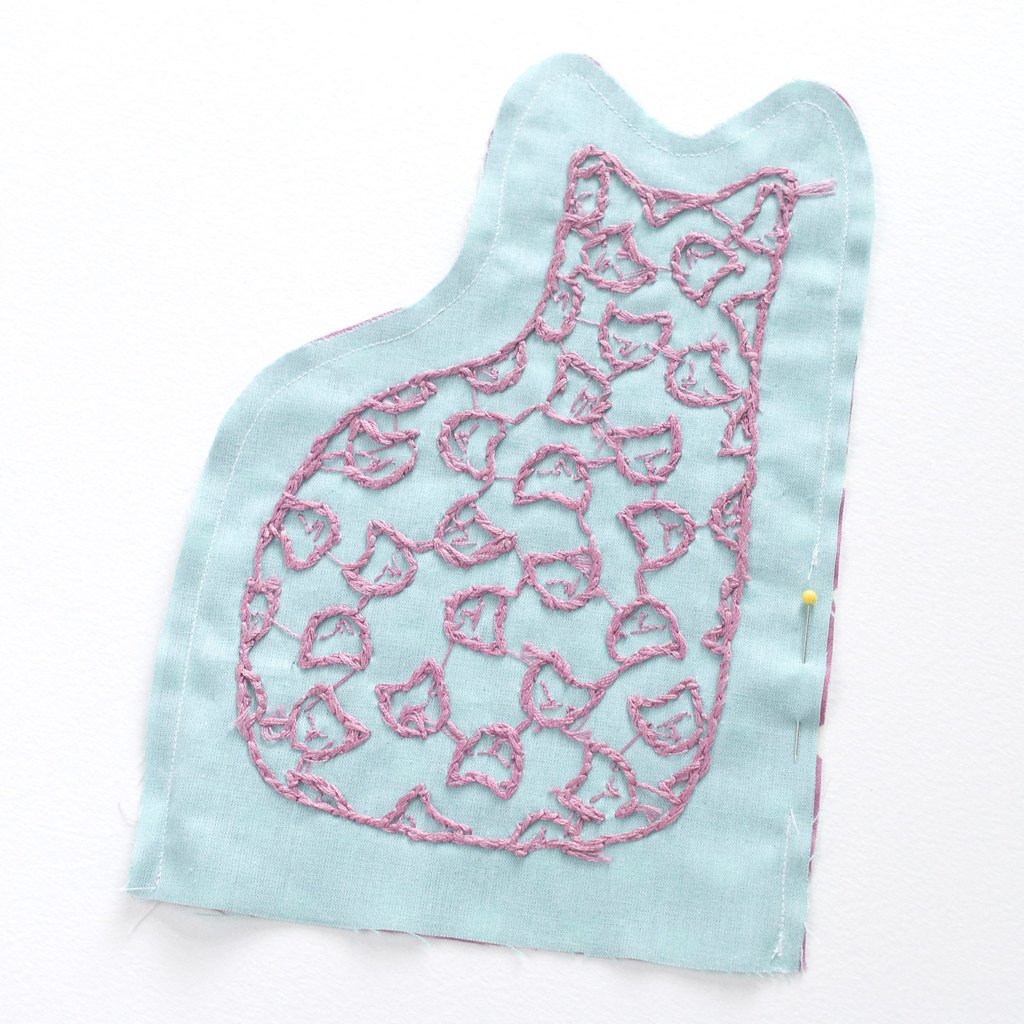
Pin the two pieces right sides together. On the longest side, sew about an inch from the bottom edge and leave a gap of 2-1/2" (where you see the pin above). Now, sew around the rest of the kitty until you get to the other side. Stop at the bottom edge. Leave the entire bottom open.
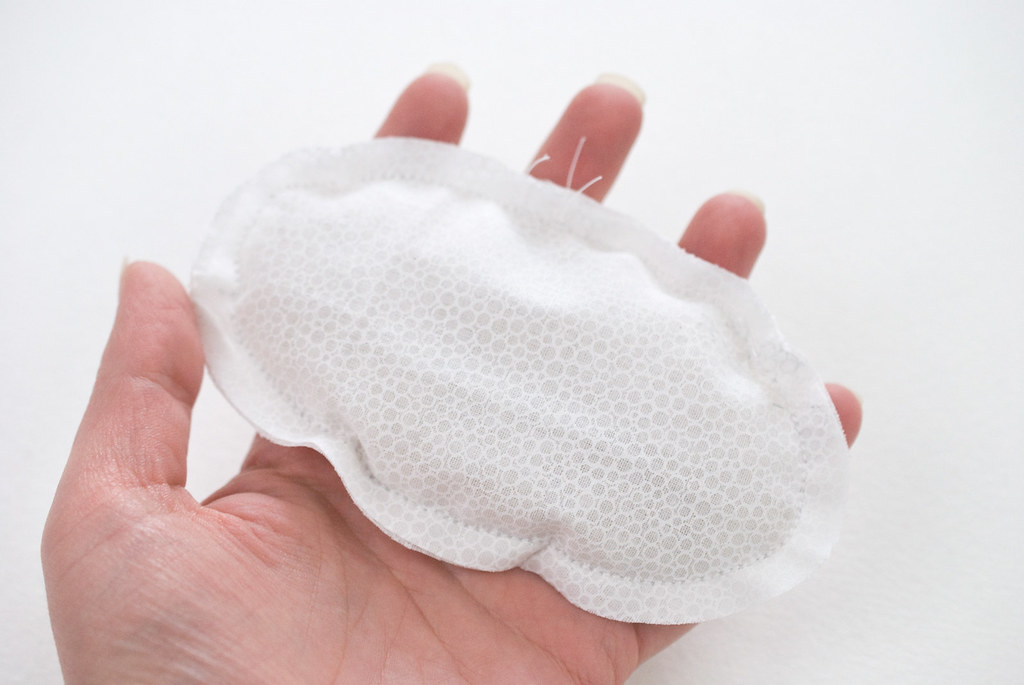
Cut two pieces of fabric with the oval template. These can be any fabric that is the same or lighter than your main fabrics (you don't want them to show through!).
Sew around the oval and leave an opening. Fill the shape with rice and sew the opening closed. There's no need to turn this, as it will be tucked away inside the base for weight.

Cut an oval piece for the base and pin it into the bottom opening. Sew around the entire oval. This is easier if you sew it by hand, but it works on a sewing machine too.
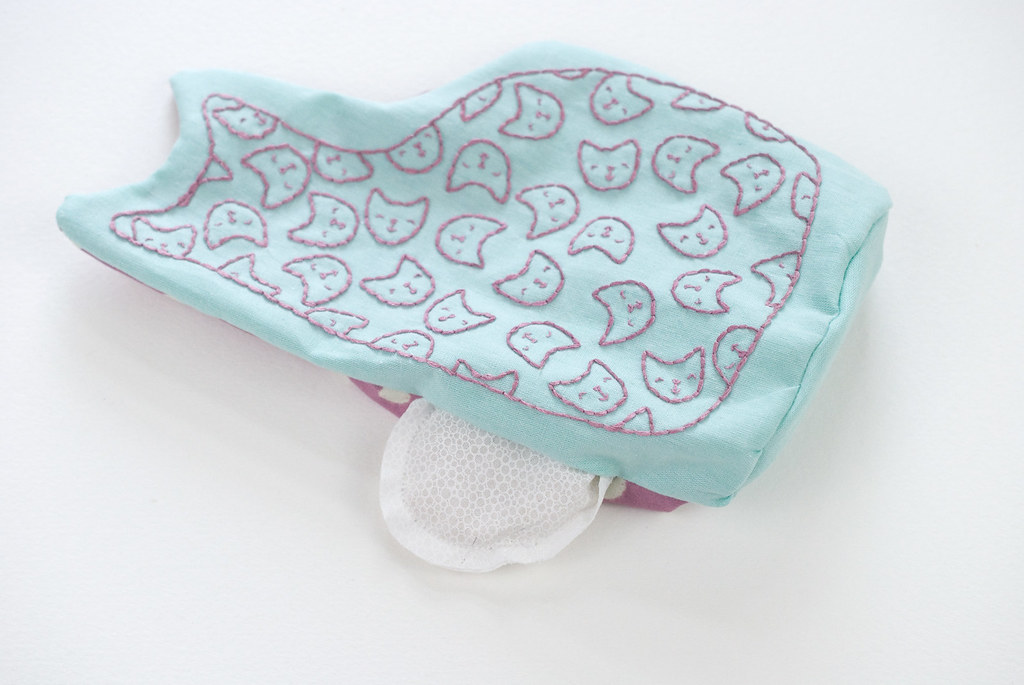
Clip the curves, then turn the kitty right side out through the gap in the side. Tuck the rice-filled weight through the gap and situate it at the base of the kitty.
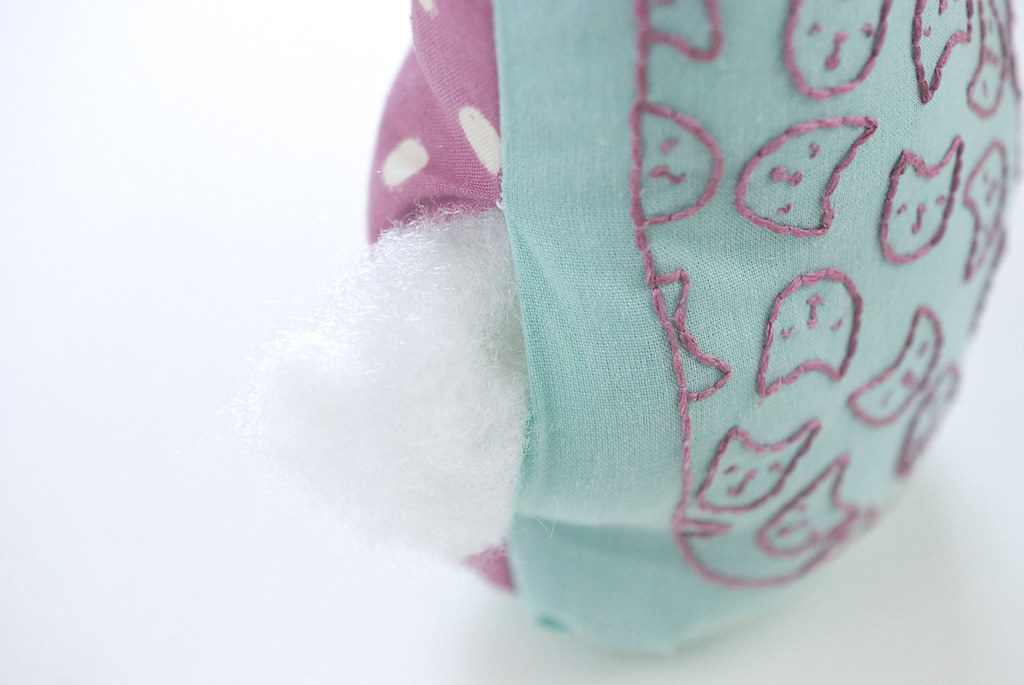
Fill the entire shape with stuffing, starting at the ears. Use small amounts to prevent lumpiness.
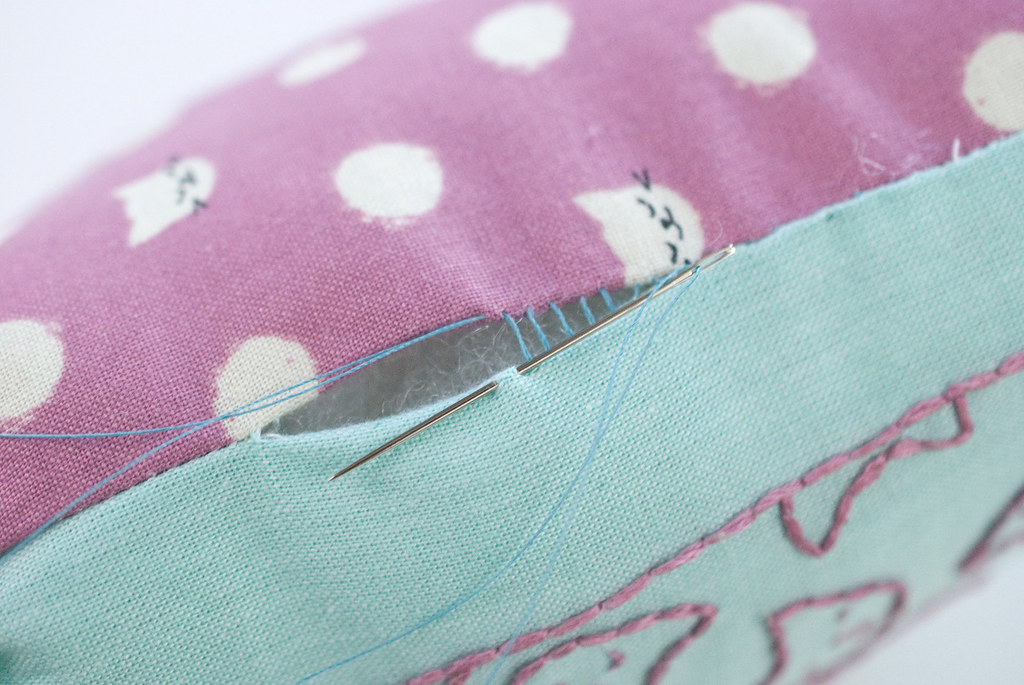
Stitch the gap closed with ladder stitch and hide the knots.

The weighted bottom will keep your kitty standing up, which is different than the original project that inspired this. Of course, you could skip the oval insert in the bottom and just make this a pillow.
But I like the idea of this sitting and watching. Much like my own kitty likes to do!
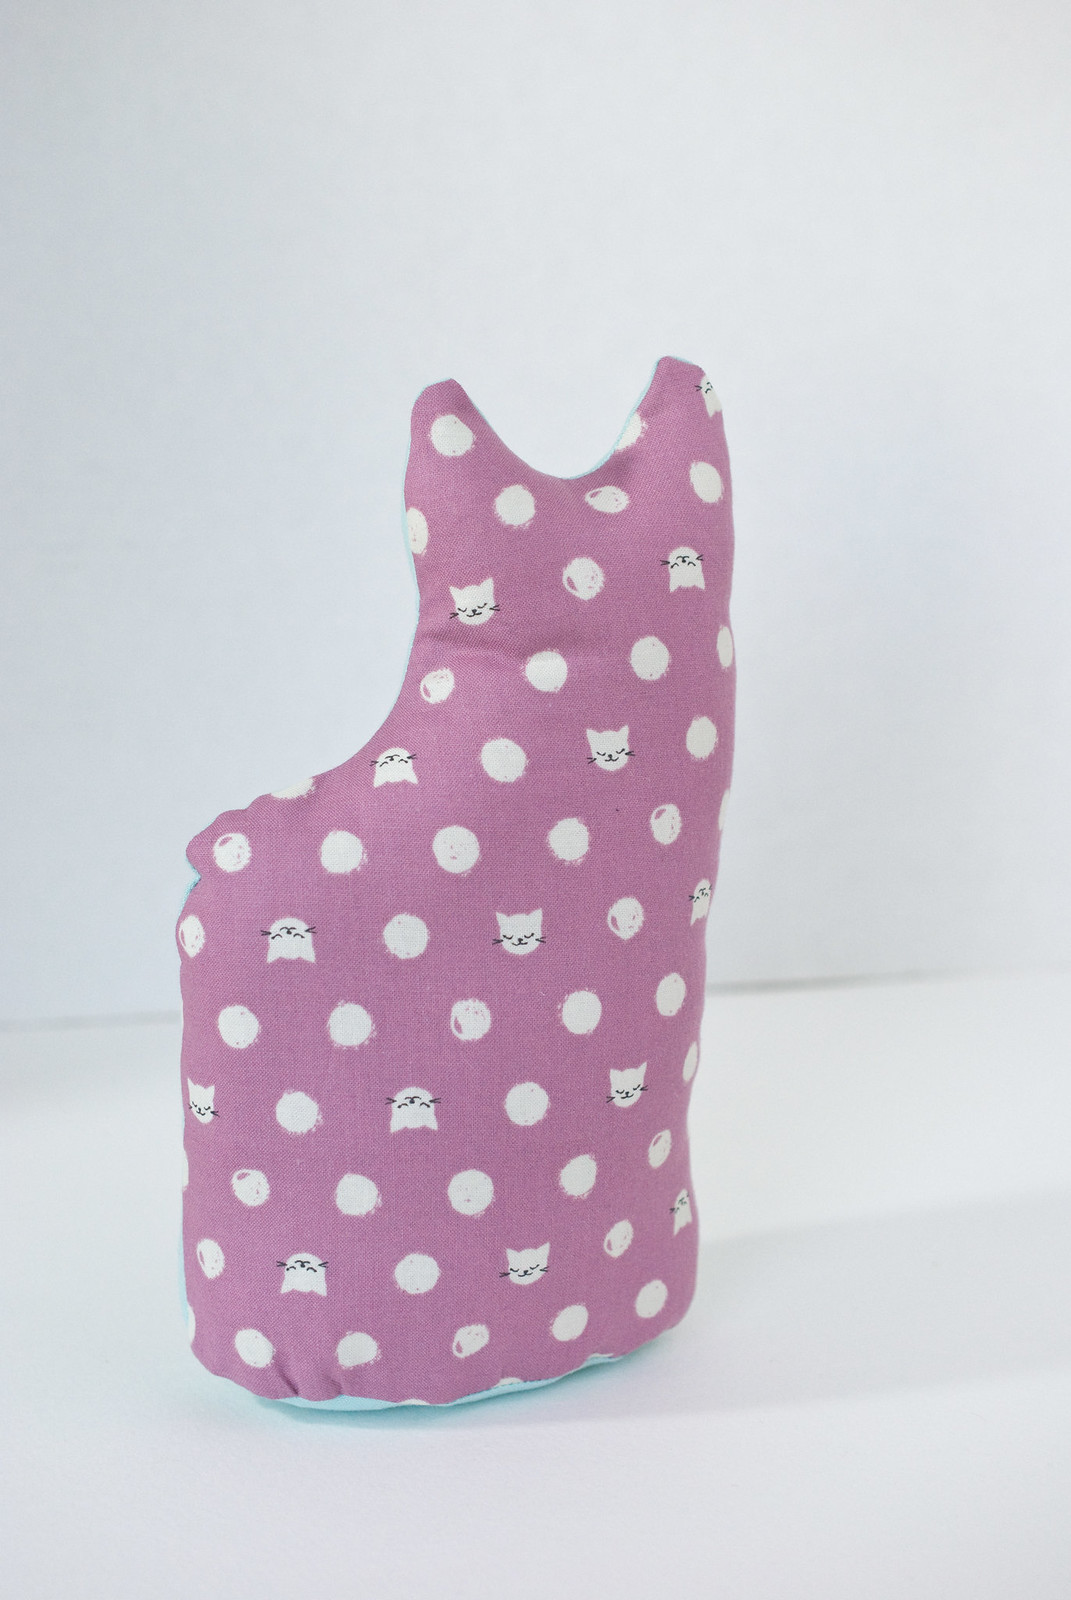
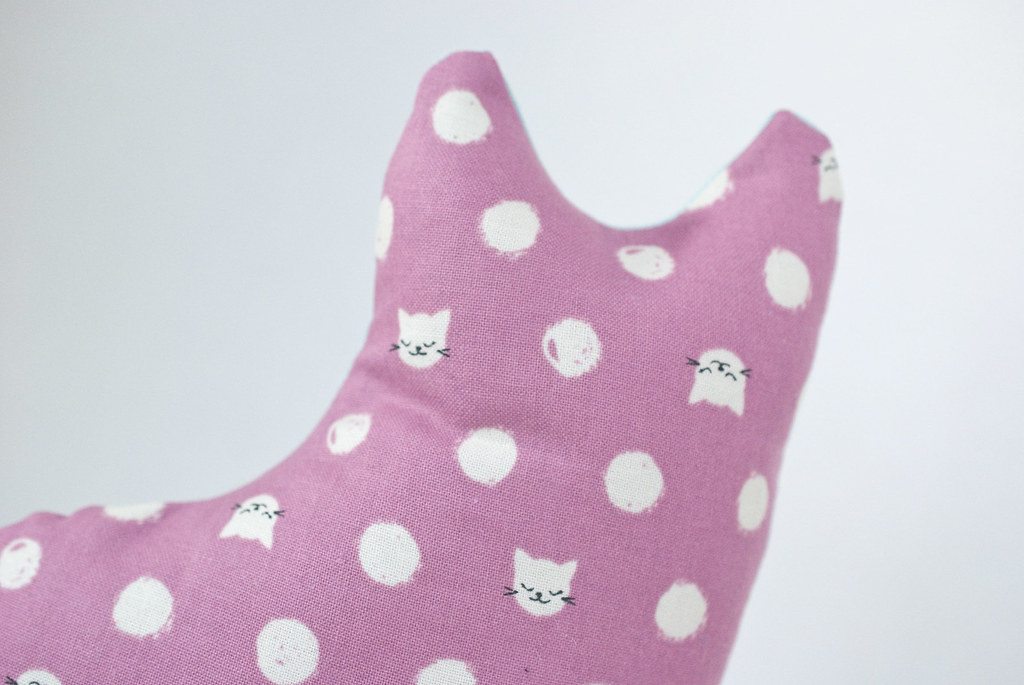
And this was a perfect place to use my Cotton + Steel polka dot kitties. Right? The front is a cat filled with cat faces, and so is the back!
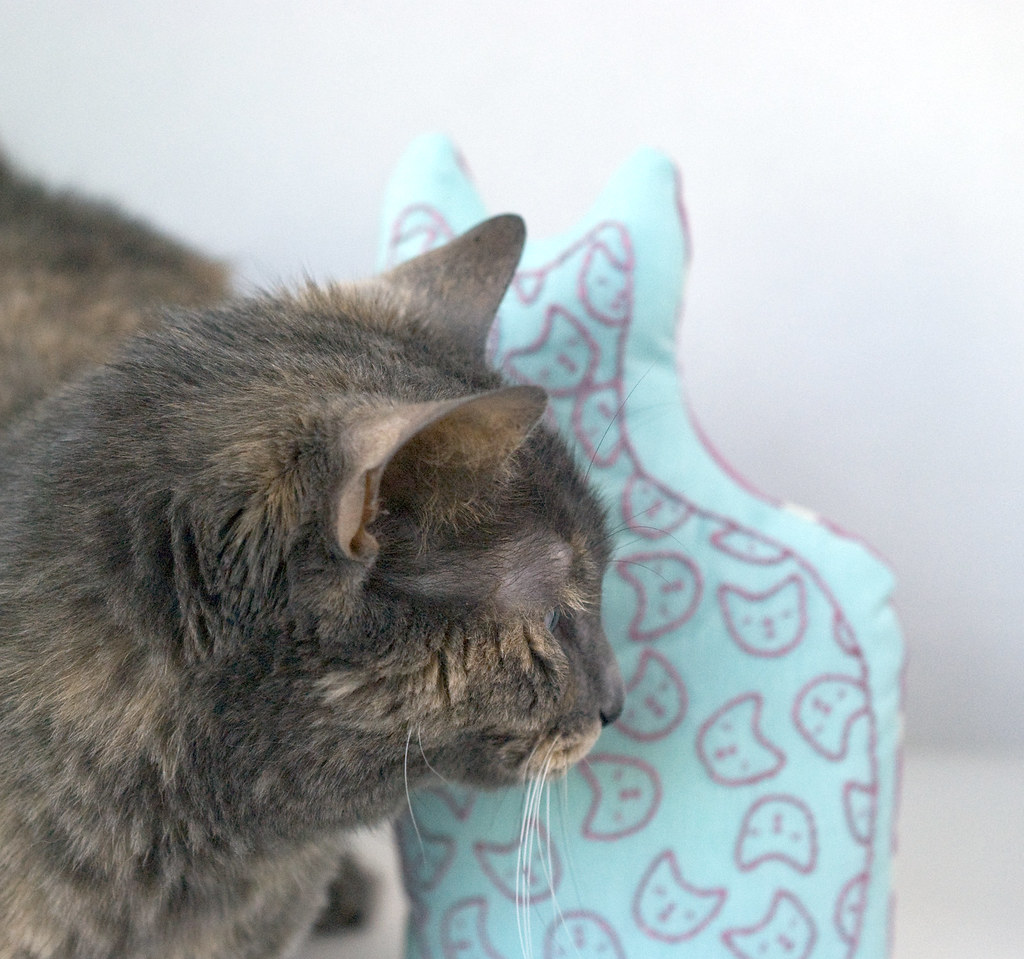
As I mentioned, Darcy Cat likes to sit just like this stand-up plush. Like, a lot. But do you think she would do that for a photo? No, of course not. I got one picture before she bolted out of here.
That's okay. My embroidered kitty stuck around!
Happy Stitching!
Thank you for the pattern! How pretty! -Marci @ Stone Cottage Adventures
ReplyDeleteCrazy cute! What more can I say?!
ReplyDeleteThis is SO cute!!! Love it :)
ReplyDeleteBlessings,
Edye | Http://gracefulcoffee.wordpress.com
Adorable kitty! Love your color combination. Thank you for the tutorial!
ReplyDeleteThat's a tortie for you! I love them. Darcy Cat is adorable. Cute project, too! :)
ReplyDeleteThank you so much! It is so cute. I'm thinking I might make one for my guild's auction!
ReplyDeleteThis is DARLING. I love it. Pinning and remembering for gift time!
ReplyDeleteSo cute, love some of old patterns made new..Thank you
ReplyDeleteI think this would be cute as a t-shirt decoration too.
ReplyDelete