


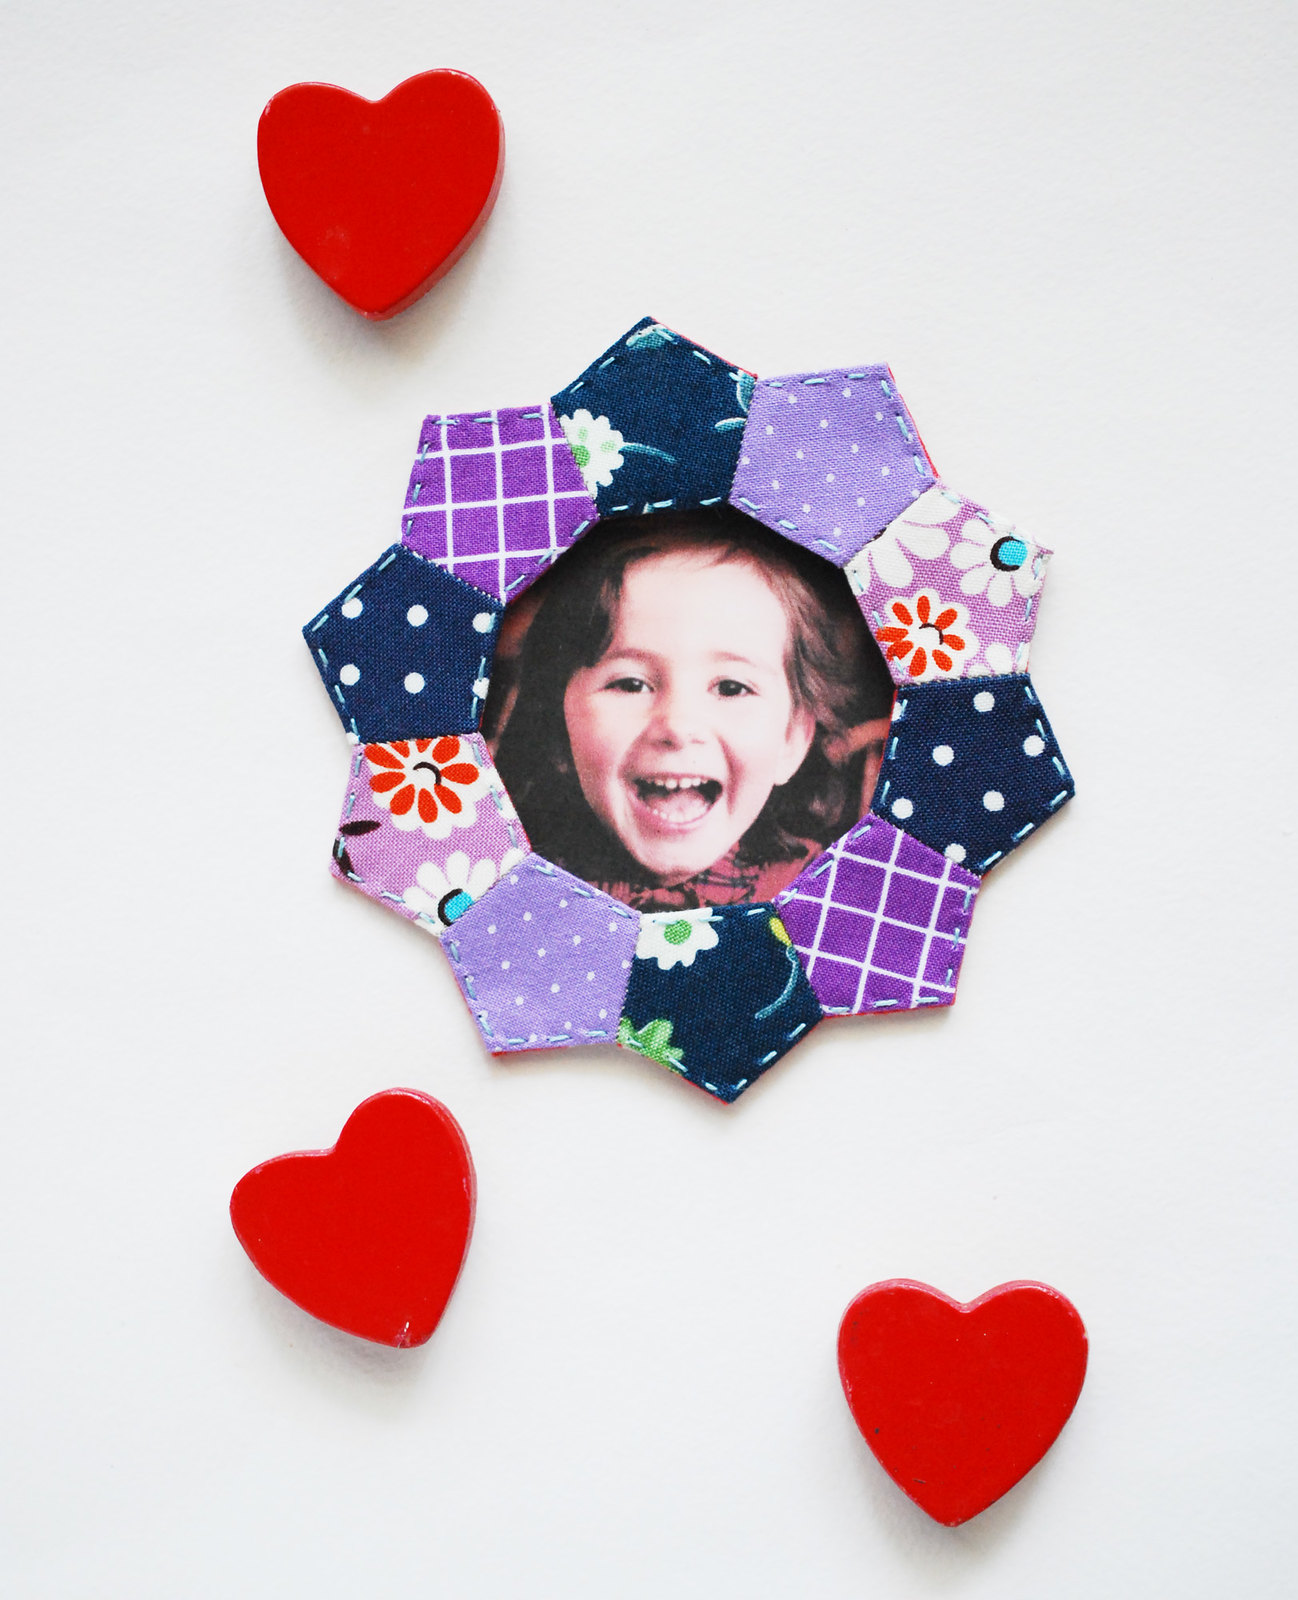

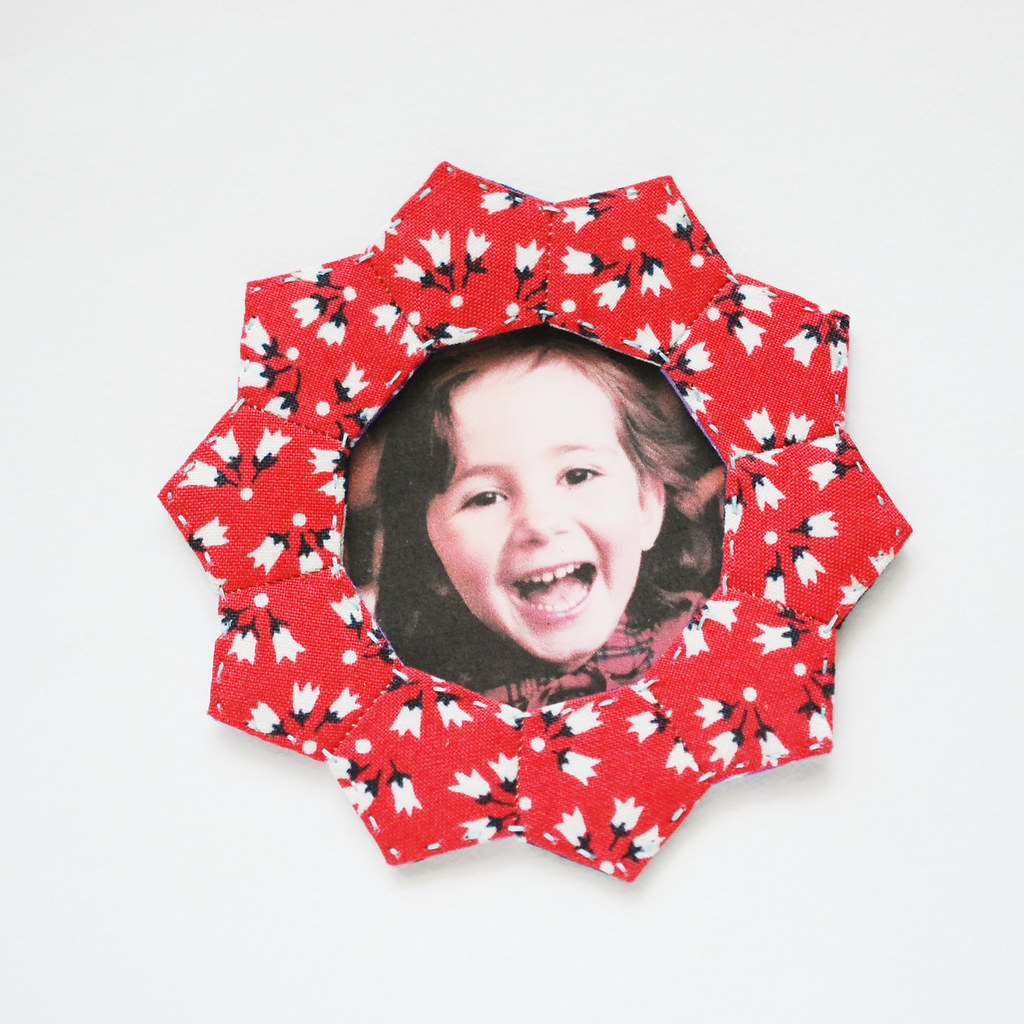
Back in January I made a mug rug that has become one of my favorite things I've made. I say that a lot, but I'm completely sincere. The quilted mat featured a circle formed out of pentagons, and since May is pentagon month, I thought I would bring back that ring of shapes.
Instead of stitching them onto something else, this time I looked for a way to use the pentagon circle on its own. And it occurred to me that the circle in the middle would make a nice frame. There are probably plenty of ways to make this shape into a frame, but I went for something magnetic.
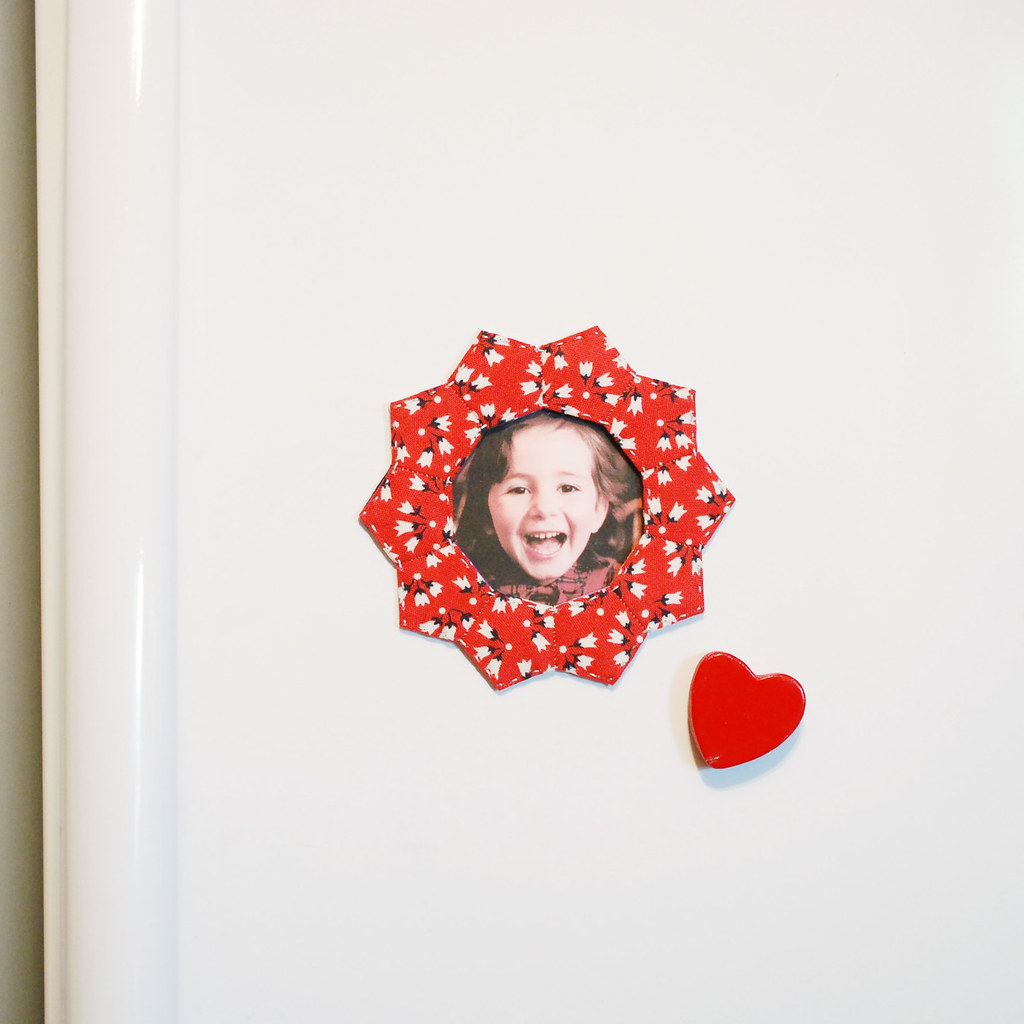
And it's also reversible! The magnets are hidden between the layers so you can easily flip it over to better suit your decor, the picture in the middle, or even your mood for the day. It's perfect for on a refrigerator, a file cabinet, or anything else magnetic.
Little Mollie (in the frame!) and grown-up Mollie like both sides of this one!

You will need:
Fabric scraps (use as many or as few fabrics as you want!)
4 Strong, thin magnets (I used 1/16" thick neodymium disc magnets)
Thread
Embroidery floss
Scissors
Glue stick (optional)
Needle
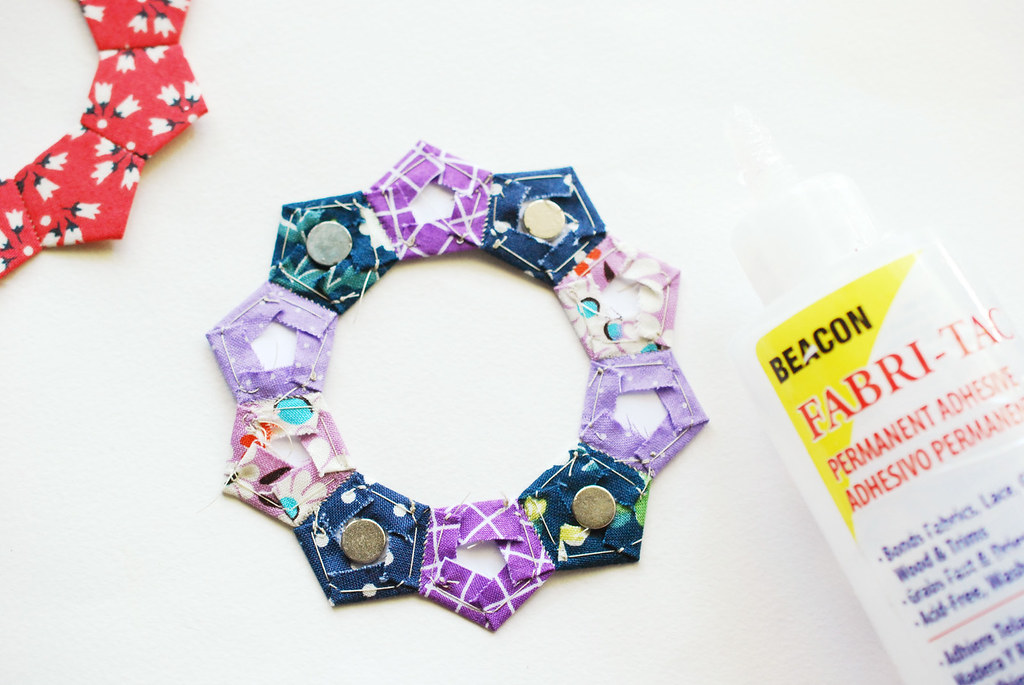
Craft glue (I used Fabri-tac, simply because it was around and easy)
Card stock
Pentagon Templates PDF
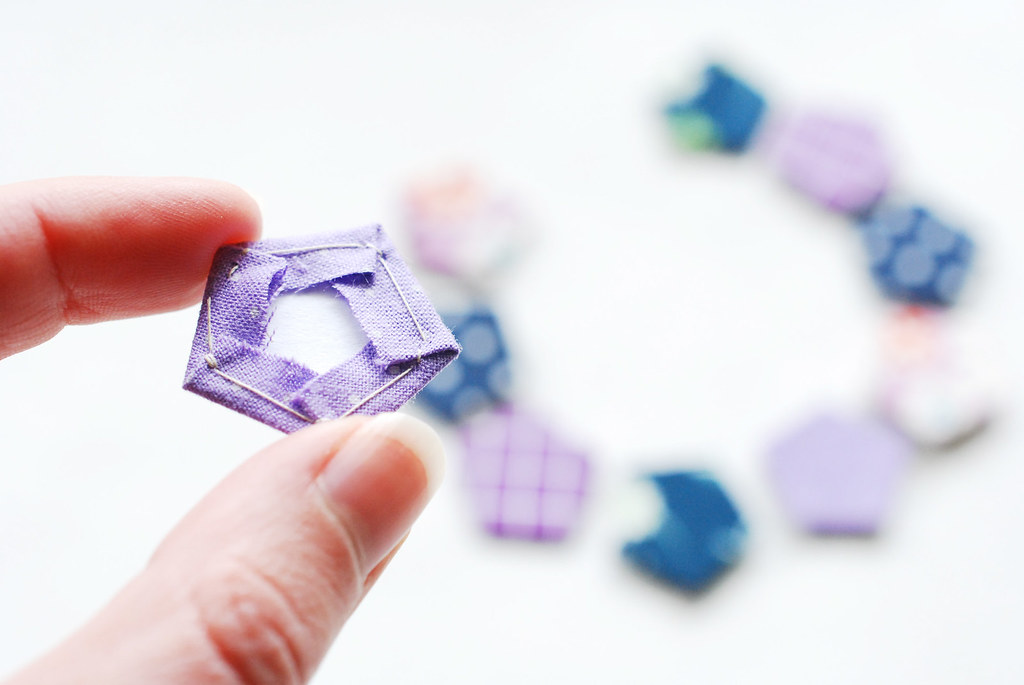
Print the templates onto the card stock, then cut out the pieces. You will need all 20 pentagons.
Each ring consists of 10 pentagons, so use basic EPP methods to baste them. I use a dab of glue stick to hold the template to the fabric, trim around with 1/4" seam allowance (sometimes a little larger), then tack the corners with a stitch or two.
My first ring is a mix of fabrics, while the second ring is all one fabric. You could also do both sides the same!
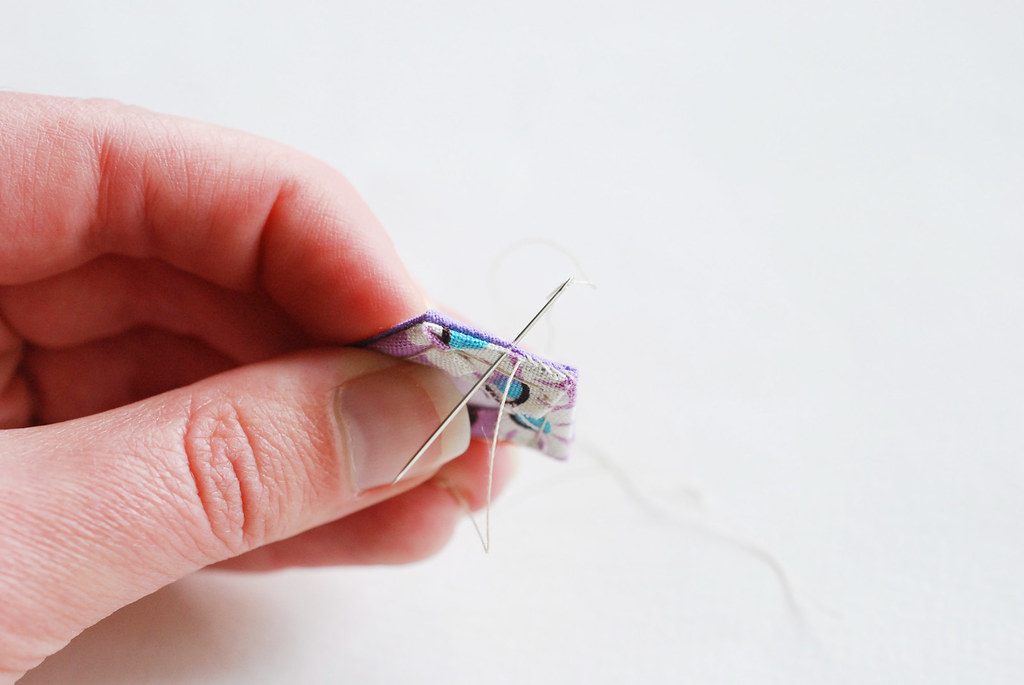
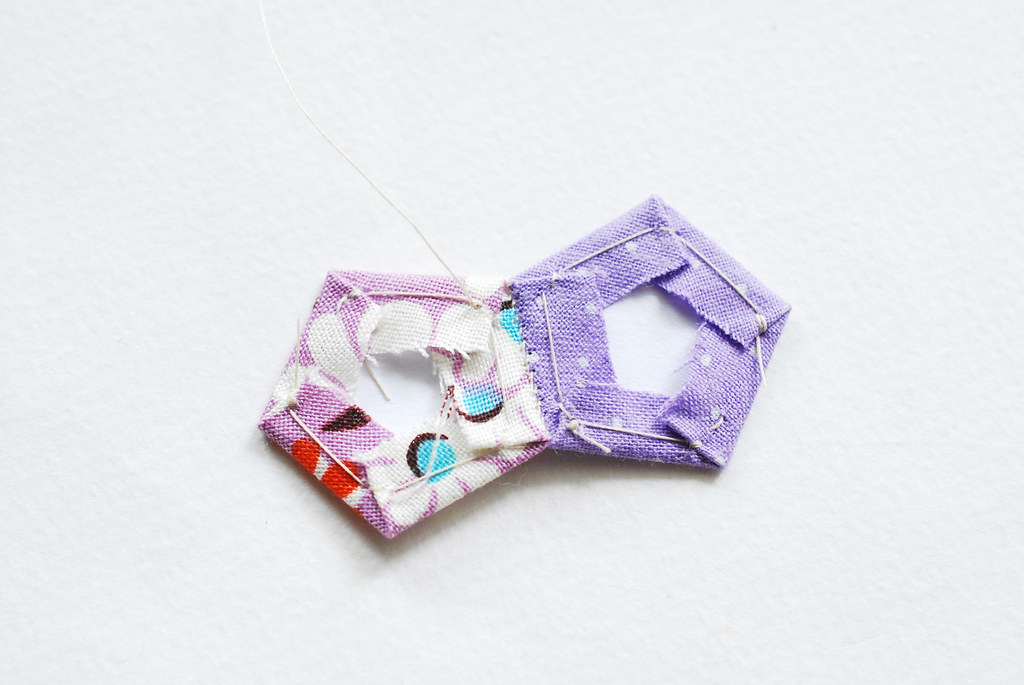
Join the pentagons. Hold two pieces right sides together and stitch one side, catching just a tiny bit of fabric.
To prevent the tails of thread from the knots from showing, I anchor the knot in from the edge a bit. Look closely at the photo above and you'll see the knots near the seam.
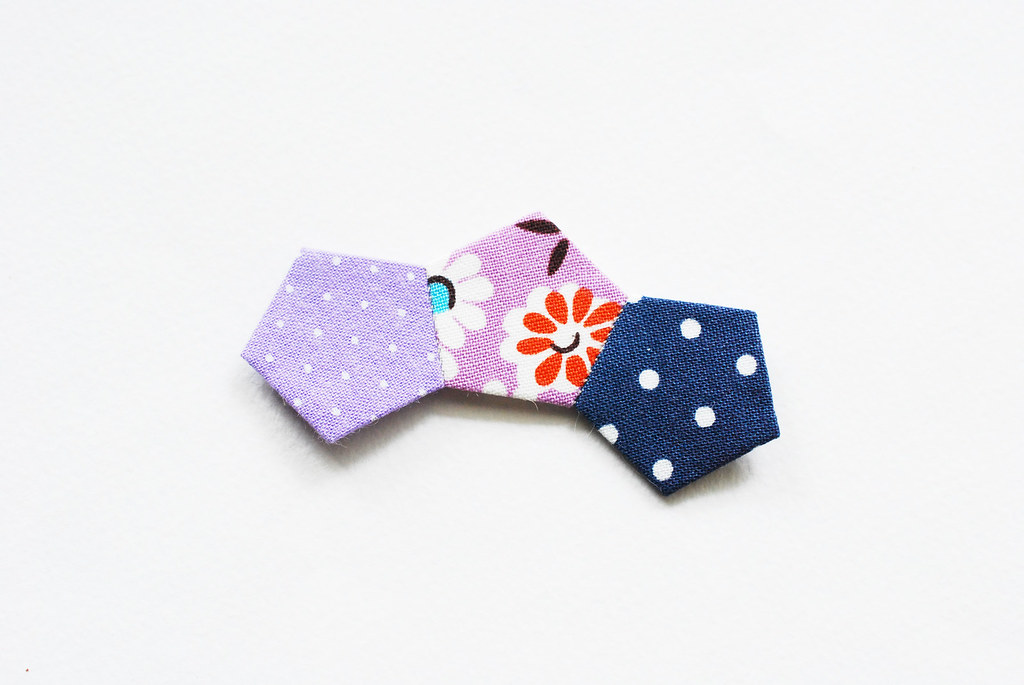
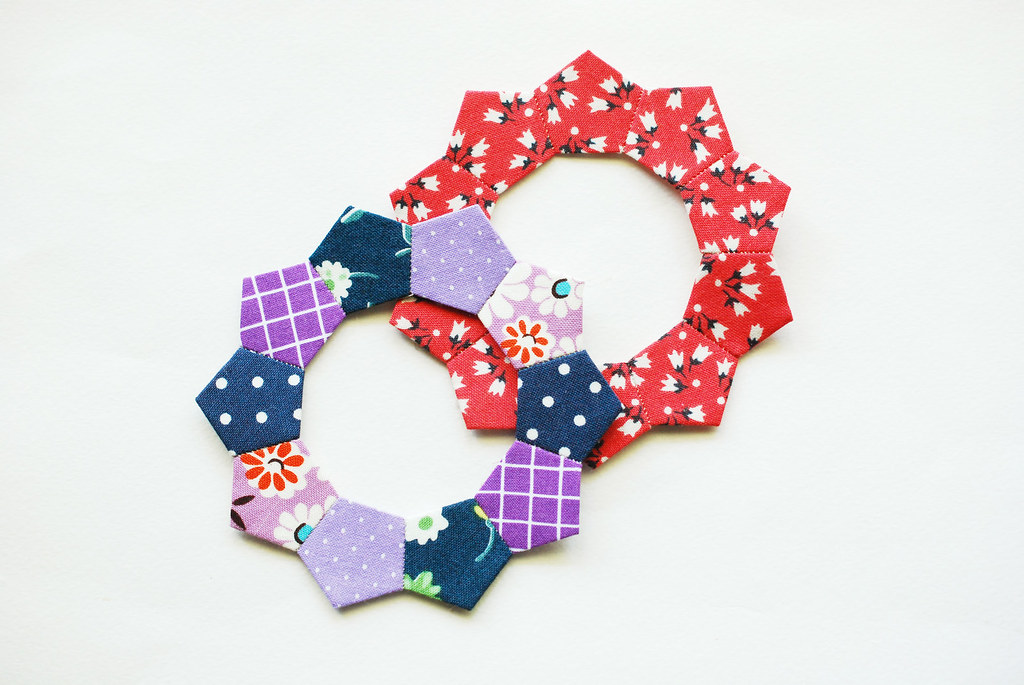
Continue adding pentagons on so that they form a ring. When you've completed the first ring, make another!
This is important: Leave the templates in the rings!
Use a tiny bit of glue to attach the magnets so they are semi-evenly spaced on the ring. The glue doesn't need to hold them long term, because they shouldn't go anywhere once this is sewn together, but you don't want them shifting as you finish up your frame.
You can also use a few dabs of glue to help hold the two layers together.
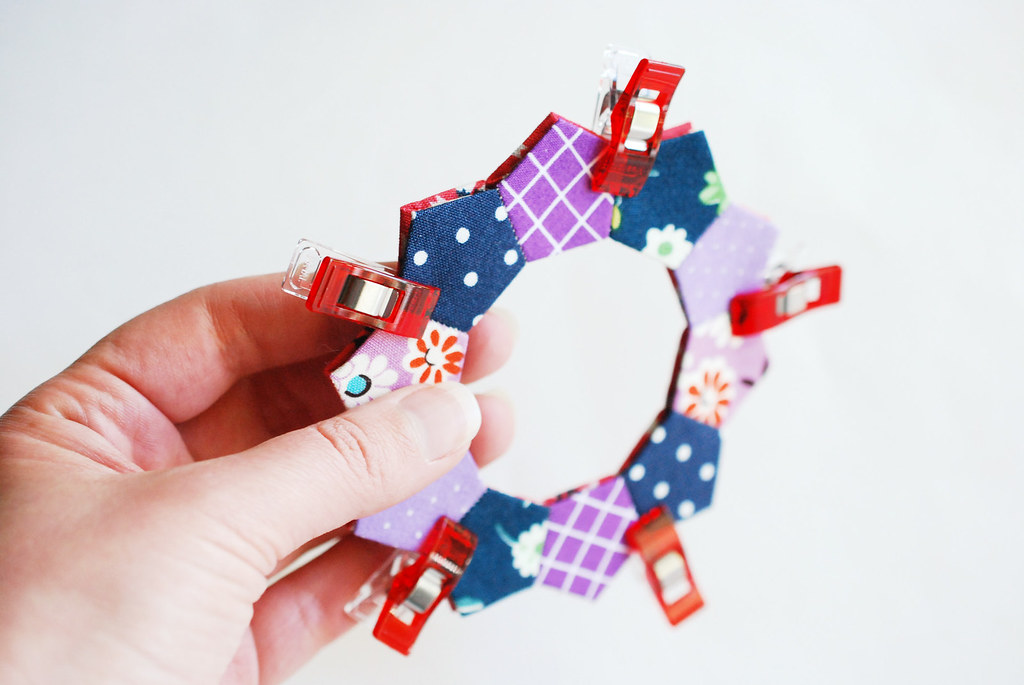
Of course, Wonder Clips are also your friend! Place the two rings wrong sides together.
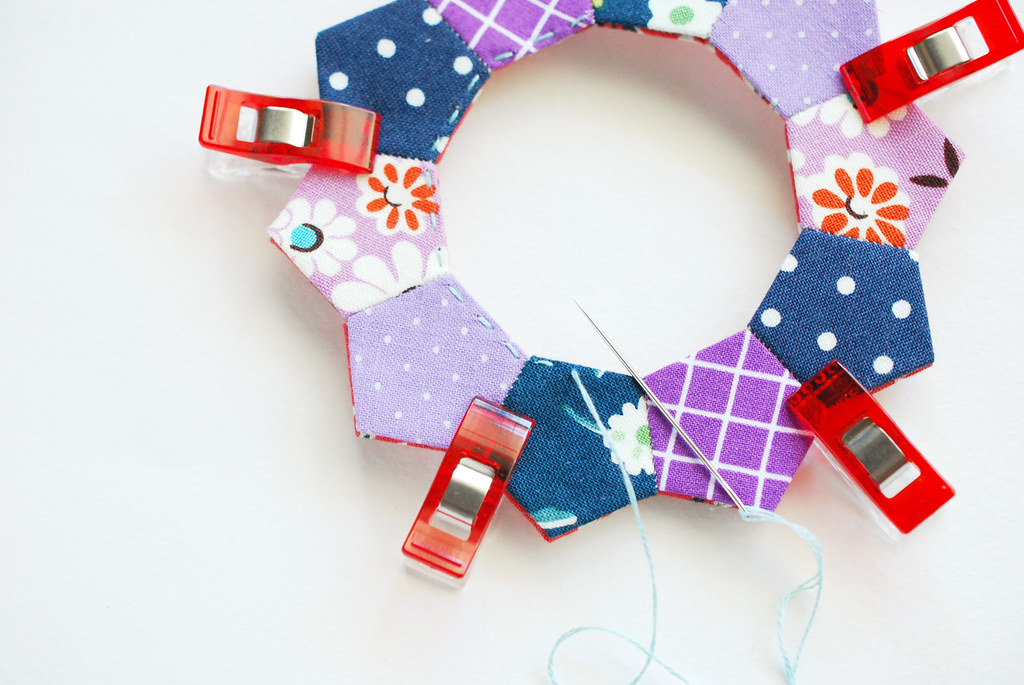
Using two strands and a large, sharp needle, stitch through the layers with running stitch. You're going through the fabric and the card stock templates, so it takes a little effort, but it shouldn't be too difficult if you have a strong needle.
Stitch around the center circle, and the points around the outside.
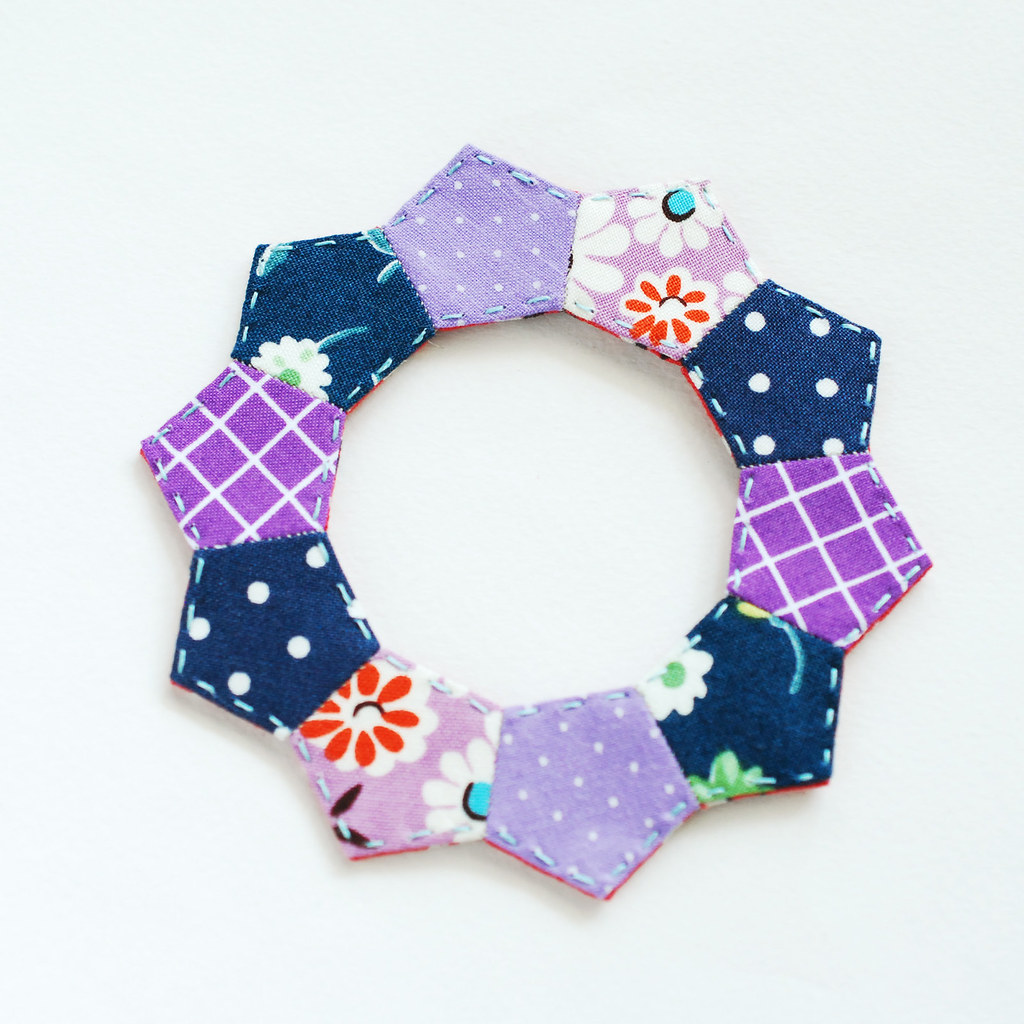

Try to keep your stitches as even as possible, and be sure to hide your knots between the layers. That way it looks pretty from both sides!

To use your frame (or to gift it to someone with a little photo enclosed), trim the photo to a circle, or just round the corners so it will fit completely behind the frame.
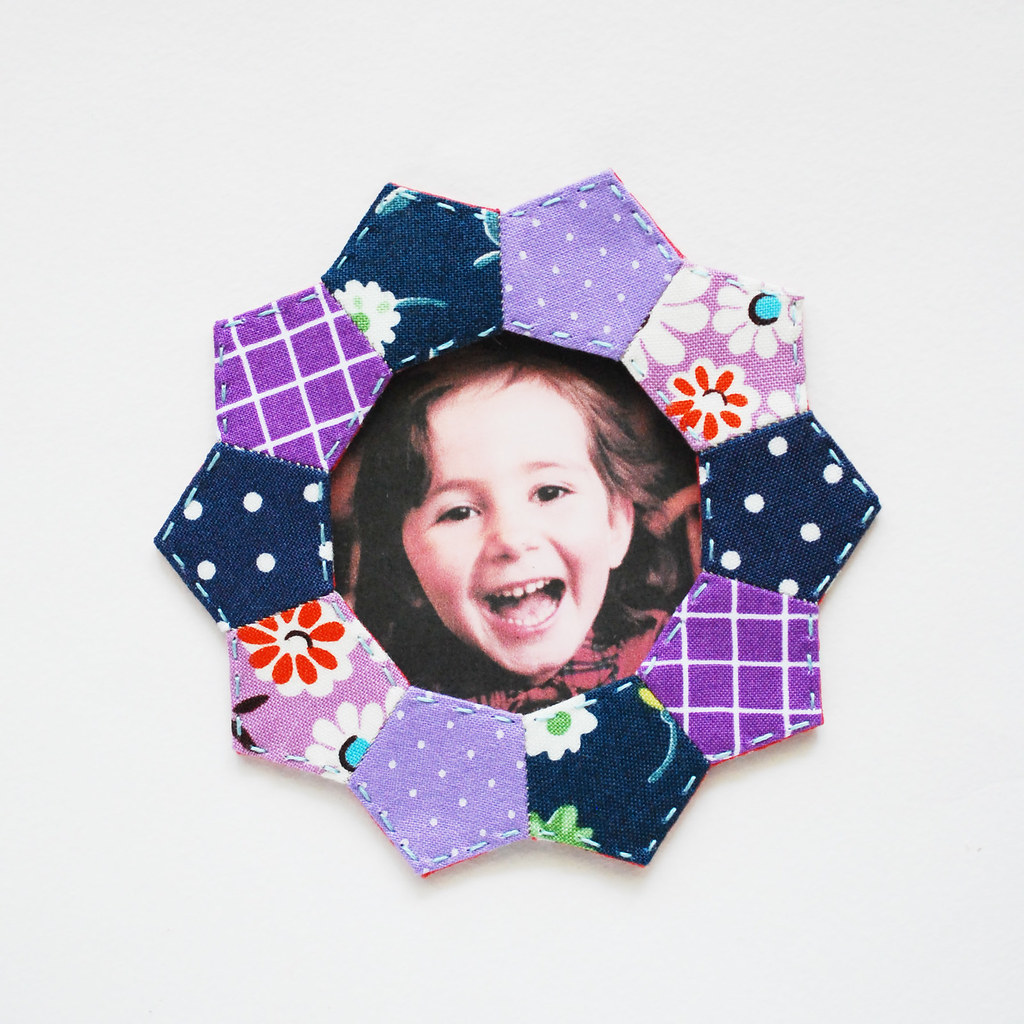
You'll hardly be able to resist a big smile when you put this frame to use!
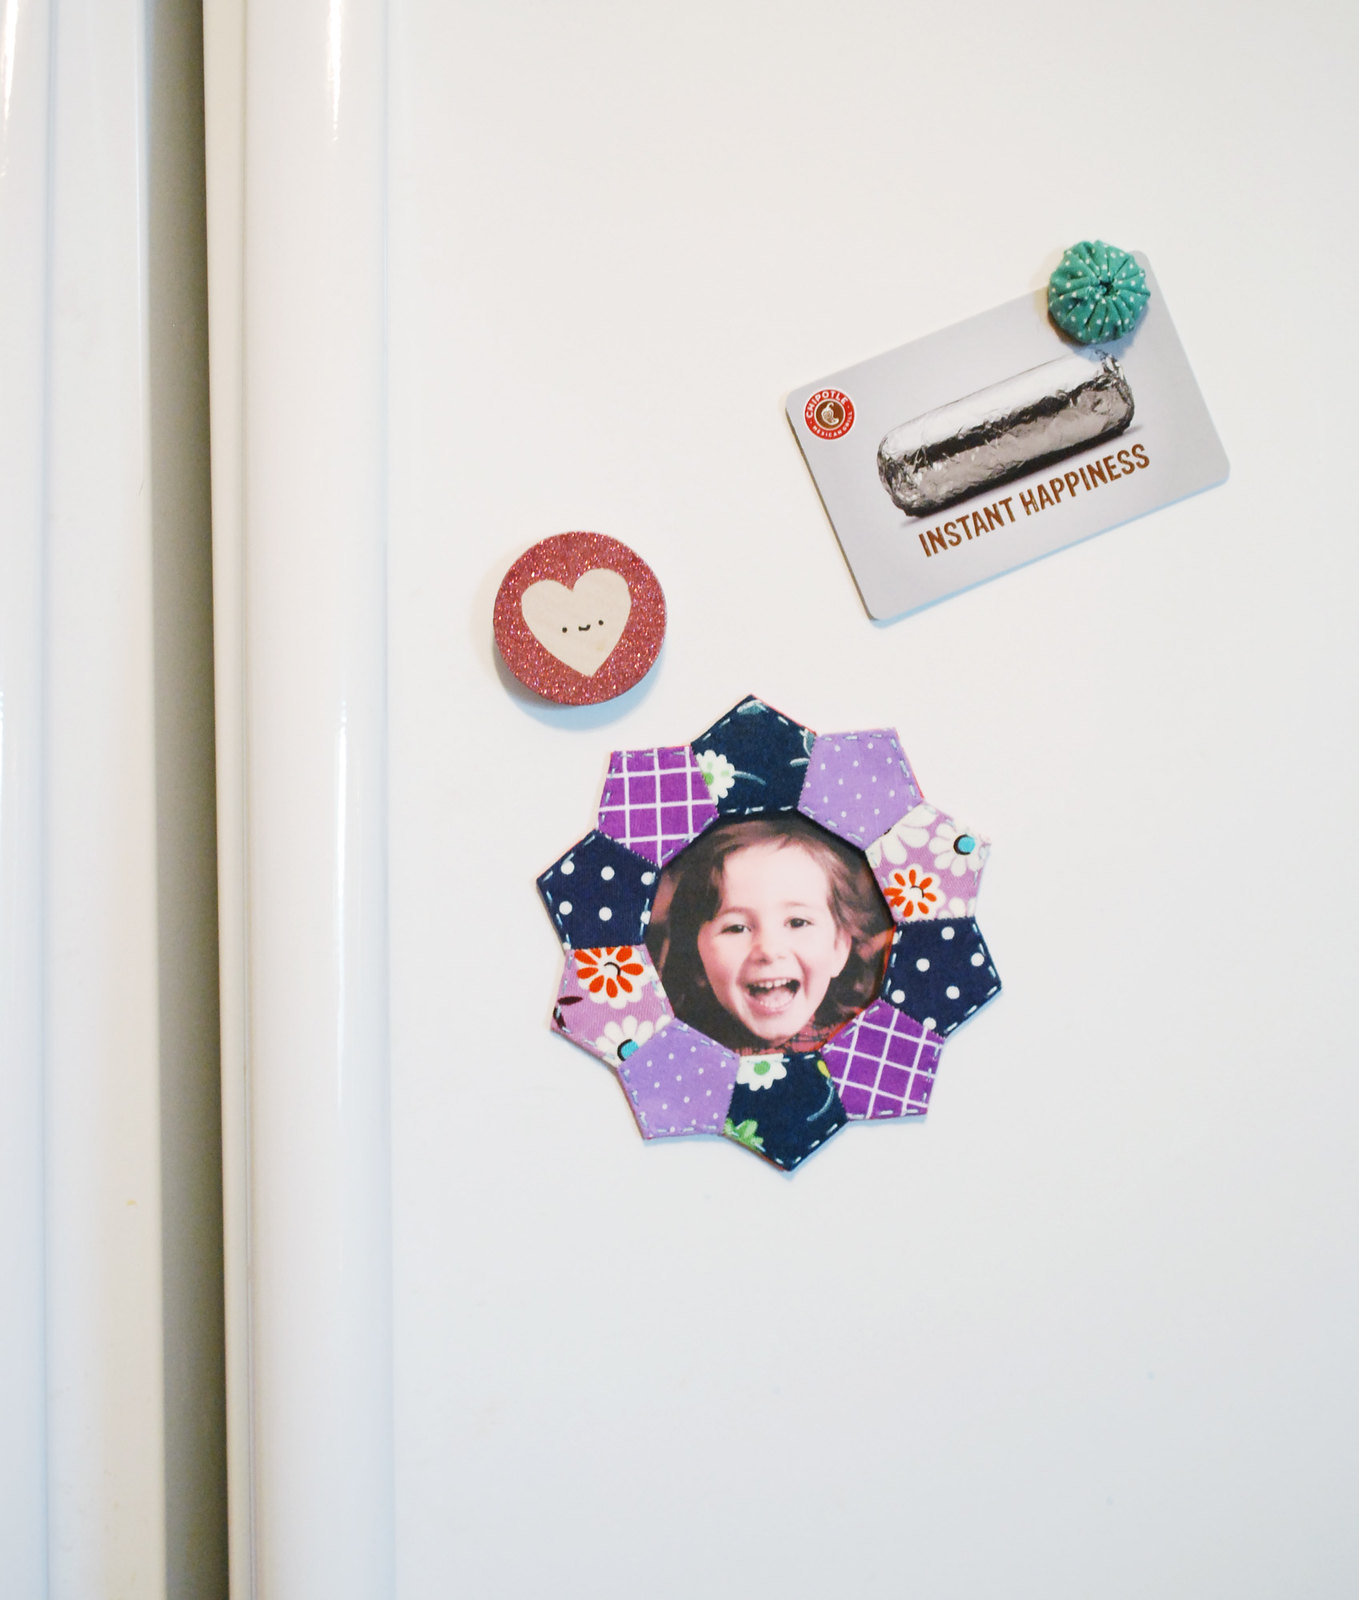
It'll be instant happiness.
I also happen to know that this little frame makes a very good Frisbee too. Just sayin'.
I love your frame and want to make one RIGHT NOW, however, the link to the templates gives an error. Help!
ReplyDeleteI seem to have more problems with template links lately. So sorry about that. It's fixed now. Thank you for letting me know!
DeleteThis is just brilliant! Love it!
ReplyDeleteAdorable! Oh, and the frame is super cute, too ;)
ReplyDeleteSuch a lovely idea!
ReplyDeleteKatrina Sophia
Little Mollie was too cute for words!
ReplyDeleteToo Cute! But one problem - No Face. :(
ReplyDeleteMaureen
This is such a cute idea and great for using up scraps. I hope you wont mind me scheduling it to share on our social media :D
ReplyDelete