


I love English paper piecing, and hexagons in particular, so I've been especially enjoying making these fruity placemats. If you haven't seen the others yet, check out my pineapple and watermelon patterns, and be sure to come back next week for the last of the four fruits!
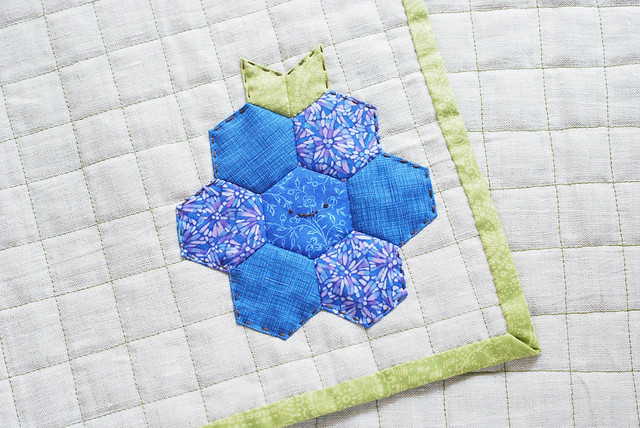
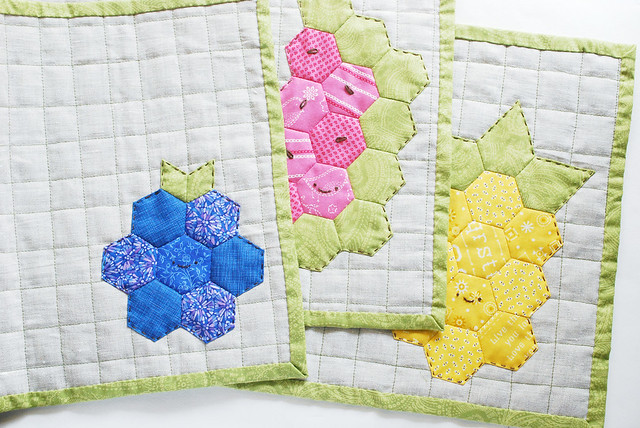
This week is what I like to think of as a blueberry, but since the hexagons make the outside a little lumpy, it's probably better as a boysenberry, blackberry, or a raspberry. In fact, you could make a whole set of placemats with just different colored berries! You could also put more than one berry on a placemat...there's plenty of room. I just kept mine to one (lumpy) blueberry.
Here's what you need for one placemat:
1 fat quarter of quilting cotton
1 fat quarter of linen
1 fat quarter of batting
(So, if you plan on making the set of four, you'll need a yard of each of these!)
For the berry, you will need:
blue fabric scraps
green fabric scraps
brown or black embroidery floss
EPP template PDF with 1-inch hexagons and diamonds printed on card stock
You will also need:
scissors
pins
ruler
rotary cutter and mat (optional, but helpful!)
disappearing ink pen
sewing machine
walking foot (if you have one!)
thread
needle
fabric glue (like Fabri-Tac)
To learn how I made my placemat base, visit the first post in this series with the pineapple placemat. All of the mats are made the same way.
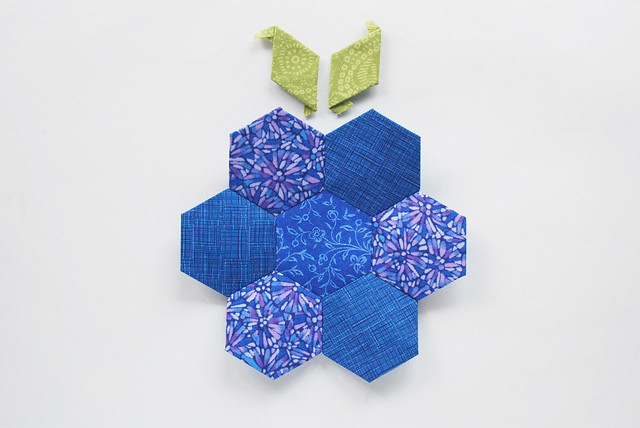
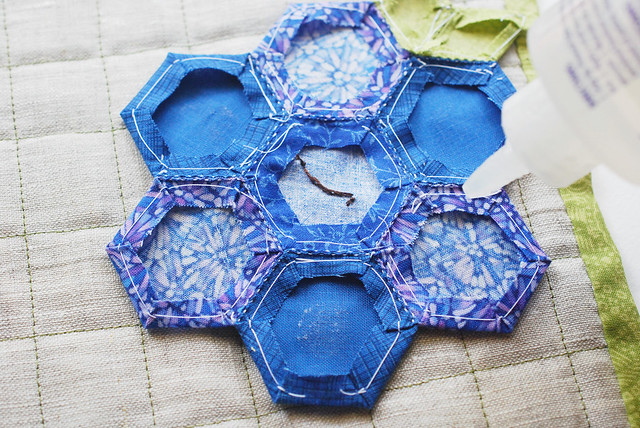
For the berry, make 7 blue hexagons (or whatever color berry you choose!), and two small diamonds. These are considered 6-pt diamonds, and they are exactly 1/3 of a hexagon. Join the hexagons into a flower shape by attaching one hexie to each side of the center hexagon. Then, join the seams of the six "petals".
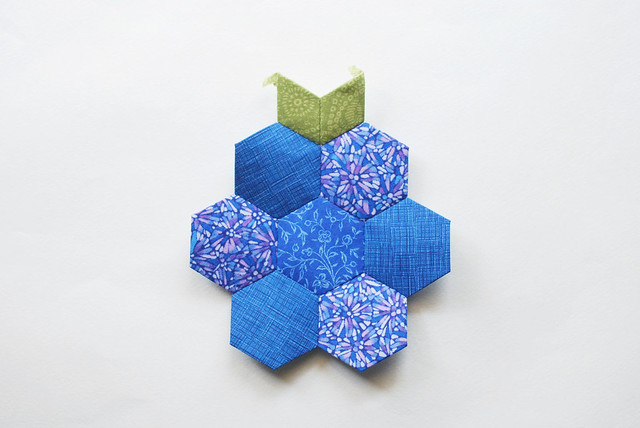
Join the two diamonds and then attach them to one of the indentations on the berry.
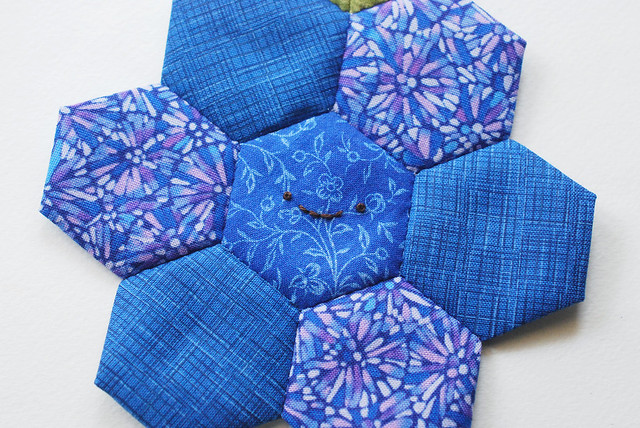
Remove the center hexagon paper and embroider the face. You know you want a face on the berry, right? Then, remove all the rest of the papers. You may want to give this a quick pressing with an iron just to help it hold it's shape.
Just like with the other placemats, use fabric glue along the seams of the fruit and then place it on your prepared placemat. This helps hold it in place for stitching and it gives it extra security for when these need to be washed.
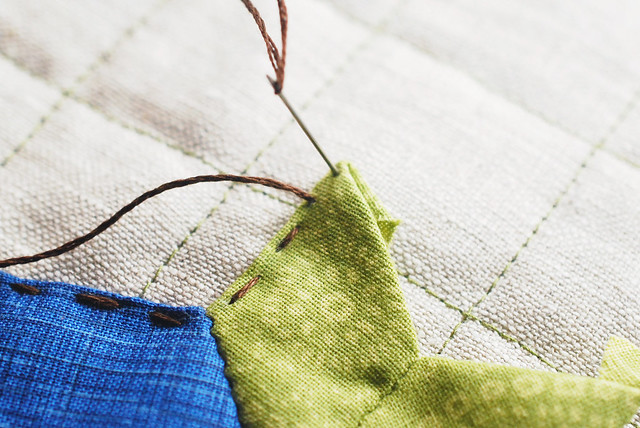
Using three strands of embroidery floss, stitch around the berry with running stitch. When you come to those flaps on the stem, fold the flap to the side, and stitch up to the point.

Tuck the flap under the point and stitch down the other side. Do this for both points. It can be tricky to get them just right, so don't fret about perfection!
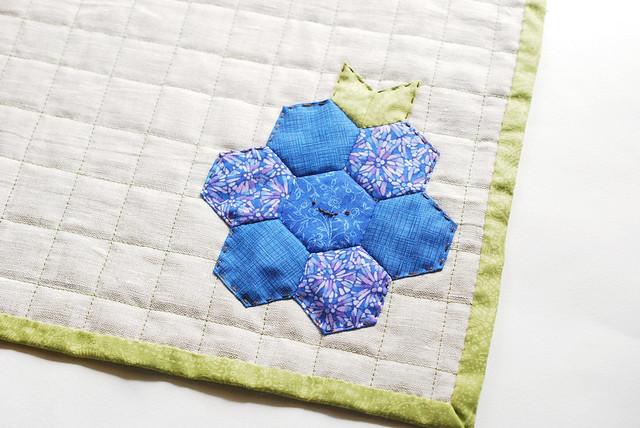
When you finish off your stitching, be sure to hide the knot between the berry and the placemat top. And now you've got the third fruit mat!
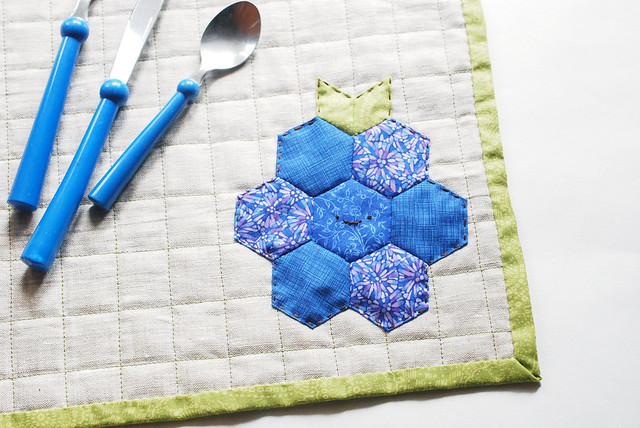

I rather like his plump lumpiness!
Three down...one more to go! Next Wednesday will be the last fruit and you'll get to choose your favorite color for this one...
These are all so cute and imaginative!
ReplyDeleteI don't *really* need to sleep do I? I so want to make these! Just...I need more hours in a day I think
ReplyDeleteOh stop it! These are so very adorable and I simply don't have time to copy you!!!!! Seriously, keep 'em coming!
ReplyDeleteThese are adorable... I can't wait to see what the fourth fruit is!
ReplyDelete