


%20%2F%2F%20wild%20olive)
When you have a favorite place to visit, you probably have a photo or two to remember your times there. And now you can make a frame to hold your photo and show off your stitching too! This is a quick cross stitch project that you can work on while you travel and finish when you're home again.
This is the perfect project for anyone who already loves cross stitch, but it's also perfect for anyone who wants to just give it a try. The patterns you'll find in this post are small and easy, which means even if you're new to this, you'll be able to complete the stitching in no time. But you also don't have to use the patterns here. You can choose any small design and follow the same basic steps.

When choosing a frame, look for one that is flat on the front and has a large enough area that you can attach the cross stitch. The colorful frame I'm using is from IKEA and they usually also have natural wood or neutral colors too. In the patterns, you'll find the same colors I used listed, but you can use any colors you like and match them to the frame or the photo.
Now, let's get stitching!
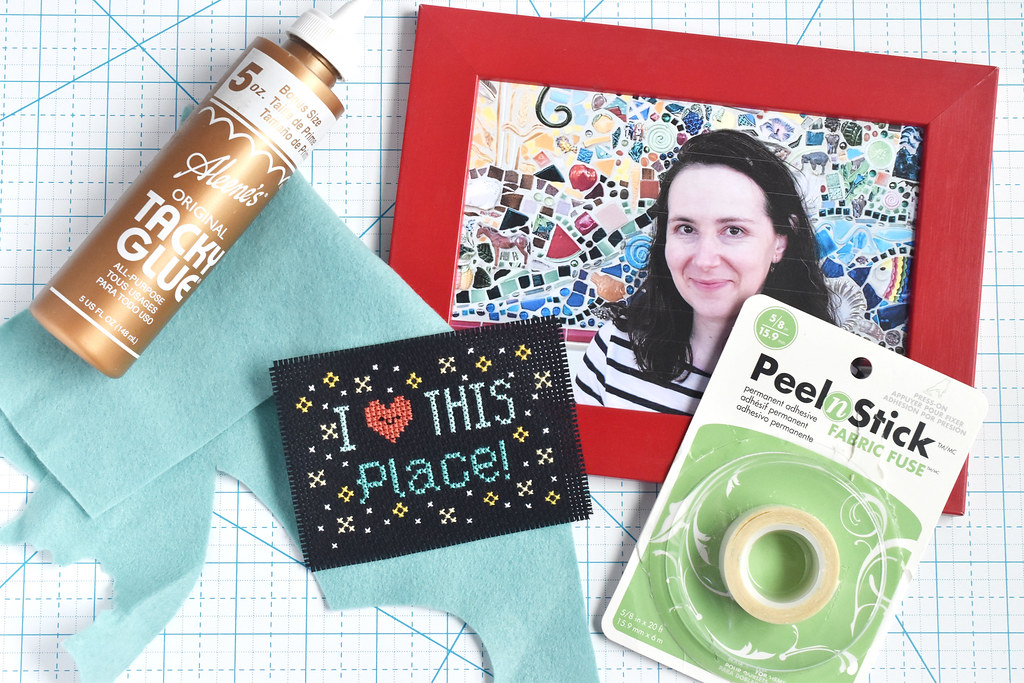
Here's What You Need:
Photo Frame (I recommend at least a 5x7 frame)A Small Piece of Cross Stitch
Felt
Fabric Tape
Craft Glue
Scissors
Patterns
I created the pattern you see in the photos right before I took a trip to Disneyland. Because I LOVE Disney parks and I wanted to have something fun to stitch while I was there. In fact, you can't see my hands in the photo, but I was literally stitching this pattern when this was taken! But my whole family also loves Disney parks, so I created a second version that says "WE love this place." You can find both versions below.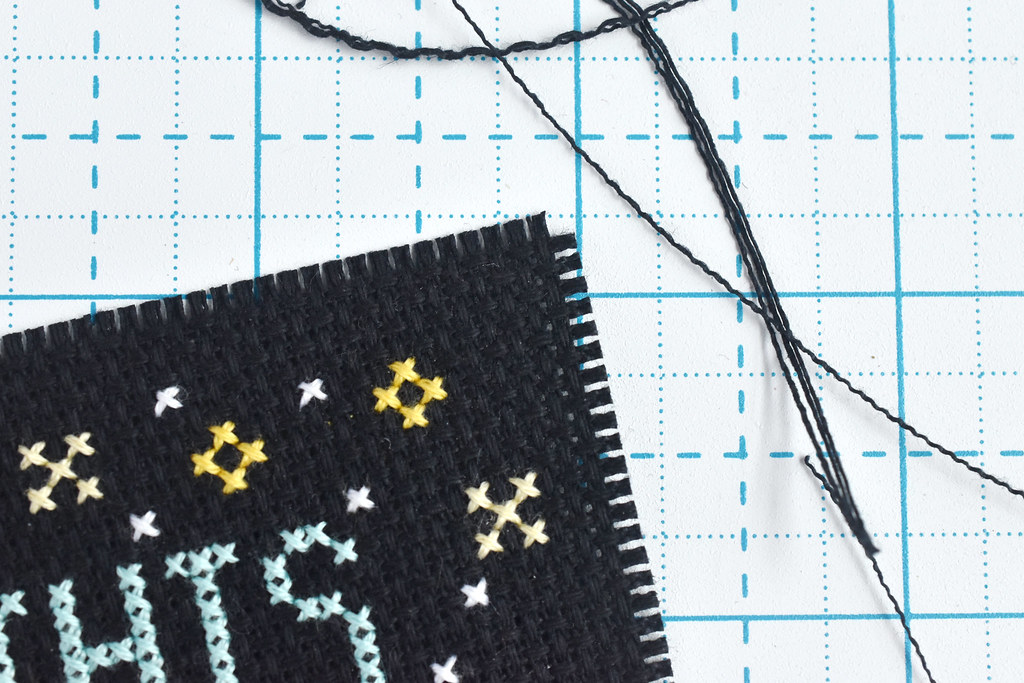
After you've finished your cross stitch, trim the fabric down. I think it's best to trim it to a square/rectangle because you can keep the edges nice and neat. Leave four rows of Aida on each side of the design.
Pull away one row on each side. This will give the fabric a little fringe edge that won't fray.

Place a few pieces of fabric tape on the back of the cross stitch.
If you'd rather skip this material, you can sew (by hand or machine) the cross stitch onto the felt. But I don't recommend glue for this step as it can soak through the fabric and look sloppy.
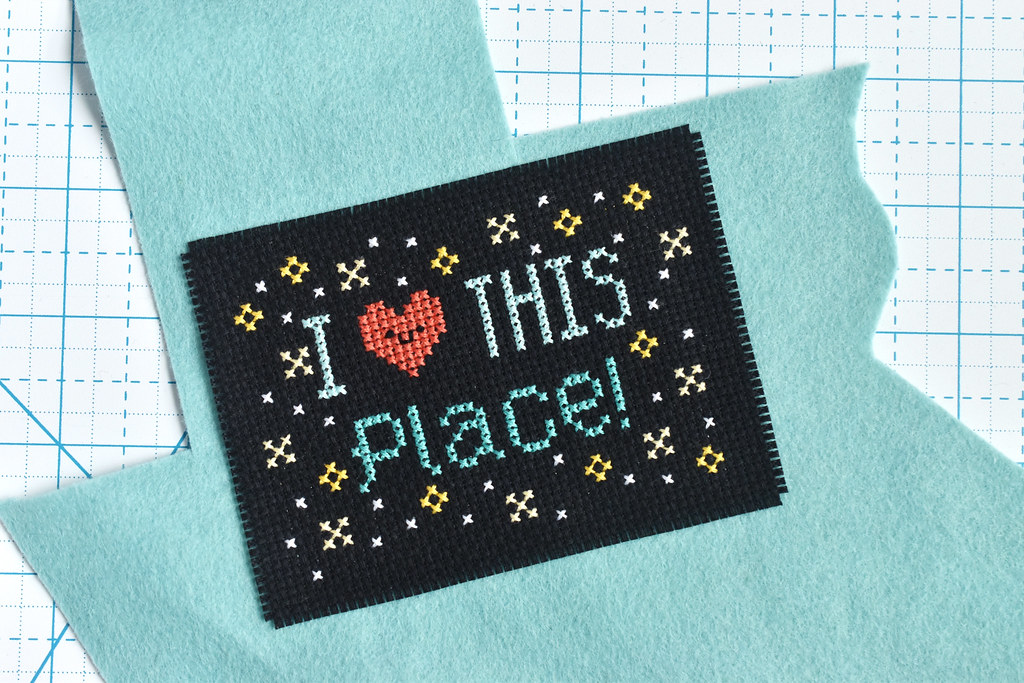
Peel off the tape backing and firmly press the cross stitch onto the felt. Be sure that there's a little bit of felt showing on all the edges.

Trim the felt down so the edges are all even.
I left just a tiny bit showing and I used a rotary cutter to make it quick. Regular scissors will work just fine, or you could use scallop shears to make it extra cute!

Decide where you want the cross stitch to be positioned on the frame. Some of it will cover what's in the frame, so take that into account.
When you know where you want it, add some glue to the frame and then press the felt side down on the glue. Give it some time to dry before you start taking the frame apart to add an image or standing/hanging it up.

Now you have a frame that helps you celebrate a favorite location! Of course, you can use other small patterns and this same technique. I did something similar with embroidery and it gives you an idea of how you can use other shapes and sizes.

For me, Disney is my favorite place to visit. But home is also a place that I love, so a pattern like this would be a good choice for a picture being home with family.
But I want to know...where is a place that you love? What special moment at that place would you put into this frame?
0 comments:
Post a Comment
I often reply to comments in the comments...check back if you have a question!