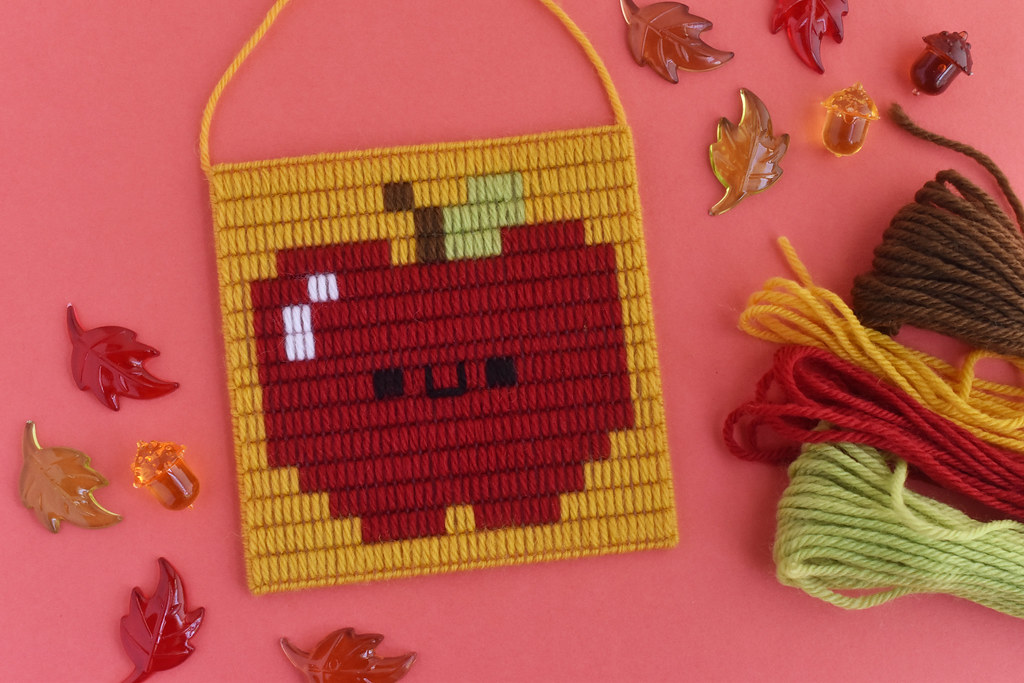
It's time for some autumn bargello pixel art on plastic canvas! I absolutely love autumn and I had so much fun stitching a rainbow in this style back in the spring. The natural combination of those was to...szhoop! Put 'em together!
Of course, now that I've done spring and autumn, I should probably do winter and summer too. This always happens to me.
At any rate, I think you'll love this take on plastic canvas crafting. It's fun for kids, but it also feels like a good grown-up project too. Also, if apples aren't your thing, or you'd like to make a whole set of autumn bargello pixel art, I have three bonus patterns that you can access by supporting me on Ko-Fi. More details about that at the end of this post.

Before I get too far into this, I'd like to address the elephant in the room. They say you should never point out your own mistakes because most of the time people don't notice them. But this sample I stitched has a glaring error in it and I don't want you to think that it will happen in yours.
Right through the middle you probably have spotted the row that is shorter than the rest. That is NOT supposed to be that way. I miscounted my plastic canvas grid when I cut it and didn't realize until I was stitching it that it was one square too small. And of course I didn't have any more plastic canvas so I could start over.
It will forever bother me. But it would have bothered me more to post this super late or not at all. Just know that if you cut the plastic canvas correctly, yours will come out looking much better!

You will need:
Scissors
Large tapestry needle
10-count/mesh plastic canvas trimmed to 45 wide x 46 high
Tapestry wool or similar weight yarn
Anchor tapestry wool colors used:
9166
8204
8022
9394
Black
White
DOWNLOAD THE APPLE BARGELLO PIXEL ART PATTERN
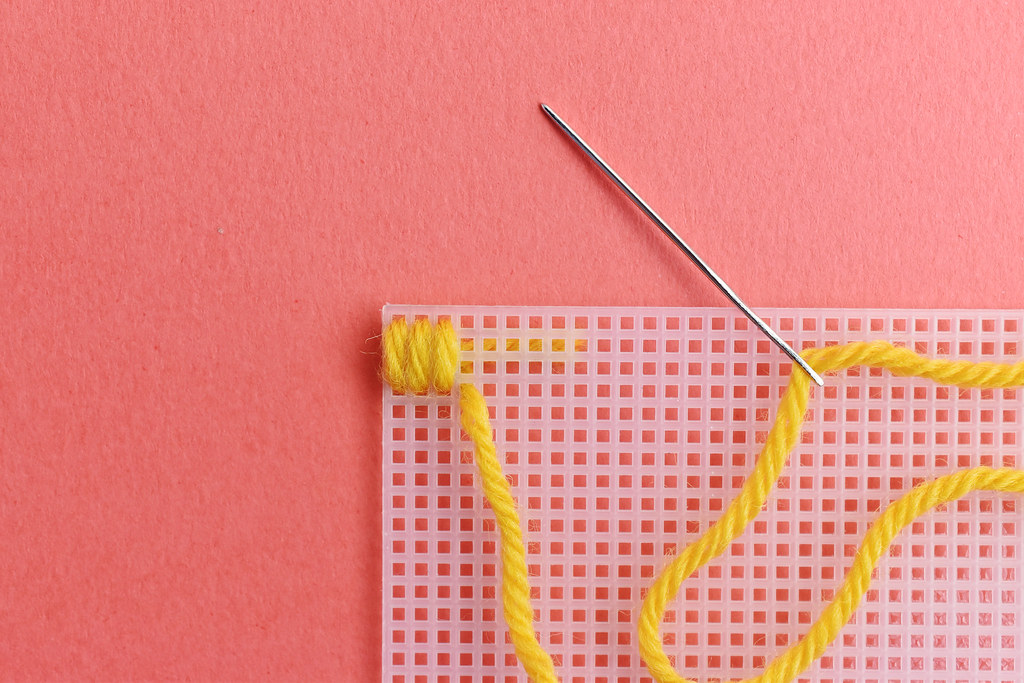
Start with a short tail on the back and stitch over it to secure the yarn.
For each stitch, come up through one hole, skip two holes, then go down. On the pattern, each square is actually going to be three of these vertical stitches, so this block of three stitches counts as one.

Always work in the same direction with your stitches. I like to work from bottom to top. On the back you can see how the stitches are almost as solid on the back as they are on the front. This uses more tapestry wool that stitching other ways, but it makes the stitching look more solid on the front, which is good.
Stitch the whole design this way. When you end a length of yarn, weave it through the back of stitches, preferably behind the same color yarn so it doesn't show.
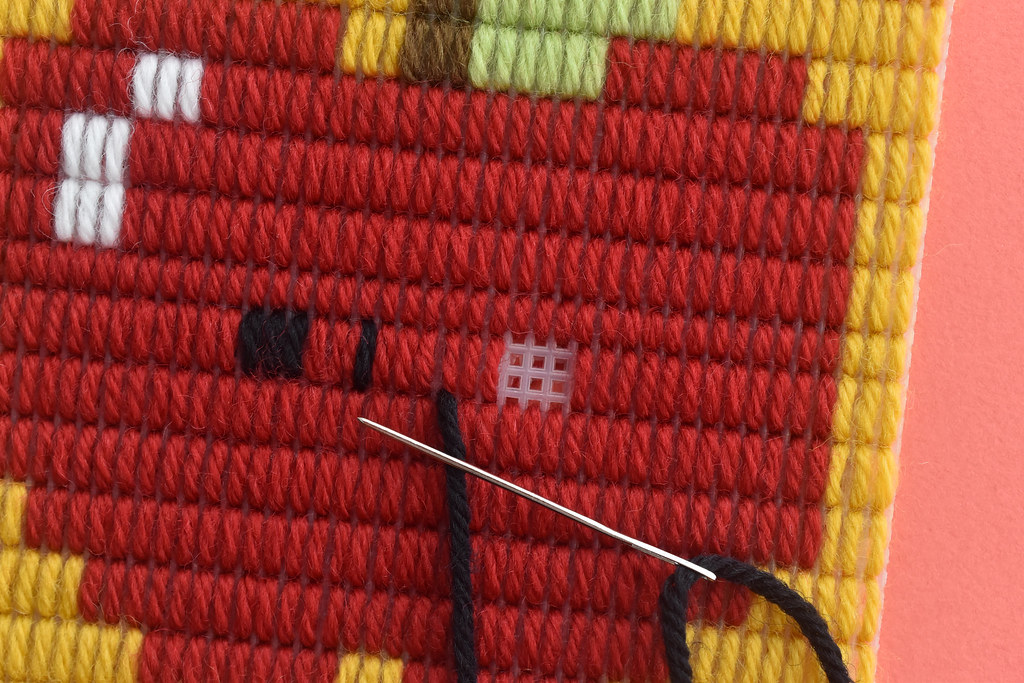
The eyes on this are just like the rest of the pattern, but for the mouth, you need to use back stitch. Just stitch through the same holes you did for the regular red stitches, then across for the bottom of the smile. The line of black will show up just fine squeezed in there.

Once you have the whole thing stitched, you're almost done. You could even leave it like this if you wanted.
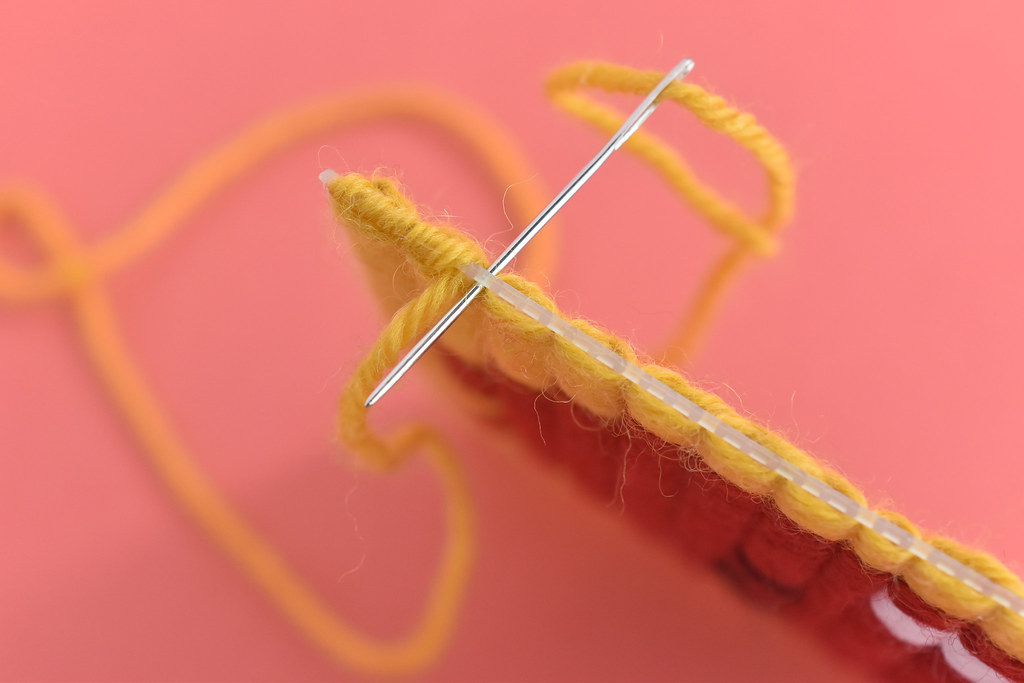
To give your art a finished look, whip stitch around the edges to cover the plastic canvas.

At each corner, stitch a total of three stitches: one for each side and one for the actual corner point. This helps cover it completely.

To add a hanger, secure a piece of tapestry wool at one of the top corners. Stitch through the back of a few stitches and then make a knot at the edge. Leave a bit of wool loose for the hanging loop, then secure it at the other top edge on the back in the same way.
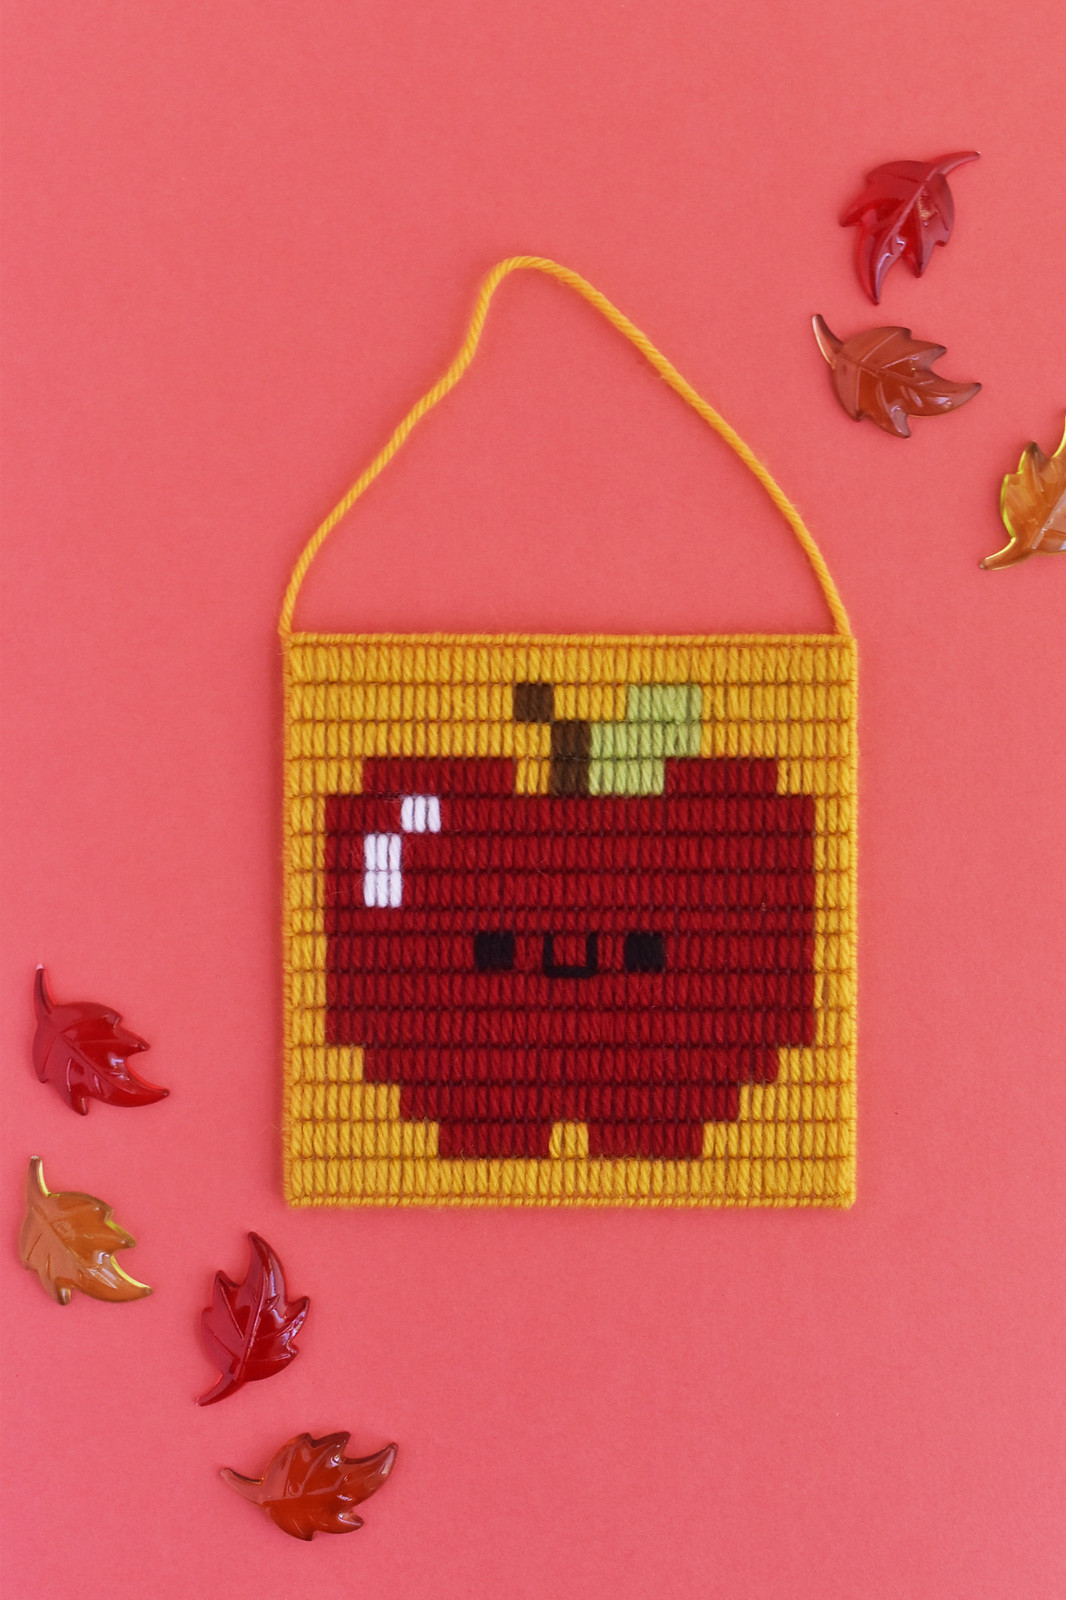
And there you have a happy little apple art piece! This was super quick and so much fun.
By the way, you can also use this pattern to stitch a tiny cross stitch for a pin. Just sayin...

If you like this design and want to make more autumn designs, I have an acorn, leaf, and pumpkin availble for those who support me on Ko-Fi. You can pay just $3 and get access to all my recent bonus files (or follow and support me monthly so you don't miss a thing!).
That's so much for every comment, share, Pinterest pin, and Ko-Fi! Happy stitching!
Just a random question: for the supplies, you show 9166 for the green, but your picture shows 9162. Is there a difference?
ReplyDeleteThat is just me typing wrong! 9162 is correct, although you really can use any green you'd like. Thanks for catching that!
Delete