


When you do a lot of embroidery, I think it's important to have a variety of pattern transfer methods available to you. Even if you have one that works for you most (or all!) of the time, you should know what other options there are and how they work.
You never know when a project may come along where your favorite technique just isn't working, or it may be that in exploring new-to-you techniques you find one that you love even more. To that end, today I'm showing you a tool/method that is still fairly new for me.
Transfer pens have been around for a while, but I've shied away from them. Especially after my transfer pencil experience. You see, transfer pens are mostly permanent. If you mess up the process or don't stitch over the pattern completely, you'll see the markings. And it used to be that you could only get transfer pens with tips that were similar to working with a Crayola marker.
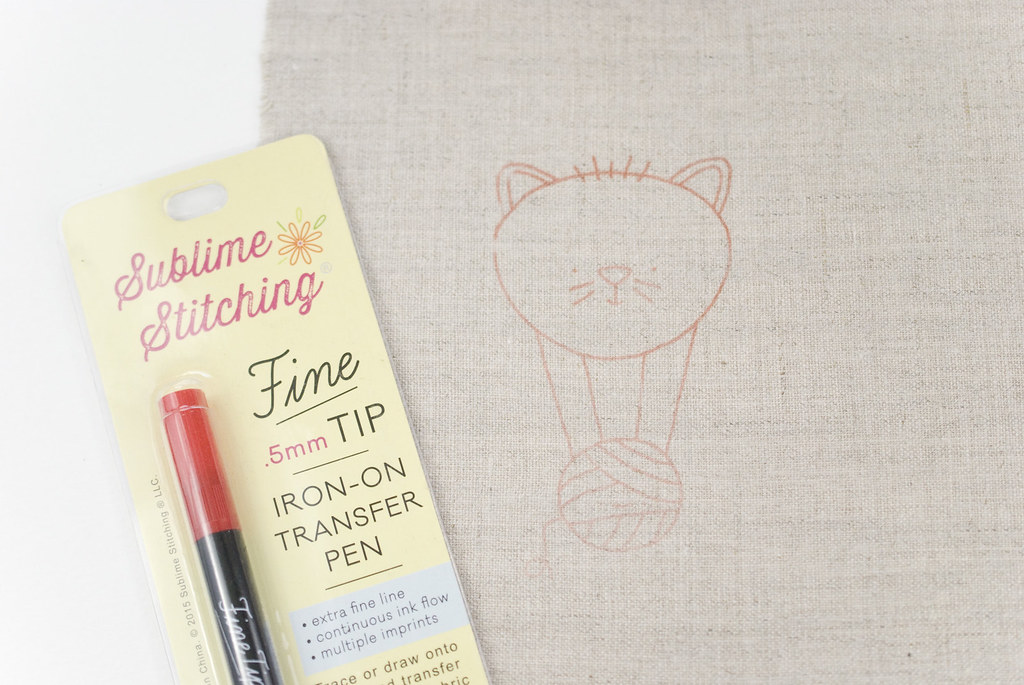
But then last year Sublime Stitching came out with transfer pens with fine tips. And in a bunch of colors too!
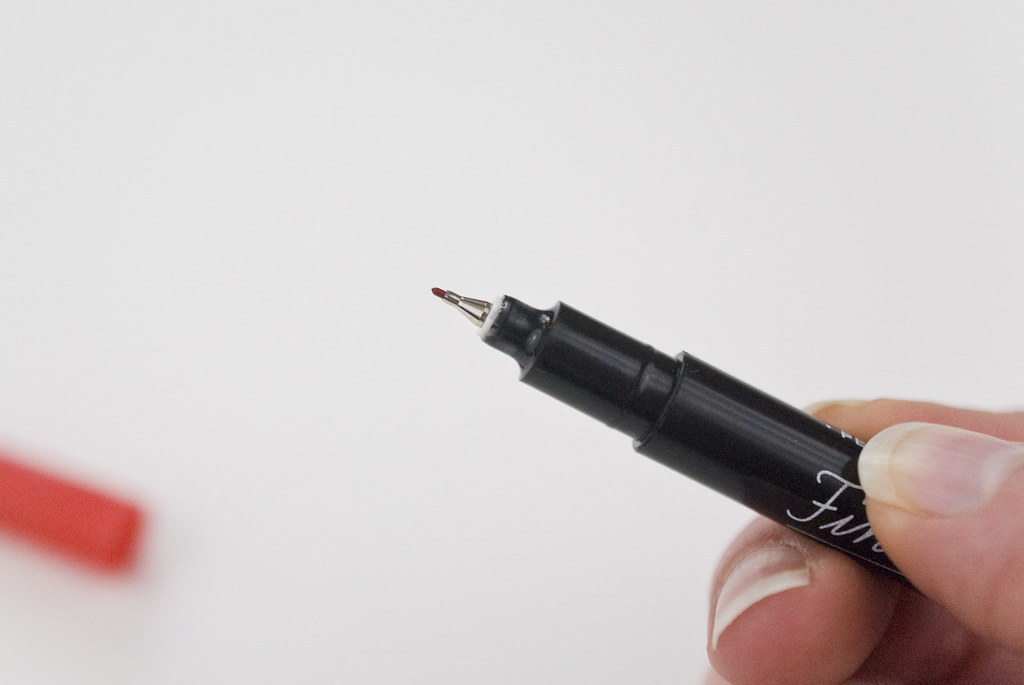
These really do have a fine tip. It's more like working with a Micron pen, and I'll tell ya...I feel 100% better about this than the thicker kind. (Full disclosure: Jenny sent me this pen to try.)
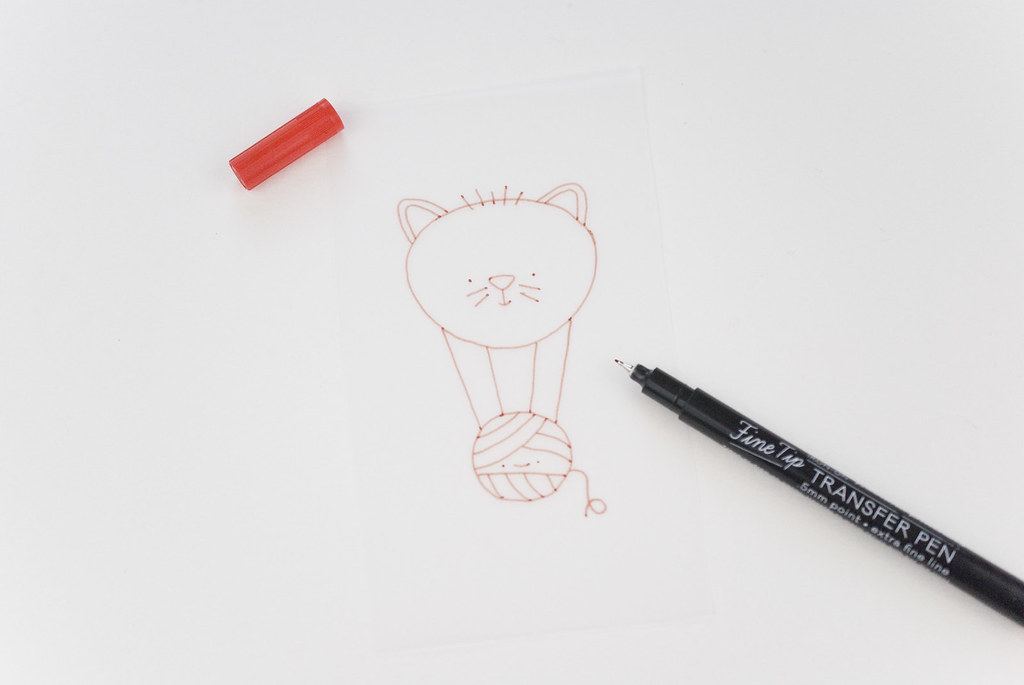
To use these, you draw or trace your pattern on a separate piece of paper. I used heavy tracing paper, but regular paper works too. Whatever you put on the paper is going to transfer, so if you mess up a line, you probably want to start over (or plan on stitching it that way). That's a little intimidating for tracing large patterns, but we'll come back to that.
Also, whatever you trace will flip when you transfer it, so you need to have your pattern reversed first. Okay, so you don't NEED to reverse every pattern, but if it has words, it's a must. Good news for you? Wild Olive patterns come with patterns pre-flipped for you!
After the pattern is traced, it's time to transfer. (By the way, Jenny Hart has a great tutorial on her blog for this whole process.)
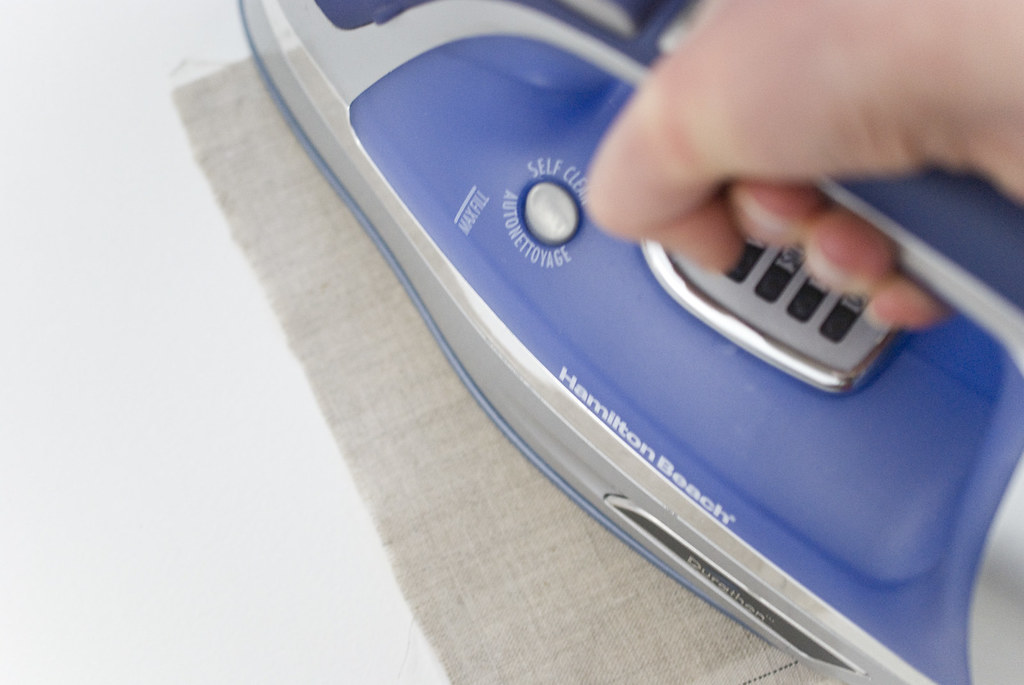
Iron your fabric, then place the pattern face down on the fabric. Press the pattern for a couple seconds. This is different from ironing, because you really don't want to be moving the iron around like crazy. It will shift the pattern and mess up the transfer.
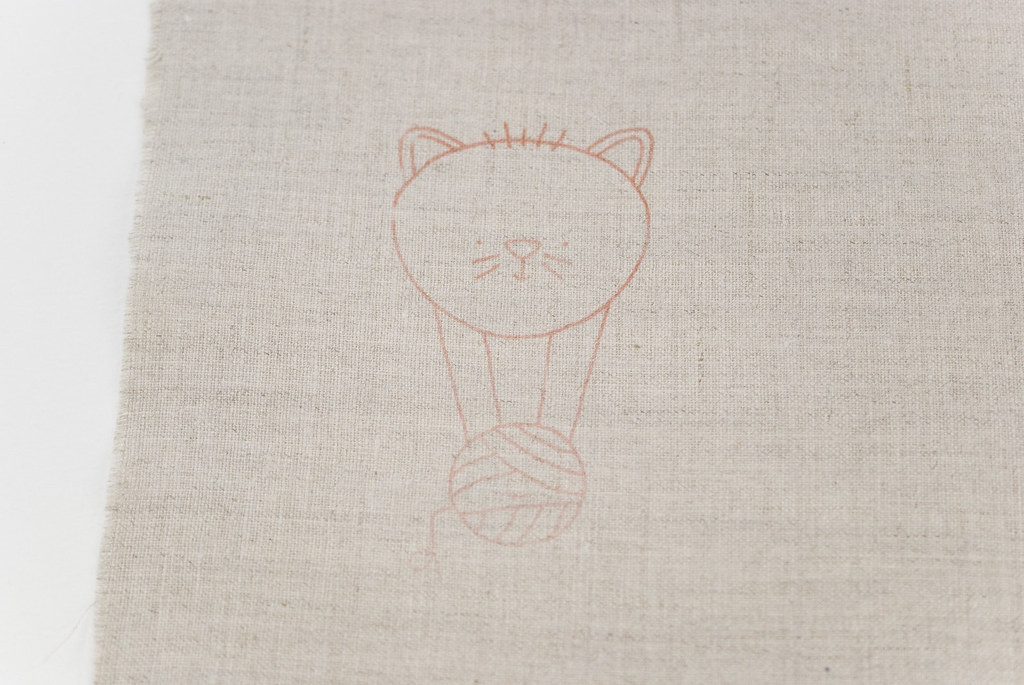
And here are my results. At the top of the pattern, the lines are darker, and even a little thicker. I think I must have pressed a little harder at that end. And there's a missing spot which must be where one of the holes in the iron plate landed.
Things like inconsistent transfer due to my own lack of finesse with transfer patterns is one of the reasons I don't use them often. Which of course perpetuates my issues! But really, these are easy to use, and I'm generally happy with the way the transfer came out.
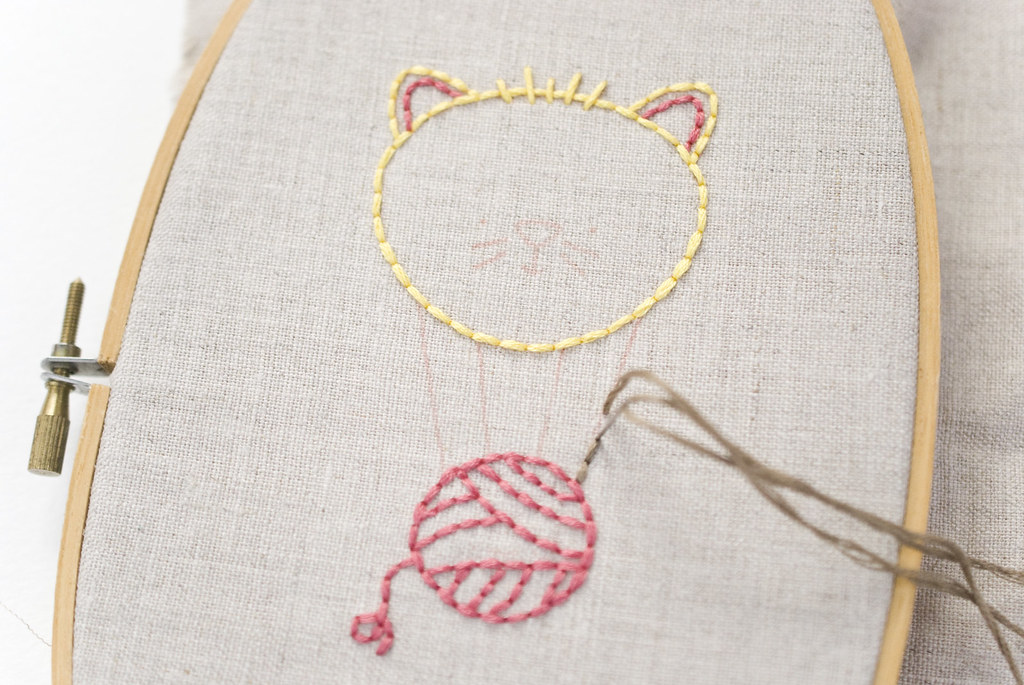
The real test comes in stitching. Even with the fine tip, I felt like I needed to use six strands of floss to cover my darker, thicker lines. Not that it's a bad thing, because six-strand embroidery looks pretty awesome! But if I needed to use fewer strands, I'd definitely want to press with a lighter touch, or maybe even trace with a lighter touch.
UPDATE: After using this more often, I've been able to transfer with finer lines that I can cover with just three strands of floss. I've even purchased a black one so I can color options!
So...getting back to larger designs. If I were doing a giant pattern, or something with lots of detail, trying to trace the entire thing by hand and not messing it up at all would make me so nervous. In that situation, I'd want something like a water-soluble pen so the markings vanish. Or even better, water-soluble stabilizer which can be printed on, avoiding the tracing entirely.
But all that said, this is a REALLY great way to use one pattern on a page of motifs without wasting a page of Sulky stabilizer. And tracing a pattern out of a book would be another perfect use for a pen like this.
Yep...I'll be pulling this out more often. How about you? Have you used these? Do you have any thoughts or tips to share?
PS: The pattern you see here is part of a new set coming very soon to the Wild Olive shop!
I need to get one of those! I have been using a water soluble marker for a lot of stitching, but it is a very light blue color and can be tough to see sometimes. Happy Stitching, Mollie :)
ReplyDeleteThe fine tip is a definite plus. My first foray back into embroidery had me purchasing one of those transfer pencils and I had the same experience as you. Ugh! I would've stopped right there if I hadn't found the water soluble marker. Thanks for the product reviews. (Love the kitty by the way, which pattern set is he from?)
ReplyDeleteOops. Now I see the P.S. about the new pattern set coming. Duly noted. :)
DeleteI don't know what the deal is with me, but I have gone through two of those water soluble marking pens, you know the blue ones they sell at Joannes, and I have had trouble washing out both of them! I have her and multiple things because I have sketched a design with them only stitched over part of it and then not been able to wash out the rest :-). I recently tried for the first time the water soluble printing paper. I thought it was very cool, but I did notice it a couple of my tiny stitches did not quit I thought it was very cool, but I did notice it a couple of my tiny stitches did not look quite the same as they did before I wash the paper out. As in, a few of my back stitches did not connect. But other than that, and given my problems with the other methods, I think I will be giving the printer method some more tries :-). I am excited about your event tomorrow :-).
ReplyDeleteI am so sorry, I really need to proofread these things before I click publish!
ReplyDeleteCool stuff there. I'm not big on transfer pencils for all the reasons you listed. But a fine line might work.
ReplyDeleteThanks!
This looks like a great pen! I've been debating purchasing one for a while now, but just might do it :) May I ask, what type of fabric are you stitching on in this? Thanks!
ReplyDeleteI've been really happy with it. The fabric is a natural linen from JoAnn Fabrics & Crafts. It comes by the yard and I love stitching on it. Tracing doesn't work very well on this material, so I have to use either a transfer pen or Sulky Sticky Fabri-Solvy.
DeleteSix strnds to cover? Absolutely no good for me then. Sometimes I use only one strand and very often two. It doesn't seem very fine nibbed at all! Micron pens come in 2.5 width nibs, so that is what I would call fine. I think I must go on looking for an ideal solution for thicker fabric. How difficult can it be to have a properly fine pen and one that washes out too?
ReplyDeleteSince writing this, I've had much better luck with getting a finer line to transfer. Three strands will easily cover the line. Updating the post to reflect that!
Delete