


I love that embroidery is something you can pick up and learn in a very short amount of time, and also something you will never master. There are so many stitches, and just when you think you've seen it all, you find a new stitch or a new way to use what you've already learned.
Yesterday I stitched my first "Sprat's Head" (sometimes also called Arrowhead Tack) stitch.
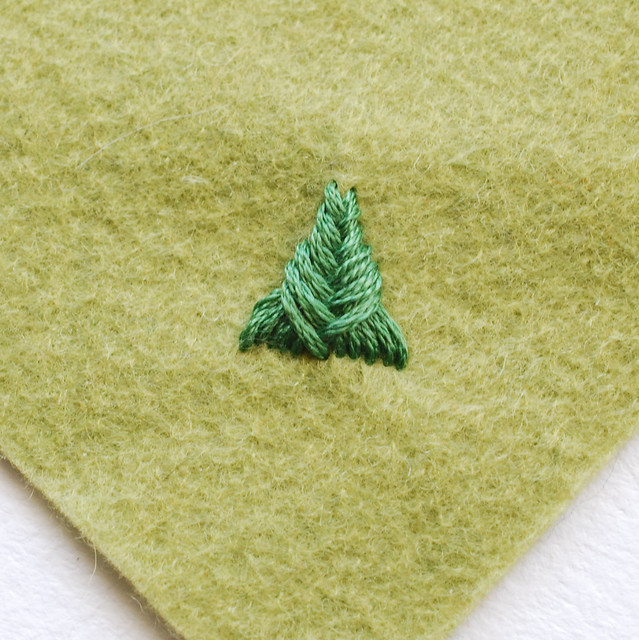
It's right up there for you to see, and it's not perfect. It was my first try after all! I also stitched it on felt, which might not have helped, but I had a plan. It involves triangles and green, and you'll see it start to take shape.
I've just learned this, but jump in with me and try Sprat's Head stitch for yourself! (If you're left handed, you'll want to reverse the direction of these.)
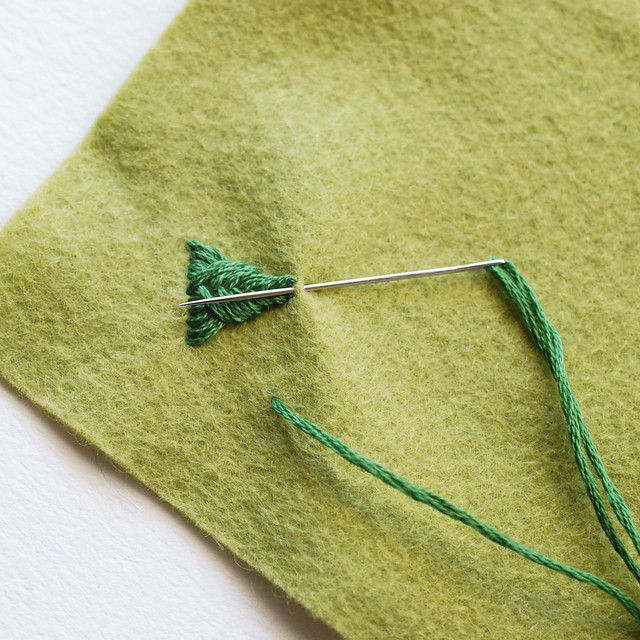
The stitch makes a little triangle, so you need to sort of envision the triangle you want, or mark it on your fabric. Come up at the left base of what will be the triangle, and take a tiny horizontal stitch at the apex.
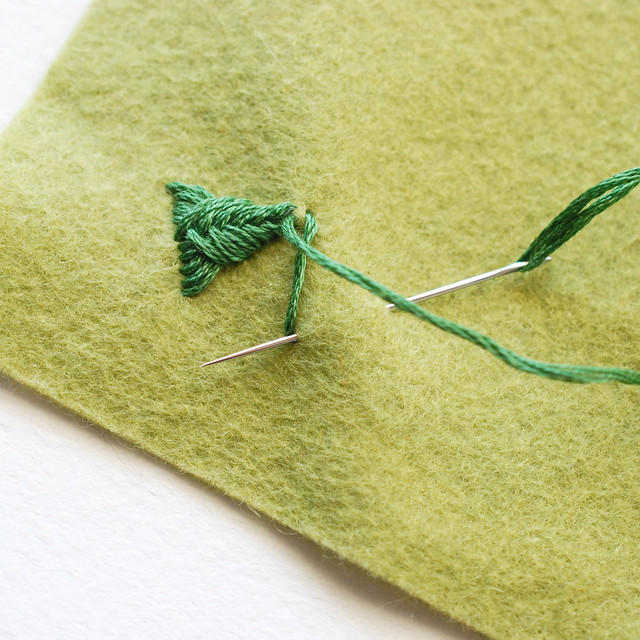
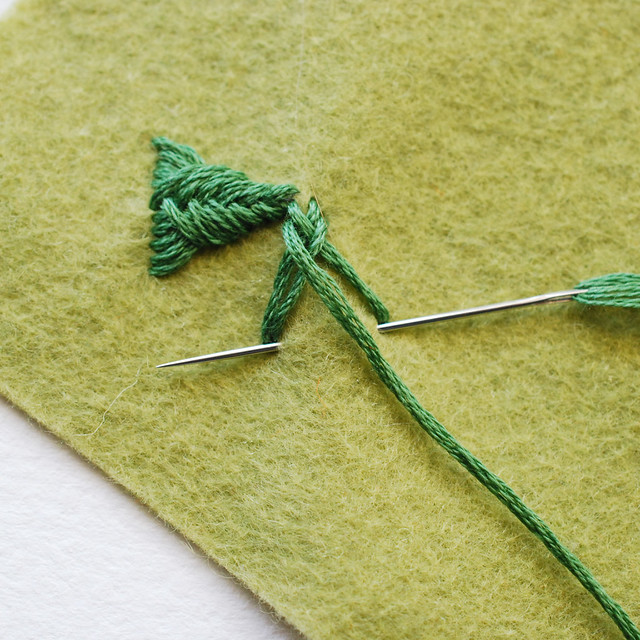
Go down at the right of the base, and come back up on the left side, just to the right of that first stitch.
Take another horizontal stitch just below the apex. Go down on the right side and back up on the left.
It's really easy to have these points be too close together, which will draw in the sides of your triangle. My first one had a lot of this. Be sure that you're staying right on the triangle "lines" and not going under the lines created by the floss.
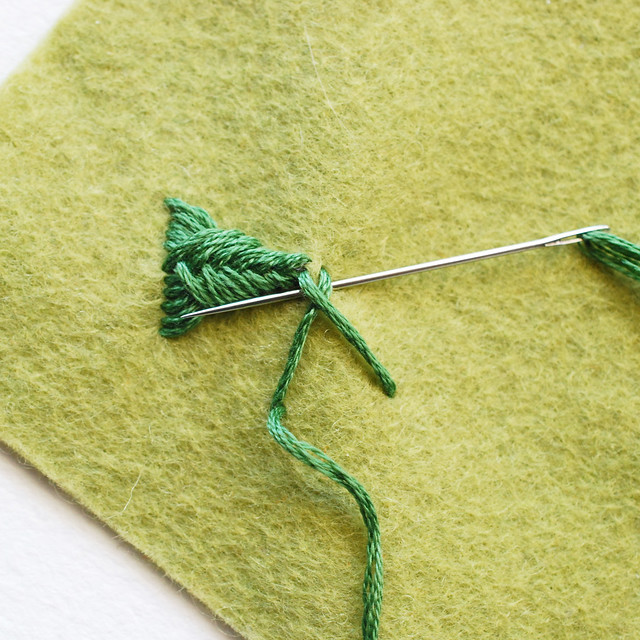
Again, go down at the right of the base, just to the left of the previous stitch down there, and come up on the left, to the right of the previous stitch.
Keep these points close together to have a more solid triangle. I haven't played with spacing out the stitches more. Hmm...that could be interesting.
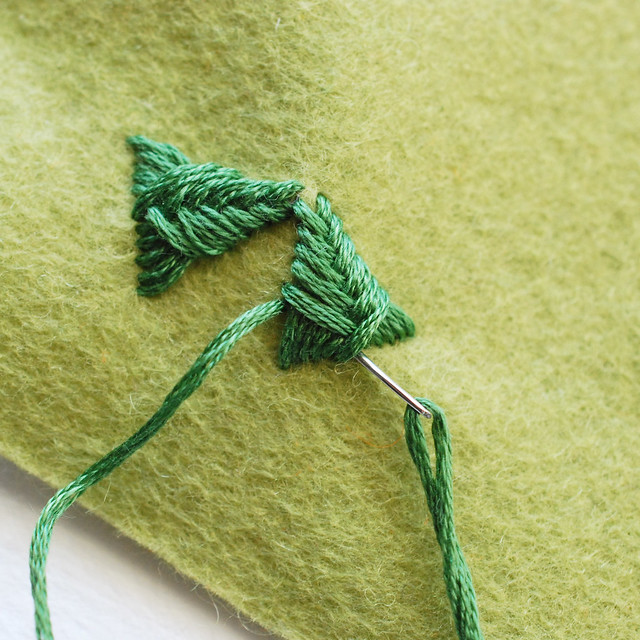
Keep going until the base is solid with stitches.

You've got a nice little triangle now! Mine is more acute (skinny!) than most of the examples I found for this stitch. Do a search for Sprat's Head stitch and you'll see what I mean. But again, I had a plan. And it was a perfect way to practice this new stitch:
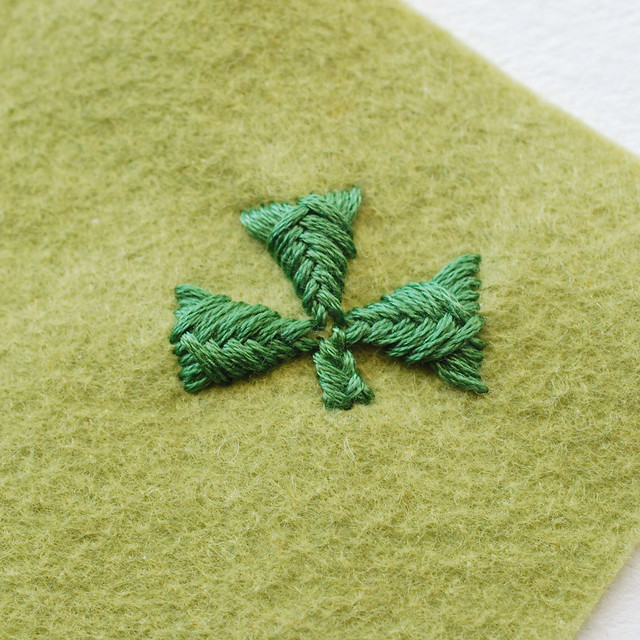
Because by the time I reached my third Sprat's Head, I was really happy with the shape. All I had to do was add a mini stitch to be the stem of my shamrock!
You could make this a four-leaf clover, but I like the shamrock and its connection to the Holy Trinity. It might only be folklore that St. Patrick used the symbol, but it's still a beautiful way to look at it. Now I'm going to make something with my newly stitched shamrock! I'm thinking headband or maybe a necklace!
Oh, and something fun for today, Friday the 13th! All orders from my Etsy shop will receive a FREE DIY lucky charm, my Lucky Me embroidery pattern!
Being Irish, I will have to try this. Btw, your book arrived Tuesday and I embroidered the lion onto a Wee Care gown for my SAGA chapter's outreach. It is just precious!
ReplyDeleteWhere do you get your nice wool felt? There are no local sources that I know of in my area and I could use some.
The wool blend felt that I use all the time is from benziedesign.etsy.com, and the 100% wool felt that I use when I want to be extra fancy comes from MagicCabin.com
DeleteAnd I'm so glad to hear that my book as already been put to use!
What a pretty and textured stitch. What a great way to create an evergreen forest or Christmas trees on those smaller projects. Now I want to go play with it, but I need to stay focused. I am so far behind on the 50 states project after moving. I need to catch up on that before I think of starting anything else.
ReplyDeleteThank you for showing us the sprats head stitch - I really love it and will use it in my embroidered cards. .Andy LW :Bath
ReplyDeleteWhat a pretty stitch! Great photos, and a wonderful tutorial!
ReplyDelete