


Eleven years ago, my first book, Stitch Love: Sweet Creatures Big & Small came out, and I shared a fun little pattern to make a stuffed otter or ermine, or in today's update, a stoat. Why a stoat? Because the Winter Olympics have some adorable mascots that are brother and sister stoats named Milo and Tina. I love them, and decided to use my pattern to make cute little Wild Olive versions of these two siblings.


Tina is the official Olympic mascot and Milo is the mascot for the Paralympics because he was born with one paw and uses his tail in its place. How sweet are they?
Now, I admit that my version is not quite like the official plush (which are apparently very difficult to find), but they are very "me." I'm also basically adding just a few small changes to an existing pattern I made. I decided to sew my new version with raw edges (no turning), which I've done a bunch of times for other stuffed toys, even though that's different from my original critters.
You'll also notice that I didn't include things like the different colors on their paws, tails, and inside the ears. This is intended to be a simple project!

So here's what you'll find in this freshly updated post:
The original post showing the otter and ermine I made, along with that pattern, the supply list, and the instructions. After that, I've added the process for making Milo in a simplified form because it's still fairly similar in process to the original.
Are we ready? Let's hit the slopes! Er...sewing machine...

Today's project tutorial is brought to you by my little sister's birthday, and a random web search. Since that's a little confusing, let me explain.
We got into a discussion at my house about ermine. That's the kind of fur you often see around king's robes. It's also an animal in the weasel family, and if you do a Google image search, you'll see some photos that are the cutest thing you've ever seen, and some where the ermine looks like it wants to eat your face. I highly recommend taking a look.
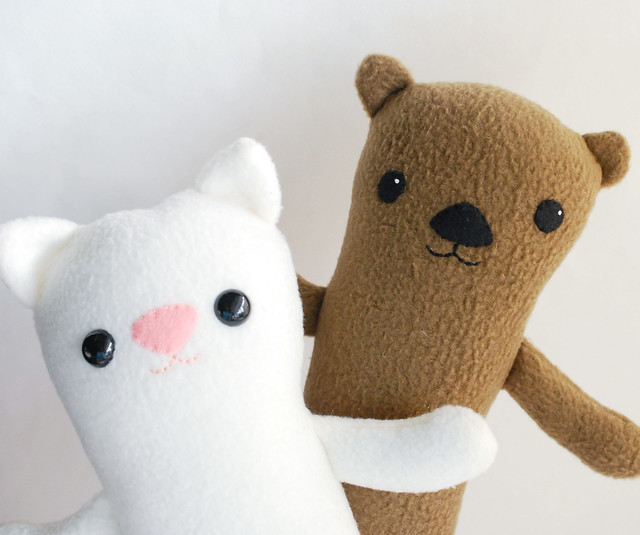
Anyway, my little sister saw the photos and insisted that I make her a super cute stuffed ermine for her birthday. I couldn't resist, and as I was making it, I realized that the same pattern could look a lot like other animals too. An otter. A meerkat. A cat. And if you use your imagination, probably a lot more things too. Just a few small adjustments of color, size, and placement make the difference!
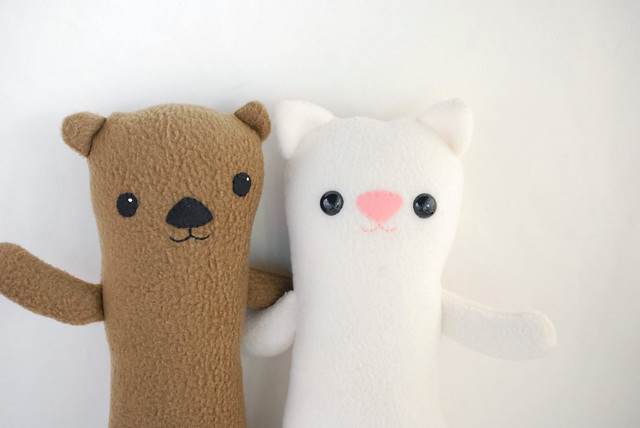
So once her ermine was done, I made my own otter, and now you can too! I'll admit, the ermine (which really does look like a cat, but I promise you, also looks like an ermine) is cuter. But I find that these things each have their own personalities, and I just have to see what shows up.
Ready to make a critter to stitch & love? Here's what you need:

Fleece - 1/3 yard
Felt - scraps
Embroidery floss
Stuffing
Optional: Safety eyes
You'll also need:
Scissors
Pins
Needle and thread
Sewing Machine
Pencil or chopstick for turning pieces.
A Critter to Stitch & Love Template PDF
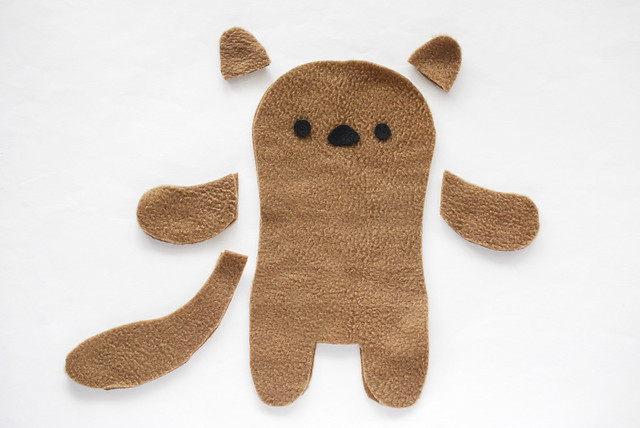
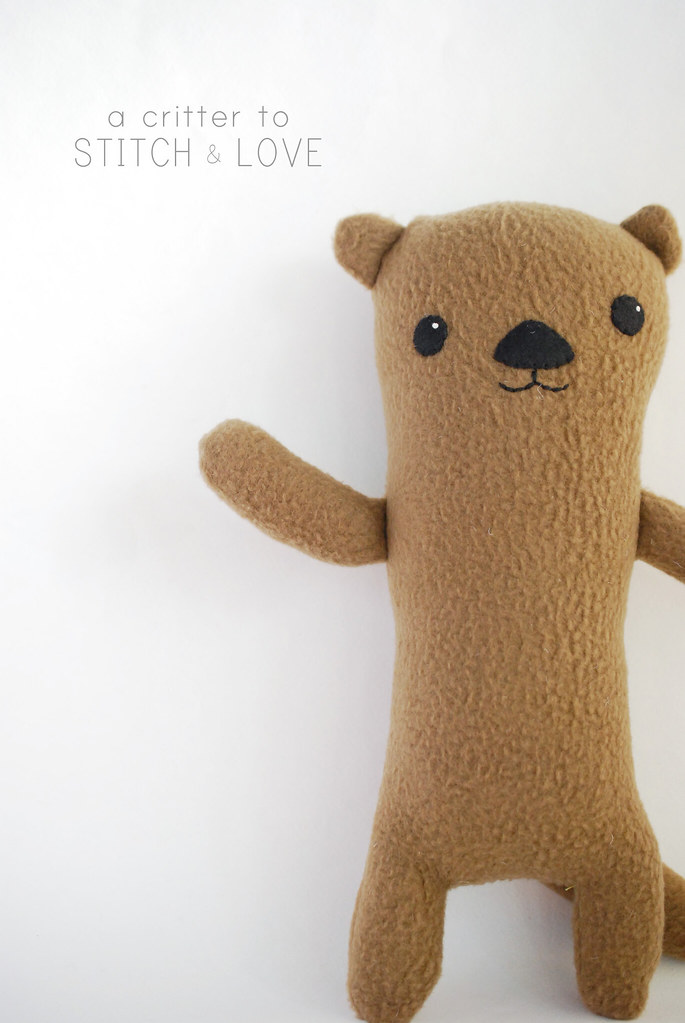
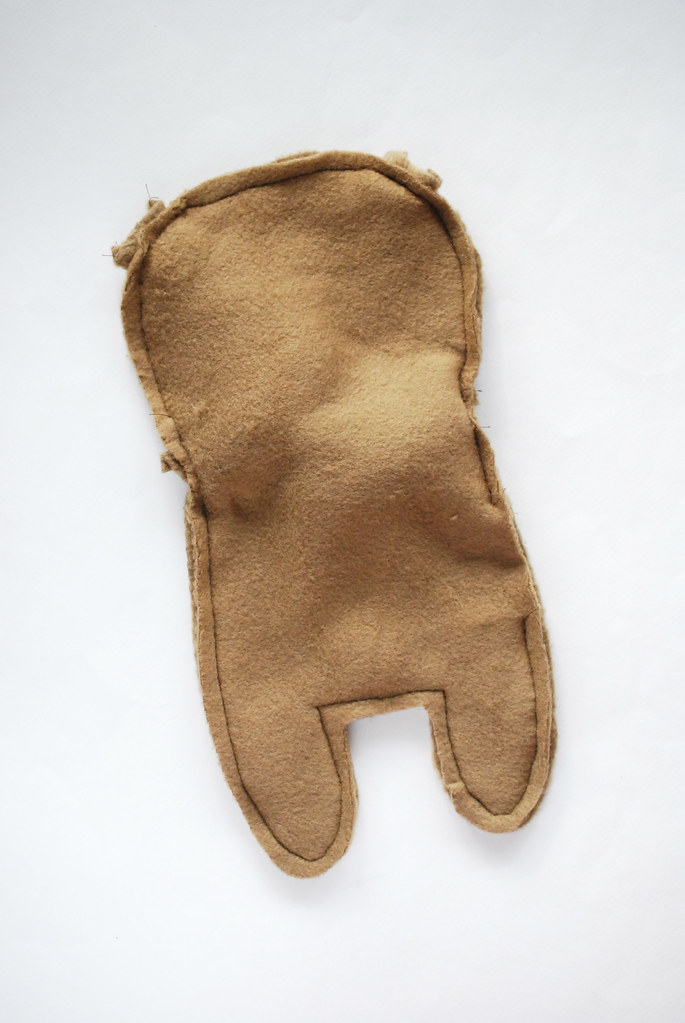
Following the stretch arrows, cut 2 bodies, 2 tails, 4 arms, and 4 ears from fleece. Be sure that you're cutting two layers, so you have a right- and wrong-facing piece. Cut a nose and two eyes from felt. (Skip the eyes if you'll be using safety eyes.)
IMPORTANT: One of the ways to adapt your animal friend is to alter the size of the tail, arms, and ears. For example, I added a generous seam allowance to the ermine's ears. You can also rotate the pattern piece for the body so the stretch goes the other way, that will give you a shorter, plumper animal.
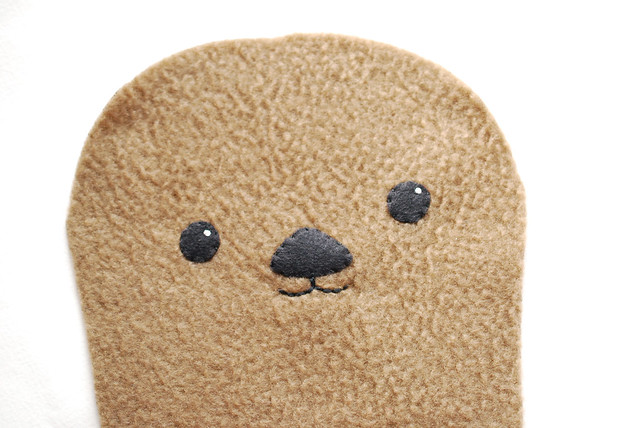
Stitch the nose and eyes in place with three strands of matching embroidery floss. Stitch the mouth with six strands of embroidery floss and backstitch. For the highlight on the eyes, add a white french knot.
Otters have differently shaped noses, so I used the nose upside down. Or maybe it's right side up? The ermine has the nose the other way, and she also has large safety eyes.
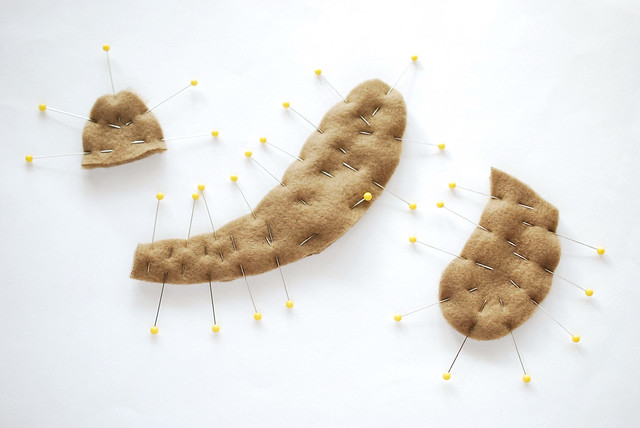
Place the tail, arm, and ear pieces right sides together and pin them well. Note that on the tail, I've placed a pin across the side, because that's a good place to leave it open for turning. We'll come back to that later.
Sew around the arms and ears, leaving the straight edge open for turning. Turn the pieces right side out and add some stuffing to the arms. Leave the ears without stuffing.
Place the arms and ears on the right side of the critter body with the raw edges facing out. You can make the arms high or low, and the ears can be up on top, or off to the sides more. Just make sure that you have the edges overlapping the body piece enough so that they will get caught in the seam.
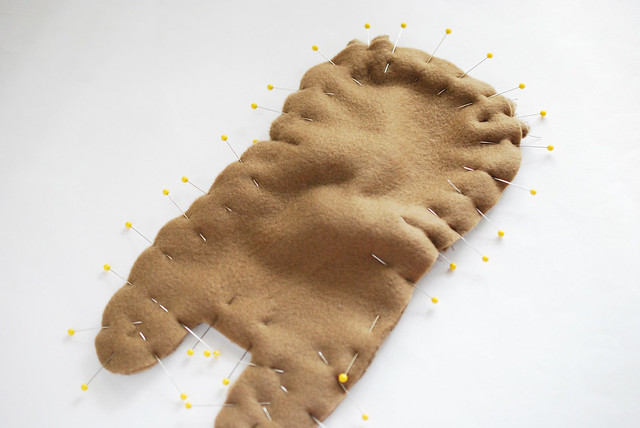
Lay the second body piece on top, right sides facing, and pin, pin, pin.
Sew around the outside, leaving an opening for turning. Before you turn it right side out, make sure that all of the seams are secure and that the ears and arms are caught in them. Also, clip those corners between the legs.
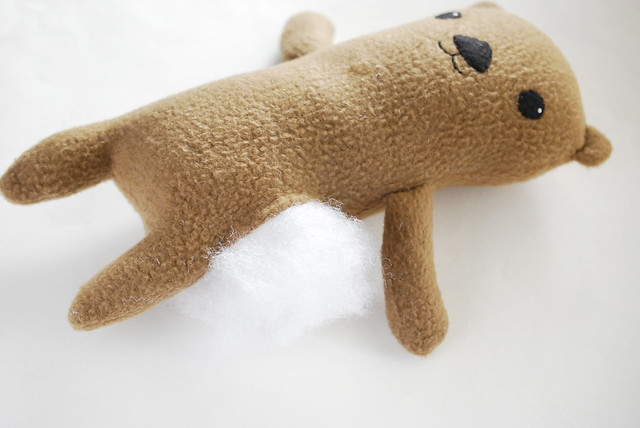
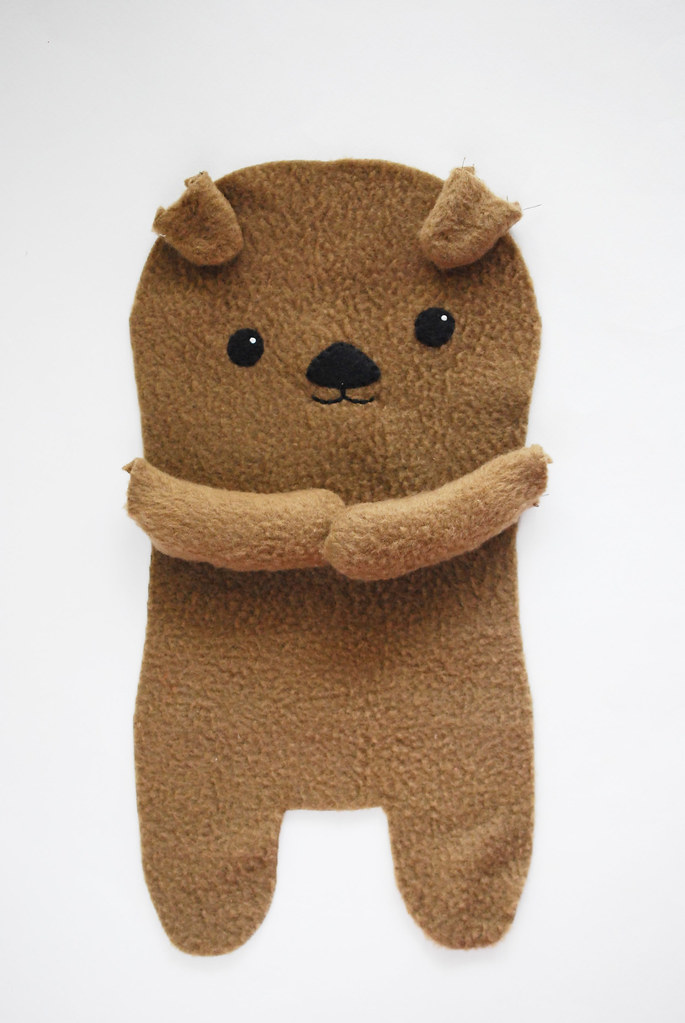
Stuff the critter really well. Go on, add a bit more stuffing. See how the stretch of the fleece made this get a lot taller than before? Now, stitch the opening closed with ladder stitch.
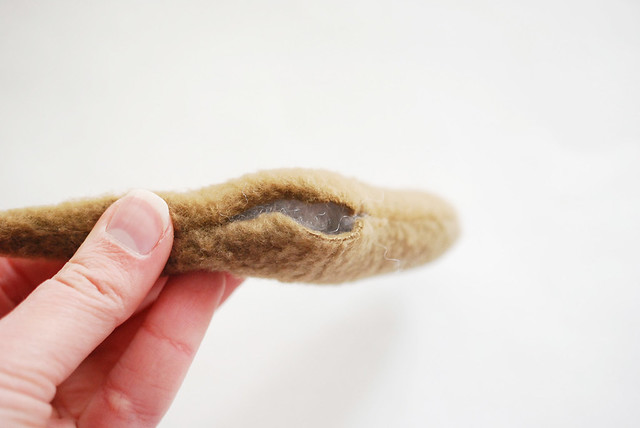
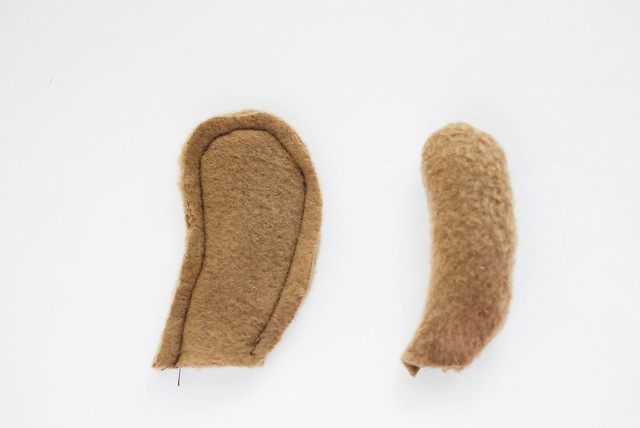
Let's go back to that tail. Sew around the sides, leaving an opening in the middle. Trim the corners at the top, then turn it right side out. Add a bit of stuffing in the lower part, then stitch it closed with ladder stitch.
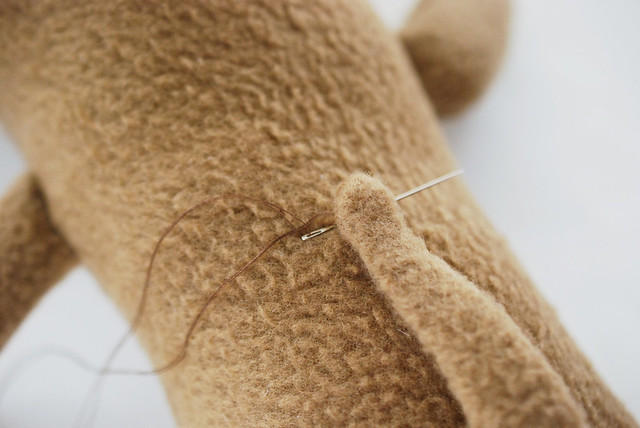

Stitch the tail onto the back of the body with some ladder stitch.
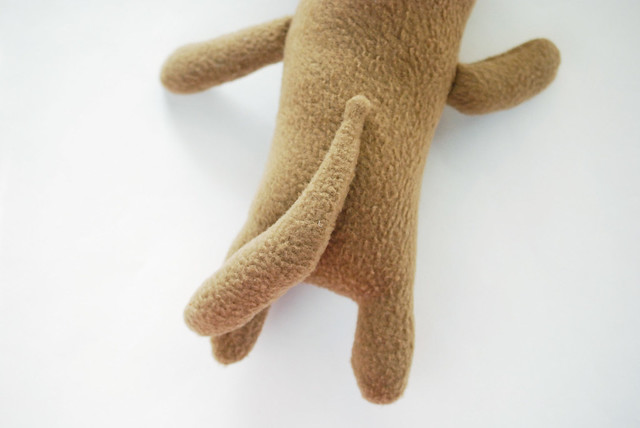
I attached the top inch of the tail, and gave it a tug to make sure it's secure.
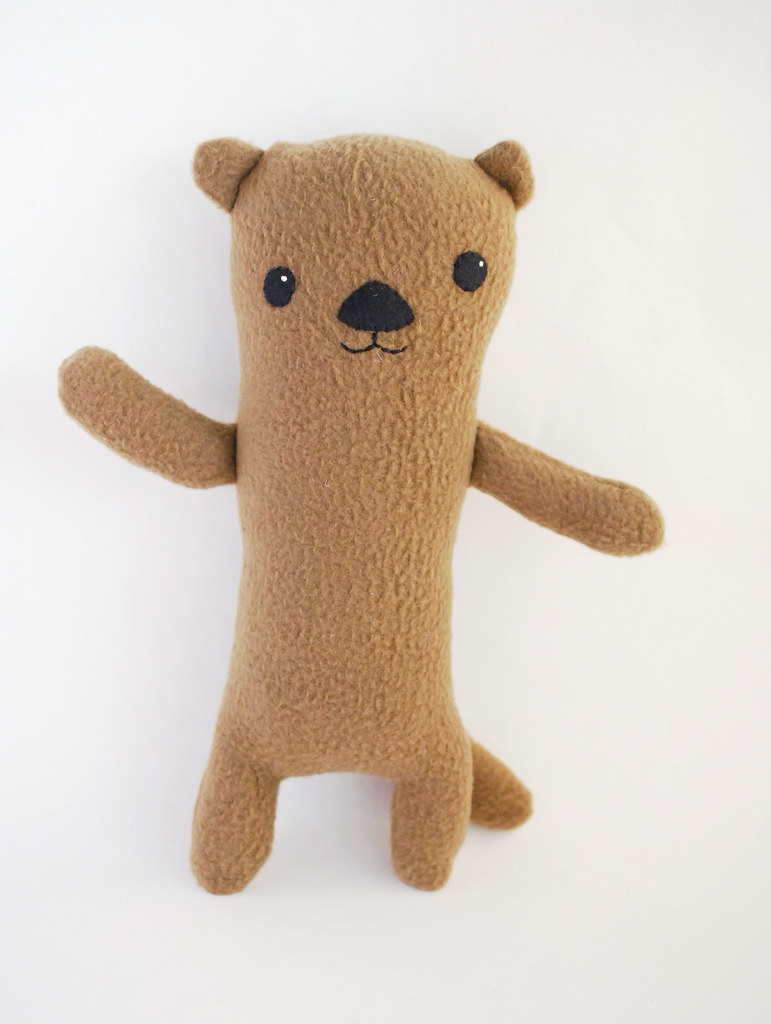
Give your new friend a hug, because it's all finished! And is it just me or does this otter look like he's ready for some disco fever?


Now, let's make a Milo version!
Here's the add-on pattern PDF that has the extra pieces you'll need for both Milo and Tina:
Milo & Tina Add-On Template PDF
 The template piece for Milo needs to be assembled. Be sure to cut the front as shown on the template and the back piece reversed. Tina usese the original template.
Cut out the belly piece and sew it to the front. This is the same for Milo and Tina.

Cut the nose from pink felt and sew it in place in the indent at the top of the belly piece. Use six strands and back stitch.
Embroider the mouth with six strands and back stitch.
Add safety eyes or felt eyes, like in the original critter version.

Make the tail, leaving the opening in the side like with the original.
Sew the tail to the back piece, lining it up so Milo can use his tail for stability. I also tacked it in place farther down to help hold it in position. For Tina, I made her tail stick up, and also tacked it further up to hold it.

Make the arms and ears.
My sewing machine was NOT HAVING IT when sewing the ears, so I stitched them together by hand with embroidery floss and running stitch. They don't have any stuffing in them.
Layer the arms and ears between the body layers and pin them well. Sew around the outside, leaving an opening under one arm for stuffing. Watch out for the tail as you sew!
Stuff your Olympic stoat friend and sew the opening closed. I did this on the sewing machine, so the stitching lines aren't perfect, but they still match the rest of the seams.

Tina and Milo both wear cute little scarves, and for these, I just cut strips of fleece and tied them in the back. They are about 2-1/2 inches wide by 18 inches long. You'll need to adjust them slightly so you can see their faces.
I just want to hug them and cheer them on!

By the way, you can absolutely make Milo and Tina in the same way that my original version was made. Turning the pieces and the body will make them more tall and thin, which is closer to the illustrations, real-life, and plush versions of these characters. I just thought it would be fun to make mine this way. What kind of critter will you stitch & love?
That looks so cute! I'm definitely going to try that myself.
ReplyDeletekisses
http://shinkusara.blogspot.nl
Aw, they are so cute! Love em!
ReplyDeleteSo cute!!! :) Love it!!! I may have to make one for myself... I mean, for my 4 year old son ;)
ReplyDeleteMollie, I received your book late last week and I LOVE it!! You should be so proud of all your hard work because it came out wonderful. I am so happy to see that you included a opossum in there. I love opossums and it's really hard to find any patterns or crafts with them. Good job!!
ReplyDeleteThanks, Aubrey! I love that opossum too!
DeleteOh my, how absolutely adorable. :D I really love it!
ReplyDeleteTo make an otter more obviously an otter, you could also give it a little stuffed seashell to hold. If you put some velcro on the back of the shell and on the front paws, you could pretend that it's on its back, eating mussels. Cute!
ReplyDeleteYes! I think a few accessories are in order!
DeleteSoooo cute!
ReplyDeleteReally adorable.
ReplyDeleteYou are so lovely sharing your pattern with everyone.
Its a real smile maker!
I love this so much. Help, I have fallen into sewing plushies rabbit hole.
ReplyDeleteHello, I love your stuffed animals. There seems to be a problem, the link for the pattern doesn't work...
ReplyDeleteHmmm...It's working on my end. Try it again.
DeleteLinks also don't work for me.
DeleteI found a workaround to download the template pdfs. (The links were blocked by my security software even after I adjusted my settings to allow links to be opened from Wild Olive.) I copied and pasted the link url into a new tab. When I hit enter, this downloaded the PDF, but it had a "keep" next to the file name and a "insecure download" message under the file name. I clicked on "keep" and the file downloaded.
Deleteermine are my favorite animals now
ReplyDelete