It's amazing to me how sometimes the simplest of things can be so cute.
This is Jan. Jan the Marshmallow. I know that might seem like a strange name for a marshmallow, but read on and all will become clear. She's super simple, but oh so cute! Basically, this is a cylinder made from fleece...with a face. There's no pattern needed, only a bit of math.
Within a very short amount of time, you can have a cuddly friend to sit beside you as you sip some hot chocolate!
Here's what you need:
White or off-white fleece
Safety eyes (see note below)
Black embroidery floss
Stuffing
Scissors
Needle
Pins
Sewing machine
NOTE: though commonly referred to as "safety eyes", please remember that they should not be used on toys that will be given to very young children. Instead, you could embroider the eyes with satin stitch.
Here's what you do:
This is the math part. Decide roughly what size you want the end of your marshmallow to be and make a circle template. Cut out two fleece circles. Take the diameter of the circle (straight across from side to side!) and multiply that by 3.14 (pi). ooooh...pie! Wait, where was I again? Oh yes. Now, add about 1/2 inch. Whatever number you end up with, make a rectangle that is your number long by your diameter wide.
Let me show you:
My circle: 6 inch diameter
Multiply: 6 x 3.14 = 18.84 + a bit of extra (round it off...it will be okay!)
My rectangle: 6 x 19.25 inches
Make sense? This way you can make it any size you want. Oh, and I found that it's easier to sew if the stretch of the fleece goes the short way. Meaning if you grab the two ends, there should NOT be much stretch. But it will work either way.
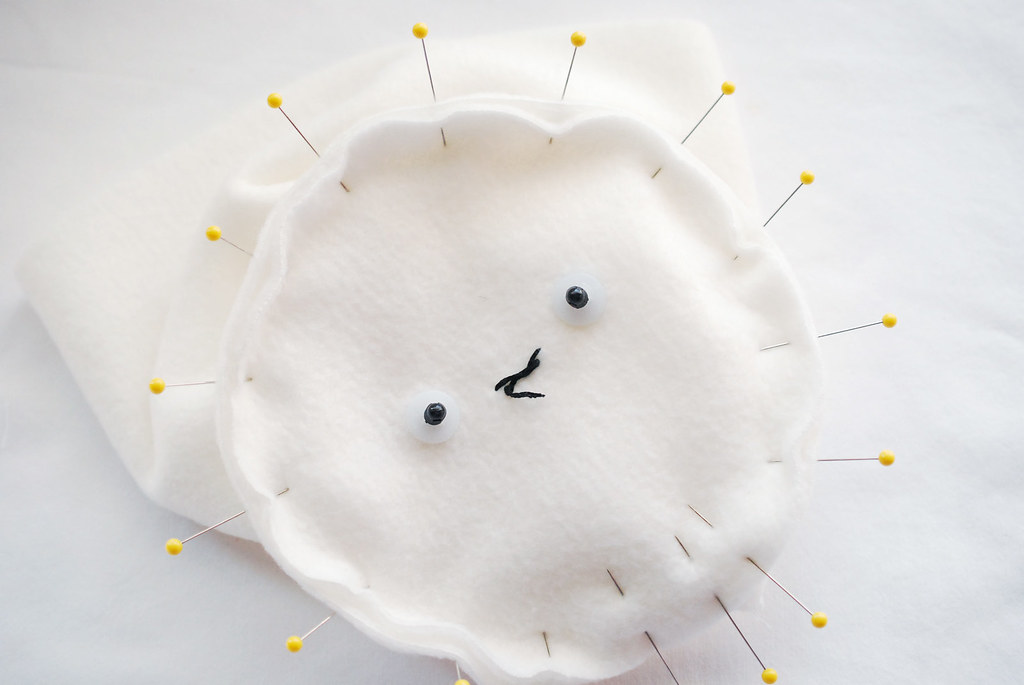
Make a face. It's as easy as two eyes, with a little embroidered smile! Jan has her face on one of the circles so she resembles the marshmallows in Cloudy with a Chance of Meatballs 2. But you can put the face in the center of the rectangle instead. I've made them both ways and can't decide which I like better. Varying the size of the eyes is fun too!

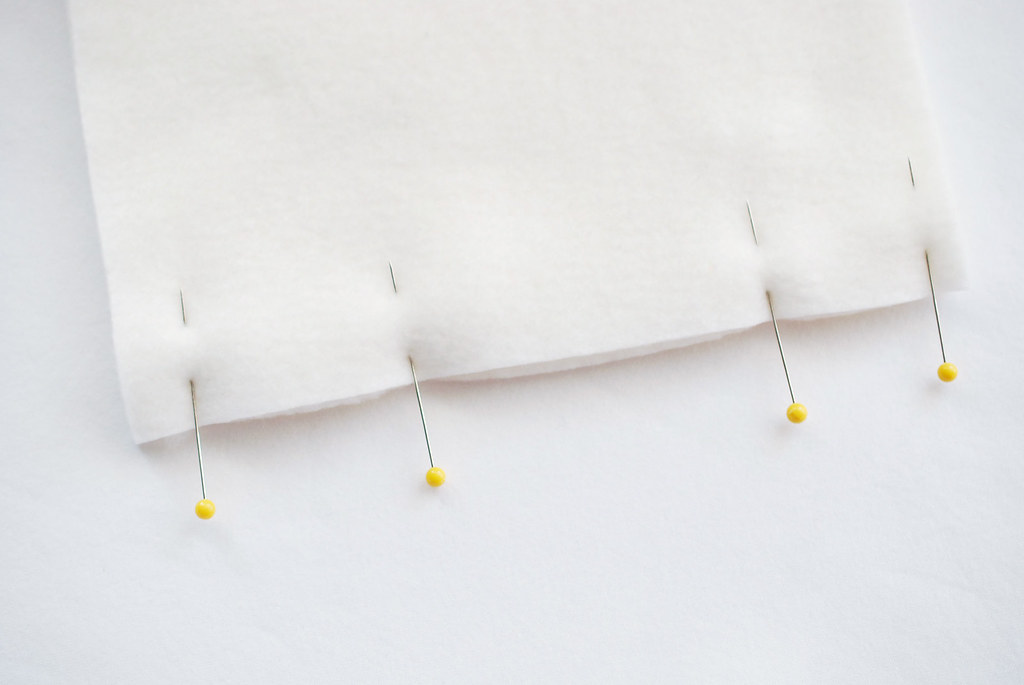
Fold the rectangle in half with right sides together. Pin the short edge, then sew in from each edge (1/4-inch seam!), leaving a gap that's 2-3 inches long in the center. Be sure to backstitch where you start and stop.
This opening will be where you turn it right side out later...it's so much easier to close the opening on a straight seam instead of the curves!

Your rectangle is now a tube, so take one of the circles, and with the right side facing in, pin it in place at the end of the tube. It's a good idea to have the seam of your tube at the bottom edge of your circle with the face. Pin it a lot. It looks crazy, but it will sew together better.
At this point, you'll also see how your math came out. If it doesn't seem to fit quite right, you can sew the tube to make it a little tighter, or trim off just a hair of the circles. But even if it's off by a tiny bit, it should still sew together okay.
Sew around the circle, removing pins as you go.
Turn it to see how it came out. Did you catch all the seams? Good. Now go back and sew the second end in place, just like you did with the first end. For a nicely shaped mallow, check that the circles both stretch in the same direction before you pin and sew.
Turn the marshmallow right side out through the seam in the side of the tube. Fill it with stuffing.
Use ladder stitch to close the opening and you'll hardly see it!
Awww...it's Jan the Marshmallow!
Why is she called Jan?
Well, it's because her older sister is named Marsha, of course! (You can see that her face is on the rectangle side!) And yes, I will be making a smaller one which we will be naming Cindy. My sister Grace has been watching the Brady Bunch for the first time lately, so it's only appropriate, right? Marsha is hers, Anna has claimed Jan, so I guess little Cindy will be mine...
It's silly how happy these make me! I hope they do the same for you.
Oh, and if you still can't get enough marshmallows, check out this fabric I made! You can find it at Spoonflower. It has a lovely aqua background and soft sweets in pretty pastels. I think it would be so nice paired with some solids in these colors!
What a cute marshmallow. :) I think this project is great for anyone.
ReplyDeleteAWW!! They're so adorable!
ReplyDeleteHow can something so simple be so cute!! I love this Mollie!
ReplyDeleteI love this tutorial. What a happy little marshmallow. Please do more of these. My kids would love to make these. Do they sell those safety eyes at the craft store or do you have to order them online?
ReplyDeleteVintagehoneybee.blogspot.com
You can order them online, but I got these at JoAnn. They come in small packs for around $2.00
DeleteOh how adorable! My nieces and nephews would love this!
ReplyDeleteI'm thinking a pocket sewn inside Marsha and some pj's made with your fabric to stuff inside! That would be great for a sleepover - pj's plus a stuffie/pillow in one. I can't decide if there should be a zipper or if I will just leave it open. Marsha could be the pillow and Jan or Cindy the stuffie.
ReplyDeleteSo so cute! Thanks for sharing, your ideas are also so inspirational.
ReplyDeleteThe fabric is gorgeous. Love!
ReplyDeleteClaire xx | somewhere... beyond the sea
Soo cute :3 Lovely photos ! Great post <3 :)
ReplyDeleteℓα ℒιcσrηe - ℒa vie est ℓa petite ℓicorne.
you made me laugh out loud - Jan and Marsha...
ReplyDeleteTheir last name must be Staypuft....... (snicker)
ReplyDeleteAwww so cute ><. I love these tutorial. Can't wait to make my own marshmallow.
ReplyDeleteJan is ADORABLE! So incredibly cuddly, I love it!
ReplyDeleteMake more patterns for fabric!!
ReplyDeleteI've already made three! Thanks for the idea. I've gotten a lot of suggestions: make a little black fleece sleeve so that the marshmallow can transform into a piece of sushi, make brown fleece squares as graham crackers and chocolate to make a s'mores sandwich with the marshmallow...
ReplyDeleteI also want to take the idea and run with it and make little puffy clouds. Calculating the length of the "body" strip will be a little harder though!
Just love it!!
Those are fantastic ideas!
Deleteoh my gosh this is SO CUTE!
ReplyDeletethis is lovely :)
ReplyDeleteIt's just adorable! I love Jan!
ReplyDeleteAww too adorable! Love how simple Jan's face is yet it makes everyone go aww... Happiness doesn't have to be complicated. ♥ Stefanie, One Savvy Lady
ReplyDeleteI just love how you put a smile on everything! Very happy making :)
ReplyDeleteEmily at backtothecraft.blogspot.ca
Can you please make me one and I'll buy it? Or can I buy the ones you've made, I really really want one. I live in London btw so would that be okay?
ReplyDeleteYou're too sweet! The ones I've made have been claimed by family, and I don't generally sell finished pieces. But maybe we could work out a trade for something fun from London? email me so we can talk more! molliejohanson at gmail dot com
DeleteIt is so cute omg !
ReplyDeleteLove the idea <3
ReplyDeleteWhich way do I fold the rectangle hot dog or hamburger style. thanks makeing this for a friends party tomorrow
ReplyDeleteHamburger style. I hope it comes out well!
DeleteSuper Ultra Mega cuteeeeeeee! >v< i want to do it but i don't have the materials needed ;-;
ReplyDeleteWhat size safety eyes are those? 12mm, 10.5mm, 15mm?
ReplyDeleteI used 12mm.
DeleteLooks super cute - I can't wait to try this! Unfortunately, I can't seem to see two of the photos? I think they're the ones about sewing the rectangles...
ReplyDeleteDo you necessarily have to use a sewing machine? Would it be ok if I hand sewed it?
ReplyDeleteI don't have a sewing machine or know how to embroider. Do you know if it would be ok if I sewed the smile on with black thread and hand-sewed the entire thing instead of using a sewing machine? Please reply as soon as possible. Thank you for the help!
ReplyDeleteThat should work. Just be sure to take small stitches so the seams are strong and smooth.
DeleteI have a two yr old and and eight yr old who absolutely love cloudy with a chance of meatballs 2. Asked for the little marshmallows for Christmas and you can't find the marshmallows anywhere! Saved my Christmas! The best part, they're made not bought! Love it!
ReplyDeleteYaaaaayyyy! This makes me so happy!
DeleteA few years back I made a plush "Bat Cat", a character from the show Charlie and Lola, for the same reason. It was so important to my little brother, and no one made ANYTHING like it.
Happy marshmallow making!
Is there anyway that I could buy one of these ready made?
ReplyDeleteI don't sell finished items of my projects, but thank you for your interest!
Delete