


It's always exciting when a new embroidery supply comes along, and when two come out at the same time, it's even better. That's why I'm so happy to be part of a blog hop showing some fun ways to use DMC's new Stitchable Mesh and Stitchable Cork. I've worked with screening mesh and regular cork in the past, and I love the idea of having the same or similar materials that are actually designed for embroidery.
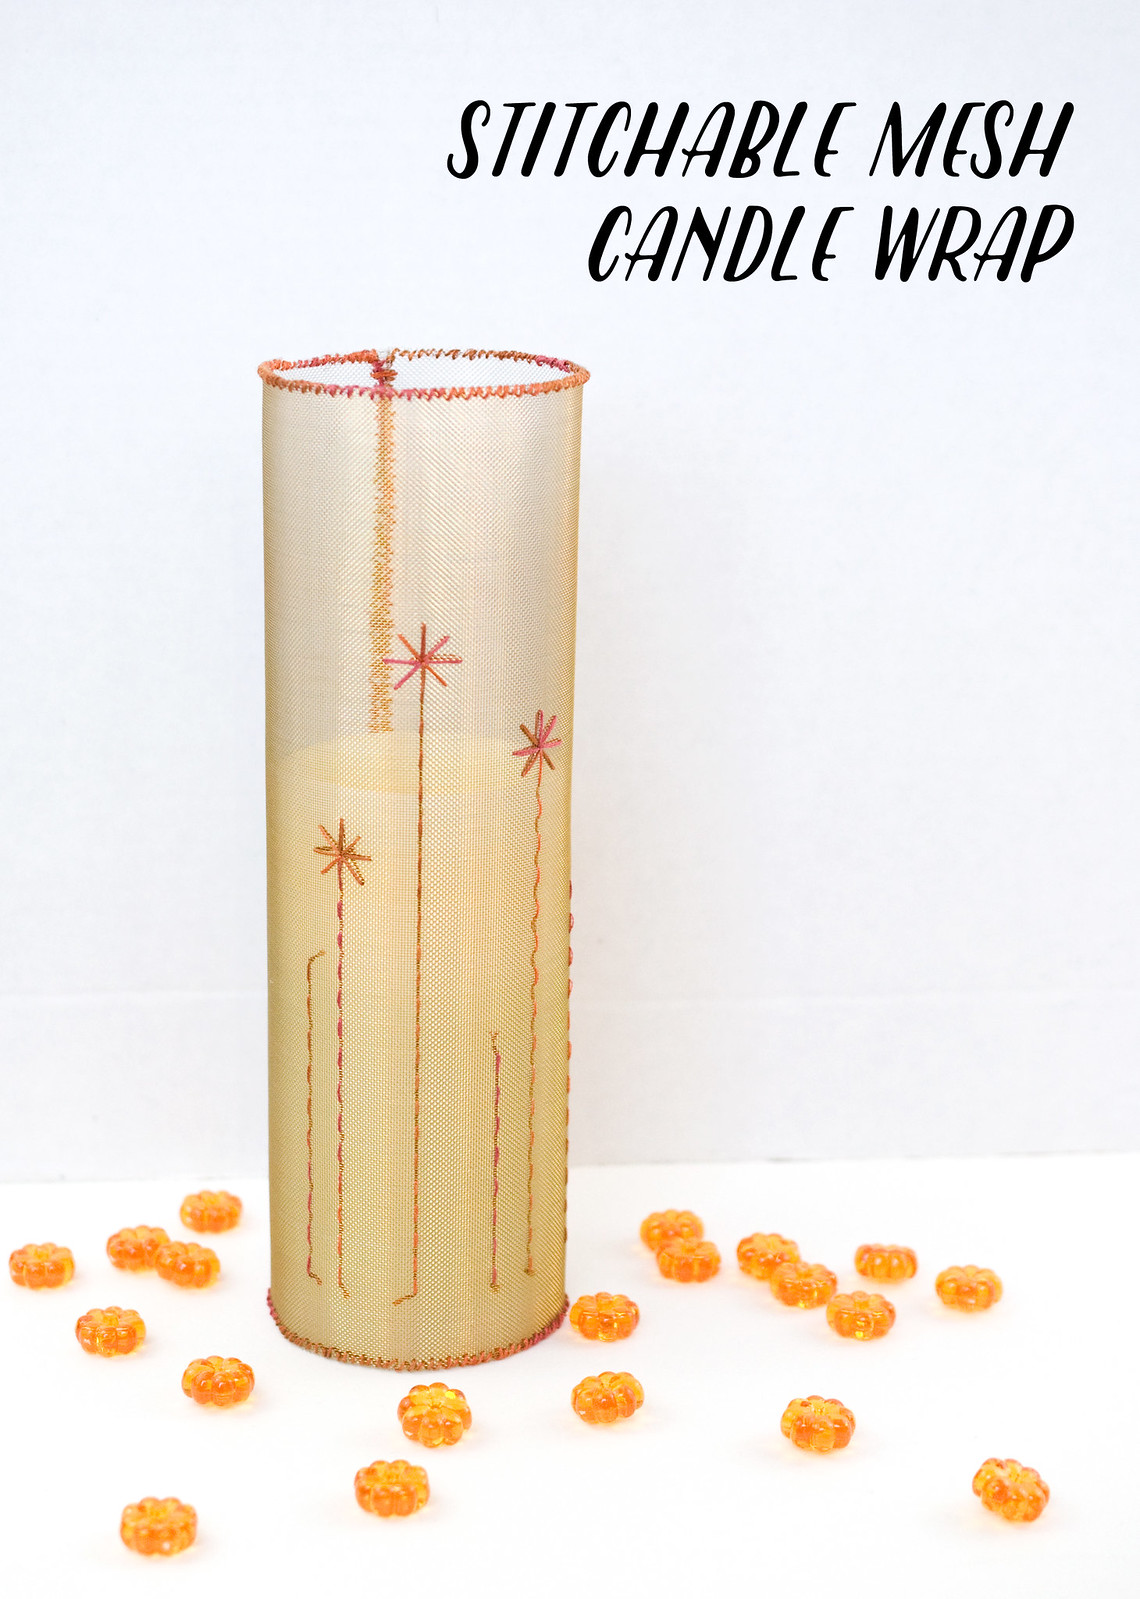
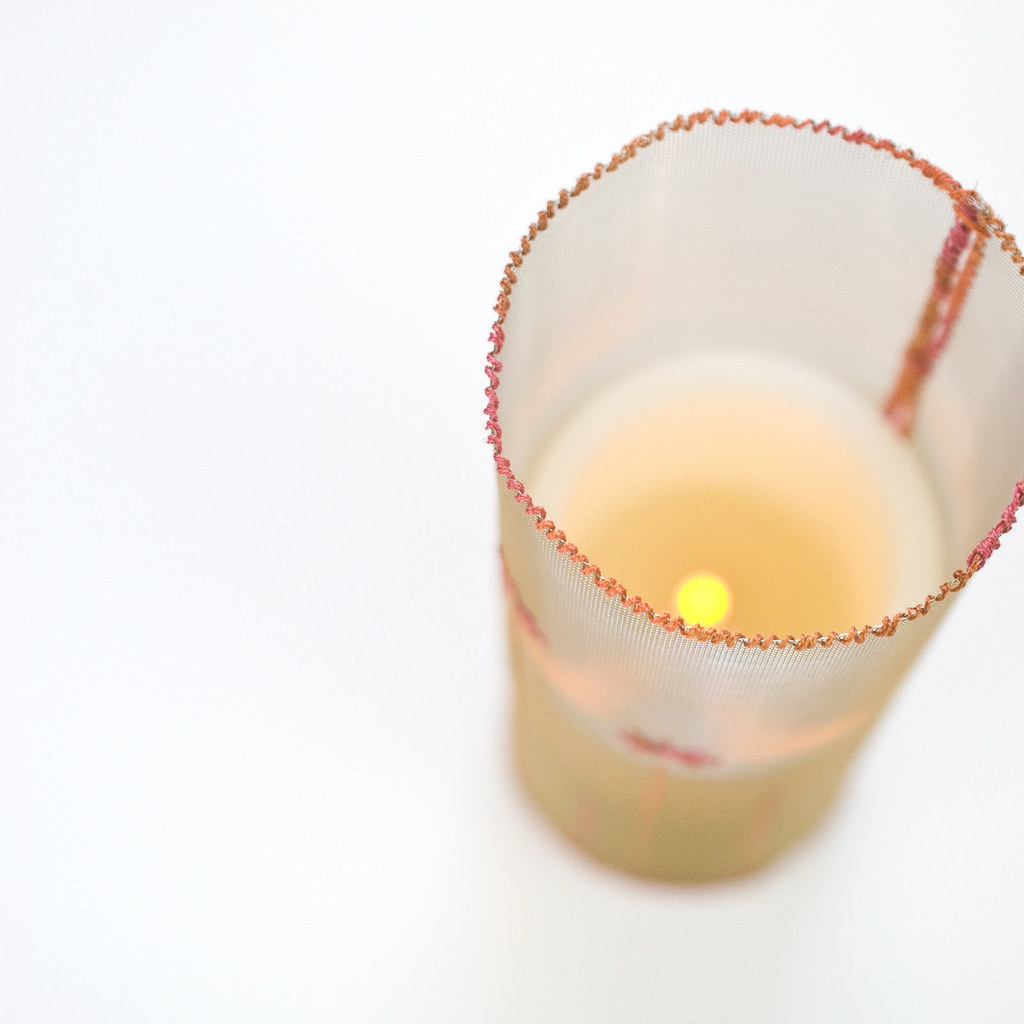
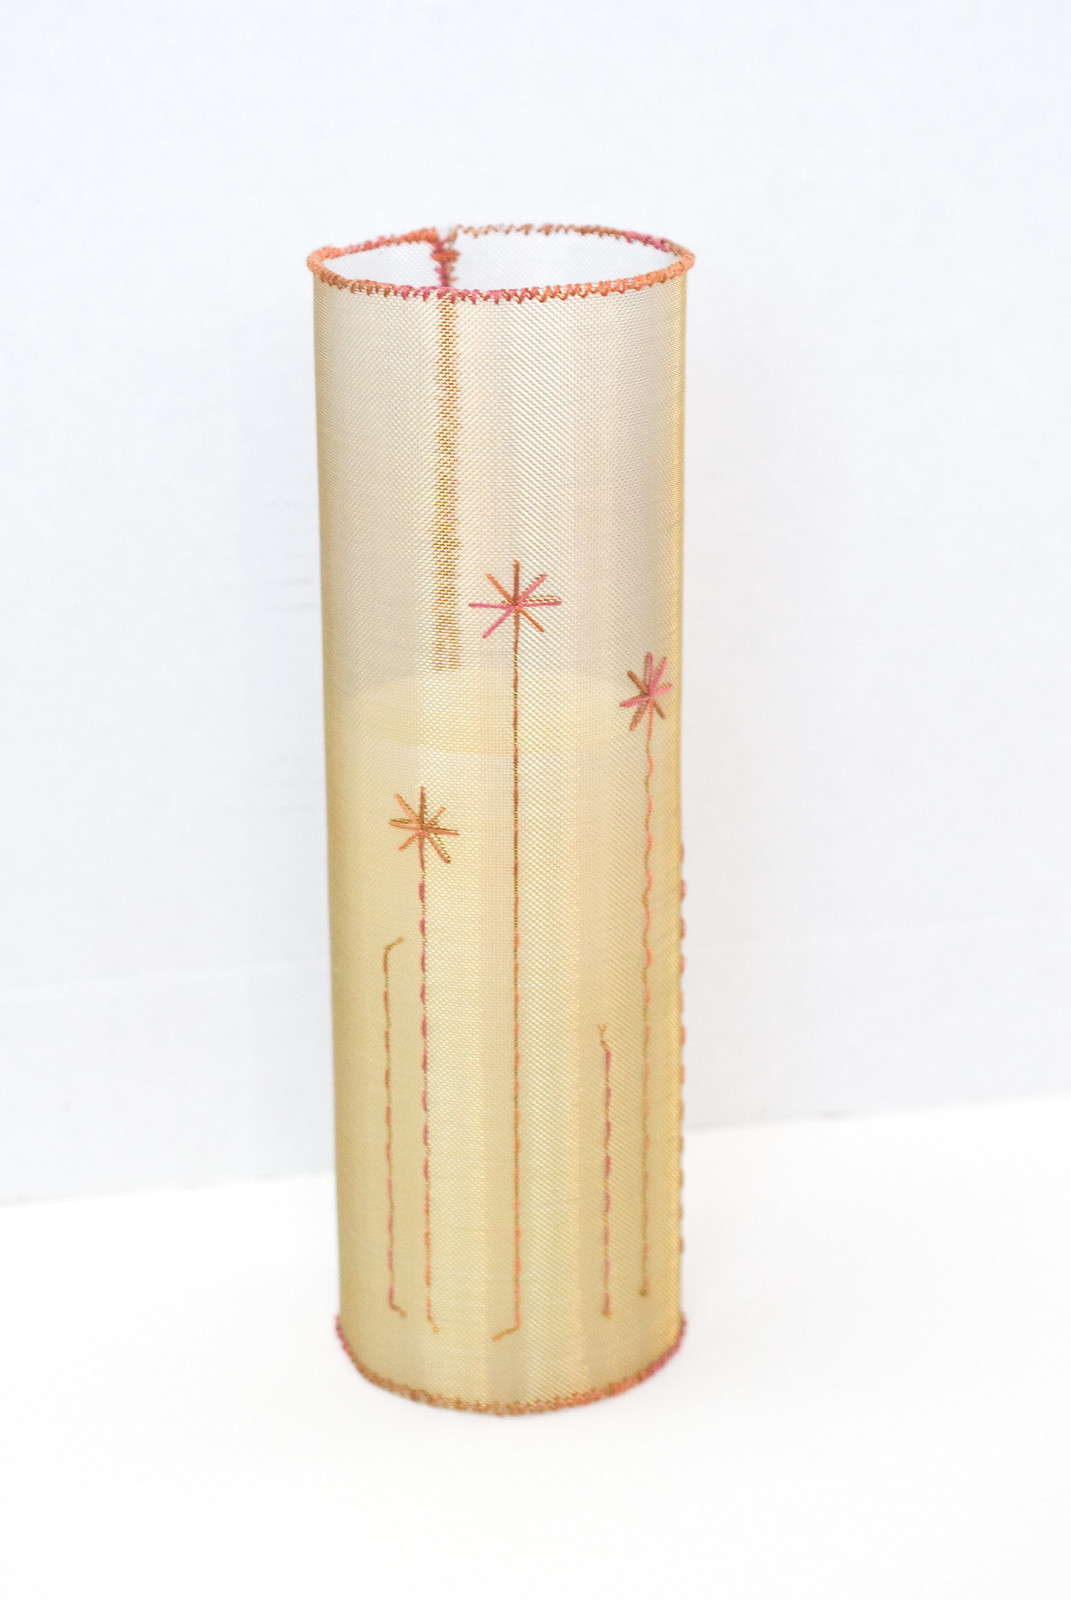
The mesh has a beautiful metallic finish and liked the idea of making something that was a little formal and a little rustic too. Something you might put on your Thanksgiving table. A candle wrap is pretty way to adorn a candle, or in this case, the battery-powered version, and the light shines through this mesh so well.
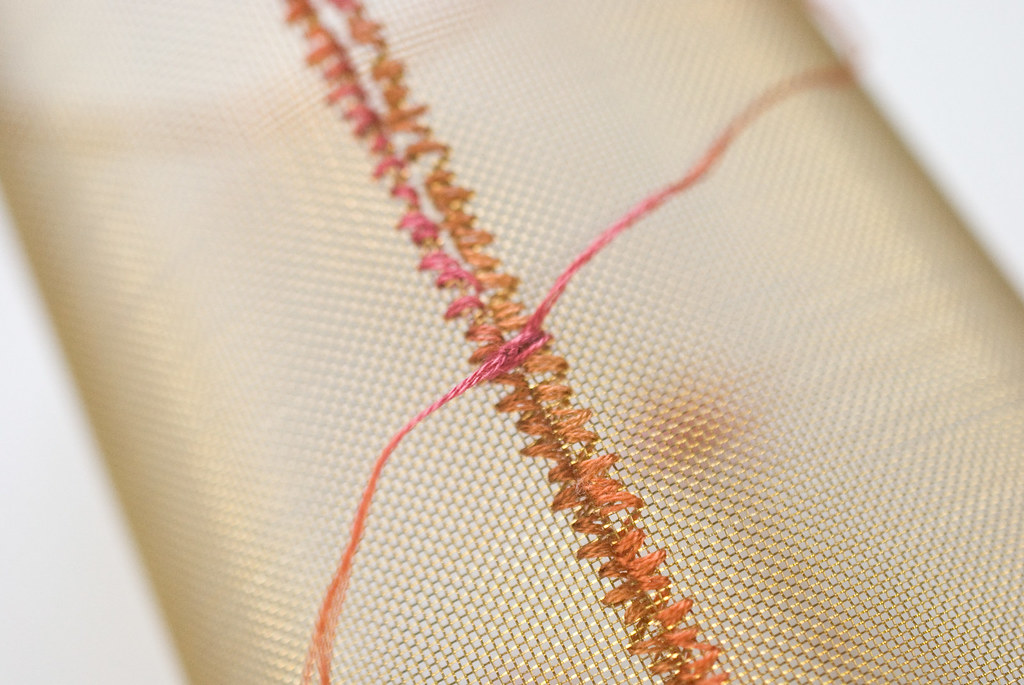
DMC sent me some of each of these stitchable fabrics to try, and so far I've only used the mesh. But I hope to get to the cork soon! The mesh is doubled-sided with gold on one side and silver on the other. The weave is small enough to work designs with some precision, but large enough to have plenty of room for stitches (I used three strands and went through the same hole eight times without much trouble). The weave has some give, which is good. For the most part.
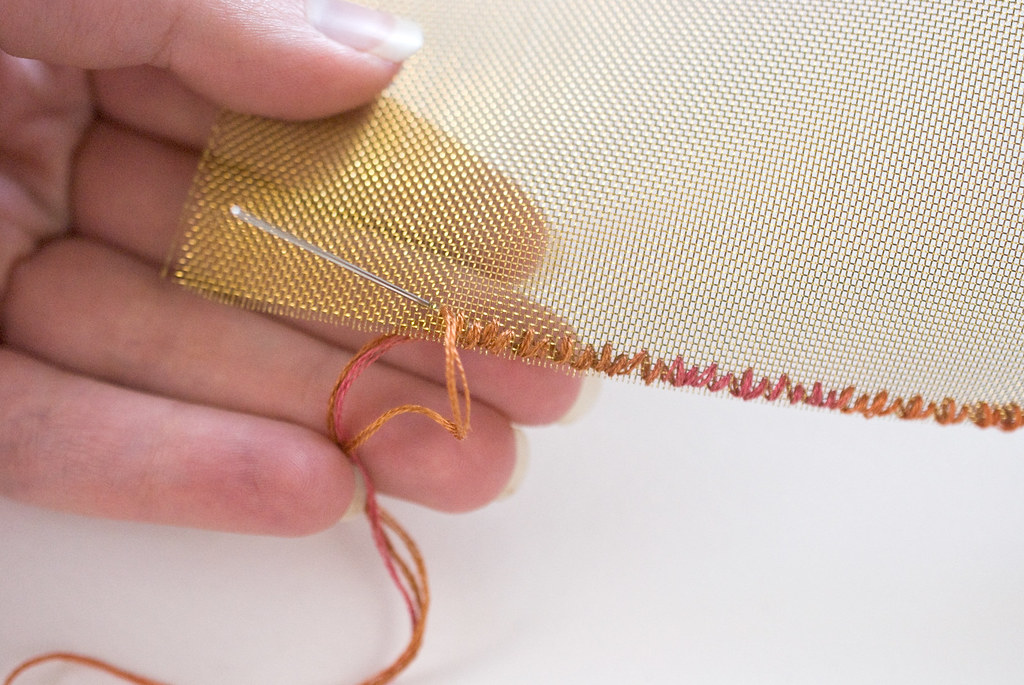
The one downside I found was that it frays fairly easily. As you'll see in the project below, I stitched the edges to prevent fraying, but sometimes that was a challenge. I've also heard that if you place it in a hoop, the hoop shape will stay, so play accordingly. That said, it wasn't difficult to stitch without a hoop.
Now, let's make some candle wraps!
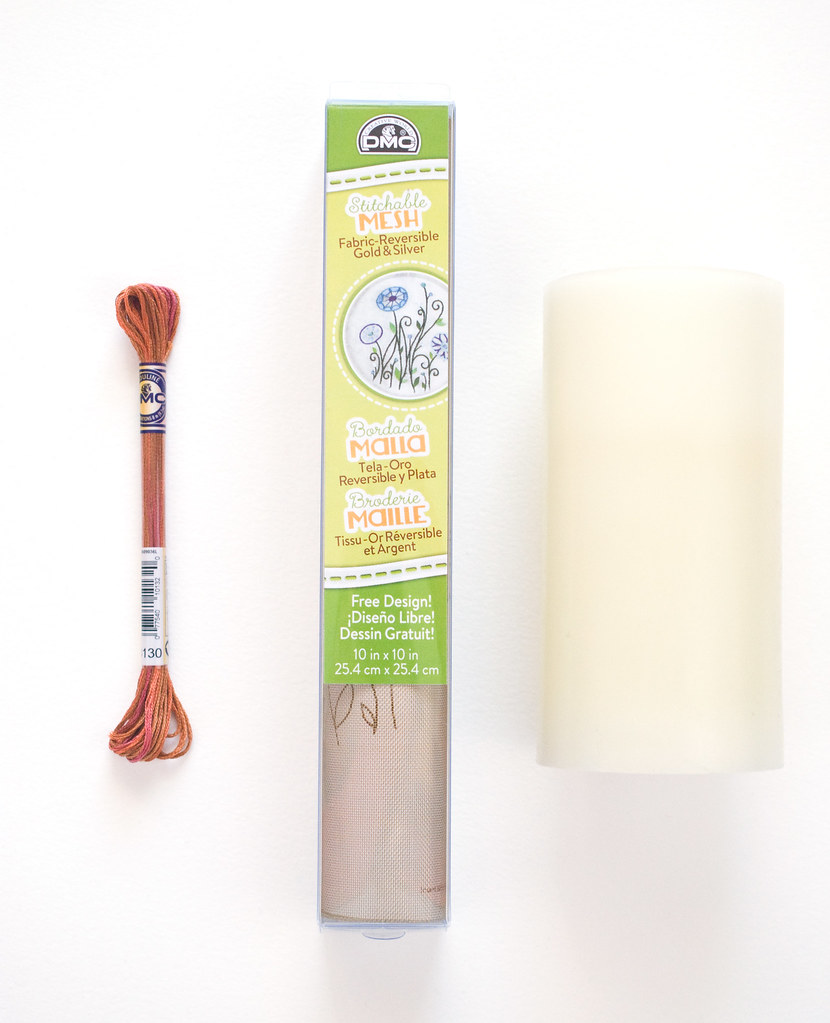
You will need:
DMC Stitchable Mesh (one sheet per one to two candles)
Embroidery Thread (I used Color Variations)
Battery-powered Candle
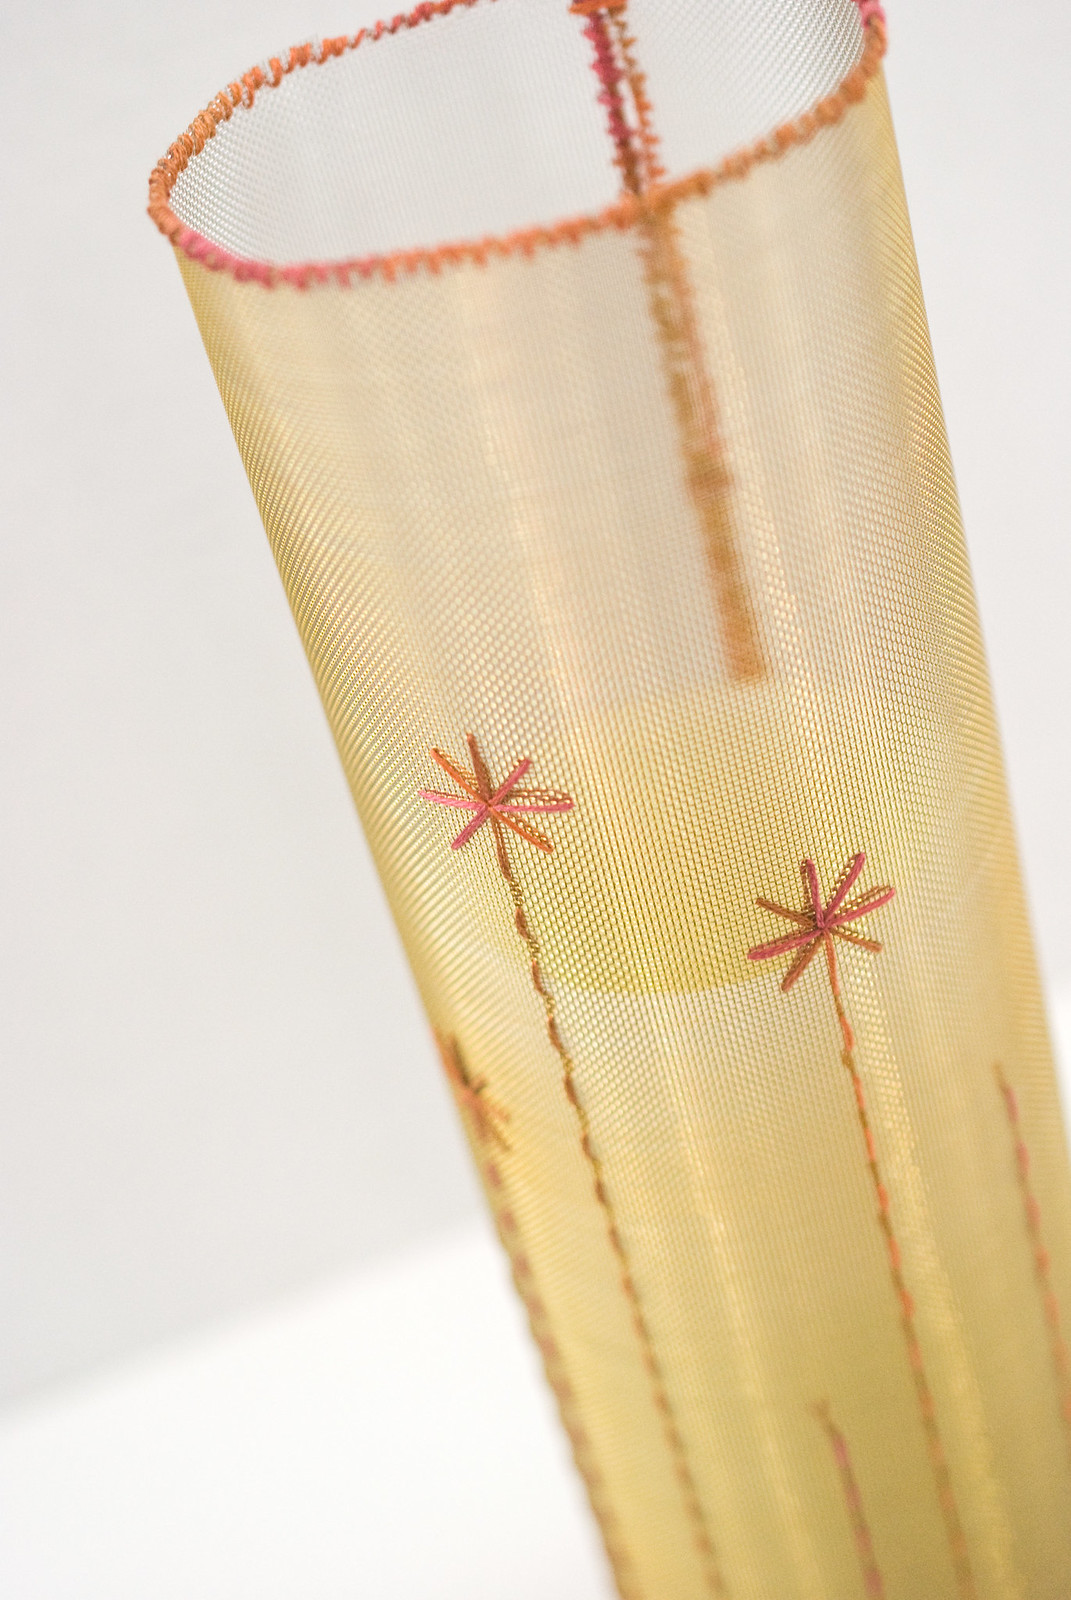
Wrap the mesh around your candle and decide how tall you want the wrap to be. You can make it the same height as your candle, shorter, or taller. For mine, I used the full sheet of mesh so that the wrap is much taller than the candle.
Cut the mesh to size (or leave it), following the weave of the mesh.
Stitch around the edges with whip stitch to bind the material and stop it from fraying. Stitch evenly so it doesn't get too messy. I actually went so far as to count squares and form a pattern with the binding stitches.
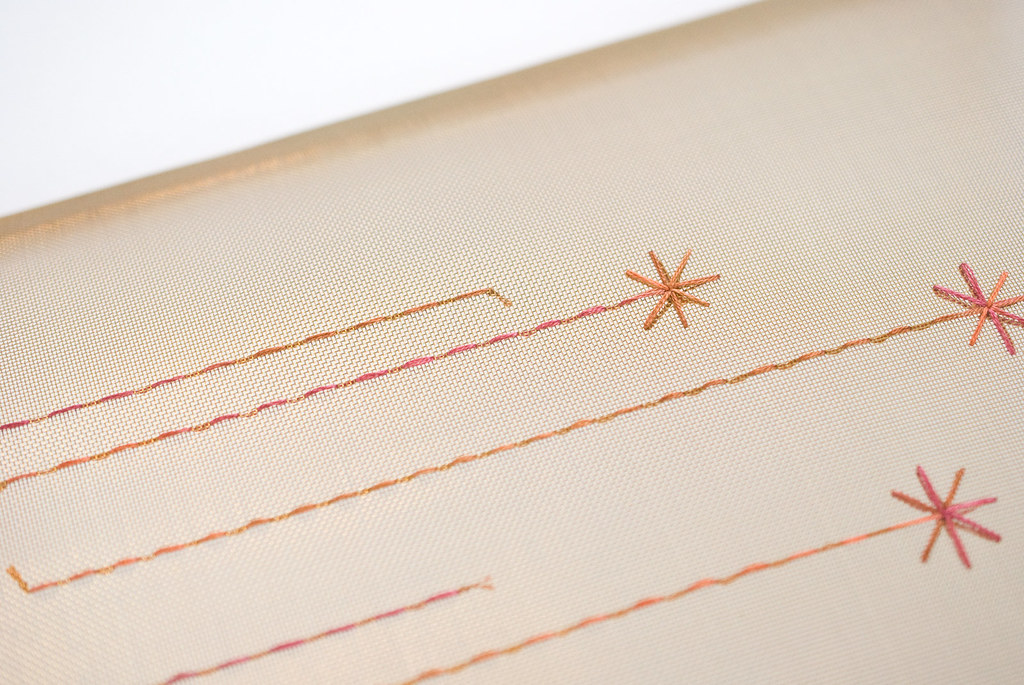
Embroider a simple, freestyle design on the wrap. Lines of running stitch in varying lengths are a great start, and then top off a few of them with star stitches.
Remember that the back of your stitches will show on the front, so don't jump from one area to another (which is also good practice for any stitching!). The running stitch does show through, but it's a nice effect here...sort of two-tone. Of course, you can choose whatever you want to use. Chain stitch would look pretty amazing on this too!

Add as much or as little embroidery as you want. You should have something like this. Or something completely different! Make this your own. In fact, if you're making this for a special occasion, you could even embroider a word or short phrase (think "give thanks" or "be merry!")
Roll the mesh into a tube and stitch the bound edges together, then tie it off. You only need to stitch it together every inch or two.
Slip the finished candle wrap over your candle, and it's ready to use.
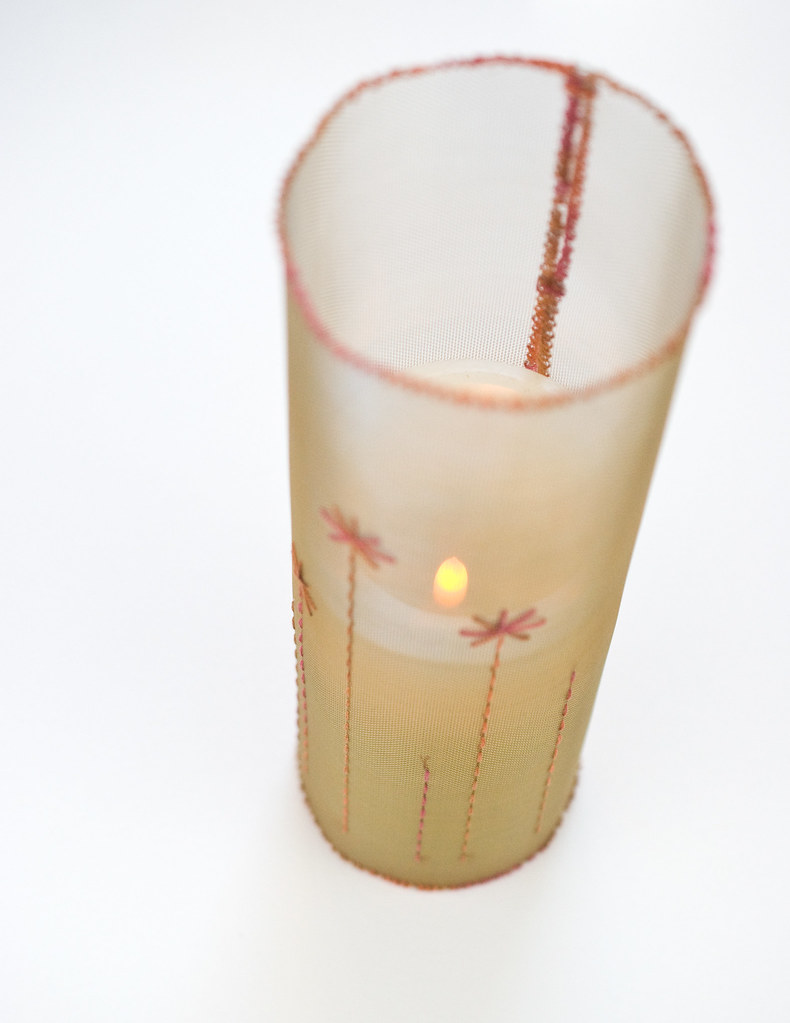
Switch on the candle and watch it glow through your stitching!
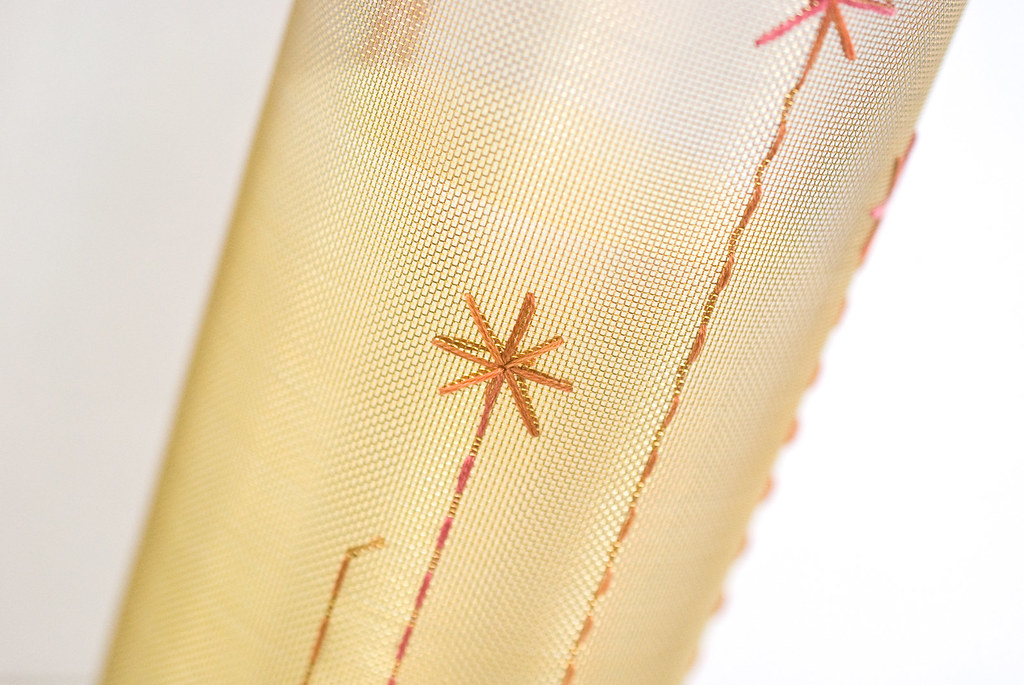
I love how even the most basic stitches shine on this metallic material. Silver is usually my thing, but the gold was too good to resist, especially with the autumn tones of the floss I chose.
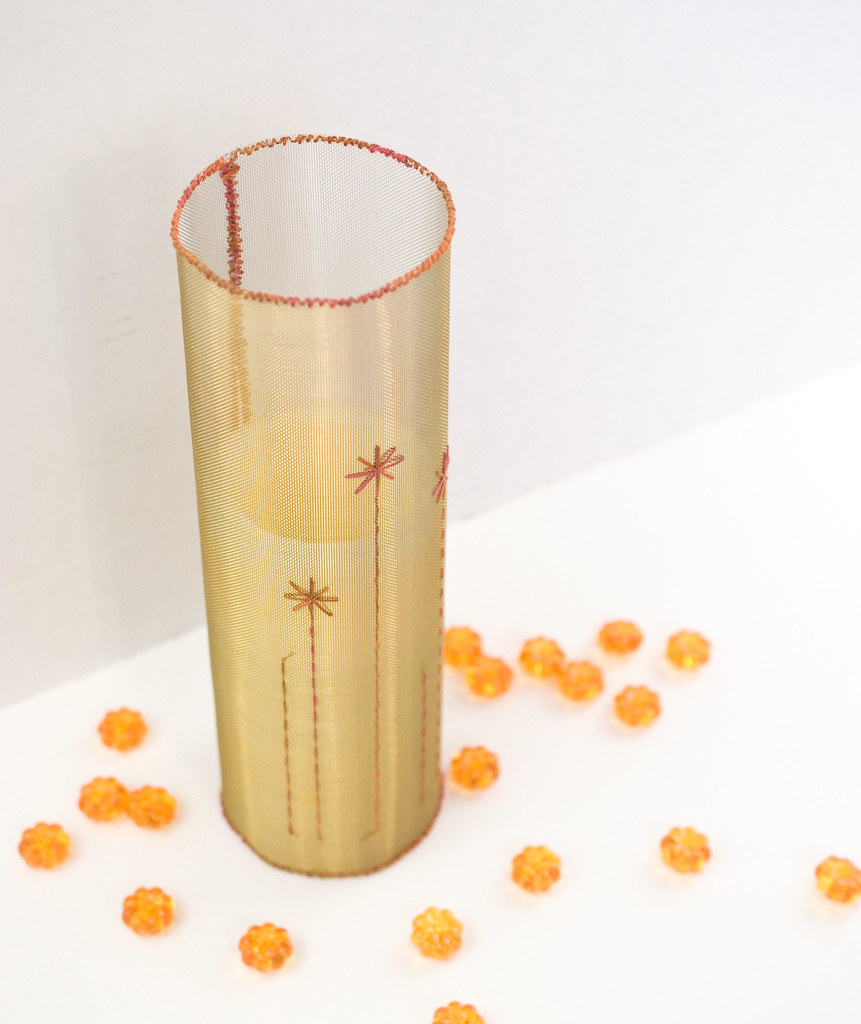
Stitch one candle wrap, or a cluster of them for a tablescape!
Then, be sure to check in with DMC Commonthread to see all of the posts and projects in the blog hop. (While you're at it, follow them on Instagram!) Bev from Flamingo Toes coordinated all of this, and she has updates too! Thanks so much to Beverly and DMC for bringing so many projects together and for the great product!
This is sooo pretty Mollie! I love how creative it is - it's so perfect for Fall!!
ReplyDeleteGorgeous (and so versatile, too)!
ReplyDeleteThis is an awesome product!
ReplyDeleteI'll have to try it out. Thanks for sharing!