about shop patterns projects printables extras sponsorship wild olive twitter flickr pinterest subscribe
Showing posts with label japanese craft. Show all posts

book review // cuter stuff by aranzi aronzo

book review // cuter stuff

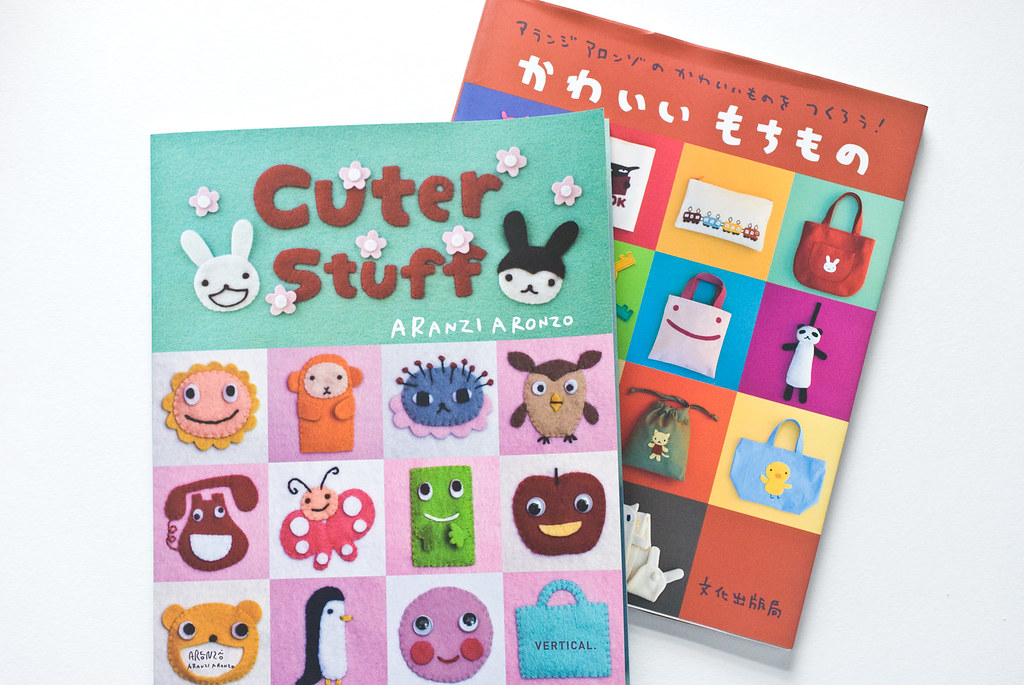
If you saw a book that claimed to have Cute Stuff in it, you'd want to look, right? What if it declared that it was filled with Cuter Stuff? Well, you'd pick up that book, find that it was indeed super cute, and then you'd buy it. Full price. This is what happened when I spotted this Aranzi Aronzo book at Barnes & Noble the other day.

A few years back, I picked up the Japanese version of Cute Stuff (before it was translated), and loved it. The sequel to this title is similar to the first and both are true to their names.
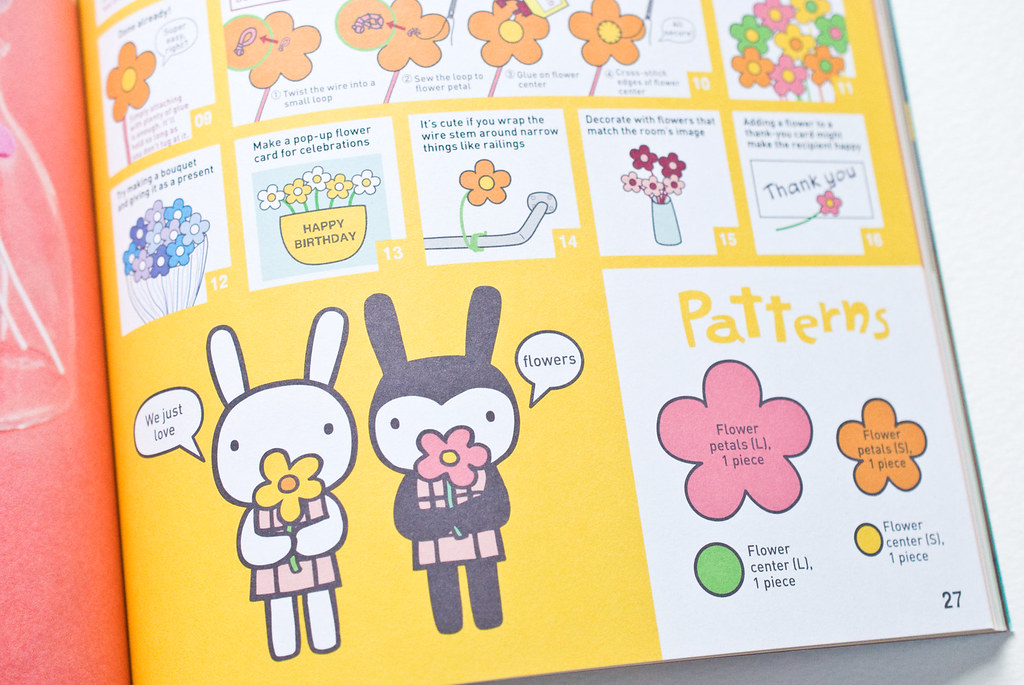
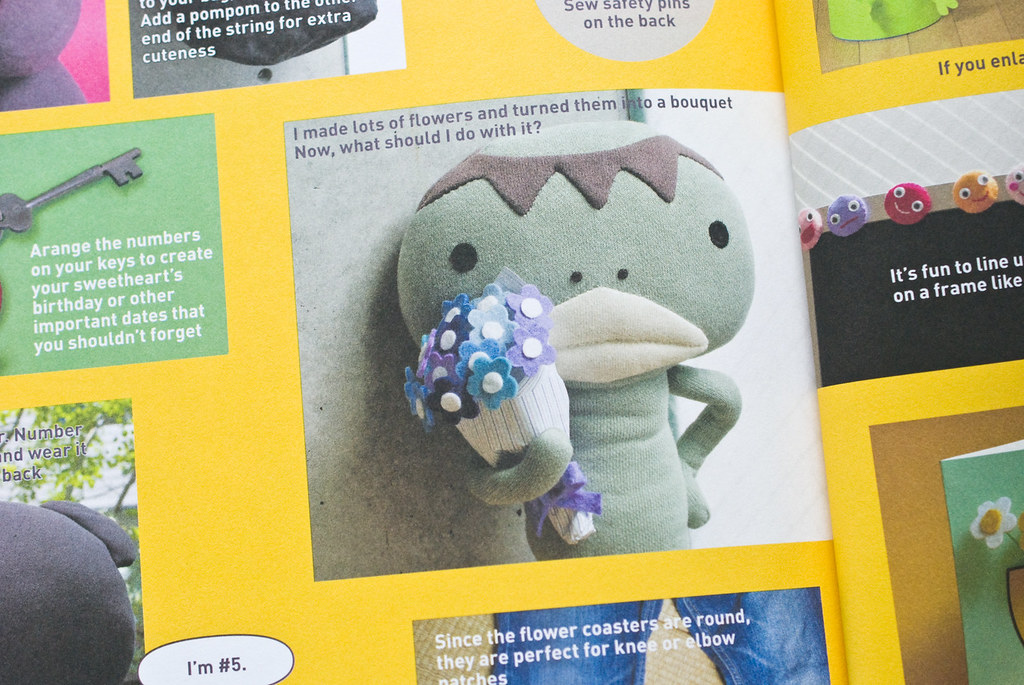
book review // cuter stuff

Each item in the book has a photo, or sometimes several photos, but all of the instructions are illustrated. This was a huge inspiration to me when working on my own book, but I don't think anyone could do it better than the Aranzi Aronzo books. The projects and motifs are cute, but so is the whole process!

Along with the project photos throughout the book, at the back there is a gallery of pictures showing some most of them in use. I love that they are often modeled by stuffed animals designed by the authors!
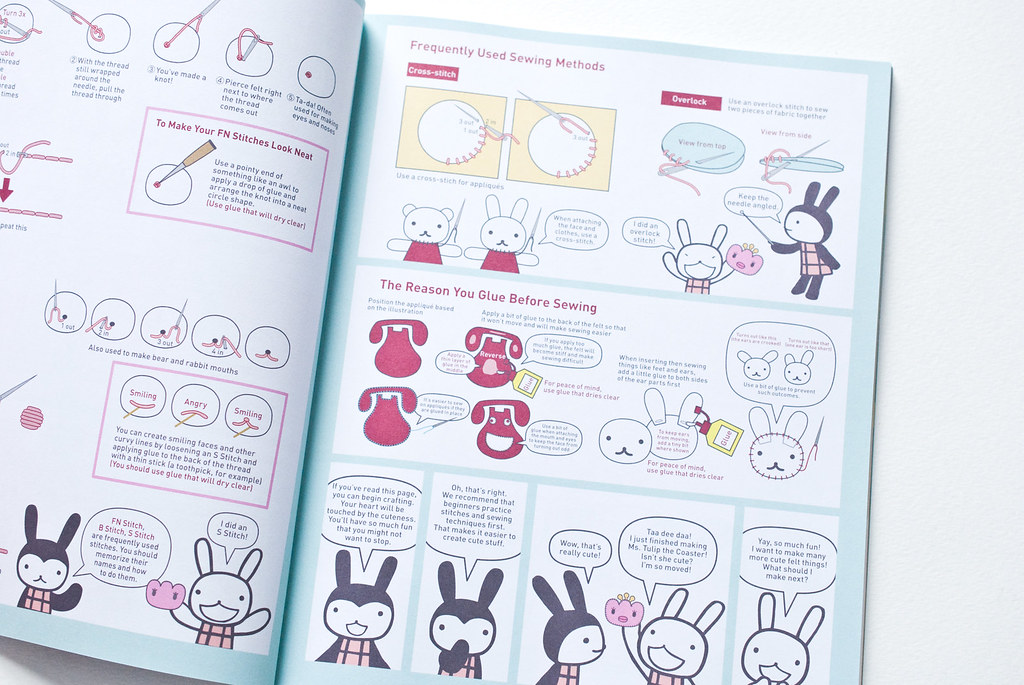
book review // cuter stuff

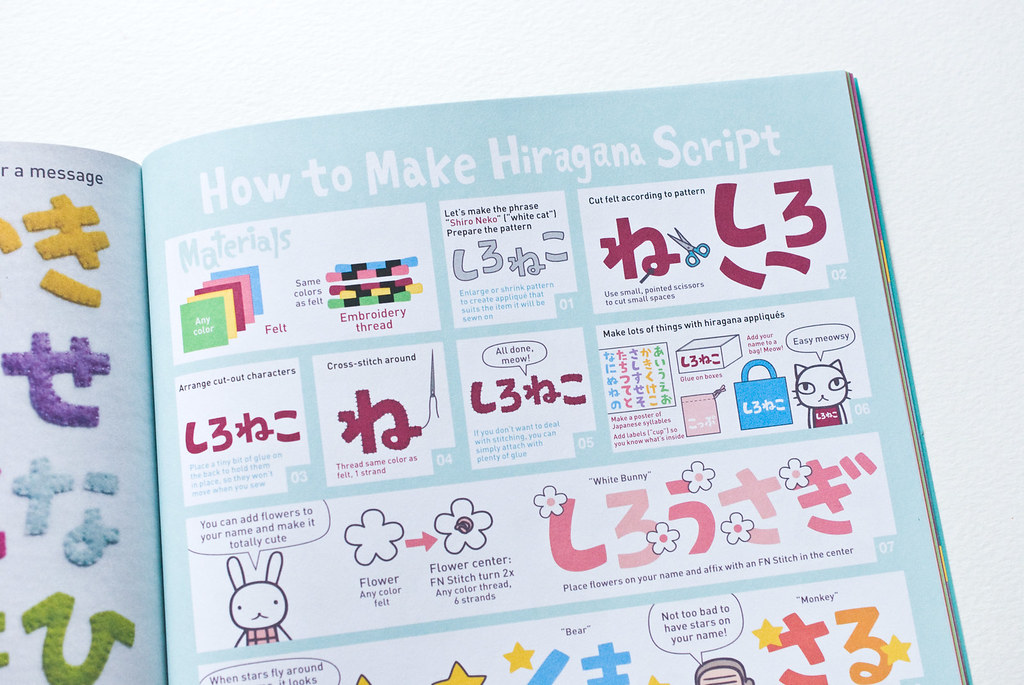
And here's a better look at the illustrations. These are from the basics section. Sewing instructions from bunnies? Yes please! This is a good example of why buying the Japanese version of Cute Stuff worked for me. I can't read Japanese, but the illustrations explain so much. A picture is worth 1000 words, right?
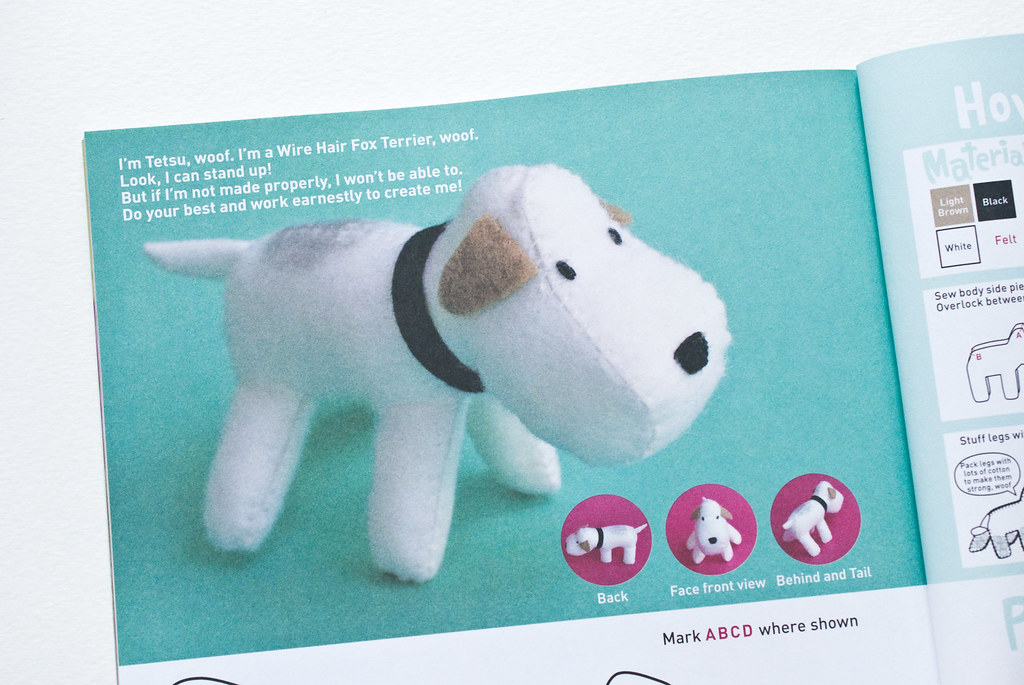
book review // cuter stuff

The projects range from magnets to pencil holders to coasters and more, most of which have a useful quality to them. This doggy is just cute, and I'm good with that. I think my sister and I might make one to play with her American Girl dolls.
book review // cuter stuff

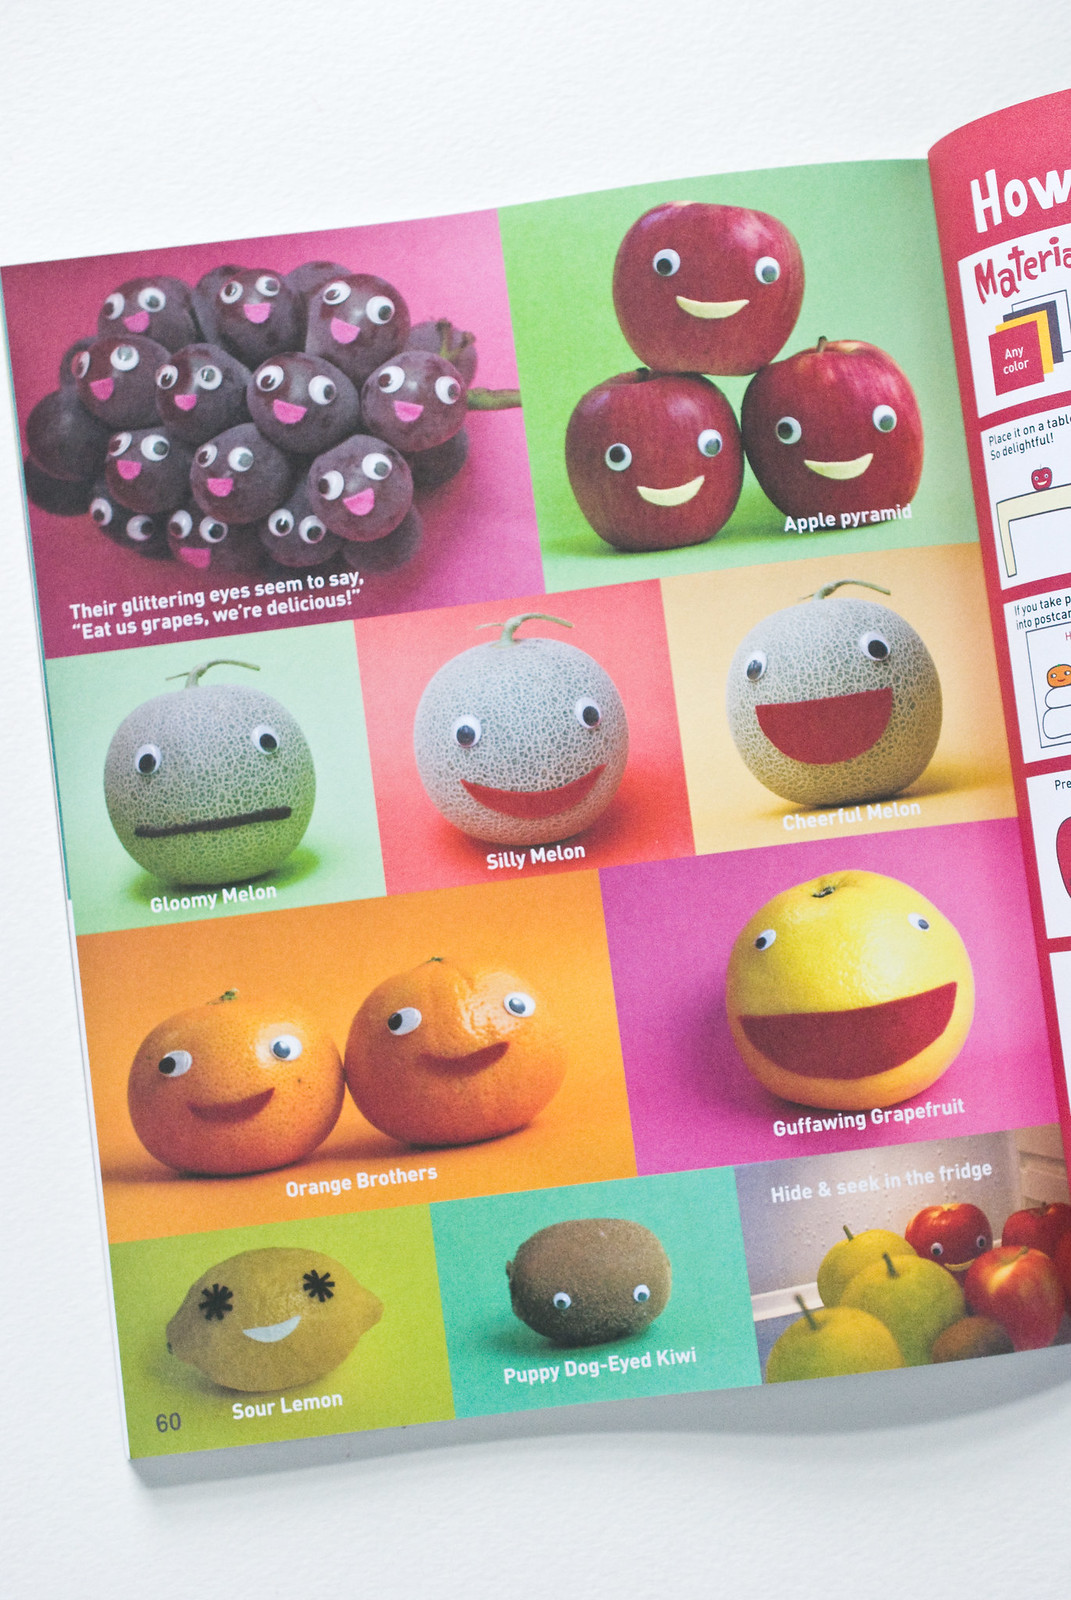
Some projects are rather simple, for example, I didn't need a book to show me how to add faces to fruits and vegetables. But you can bet that I'm crazy for this page. Seriously...things are better with faces.
book review // cuter stuff

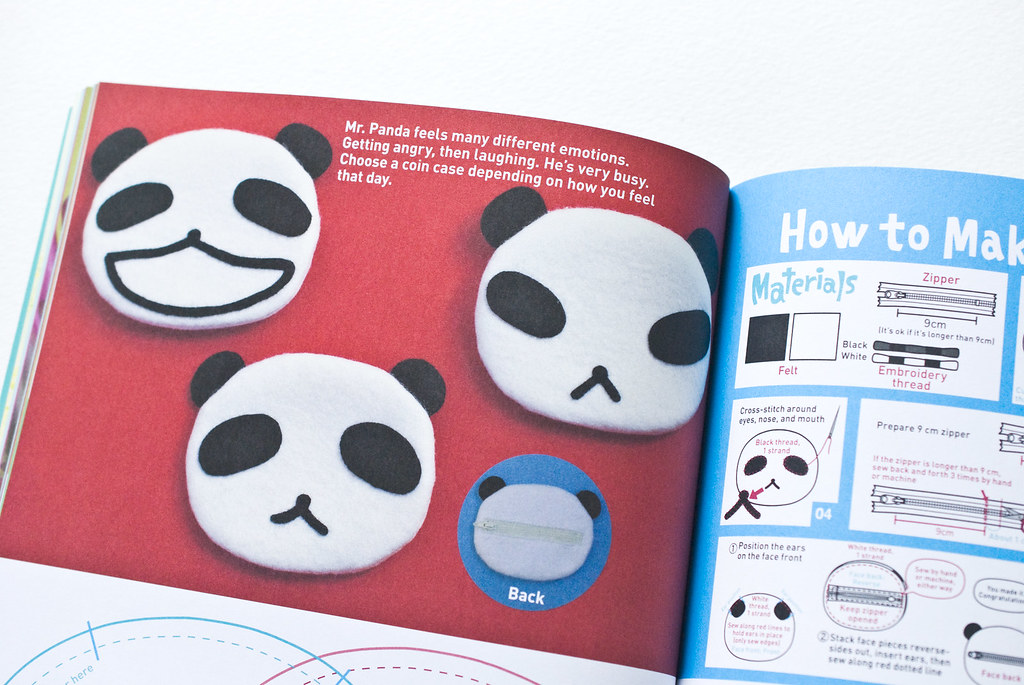
One thing I really appreciate in Cuter Stuff is that you don't absolutely need a sewing machine. They tell you when you can use one, but nearly everything works with hand sewing. Even a panda zipper pouch!
book review // cuter stuff

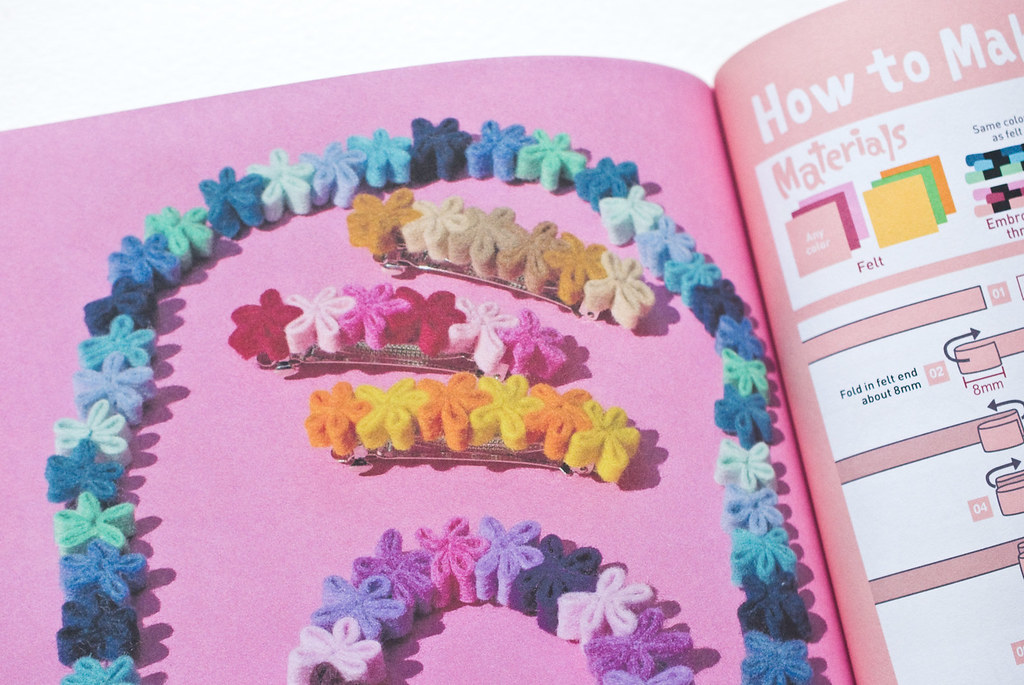
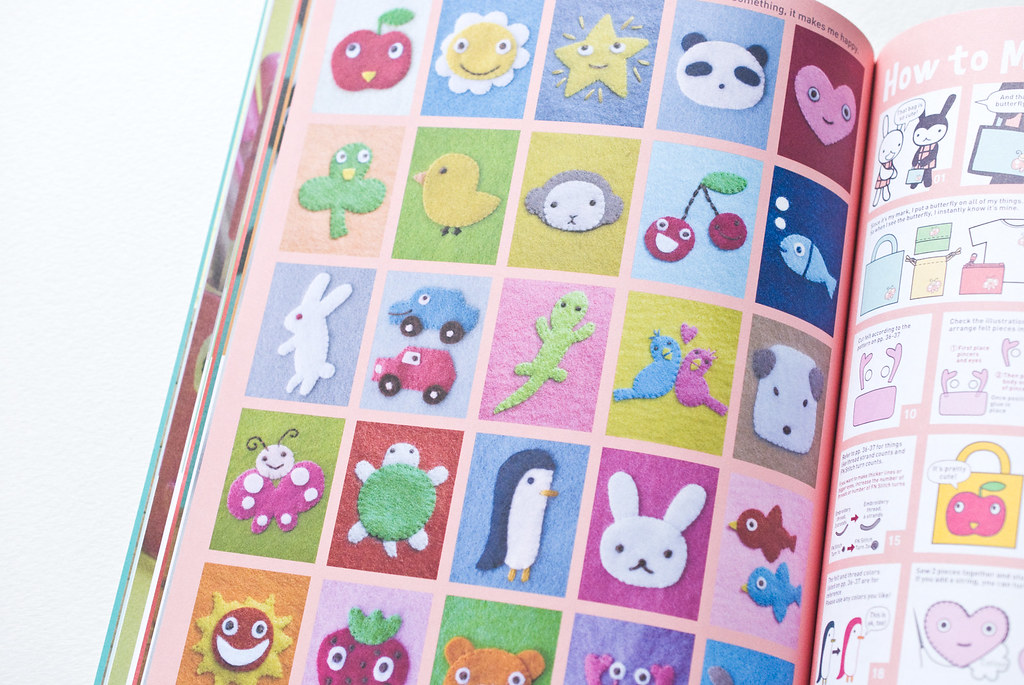
Most projects have a distinct Aranzi Aronzo style to them, but a few feel more generic. They are all still super cute, and I'm looking forward to making these felt flowers. Speaking of felt, that is the most common material you'll use for the Cuter Stuff in this book. Love that!
book review // cuter stuff

Working with felt is one of my favorite materials, and seeing easy ways to work with it is good for me. There are several projects that use the collection of felt applique motifs in the book, including hiragana. Just seeing these kinds of ideas is helpful, because it will get you thinking about new ways to use favorite patterns.

Cuter Stuff by Aranzi Aronzo is simple and good for kids or beginners, as well as for those who just need a dose of cute inspiration. Look for it at your local bookseller or at Amazon or Barnes & Noble.

project // kanzashi butterfly headband

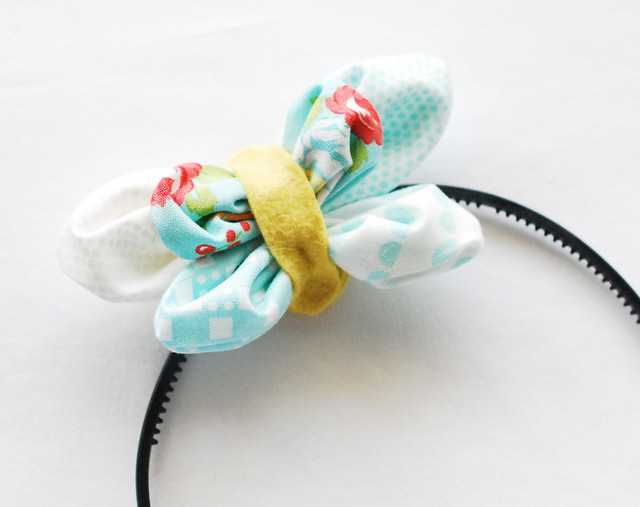
Kanzashi Butterfly


I really like making headbands, especially when I can customize them for holidays and even outfits that I have planned. The headband I'm sharing today fits both of those special uses. But let's back up just a little.

The butterfly theme that keeps showing up in my projects and posts (yes, there are plenty more fluttery friends coming!) was chosen because butterflies are so perfect for Easter time. They go through a kind of death that leads to new life. Forget the eggs, bunnies, candies and whatnot (although I do love those things!). Easter is about death and resurrection and life. For that, I'm forever grateful.

To keep a reminder of that on my mind, I thought I'd keep the butterfly on my head. The end result definitely looks more like something a child would wear, but since I volunteer with the kids at my church, I think it will be perfect to wear on Easter Sunday!

Kanzashi Butterfly

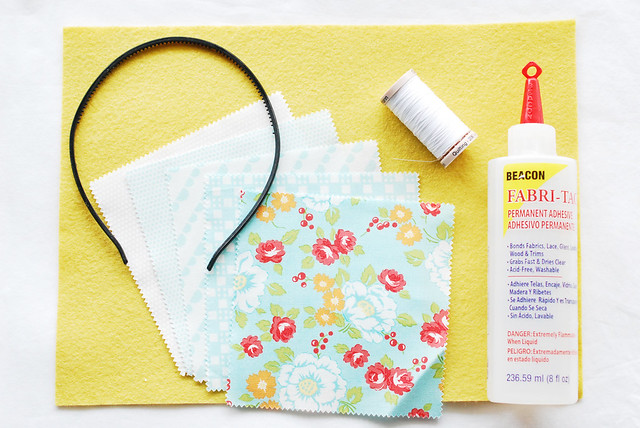
Here's what you need:

Fabric (I'm using 5 Happy Go Lucky charm squares)
Felt
Headband (the cheap kind from the $1 store cause less headband headache!)
Scissors
Needle and thread
Fabric glue

Kanzashi Butterfly Template PDF

Kanzashi Butterfly

By the way, this is called a Kanzashi Butterfly because it uses the Japanese technique of kanzashi. Sort of. I'm basically experimenting with this idea and going with what I like and not being formal about it. Mmmkay?

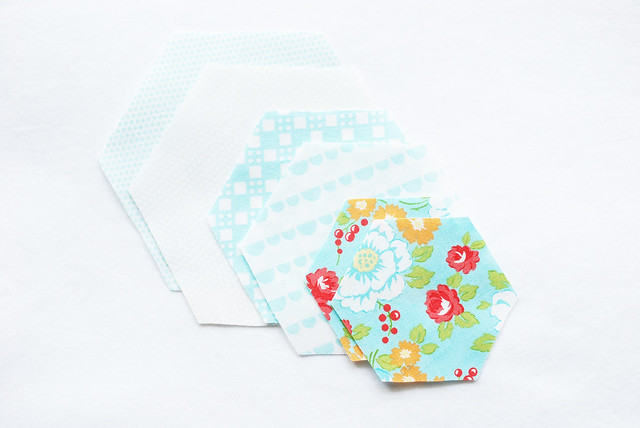
For a layered butterfly like mine, cut out 2 large hexagons, 2 medium hexagons, and 2 small hexagons.

If you don't want the small, extra wing pieces on top, omit the small hexagons. Or, if you want to make a smaller butterfly without the extra wing pieces, omit the large hexagons.

Kanzashi Butterfly

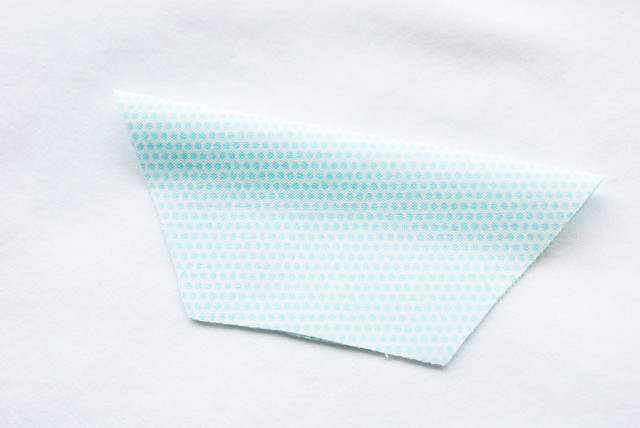
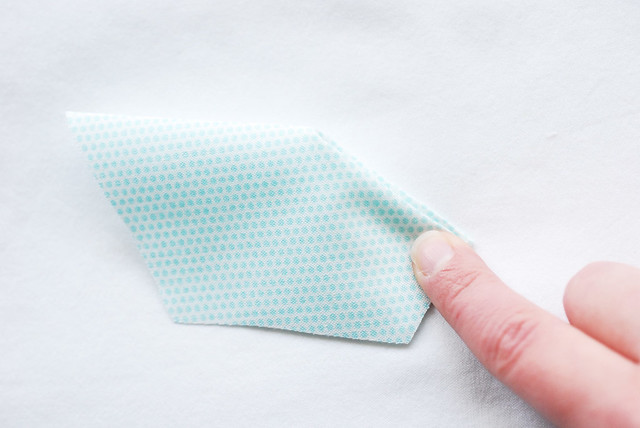
Take one of your largest hexagon pieces and fold it in half as shown.

Kanzashi Butterfly
Kanzashi Butterfly

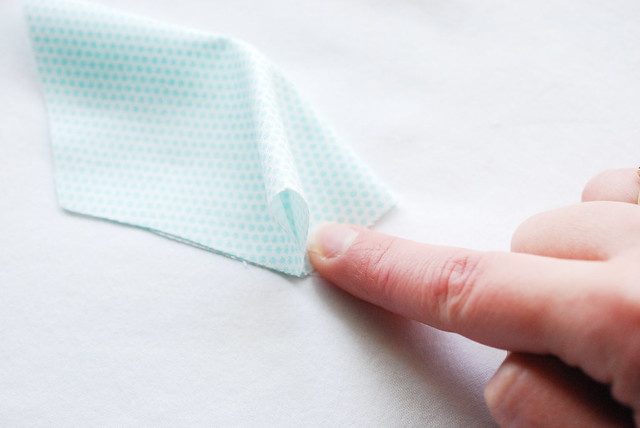
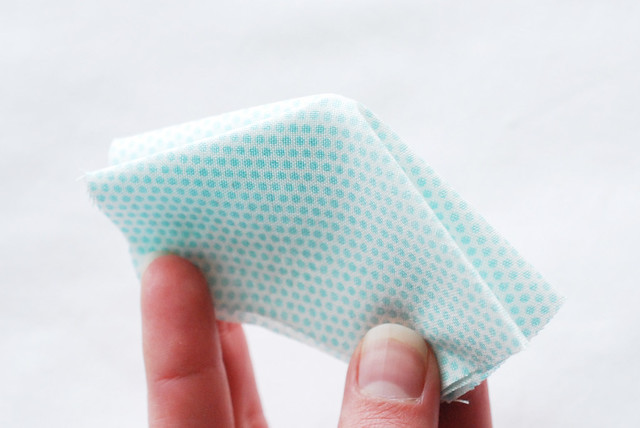
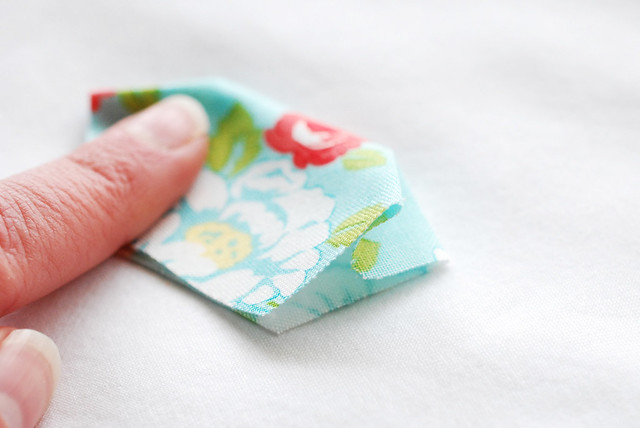
Fold the point at one end of the fold down to the next point on the hexagon, but do this so it creates a valley.

Kanzashi Butterfly

Repeat this fold on the other side and you should end up with a little shape like this.

Kanzashi Butterfly

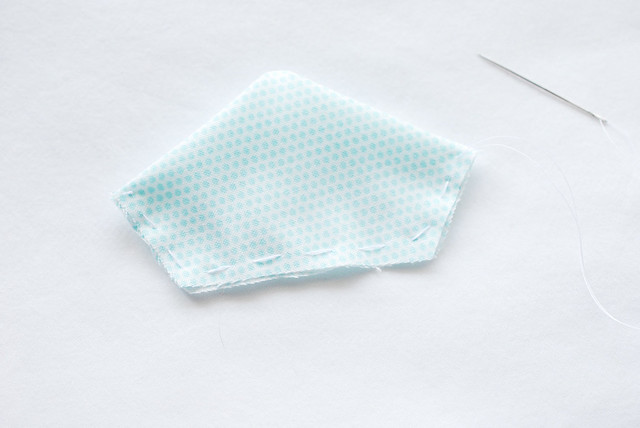
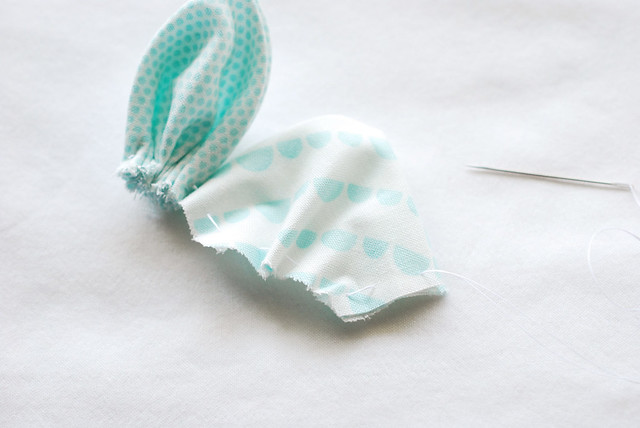
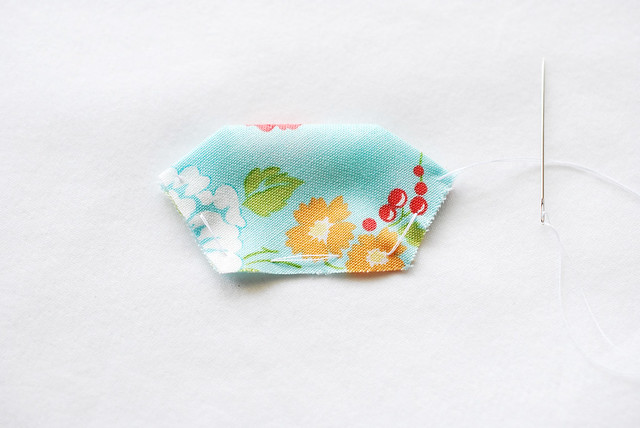
Using your needle and thread, stitch with loose running stitch along the three raw edges of the folded shape.

Kanzashi Butterfly

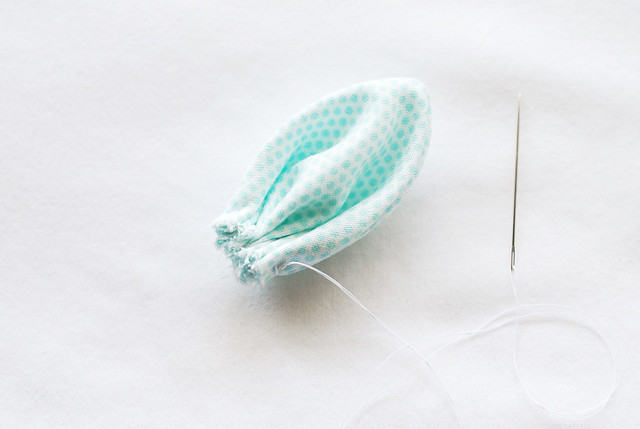
Pull the thread to gather it tight, then secure it with a knot (but don't clip the thread off!).

Kanzashi Butterfly

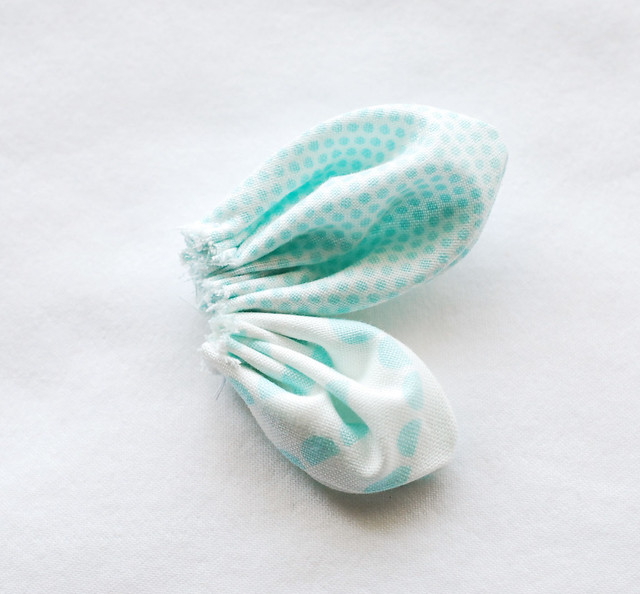
Repeat the folding and stitching process with the medium hexagon. You'll use the same thread that's attached to your first wing piece.

Kanzashi Butterfly
Kanzashi Butterfly

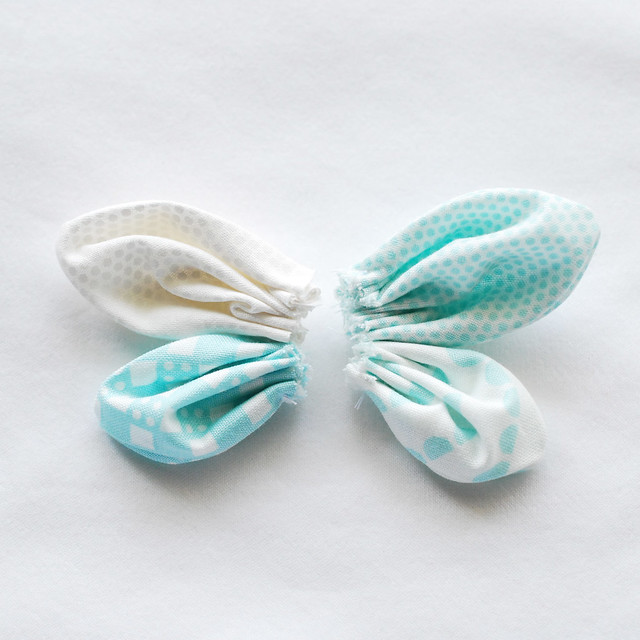
Tighten the gathering on the wing and tie it off. Now, make another set of wing pieces just like the first.

Kanzashi Butterfly

For the extra wing layer, take the smallest hexagon piece and fold it as with the other hexagons, but this time, bring the fold point down only half way between the hexagon points.

Kanzashi Butterfly

Stitch the raw edges with really big stitches, then pull to gather and tie it off. Repeat for the second piece.

Kanzashi Butterfly

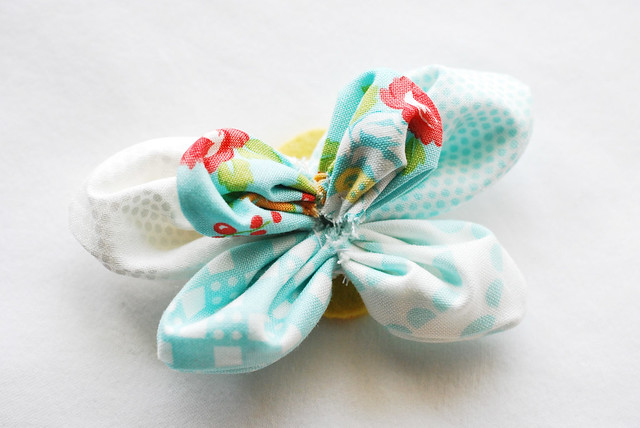
Join the two-part wings together with a few stitches at the top and bottom, then tack the extra wing layer on top. You could do this with the fabric glue, but I like the security of stitching.

Kanzashi Butterfly

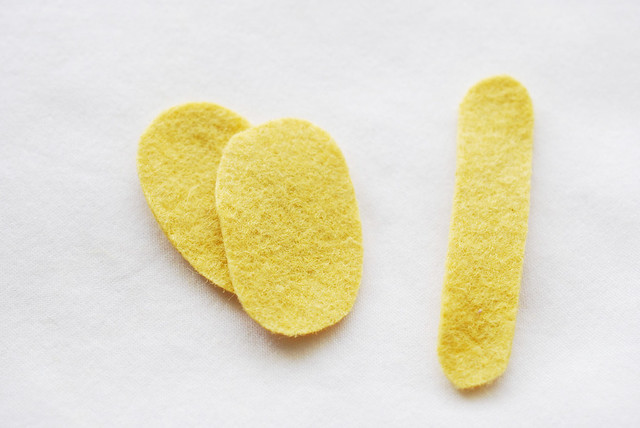
Cut two felt ovals and one felt strip.

Kanzashi Butterfly

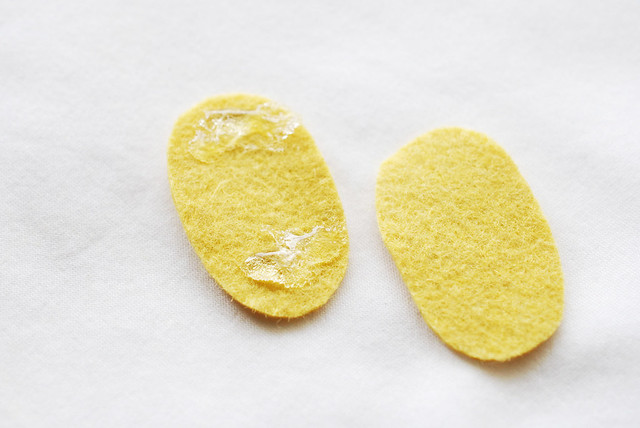
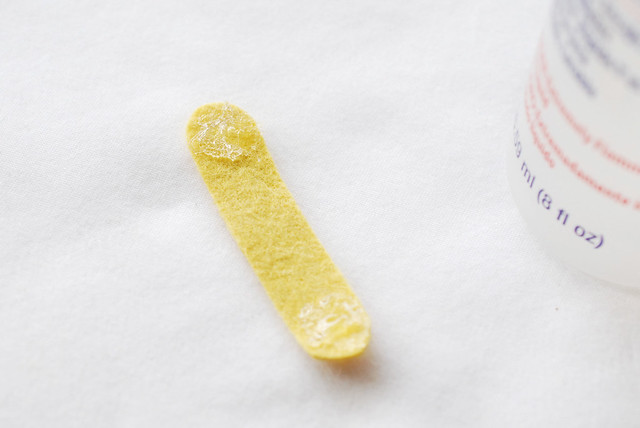
Place a little glue at each end of one of the ovals, but leave the middle free of glue. This will be important because your headband will eventually need to slide through here. Press the second oval on top of the first.

Kanzashi Butterfly
Kanzashi Butterfly

Glue the butterfly down onto the felt oval base. This time, you'll want the glue in the middle, but not on the ends.

And let's just pause to relish in the amazement that is Fabri-Tac. I never thought I'd be a fabric glue kinda gal, but I totally am for projects like this!

Kanzashi Butterfly

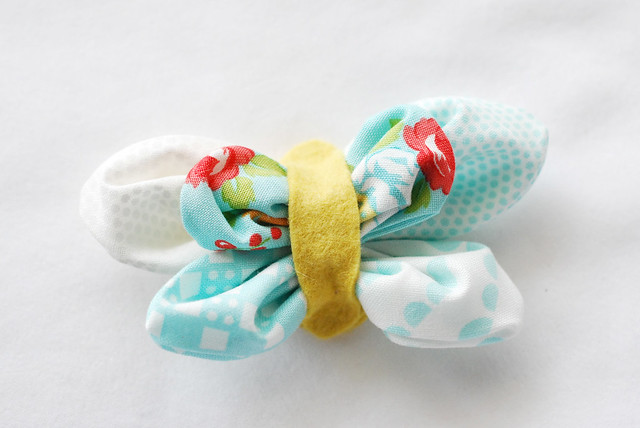
Check that the felt strip is the right length for covering your butterfly body. If you eliminated the extra pieces or used only the medium and small pieces, you may need to shorten this piece.

Add some glue to each end of the felt strip.

Kanzashi Butterfly

Stick the ends of the felt piece down onto the oval base, covering the raw edges of the wings.

Kanzashi Butterfly

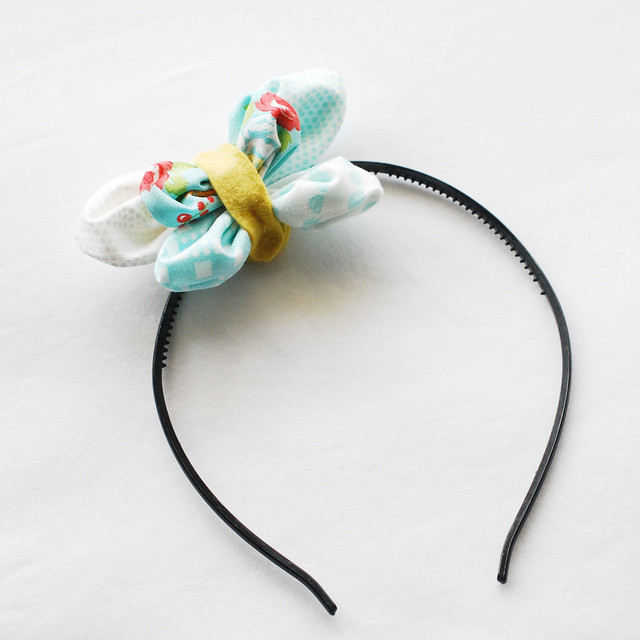
After everything has dried, slide the headband through the oval base. It's all ready to wear!

Of course, you can very easily change this into a pin instead of a headband. Just attach a pinback to one of the oval pieces before you glue it together!

Kanzashi Butterfly

I'm so excited to have this to wear on Sunday! It matches the skirt that I'll be wearing, and I'm sure that the preschoolers that I work with will love it too.

May you have a very blessed Easter, celebrating the risen Savior!

project // kanzashi shamrock pin

Kanzashi Shamrock Pin


Some of my favorite projects seem to come together quite by accident. Ideas like a pin celebrating an Irish holiday and made using a Japanese technique. I was thinking that I wanted to make a little shamrock, then out of nowhere I spotted some flowers that I knew needed to become my clover pin.

In Japan, they make hair accessories with folded fabric flowers and the technique is commonly called kanashi or tsumami kanzashi. There are tons of ways to make these flowers, and a quick search for "diy japanese fabric flowers" will turn up plenty. I especially like the tutorial from The Thread and Kanzashi in Bloom.

These really are quick to make, and I'm confident that even kids could learn how to do this!

Kanzashi Shamrock Pin

Here's what you need:

Green fabric
Green felt
Embroidery floss
Pin back
Fabric glue
Scissors
Needle and thread

SHAMROCK PIN PDF TEMPLATE (This is optional, as you could create these pieces without printing an entire page...I'll explain along the way)

Kanzashi Shamrock Pin

Here's what you do:

Cut out four 2-inch circles from green fabric. This is included in the template, if that's easier. Set aside one of the circles.

Kanzashi Shamrock Pin

Thread your needle and knot the end. Fold one of the circles in half, then add a line of running stitch along the raw, curved edge. The stitches should be a little smaller than 1/4-inch long, and I found that it helps if they start and stop pretty close to the folded edge.

Kanzashi Shamrock Pin

Pull the thread to gather the piece into one of the shamrock leaves.

Kanzashi Shamrock Pin

Fold another circle and stitch along the edge. Gather it close to the first leaf, then add a third leaf in the same manner.

By the way, the little "puffs" that each leaf has can be pushed in either direction, so if one is going the wrong way, just poke it out so they are all matching.

Kanzashi Shamrock Pin

With all three leaves together, bring the needle through at the edge of the first leaf. The secret here is to pull these all together into a sort of circle at the center, without pulling so tight that they want to stay in a straight line.

Kanzashi Shamrock Pin

When you've gotten them all gathered and spaced nicely, take an extra stitch or two and tie a knot to hold it all in place.

Kanzashi Shamrock Pin

To make your shamrock to be a happy Wild Olive shamrock (you know you want to!), stitch a face in the center of the circle. Again, this is included in the template, or you can make your own face.

If you don't want a face on your clover, leave the circle blank, or switch this part out for a green button.

Kanzashi Shamrock Pin

Make this circle into a fabric yoyo. To do this, fold down the edge of the circle by a little less than 1/4-inch and and stitch with medium-length running stitch. Pull the thread to gather it tight and secure it with a knot.

Kanzashi Shamrock Pin

Flatten and shape the yoyo so the gathered part isn't sticking out too much in the back, then use fabric glue to attach it to the center of your three leaves. Press and hold it in place for a minute or so until it's sticking. I love Fabri-Tac for things like this because it dries so very quickly which means a lot less frustration!

Kanzashi Shamrock Pin

Cut out a backing stem piece from green felt. Mine is a 1-inch circle with a stem coming off of it, and it's included in the template.

Stitch the pin back onto the felt piece. Ideally, you'd probably want matching thread, but I grabbed the black because it was close at hand but still blends in.

Kanzashi Shamrock Pin

Put some fabric glue on the back of the circle of felt, then press it onto the back of your shamrock.

Kanzashi Shamrock Pin

Top o' the mornin' to ya, my shamrock friend!

Oh dear. Clearly I'm far too amused by my crafty creations.

Kanzashi Shamrock Pin

I like shamrocks with three leaves because in keeping with the story of St. Patrick, they serve as a great reminder of the Holy Trinity: Father, Son, Holy Spirit.

But you can very easily add an extra circle leaf to make this into a lucky four-leaf clover. As you can see, you can also reverse the leaves and it's just as cute! In fact, I can't decide which way I like better...

Kanzashi Shamrock Pin

Whichever way you make one of these, I hope you have a happy, lucky St. Patrick's Day next week!