


Do you love felt ornaments and essential oils? They go really well together because this wool felt bee ornament is also an essential oil diffuser!
I pretty much only use essential oils for the scents and how they fill the air with wonderful smells. So when I thought about how felt is often used with diffusers, I went...wait. What would happen if you put these oils on a wool felt ornament? I did some testing with scraps of Benzie felt and was SO HAPPY with the results that I decided to make a whole thing.
And you can too!
Today I'm sharing a free pattern, but you could use my other felt ornament patterns as diffusers too.
I will say that while I tested how the oil and felt interact, I haven't tested it long term. I'm not sure at what point it would look gross or if it would get sticky or break down. But the point here is to have a handmade object that you use for a specific purpose. If it doesn't last a really long time, I'm still happy!

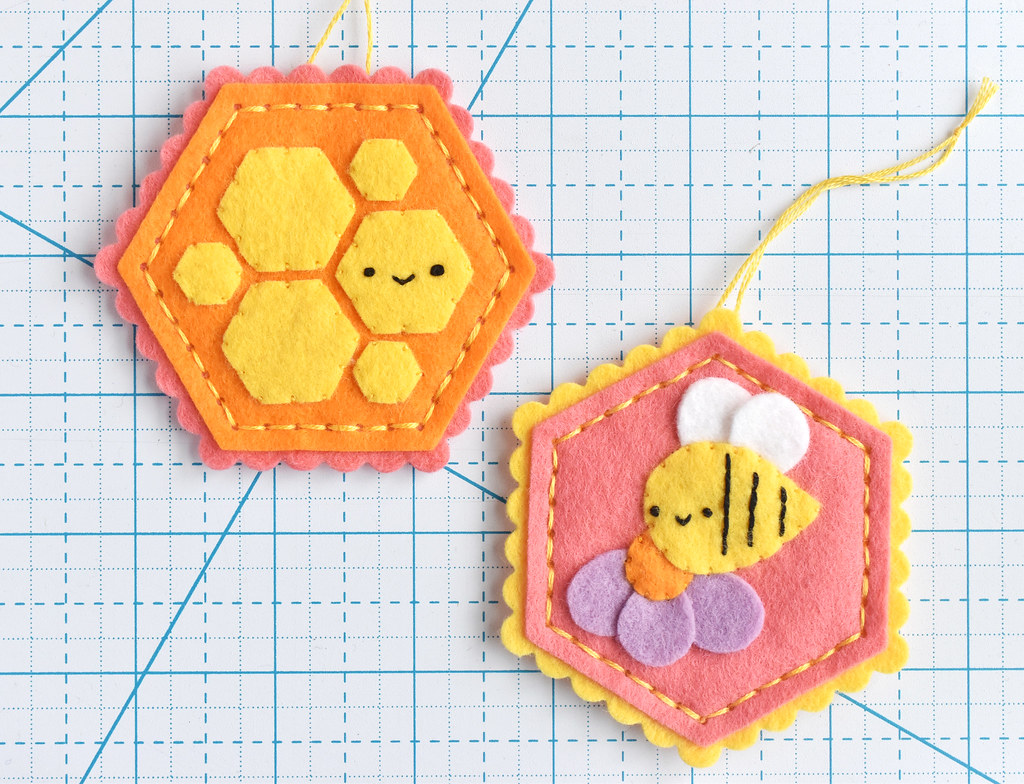
The ornament base for this uses my new Hexagons and Scallops deep-etch die from Benzie. When I started planning this die, the original idea was for a set of hexagons with some shapes you could use to also make bees and flowers. Because bees...honeycombs...hexagons...
When working with Benzie, we ultimately decided to make the set ONLY hexagons, but I still had these little bee shapes and so I thought it would be fun to share them here! But first I have a few more things to say about these hexagons.
The dies are great for making ornaments, and many of my felt ornament designs will fit on this. I'll also be creating some NEW patterns with the hexagons specifically in mind. The varying sizes allow you to make mini ornaments too, and I'm working on more projects to really put these shapes to use. I have other new dies too, and you can find them exclusively from Benzie Design.
Benzie Deep-Etch Dies (affiliate link)
Now, let's make a bee ornament that's also a diffuser! You will need:
Wool or wool blend felt
Embroidery Floss
Hexagons and Scallops Dies (optional)
Scissors
Freezer paper (optional, but helpful!)
Pencil
Iron
Needle
Bee Diffuser Template PDF
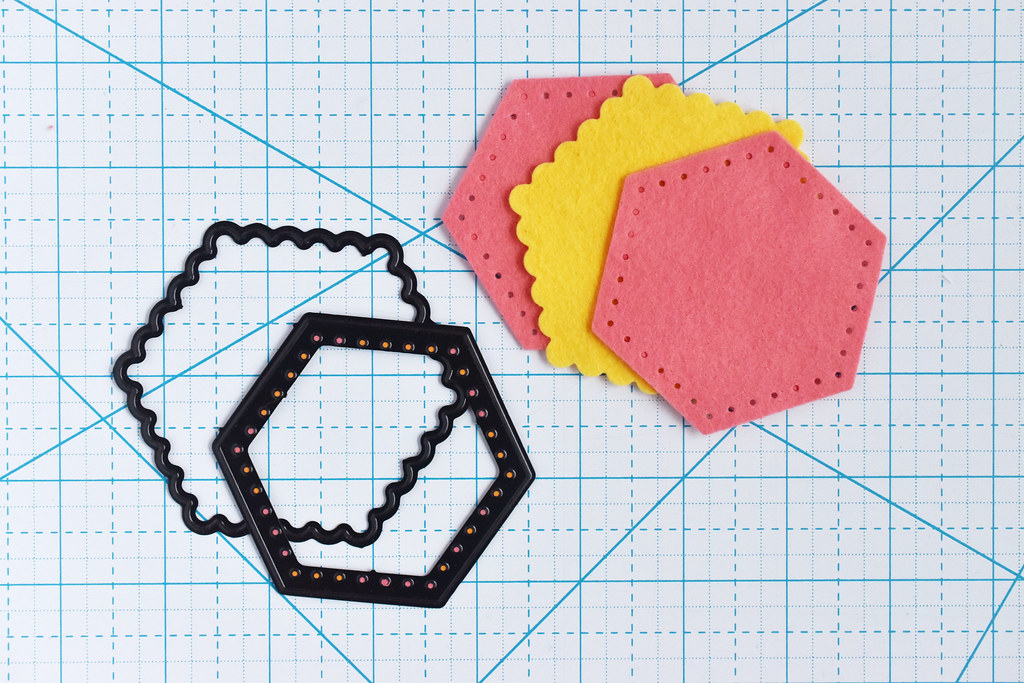
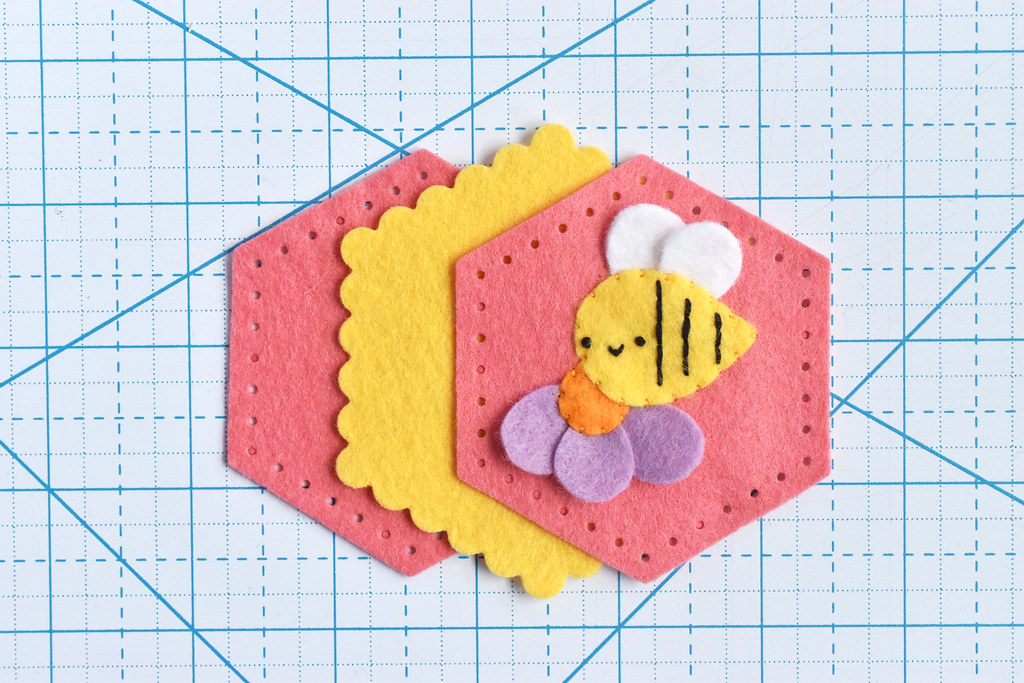
Using the Hexagons and Scallops die, cut two large plain hexagons and one large scalloped hexagon.
Normally I just use a front and back, but because we're putting oil on this, having an extra layer ensures that none of the oil comes through. I've tested this and it didn't come through with two layers of felt, but this is extra assurance. Plus the layers look cute!
You can use the bee and flower pieces on other ornament shapes if you want. Or just cut out several hexagons by hand!
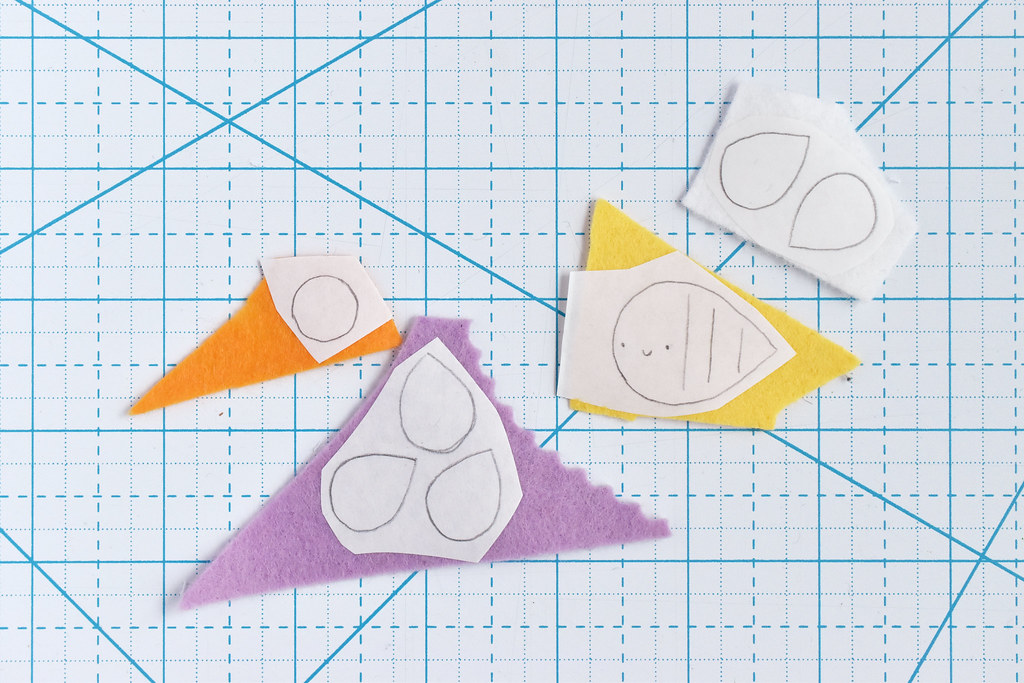
Trace the pattern templates onto freezer paper. For the bee, you need one large bee shape and two smaller wing/petal shapes. For a coneflower like I made, you'll need one circle and three smaller wing/petal shapes. You can also make a different flower with more petals if you want.
Iron the freezer paper onto the felt.

Embroider the face and stripes onto the bee before you cut it out. I used french knots for the eyes, a scallop stitch for the mouth, and back stitch for the stripes, all with three strands of black embroidery floss.

Cut out all the pieces and peel off the freezer paper. For the embroidered bee, carefully tear away the paper.

Arrange all of the pieces on the top hexagon. You can use a drop of glue to hold the pieces in place if you'd like.
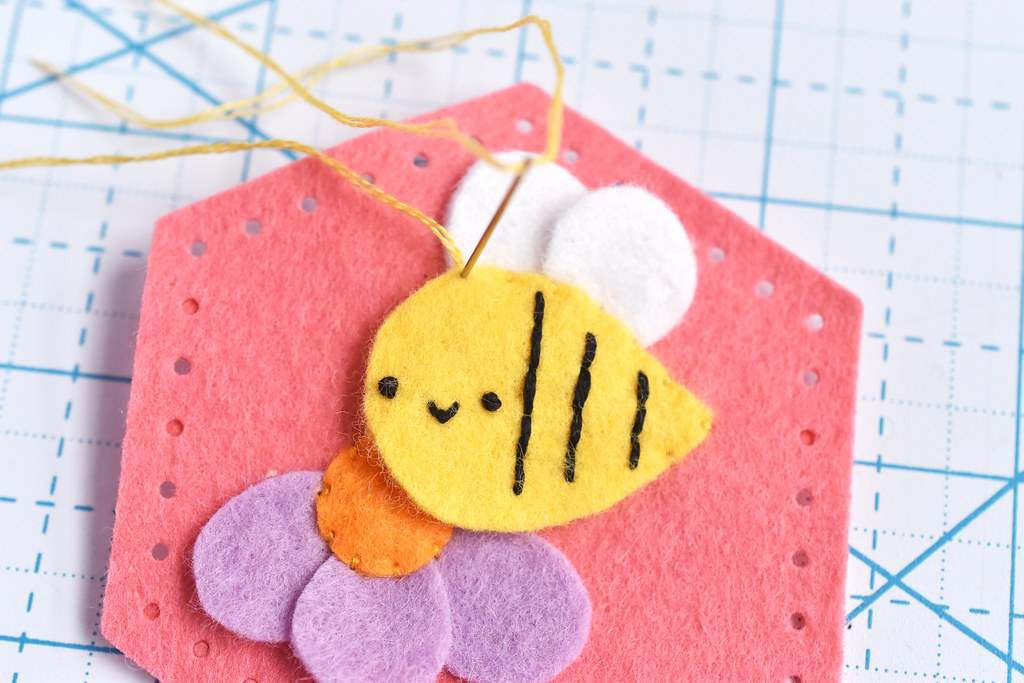
Using two strands of matching embroidery floss, stitch around the edge of the flower center. Be sure to stitch through the petals as you do this. Use the same process to stitch around the bee body, stitching through the wings at the same time.
You can leave the flower petals and bee wings unstitched so they can stick up from the base. It's cute and 3D this way!
Layer the three large hexagons like a little sandwich. Make sure the front and back hexagons are in alignment with each other.

Using three strands of embroidery floss, stitch around the hexagon with running stitch. Hide your starting knot between the layers of felt.
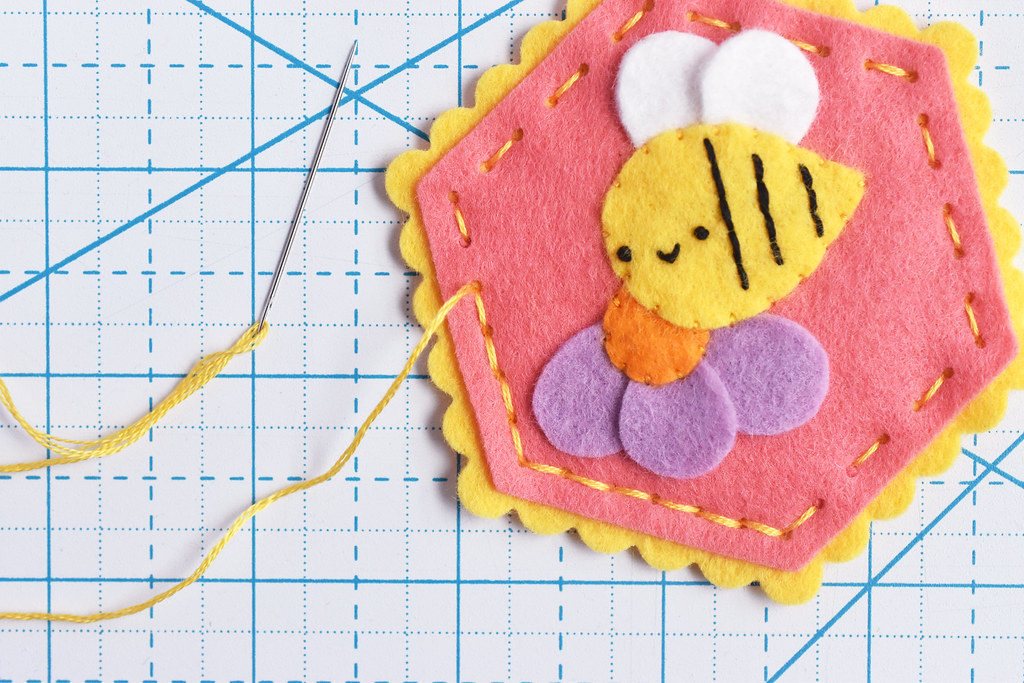
When you reach the start, go back and stitch in the opposite direction, filling in the gaps with the running stitch. When you finish, hide the ending knot between the layers of felt.

To make a hanger, slide your threaded needle between the layers of felt at the top point of the hexagon.
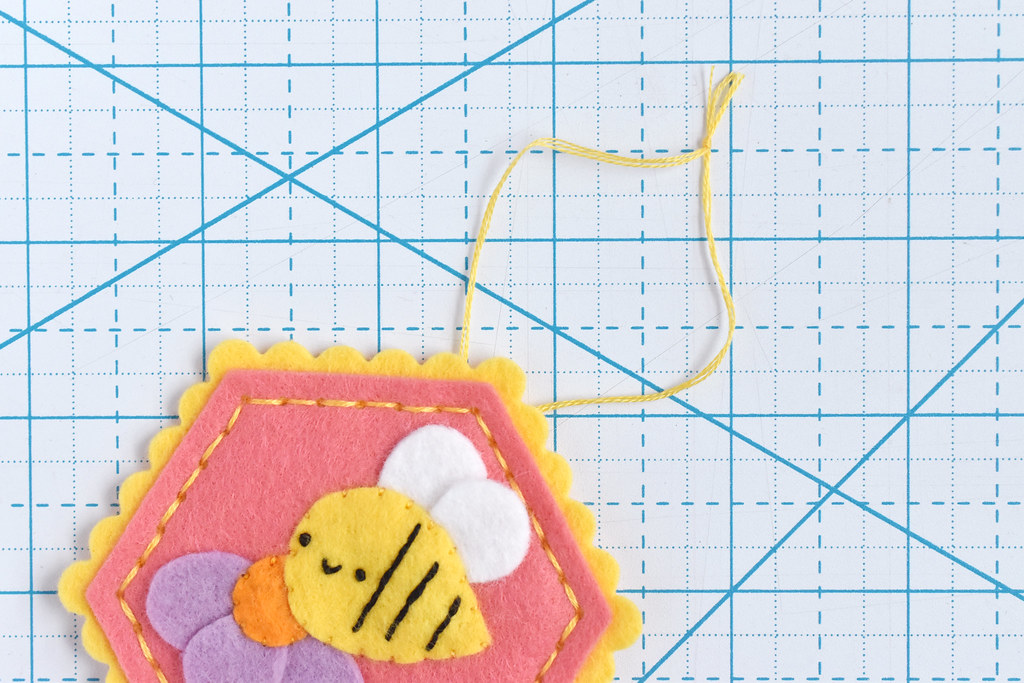
Bring the ends of the thread together and tie a knot.

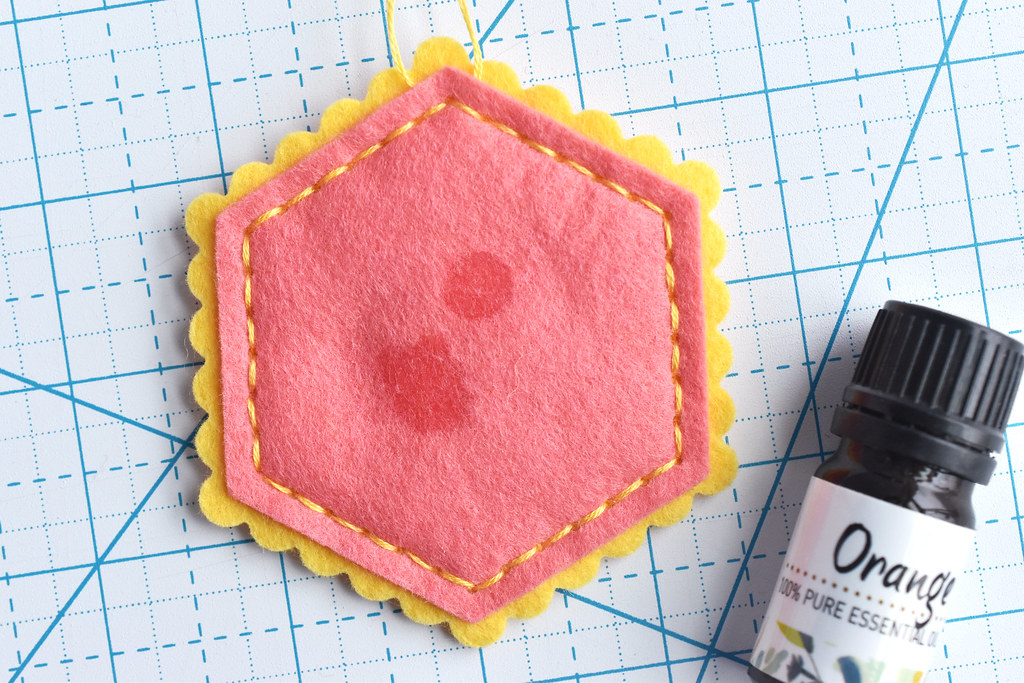
To use your ornament as a diffuser, add a few drops of essential oil to the back. The oil will show for a few minutes, but then it will start to soak in and dissapate, leaving the smell behind. I found that the aroma lasted a few days before I needed to add more oil.

I went for orange essential oil because it felt like something a bee would like. I don't have too many scents right now, but now that I know I can make these little hanging diffusers, I may need to add to my supply. Especially with so many scents available!

To go with my little bee, I also made a honeycomb that doesn't use any extra patterns. It's just all cut using the Hexagons and Scallops die. Of course, I added a little face because things are better with faces! And now I just need some honey essential oil to use with this one!

These are adorable! These would be fun to hang in a window and enjoy the fragrance throughout the room. Where can you buy wool based felt?
ReplyDelete