


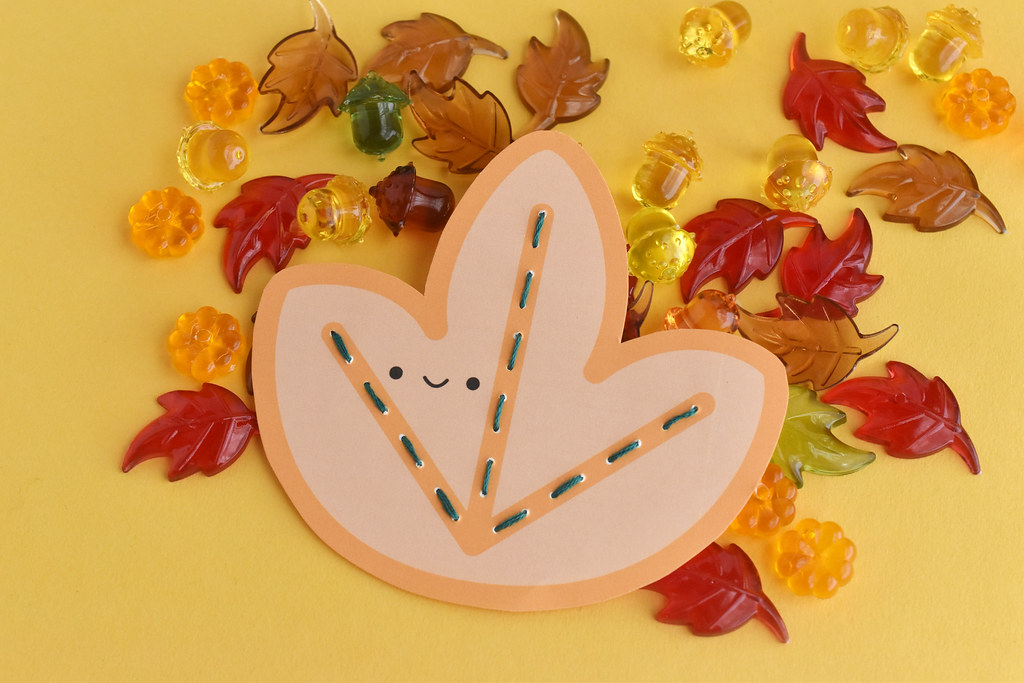
What's better than walking through crunchy autumn leaves? Stitching them! Okay, so this isn't about stitching real leaves (but you can do that). It's about practicing some stitches on printable kawaii leaves. This is a fun project for nearly all ages.
A while back I made some printable autumn leaf lacing cards, which are similar in basic idea, but better suited for younger kids. These new stitching cards are ideal for kids who are learning embroidery, teens who like to make easy projects while hanging out with friends, and adults who just want to make something cute!
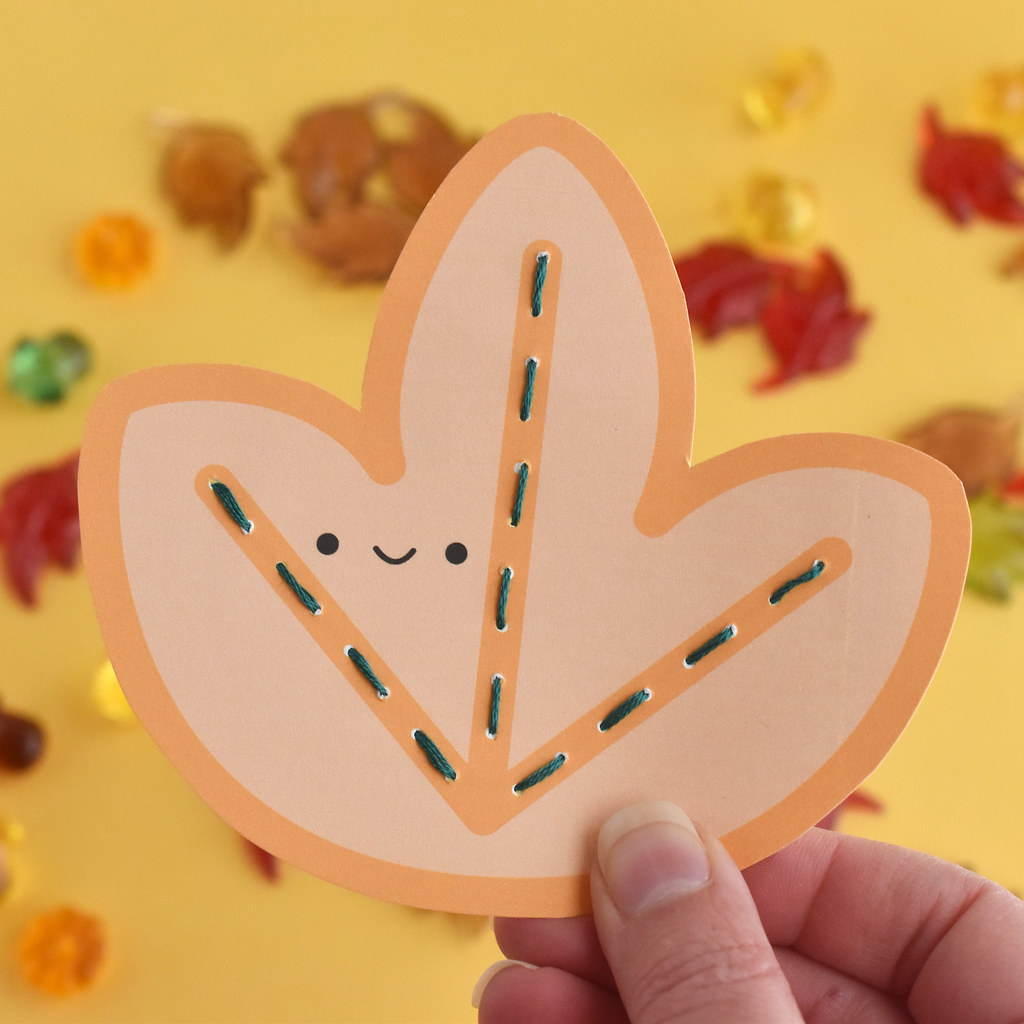
I made mine with running stitch, which is what I always suggest as a first stitch for anyone to learn. But you could also stitch on this with back stitch or holbein stitch for solid lines, and other stitches too if you know how to work it (tips on that at the end of this post!)
Stitching cards are such a fun way to try out a new craft. Before you know it, you'll FALL for embroidery!

Here's what you need:
Cardstock
Embroidery floss (I used fun colors!)
Scissors
Large embroidery needle
LEAF STITCHING CARDS PDF

Print the PDF on cardstock. Don't use regular paper because it will be too flimsy. Cut out the leaf shapes.

Use the needle to poke a hole on each dot. It can be helpful to set the leaf on a piece of corrugated cardboard when poking the holes.

Thread the needle with a piece of embroidery floss using all six strands. You can also use yarn if your needle is large enough. Tie a knot at the other end.

Start on the center stem (or midrib!), no matter which leaf shape you're using. Come up through the first hole and go back down through the next.
TIP: Don't pull the thread too hard or the knot will pop through the stitching card. If you're having trouble, you can tape the knot on the back.
After you stitch the center stem/midrib, end off the thread with a knot and then start again to stitch each vein from the outside edge to the middle and then out to the opposite edge.

On the back you can see how the thread travels and this is how each leaf is designed. There's also exactly the right number of dots/holes to it comes out even for running stitch or back stitch.

And there's your happy little leaf!
You can punch a hole and add a hanging loop to turn it into an ornament, attach it to the front of a card, use it as a bookmark, or just let it be a stitched leaf.
If you want to use other stitches, you just need to consider how you might need to prepunch the holes. For example, if you want to do chain stitch, you can use the dots as a guide and simply add an extra hole a the end as the tacking stitch. To do stem stitch, you probably want to add an extra hole between each dot.
Try out different stitches, unexpected embroidery floss colors, and just have fun making your leaves!
Want to make these with your classroom, library, church, or scout group? I'm very happy for you to do that! I also have a one-page printable instruction page for this project, available on my Ko-Fi page.
0 comments:
Post a Comment
I often reply to comments in the comments...check back if you have a question!