


When she heard that I was planning a year of shapes, my friend Wendi told me about an idea she had for a stuffed toy that used triangles. I was very excited and I'm soooo happy to have Wendi of Shiny Happy World here with us today. Thank you, dear! Please welcome her!
Hi there! I'm Wendi from Shiny Happy World. As soon as Mollie announced that her shape this month was triangles, I knew I had just the right project to share with her.
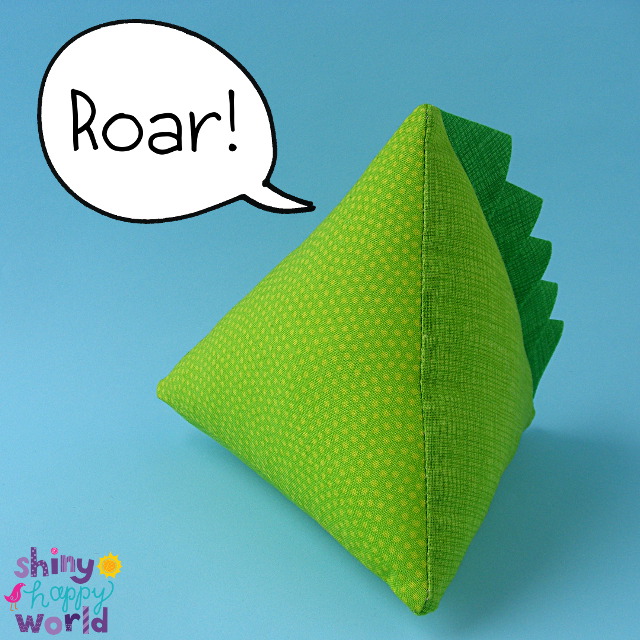
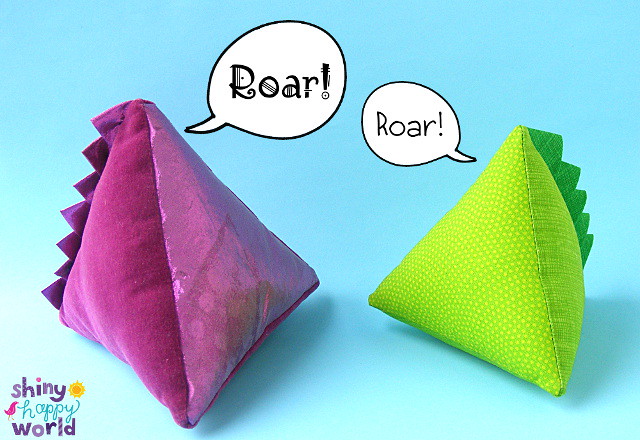
I don't know if this little toy is a dinosaur or a dragon – I think it depends on the fabric. :-)
Several years ago I was playing around with simple shapes and I started to experiment with seeing how much I could simplify a design, and still have people see it as a specific animal. I turned a simple block made with four triangles into a penguin, a chick and a dinosaur/dragon. Over at Shiny Happy World today I'm showing people how to adapt the pattern a teeny bit to make a kangaroo.

How many animals can you make out of this basic shape?
Step 1
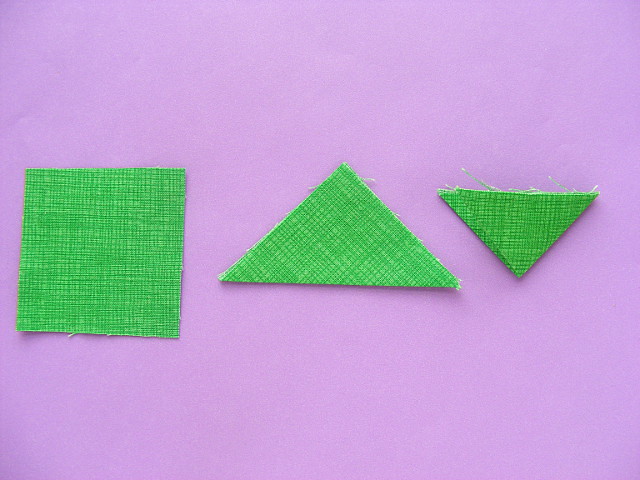
Print the pattern page. Cut 5 squares for the ridges down his back, 3 triangles from the main body fabric, and one triangle from contrasting belly fabric.
Step 2
The ridges down his back are simple prairie points. There's no sewing involved – just folding.
Fold a square in half from corner to corner to make a triangle.
Fold that triangle in half again to make a smaller triangle with all the raw edges on one side, and clean folded edges on the other two sides.
Repeat with the other squares to make five prairie points.
Step 3
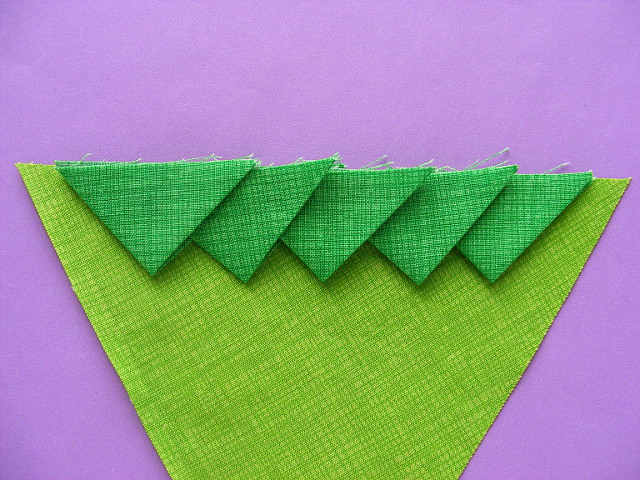
Lay out one body-colored triangle and stack the prairie points along one edge. I like to nestle the folds together so they look like overlapping plates from both sides. The raw edges should be lined up with the raw edge of the triangle, and leave a little room at each end of the stack for your seam allowance.
Step 4
Lay another body-colored triangle over the first, right sides together, with the prairies points sandwiched between them. Sew them together from dot A to dot B.
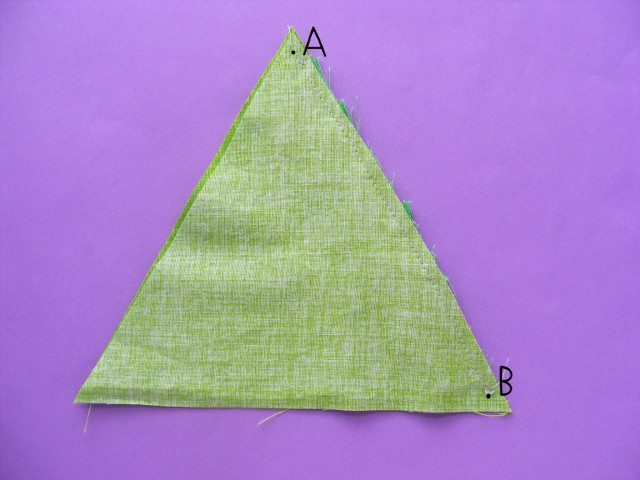
Notice that you aren't sewing from edge to edge. You're actually sewing along the dotted line marked on the pattern piece. You can transfer marks to your fabric to indicate the corners of the inner, dotted triangle, but it's ok to just eyeball it as you sew.
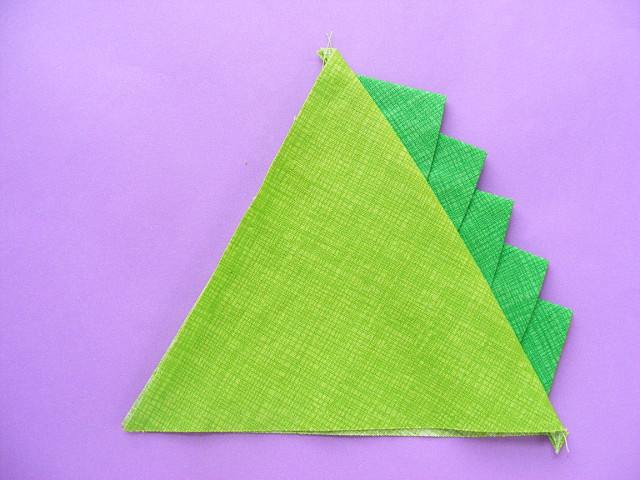
When you open up the seam it already looks like a dinosaur!
Step 5
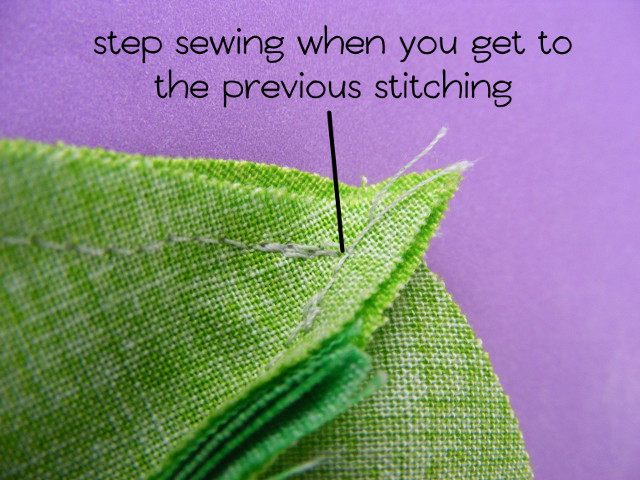
Sew the third body-colored triangle to the pair as shown. On this one you're going to leave an opening for turning and stuffing. Leave about 3 inches.
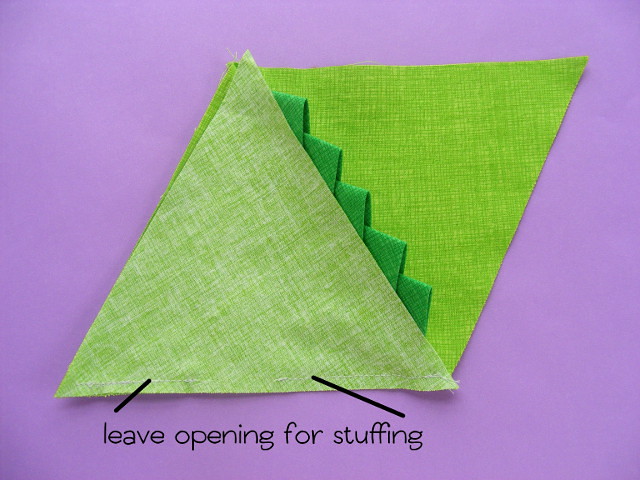
Remember not to sew all the way from edge to edge. Stop when you get to the previous line of stitching.
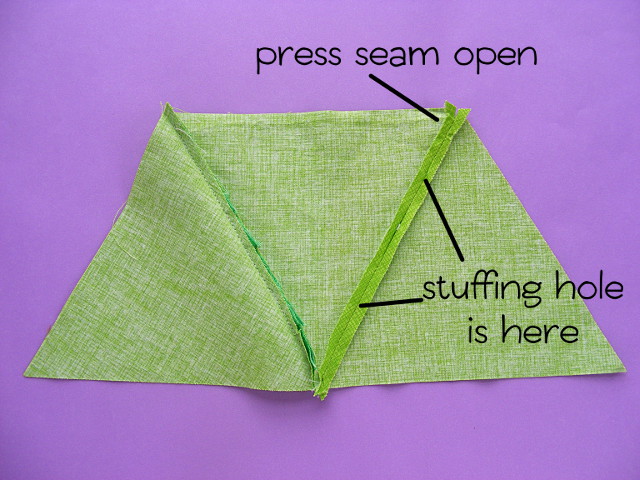
Step 6
Press that seam open. This will give you nice clean edges to sew when you stitch that stuffing opening closed later.
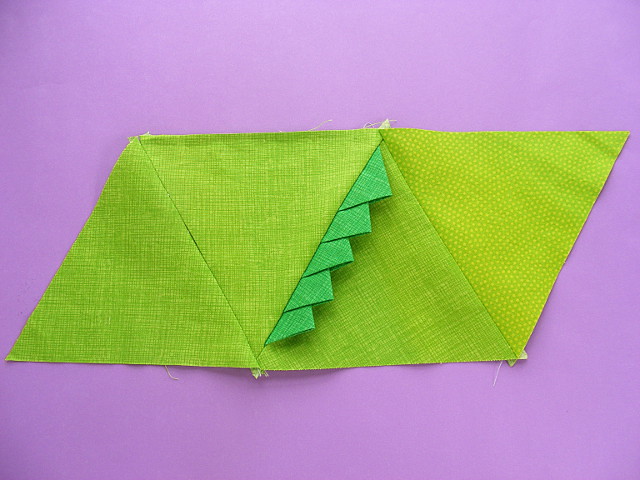
Step 7
Sew the belly-colored triangle to the set as shown in the photo.
Step 8
Lay the piece out as shown in the previous photo. Fold the right corner over so that you're sewing the flat top edge of the belly panel to the flat top edge of the middle body panel.
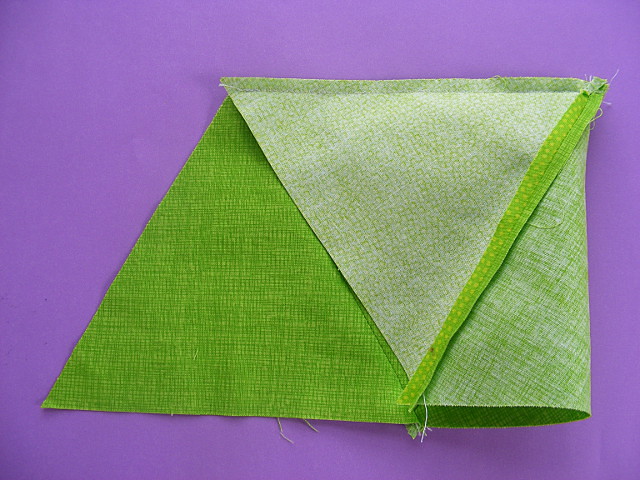
You just created a 3D dinosaur body out of a flat shape! If you hold up the corner you can peek inside and admire his nice back ridges.

Step 9
Fold up that last flap and sew the last two edges.
Don't try to sew both edges with one continuous line of stitching. Sew one edge, backstitch and remove it from the machine. Line up your last edges and sew the last edge.

Step 10
Turn him right side out through the stuffing hole. Poke out the corners as nice as you can get them and add stuffing. Stuff all the corners first and then fill in the middle so you don't get floppy points.
Sew up the opening with ladder stitch.
Finished!
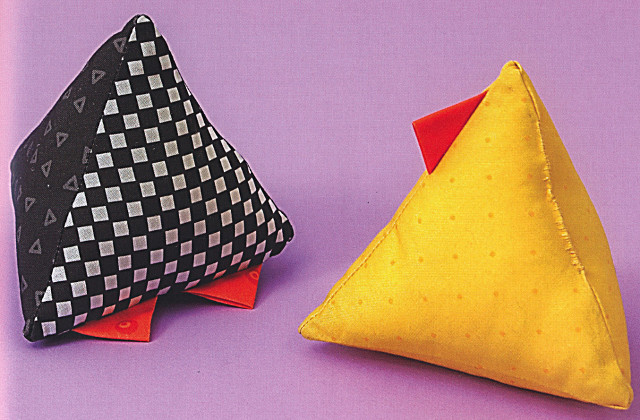
Now try one with different fabrics. :-)
I made this fancy magenta dragon (she even talks fancy!) out of velvet and tissue lame. I do not recommend this for sane people (you have to use a press cloth to make the prairie points out of tissue lame and sewing velvet requires you to pin approximately every 1/8th inch) but the results are fun!
These would make brilliant pattern weights!!
ReplyDeletebwahaha so so cute! I'm thinking of filling with walnut shells to use as pin cushions...
ReplyDeletelovely :)
ReplyDeletei just made chikens to http://www.ziripiti.com/2011/10/just-chickens.html
ReplyDeletekiss
What a wonderful and appropriate post for triangle month!
ReplyDeleteOh my, this totally reminds me of my childhood art project and also the chinese rice dumpling. lol How adorable! Love it!
ReplyDeleteJuju
http://www.jujusprinkles.com
Two of my favorite creative people in the same place! Brilliant!!
ReplyDeleteI love the freedom to imagine all sorts of creatures and personalities!! So cute!
ReplyDelete