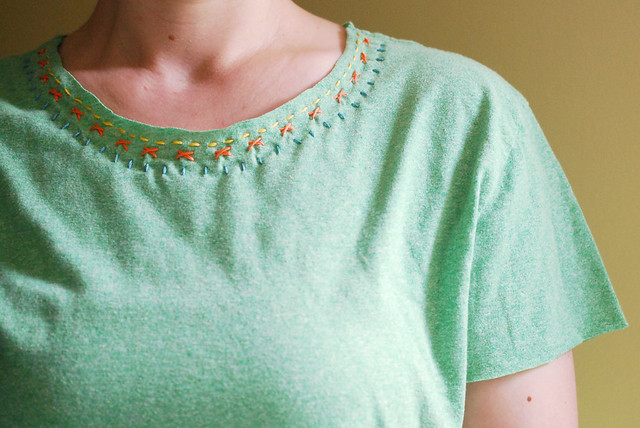

It all started with a very awesome sweatshirt that I saw on Pinterest. I kept thinking that I would find an old sweatshirt to use and embellish, but it didn't happen. Then I found a great deal on one from Old Navy and ordered it, but it was so nice that I decided that I couldn't bear to cut into it.
And then this.
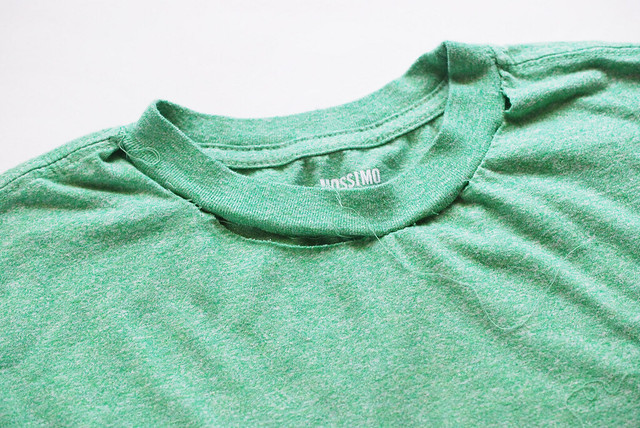
My brother's t-shirt came through the laundry and suddenly the collar was coming off. I'm pretty sure I said something along the lines of "they sure don't make things like they used to," and then I snatched the tee. I was only trying to help, because one of two things would have happened if I had folded it and given the shirt back to my brother: 1) he would have thrown it away, or 2) he would have worn it like this, and neither of those would have worked for me.
So the sweatshirt came to mind and I decided to give it a go on a tee. Now, the fabric here is quite different, and I didn't want stabilizer in there, so I just went with it.
To make your own, you will need:
a t-shirt
scissors
embroidery floss
a ball-point needle (I used a cross-stitch needle)
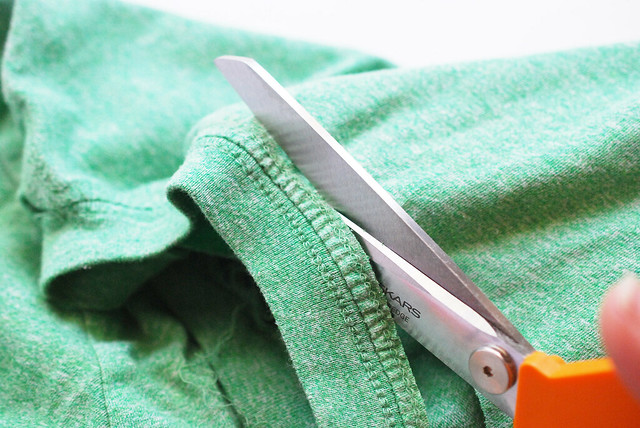
Start by cutting the collar off of the tee. Just follow along the stitching line. If your collar is coming off like this one was, it can be tricky to be sure that you're cutting it all evenly, but you should come out close enough.
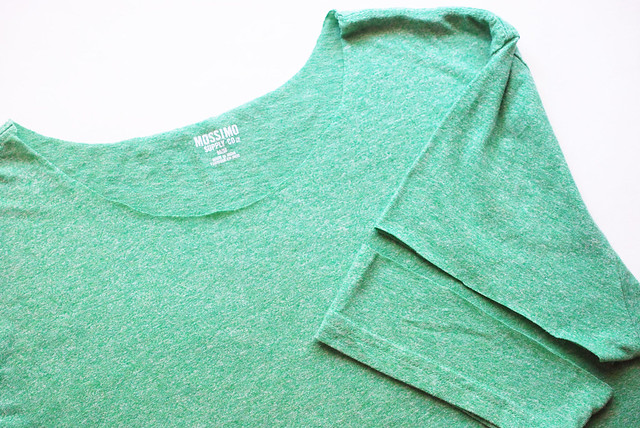
Try it on and see how you like the neckline and sleeves. I decided to deepen the scoop just a bit, and I also cut the sleeves shorter. If you want, you can also cut off the hem.
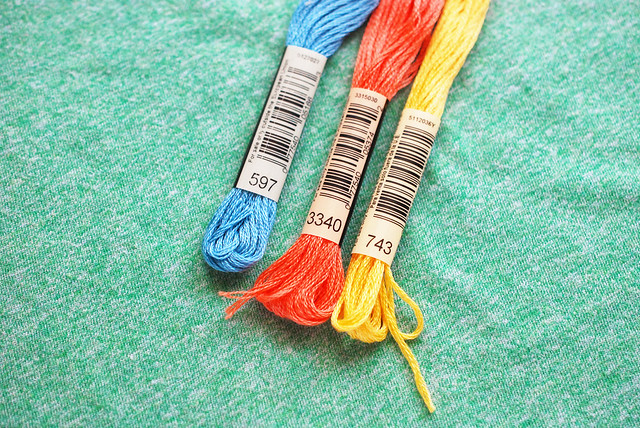
Choose some colors to stitch with. I chose three, planning for three rows of stitches. You could do more or less!
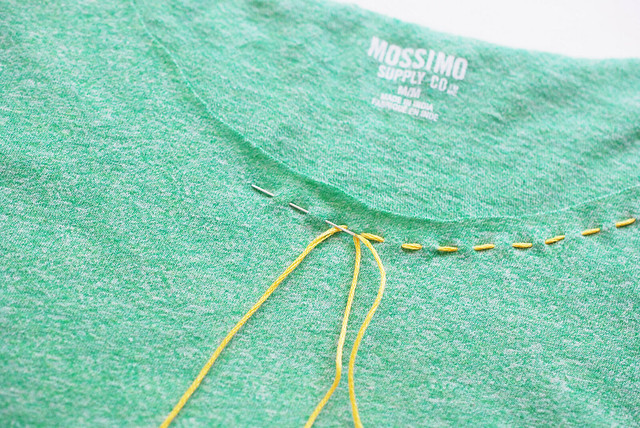
Cut a piece of embroidery floss, thread your needle, and then tie a tight knot at the other end. Carefully start stitching along the collar. The bluntness of the needle will help prevent the fabric from snagging. That said, you'll need to work it through, especially where the floss is doubled over at the eye of the needle.
As I said, there's no stabilizer here, so just pull the stitches taut without gathering the fabric. When you finish a row or need to re-thread the needle, tie it off with a tight knot.
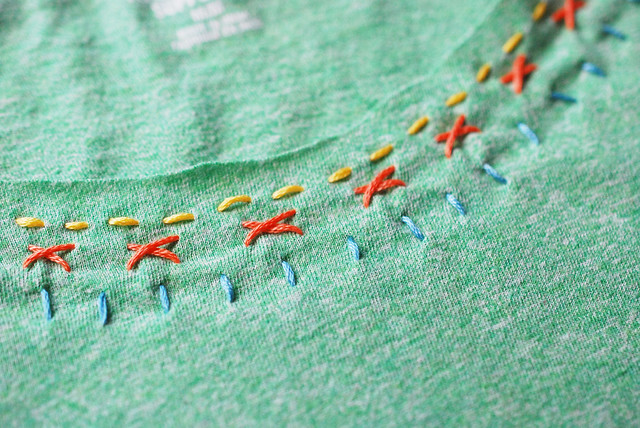
Add more rows of stitching, using different stitches as you like. Mine are simple, and similar to the inspiration sweatshirt, but you could do all kinds of stitches and make rows and rows of them!
Additionally, could you add some to the sleeves or the hem too!
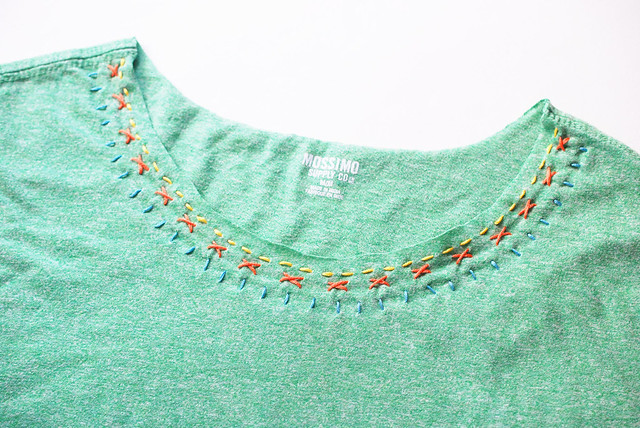
Whether you use a new tee or rescue one that has seen better days, you've got a quickly stitched piece that's perfect to toss on when you're running a few errands. Or in my case, as you are going to work at home each day and want something fancier than your PJs.
Eep, oh my goodness, I love how it came out! The simplicity is darling. I need to make one. ♥
ReplyDeleteThis is so sweet!
ReplyDeleteLove it!!! :)
ReplyDeleteNice save there Mollie!
ReplyDeleteI LOVE this project! So simple and yet so cute!
ReplyDeleteHello! I tried to post this twice already, and it doesn't appear to have worked. So, I'm hoping you don't end up with duplicates of my comment!
ReplyDeleteI love your choice of floss colors and stitches. I was wondering, how do keep the fabric edges from fraying? Thank you very much for sharing this!
Thanks, Lisa! Interlock knits like this don't fray much, so I'm leaving the edges raw. If I do have some fraying, I'll just trim the threads.
Delete