


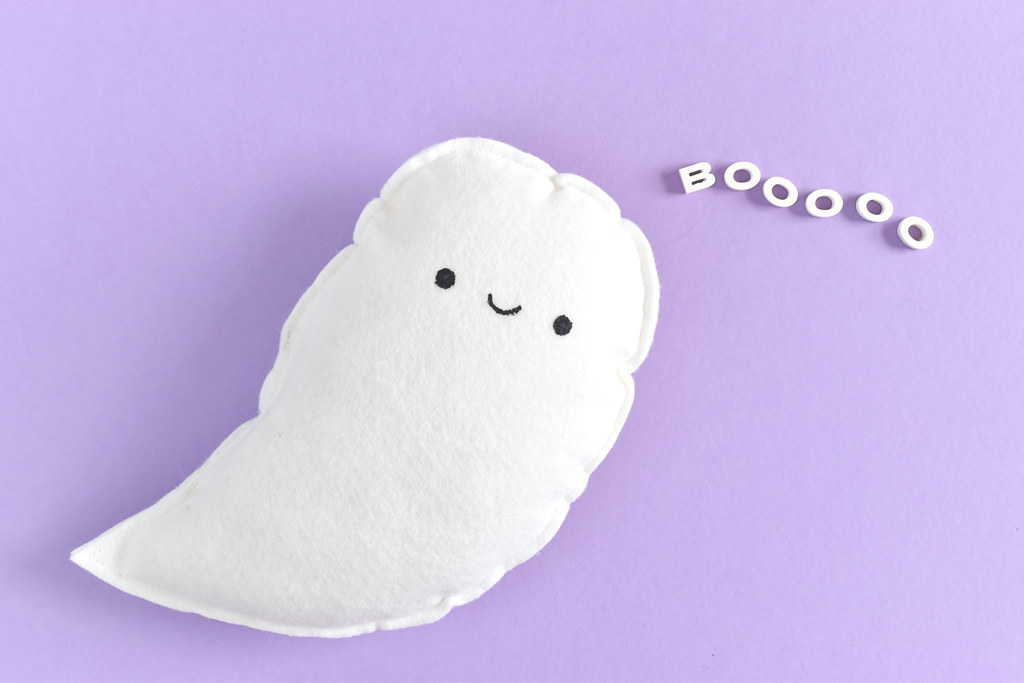
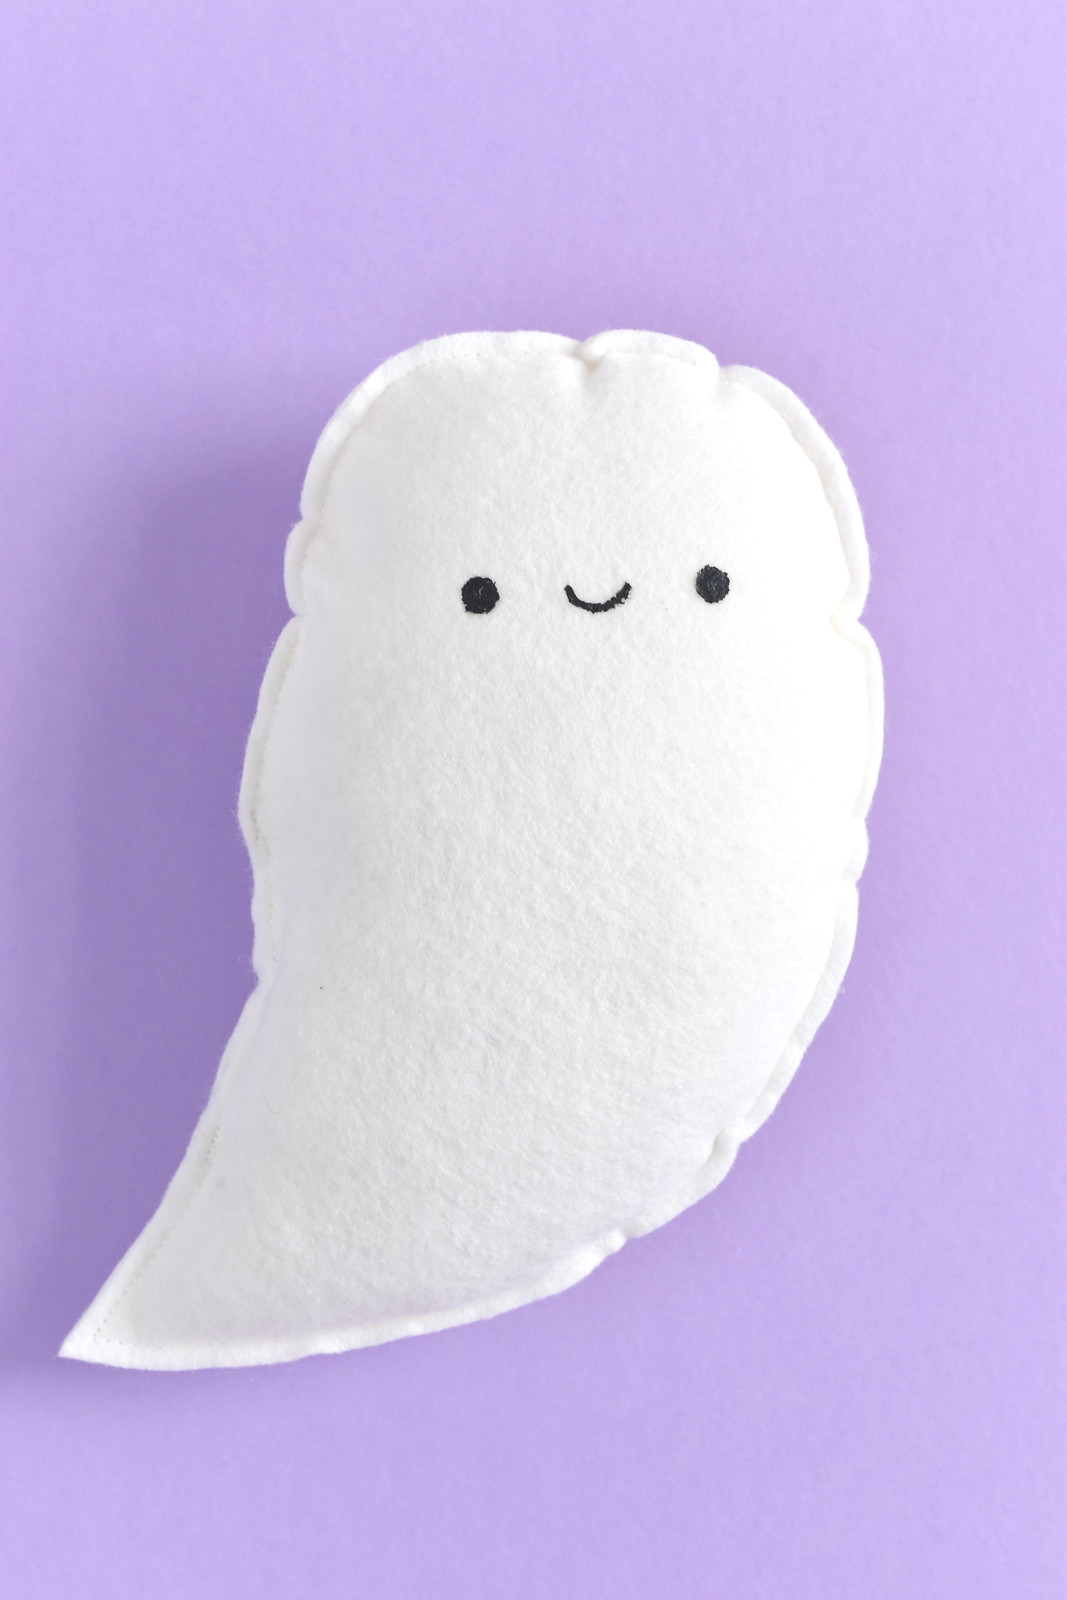
Booooooooo!!!! Today I'm so excited to share a simple sewing project for you and your kids to work on together. And since it's Halloween, we're making a sweet ghost softie!
This project is part of Sew a Softie for Halloween, which is all about making easy plush toys. Anyone can make these! I zipped out my ghosties on the sewing machine...it's simple enough for new sewists to do! But you can VERY easily sew your ghost by hand with running stitch around the edge.
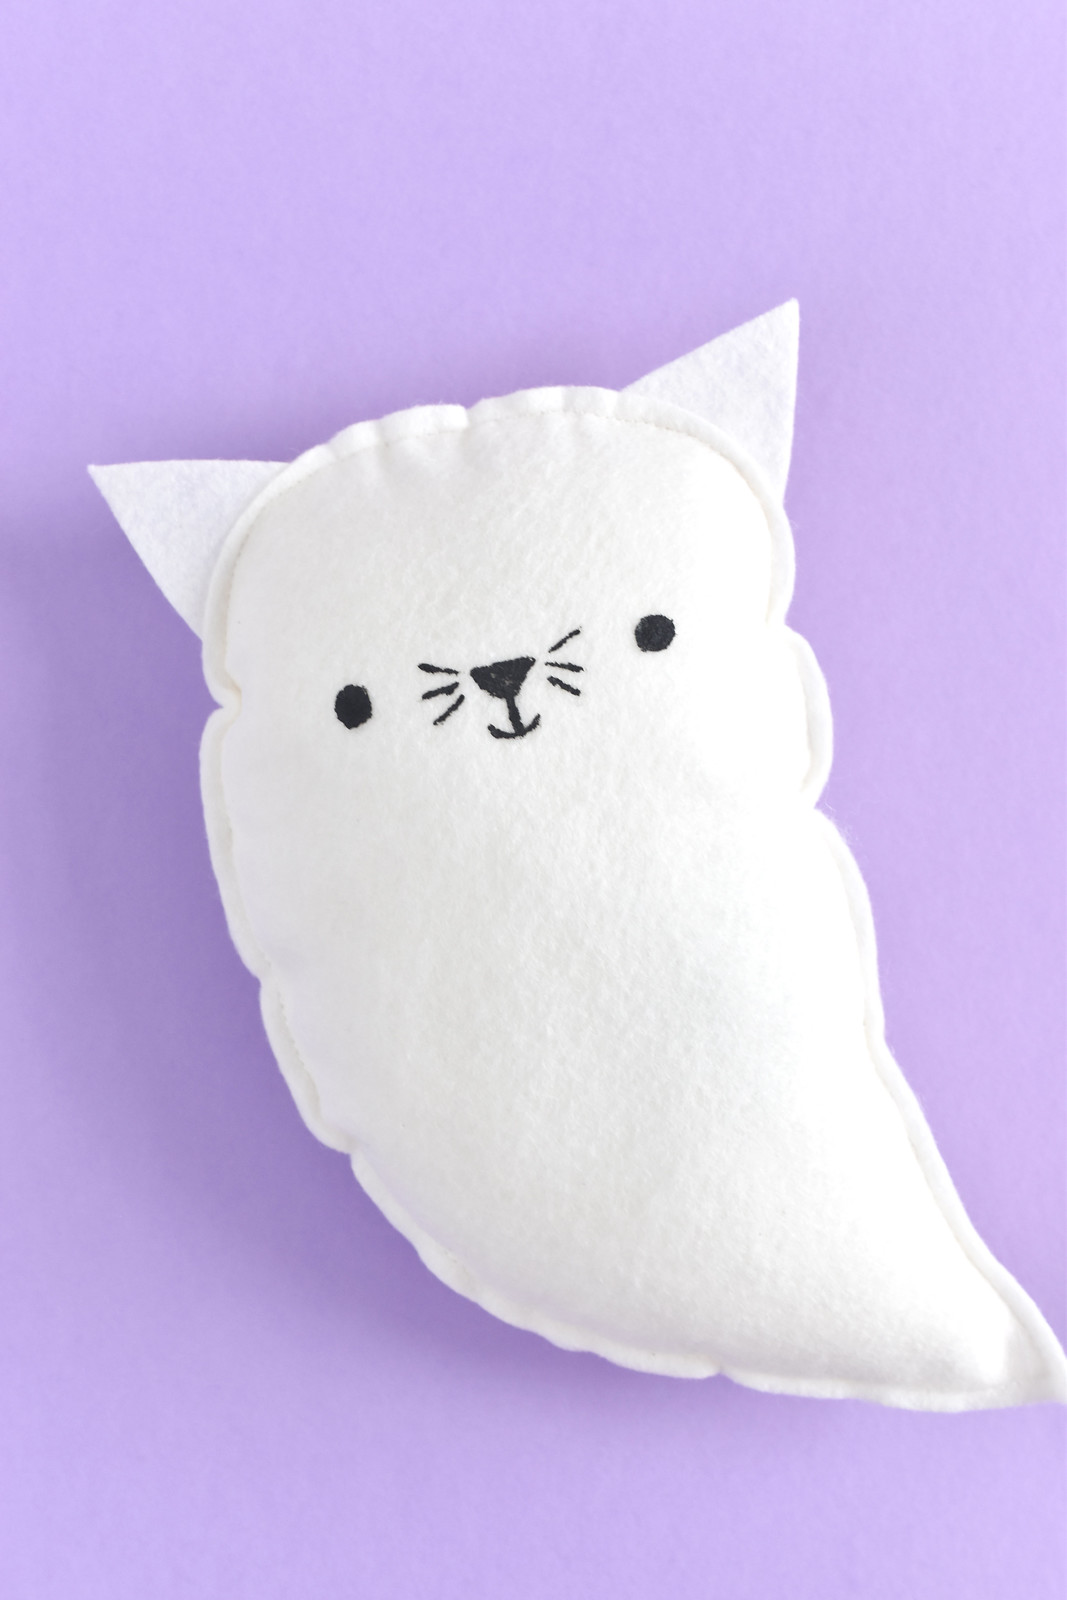
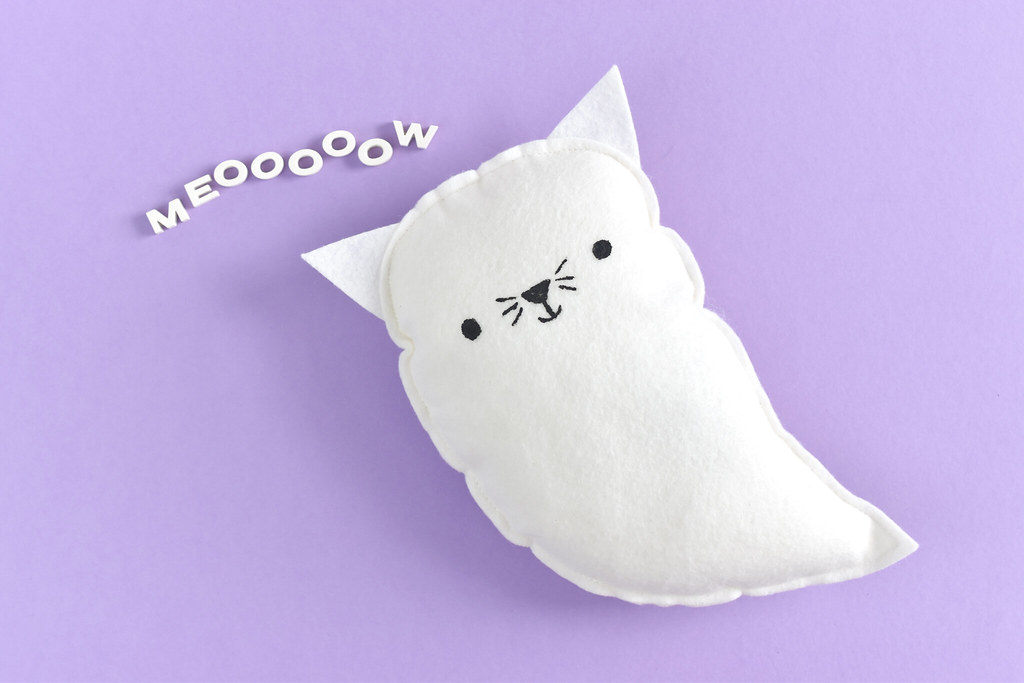
I also thought it might be fun to make some animal ghosts. Because, why not? I started with a ghost cat, but the pattern includes a few more ear shapes so you can make a bunny, a dog, and a bear too.
Instead of stitching the face on, I made this even easier by adding the face with paint. It gives it a different look that I really love.
Ready to sew a softie with me? Here we goooooooooooo....
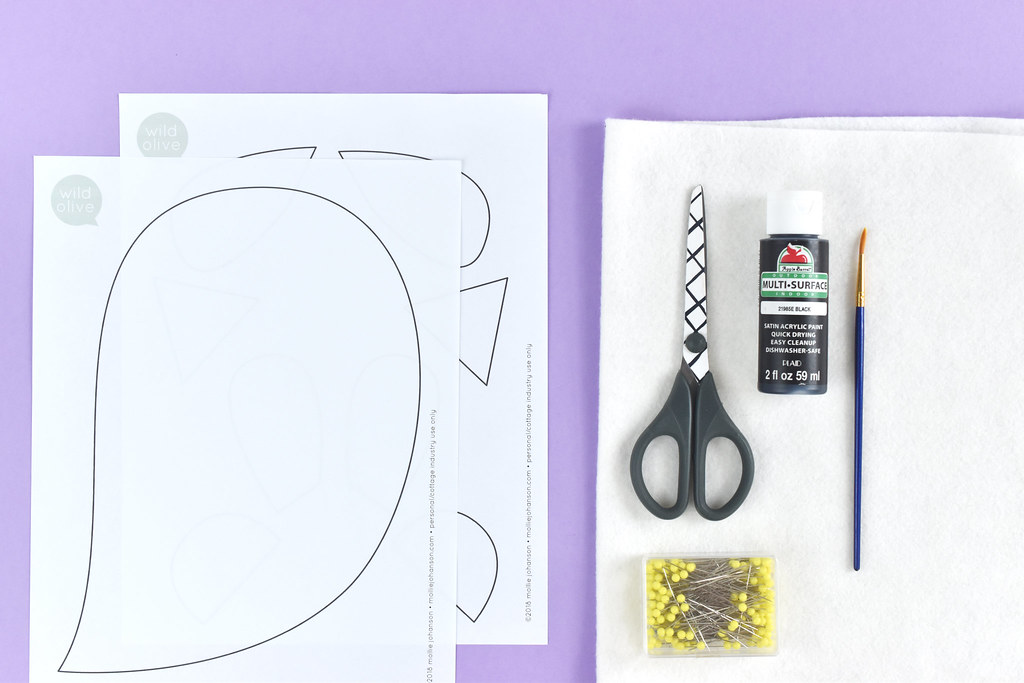
Supplies:
White Wool Blend Felt
Pins
Scissors
Black Acrylic Paint
Paintbrush
Sewing Machine -or- Embroidery Floss and a Needle
Stuffing
Ghost Softie Pattern PDF
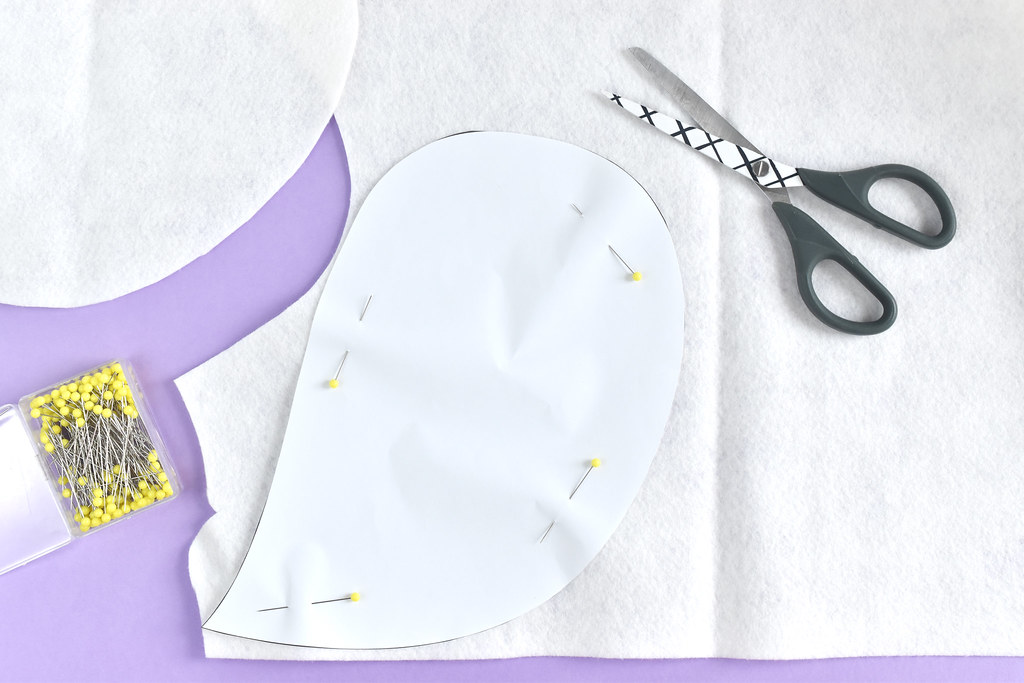
Print out the pattern and use the templates to cut out two ghost "body" pieces and a set of ears if you are making an animal.

Since we're going to be painting the faces, it helps to practice drawing the face first. You can do this on the template. This is a fun way to make your ghost look however you want! You could even add other details like hands or a bow tie.
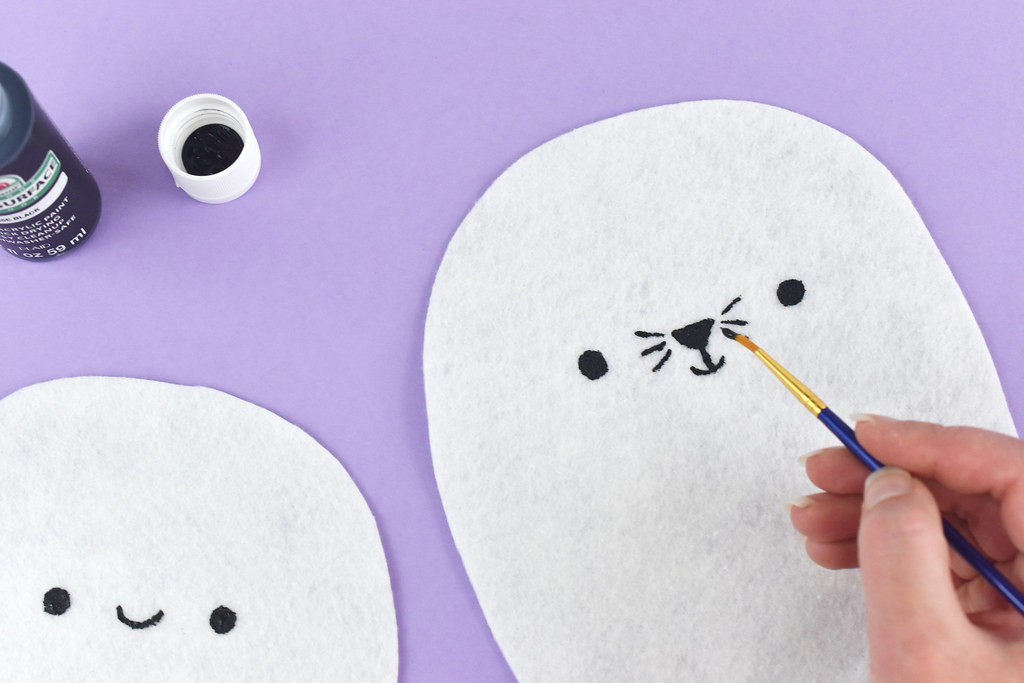
Now it's time to paint! Use a fine brush and gentle brush strokes. You could even practice on a scrap of felt to get the feel of how painting on felt works. It's definitely different than painting on paper!
If you'd rather stitch the face, you could do this with embroidery or applique instead.
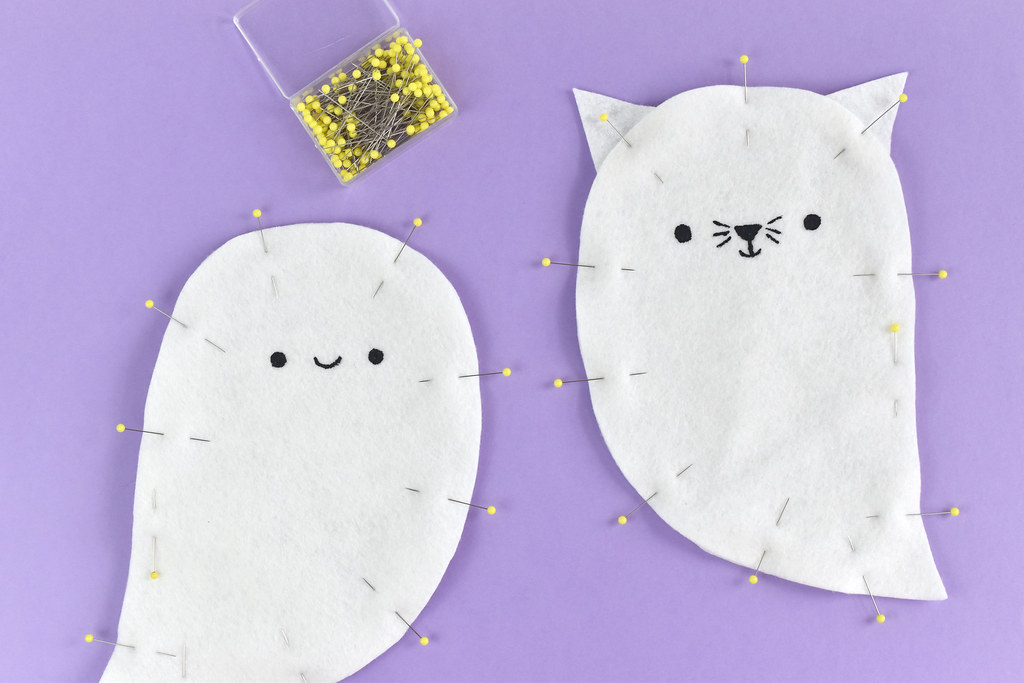
After the paint is completely dry, pin the front and back of the ghost together. If you're making an animal, place the ears between the layers. Be sure that they're far enough in from the edge so that the sewing catches them.
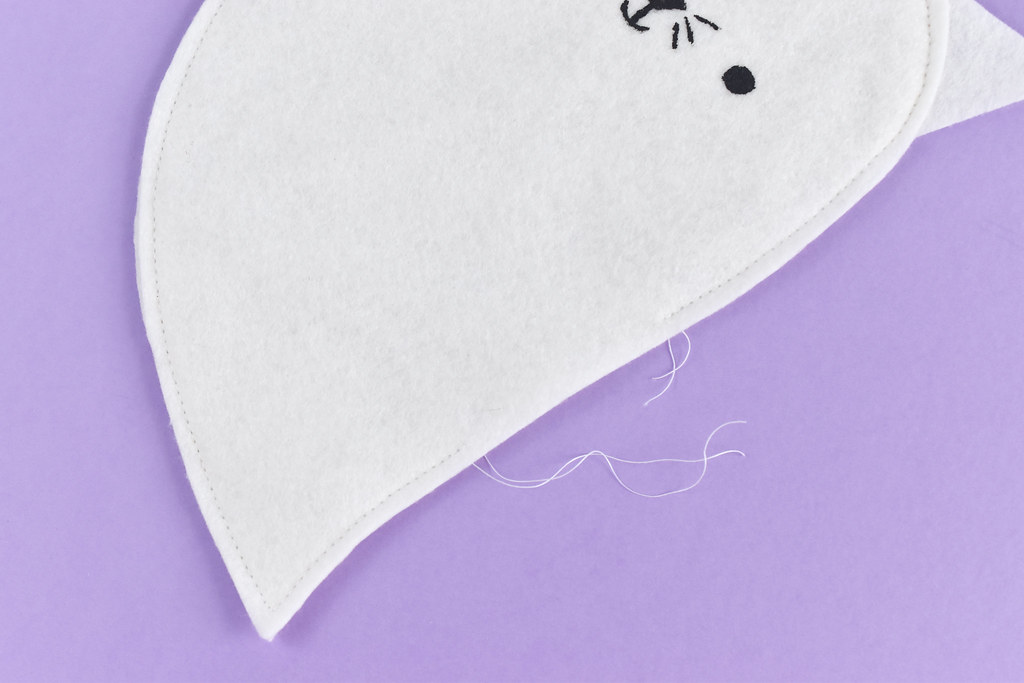
Sew around the edge of the ghost, but leave an opening on one side.
If you're sewing this by hand, leave the thread attached so you can continue sewing after the stuffing goes in.

Fill your ghost with stuffing. Add it a little at a time, and be sure to push it toward the edges so the shape fills out.
Sew the opening closed. If you're using a sewing machine, like I did, push the stuffing away from the opening so you can slide the ghost under the sewing machine foot.
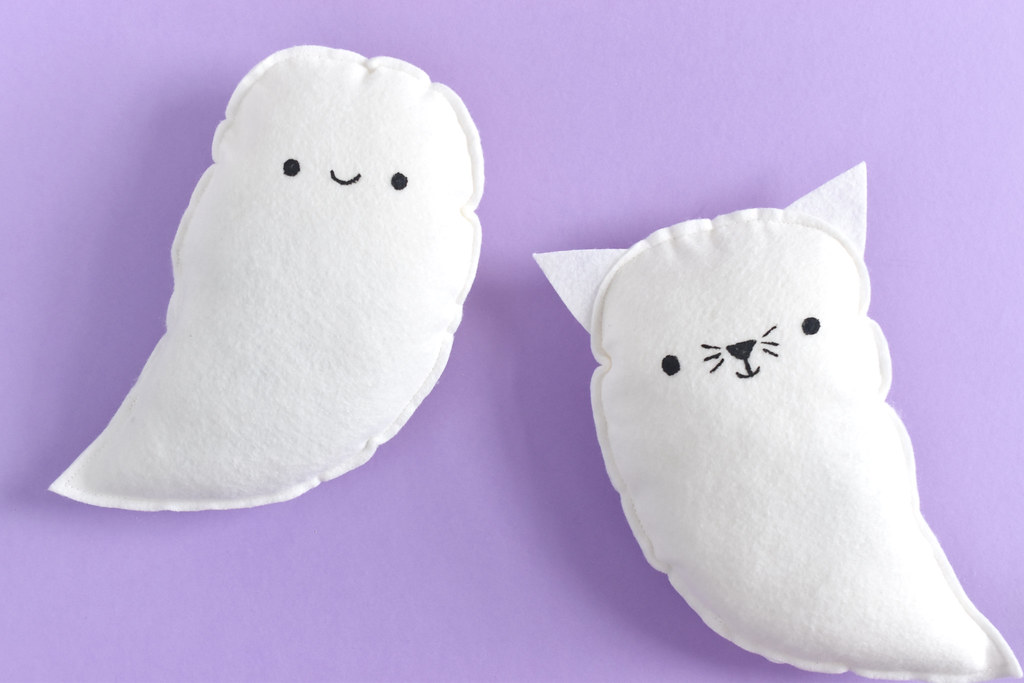
Your ghostie friend is finished! You can make more than one and flip which direction they go so they can hang out and talk with each other.
Want to make a smaller ghost or ghost animal? Just shrink the pieces to craft a pocket ghost softie! If you make one of these (in any size), be sure to use the tag #sewasoftie on Instagram or other social media. I'd love to see!
Meooooooooow!
That cat ghost softie is soooo cute! Love that the tutorial has so many options to personalise the softies and make them into different animal ghosts!!
ReplyDeleteThis is really adorable ghost. Your creative ideas always inspire me to try different with DIY and get rid of boring kinds of stuff.
ReplyDeleteThanks for sharing!
stores that sell embroidery patches for clothes
stores that sell back patches for clothes
hi! i was wondering if you know how much stuffing you used to fill the plushie? trying to figure out how much to buy. thank you for this tutorial!
ReplyDeleteI couldn't say exactly how much, but a small bag would easily fill one of these. If I were to guess, it's probably an ounce or so of stuffing.
Delete