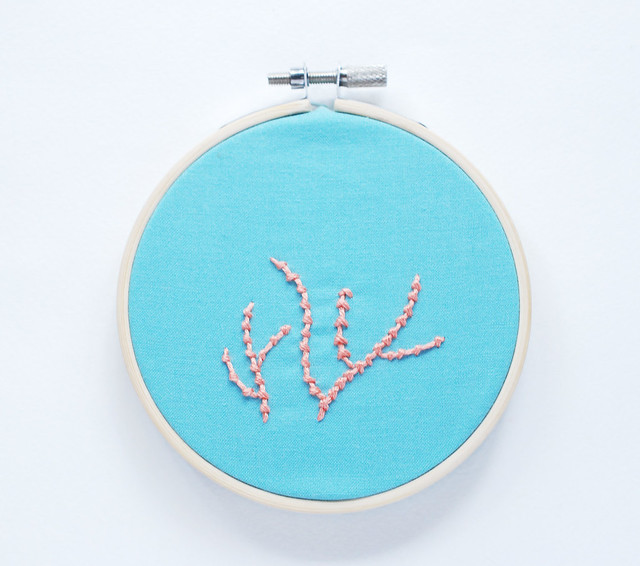

A few years ago I first published my Embroidery Basics series. If you're new to embroidery or are wanting to get started, I recommend that you check it out. Recently I've been sharing some additional stitches, and calling it Beyond Embroidery Basics. These stitches are more advanced, though not necessarily difficult, and they are great for making your embroidery well, less basic.
For a long time, I've loved today's stitch, even though I rarely get the chance to use it. To get us started, I thought I'd let my friend Olive introduce what we'll be working on.
Wait. Um, Olive? I think you're confused. A corral holds horses. We're talking about coral stitch. You know, like the color.
What? No, no, no. You can stitch with any color of floss, I just happen to be using coral for my coral stitch. Never mind. Let's just start stitching.
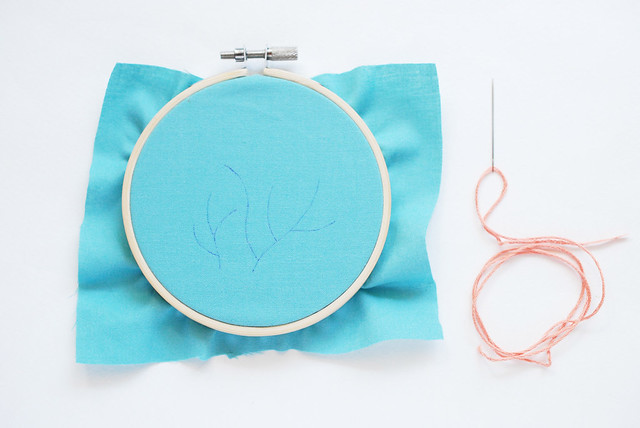
To start, I've traced the coral from my Bitty Beluga pattern. But you could easily draw something similar on your own, or try this with just about any like you'd like. I'll be using all six strands of (coral!) floss. Tie a knot in one end and thread the needle with the other.
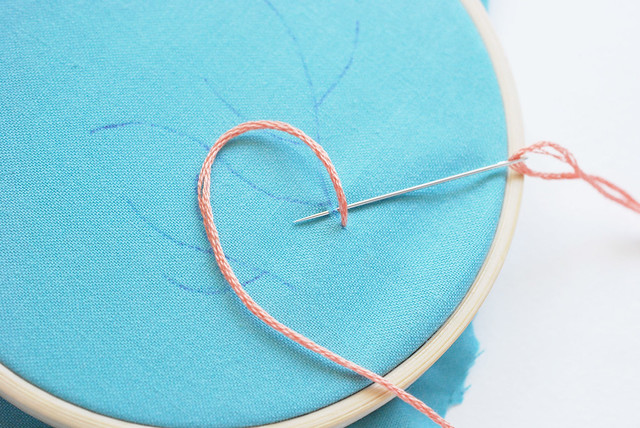
Come up from the back at the start of your line. Lay the floss in the direction that you'll be stitching, and then curve the tail to the left. If you're left handed, you'll want to reverse all these directions.
Just a short way from where your thread came up, take your needle down and back up in a single stitch, perpendicular to the line you're working.
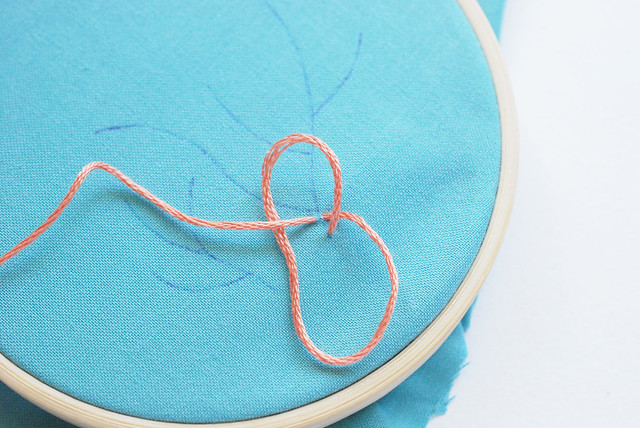
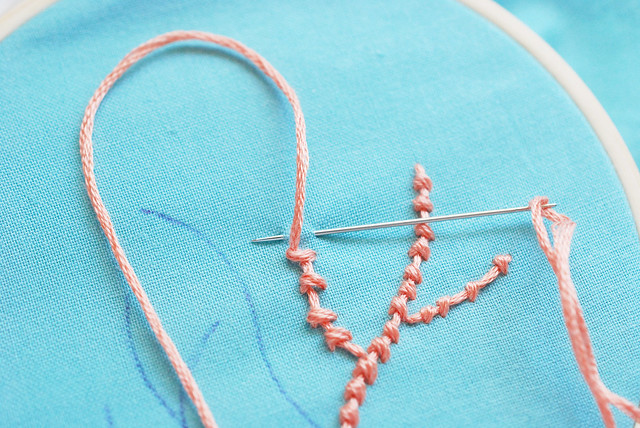
Bring your needle over the working thread on the left and pull it through.
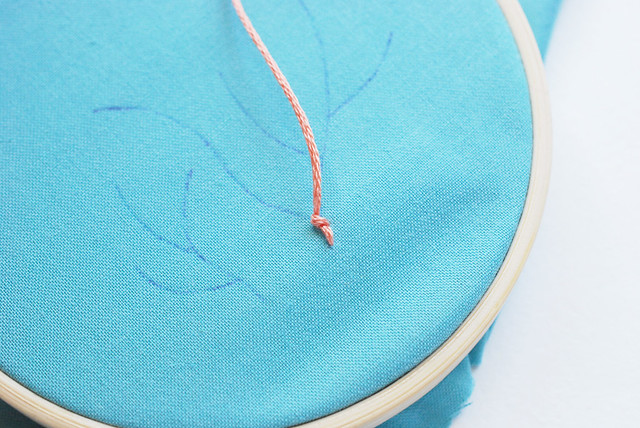
As you pull the thread taut, it will form a knot on the surface of the fabric. Which is why this stitch is also called coral knot.
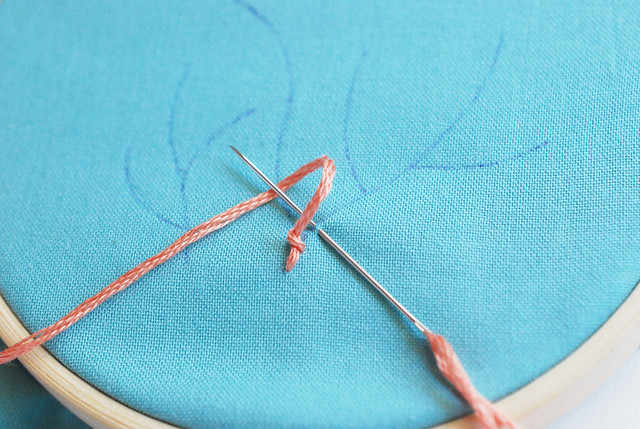
Here's the next stitch forming, from another angle. The same process is repeated, with the knots spaced evenly.
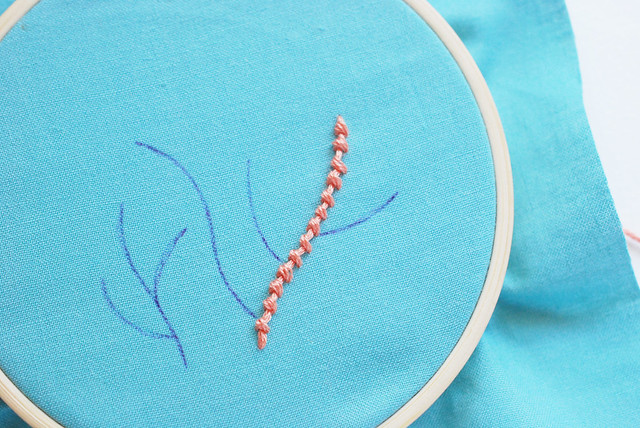
Each of these knots is about 1/8" apart. See what a neat little line they make? At the end of your line, just bring the needle through to the back of your work.
Oh, sure! You can change the spacing and size and you'll have a different feeling to the coral stitch. It's subtle, but it's there.
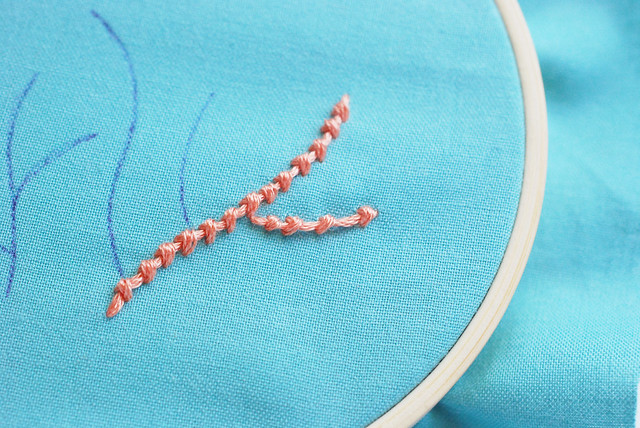
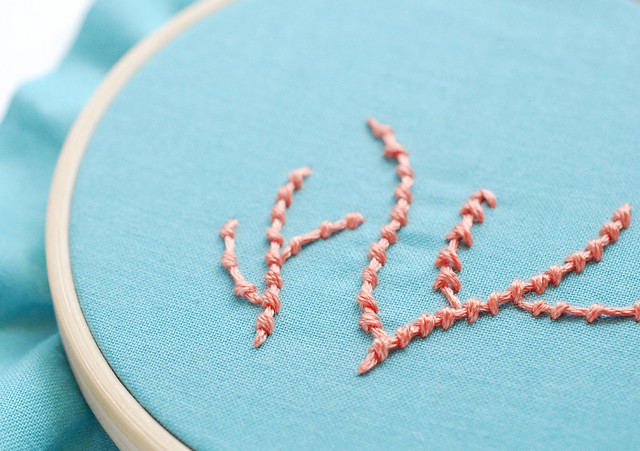
With this little line, I started making the knots further apart. You probably wouldn't want to go more than about 1/4" apart, because the floss separating each knot could snag.
Here the stitch worked perpendicular to the line is wider. This results in a larger nodule on the line. I think it would look cool to have this alternating with the standard size!
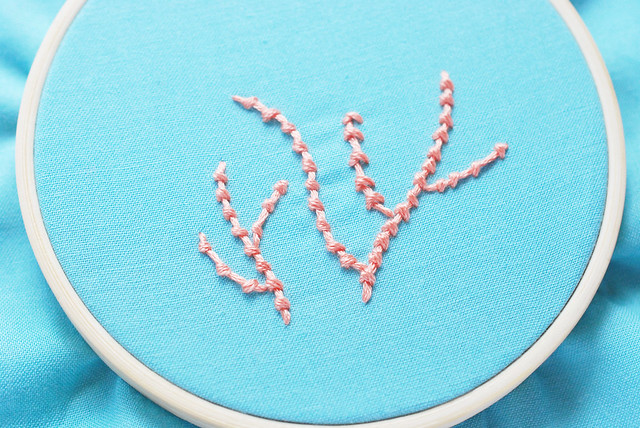
Try out a few ways to do this, and you'll find it has a nice rhythm, and a really pretty look.
Well, what do you know, Olive? It is coral. That's why we call it coral stitch!
Oh, and Jennifer asked what else you might use this stitch for, and here are some ideas: curly hair, necklaces, ruffles...lots of girly things! I've also seen it used as a fill stitch, with the nodules nestled together in rows. Plus, frames and borders would be fun with this stitch. If you have ideas for using coral stitch, share them in the comments!
Happy Stitching!
Aww, it looks so awesome. :D
ReplyDeleteI love that you are doing this and this looks so cool :-). Can you think of any other applications for the stitch?
ReplyDeleteBesides coral?:-) I love these stitches but sometimes I have a hard time figuring out what to use them on.
ReplyDeleteI think it would be great for stitching curly hair, necklaces, ruffles...lots of girly things! I've also seen it used as a fill stitch, with the nodules nestled together in rows. Plus, frames and borders would be fun with this stitch!
DeleteAwesome! Thank you so much
Delete:-).
Fried chicken feet!!
ReplyDeleteLovely, thank you
ReplyDeleteThank ya! I've made this stitch before but had no clue it had a name. Dangit, I thought I invented it! ;)
ReplyDeleteooh. I love how this stitch looks. it inspires me to do some embroidery again and will just have to look for a great little pattern soon.
ReplyDelete