about shop patterns projects printables extras sponsorship wild olive twitter flickr pinterest subscribe

pattern // mini motifs for star wars day

Star Wars Day Embroidery Patterns

My good intentions and I were going to do some Star Wars embroidery to show off, but alas...what you see here is as far as we got. Fabric. Floss. Hoop. Oh, and some patterns! There are so many amazing Star Wars-y things that could stand to be made into patterns, but I chose just three. (You know I'll make more eventually, right? I see this as an annual celebration of Star Wars Day!)

Star Wars Day Embroidery Patterns


The tauntaun is probably my favorite. I've wanted to make a pattern of this guy for a while, so I'm especially pleased to share him with you. Because tauntauns have a slight blue-ish cast to them, I planned to use blue fabric, and stitch his horns with the solid tan and the rest of him with the DMC Color Variations floss. I love it's furry look!

Star Wars Day Embroidery Patterns


My lightsaber is sort of a combination of these weapons from different characters. Choose your color to represent your favorite!

Star Wars Day Embroidery Patterns


And yes, this is a happy Death Star. Entirely inspired by this t-shirt which I have and love. Also, I'm currently hooked on playing the Tiny Death Star app, so there really was no question that this was going to be a pattern!

Download the Star Wars Patterns.

May the floss be with you!

project // super soft plush wampa (with removable arm!)

Wampa Plush


Without a doubt, my favorite Star Wars movie is Empire Strikes Back. There's just so much awesome in that one! My 20-year-old brother loves Star Wars everything too, which is why I made him a Chewbacca a few years ago, using Draw, Pilgrim!'s pattern. Since then, he's been asking me to make more characters for him, and at last, this year for his birthday I made him a wampa.

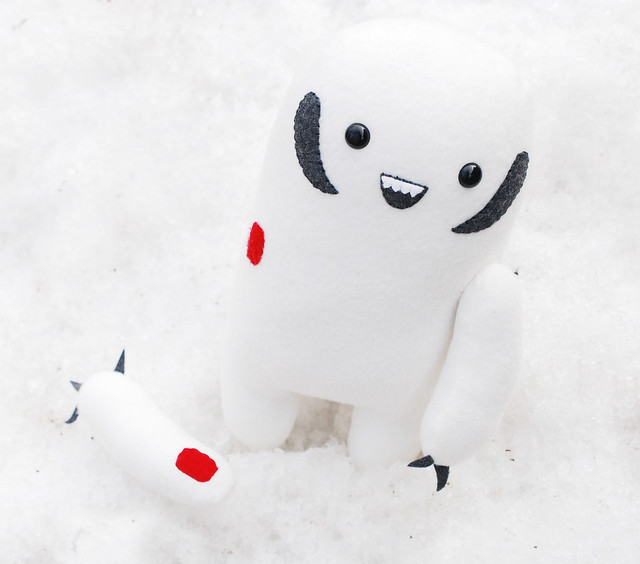
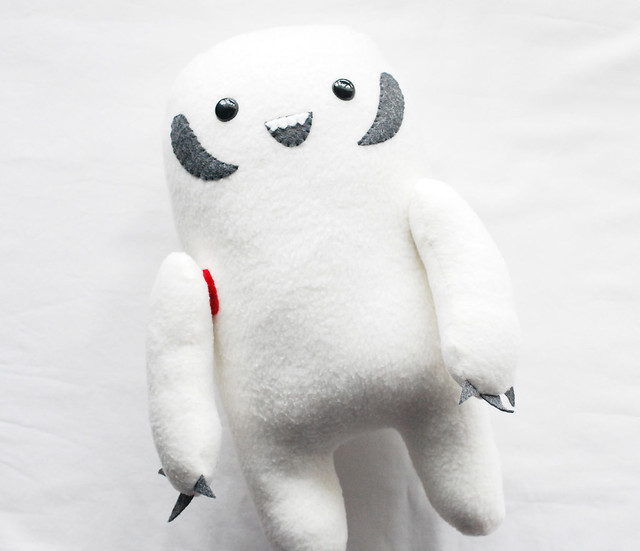
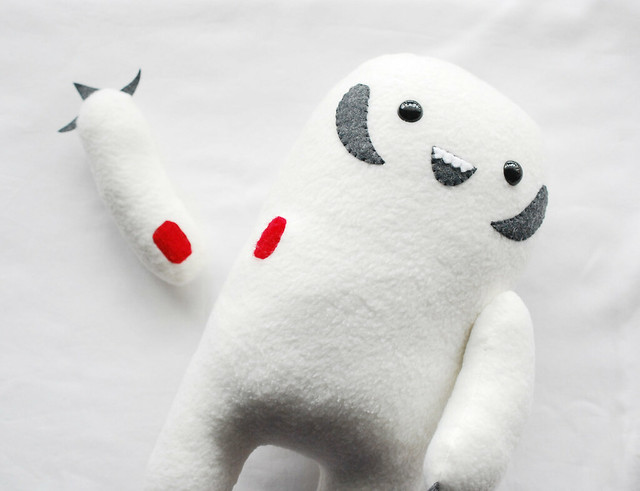
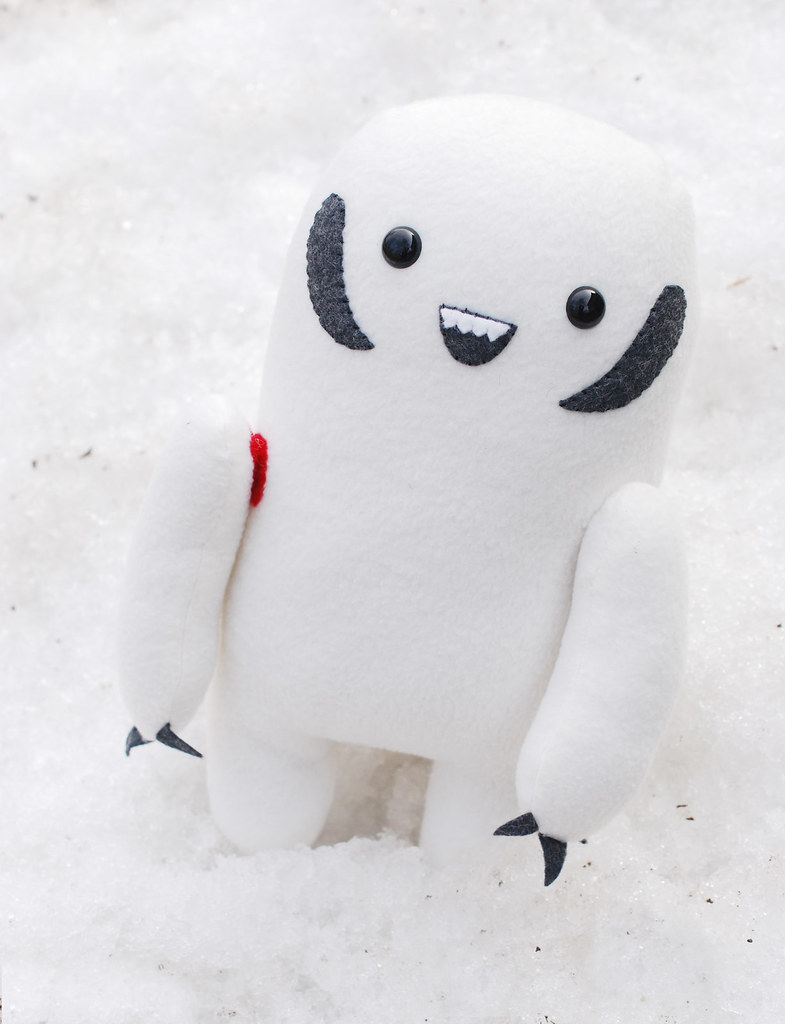
If you don't remember the wampa, he's an abominable snowman kind of creature who lives on Hoth. In the Empire Strikes Back, Luke is captured by a wampa, but then slices off the creature's arm. The poor thing. George Lucas' vision of this guy was pretty mean, but I went with soft, smiling, and ready for a cuddle!

Wampa Plush

Here's what you need:

White or cream fleece
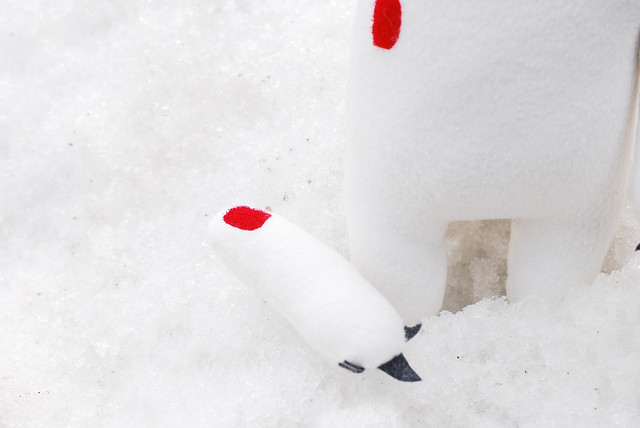
Red hook & loop fastener (for an appropriate amount of gore)
Charcoal grey or black felt
White felt
Black safety eyes
Embroidery floss
Stuffing
Scissors
Needle and thread
Sewing Machine
Pins

Wampa Plush Pattern PDF

Wampa Plush

Cut out the pattern pieces and join the two body sections so the Xs match up on the sides. With the fleece doubled, cut out the body and two arms. Be sure to pay attention to the arrows on the pattern pieces that show which direction the fleece should stretch!

Wampa Plush

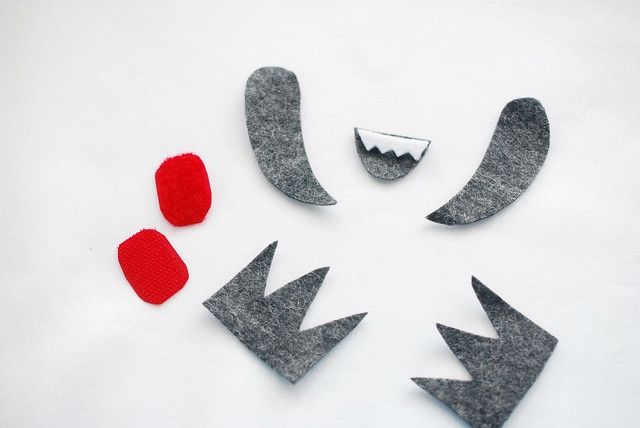
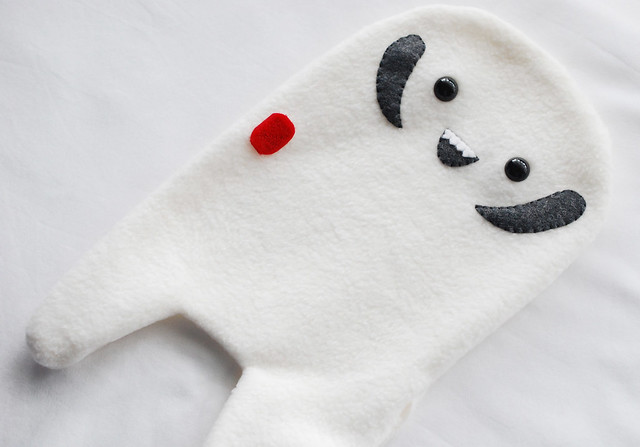
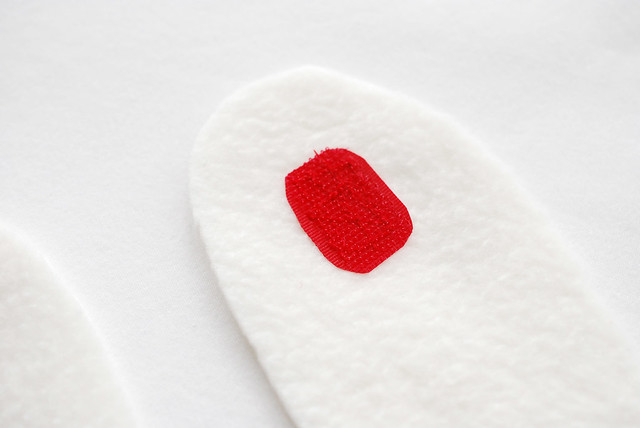
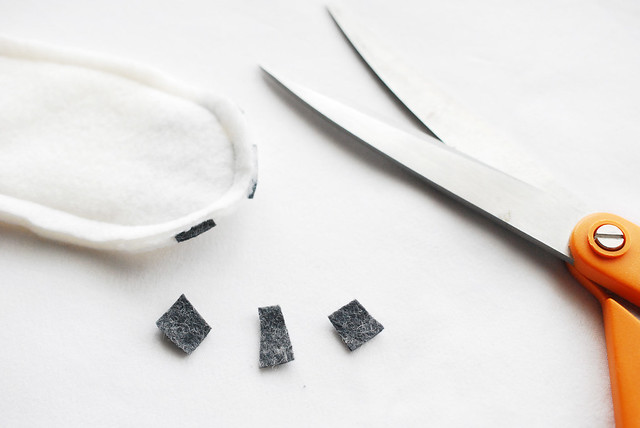
Cut out two horns, two claws, and a mouth from the dark felt. Cut out the teeth from white felt. Cut off a 1-inch piece of red hook & loop fastener, then round the corners.

Wampa Plush

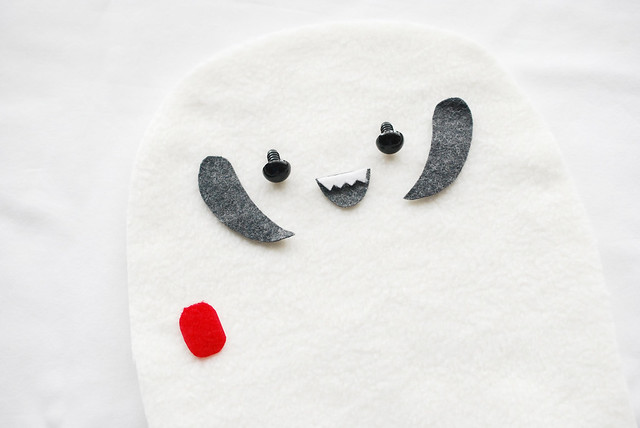
Lay the facial features and one side of the fastener on one of the wampa pieces. This is your chance to get the placement you want for these items. Oh, and if you prefer to have a more fierce wampa, simply turn the mouth upside down!

Wampa Plush

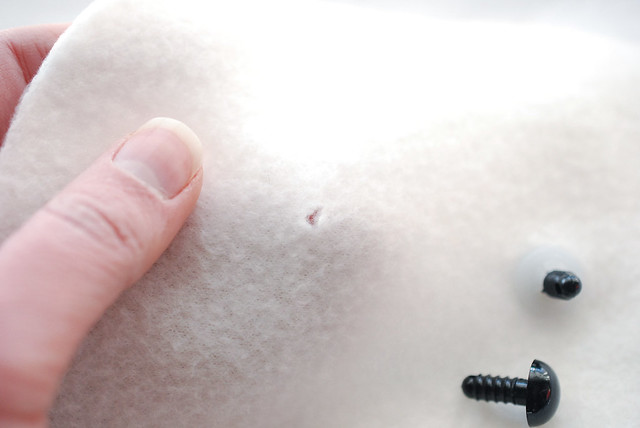
To attach each eye, make a small hole in the fleece, push the post of the eye through (the fabric will stretch around it), and then press the washer onto the back.

Wampa Plush

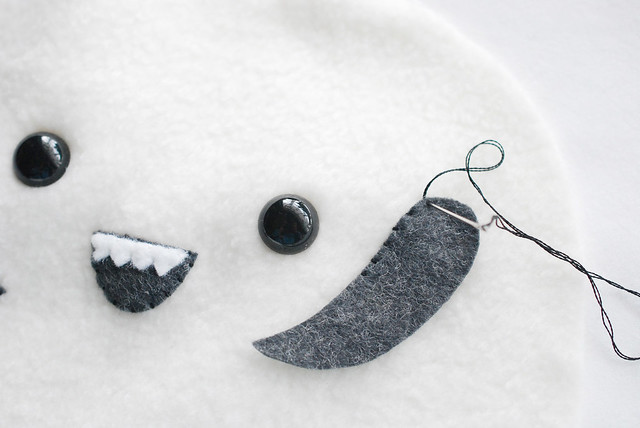
Use two strands of embroidery floss to applique the features onto the face. Sew the fastener onto the body using lots of machine stitching, back stitching, criss-crossing, etc. Oh, and the closer you sew to the edge of the fastener, the better.

Wampa Plush

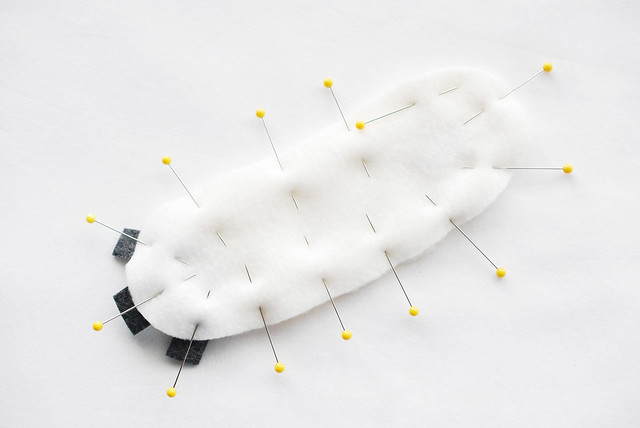
Pin the two body pieces together, right sides facing. I go overboard with pins so that nothing stretches weirdly, or shifts in ways I don't like. Sew around the outside with a 1/4-inch seam allowance, leaving an opening for turning.

Wampa Plush

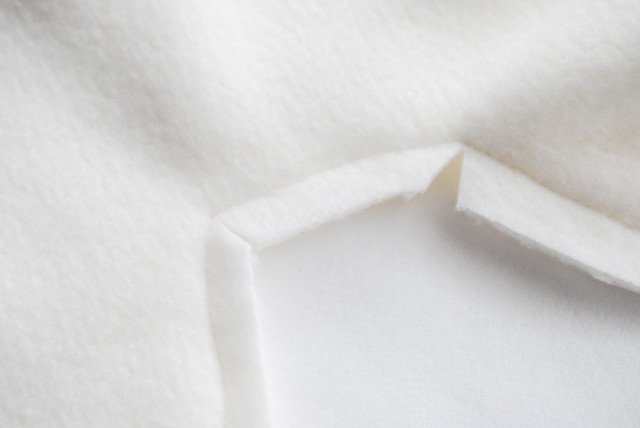
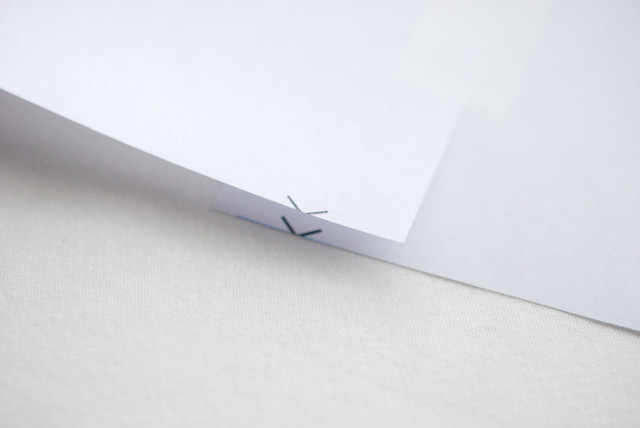
Carefully clip the inside corners of the wampa's legs.

Wampa Plush

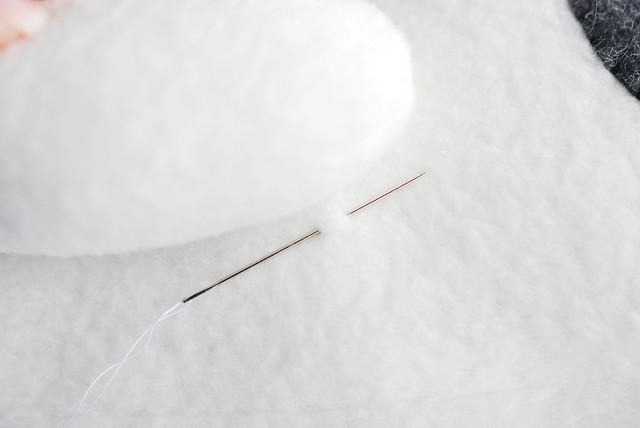
Turn the wampa right side out...and he looks a little funny without arms. We'll get there! First, stuff the body so it's nice and firm, then sew the opening closed using ladder stitch.

Wampa Plush
Wampa Plush

Cut the claws into three pieces, then arrange them at the end of each arm. Mine ended up being a little far apart for my liking, so maybe try putting yours closer together, but still pointing in like this.

On one of the arm pieces, be sure to sew the other half of the hook and loop fastener on at the end opposite from the claws. Again, sew it very securely (you'll be ripping this thing off the wampa!), and sew close to the edge.

Wampa Plush

Pin the other arm piece with right sides together, then sew around the edges, leaving an opening for turning.

Wampa Plush

Leaving some of the claw pieces poking out guaranteed that they'd get sewn into the seam, but this extra isn't needed anymore. Cut it off.

Wampa Plush
Wampa Plush

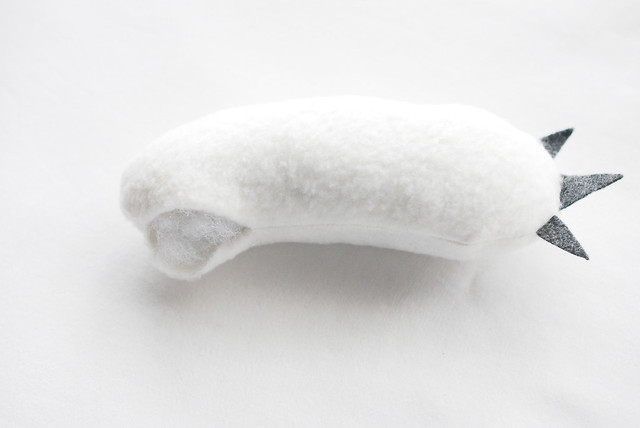
Turn the arms right side out, stuff them so they are firm, then sew the openings closed with ladder stitch.

Wampa Plush

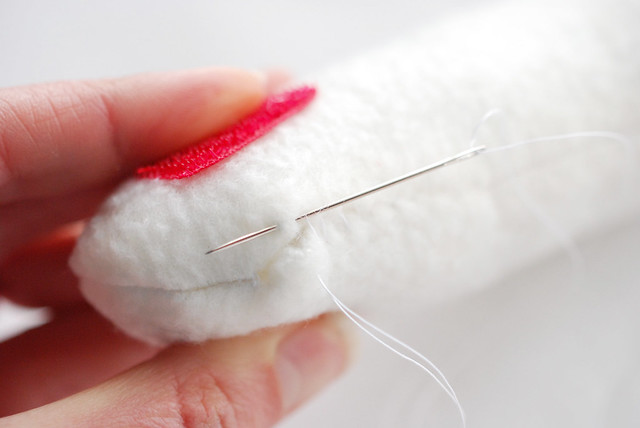
Set aside the arm with the blood...er...fake Velcro. Grab the other arm and lay it on the wampa body in the place you want it to be sewn. With a needle and white thread, take a stitch through the body.

Wampa Plush

Take a stitch through the back of the arm (that's pressed against the body) right above your first stitch. Go down and take a stitch through the body, and again through the arm. Basically, you are attaching these two pieces together with ladder stitch. Keep stitching until it feels secure, forming a circle of stitches. Knot the thread off really good, and the first arm is in place.

Wampa Plush

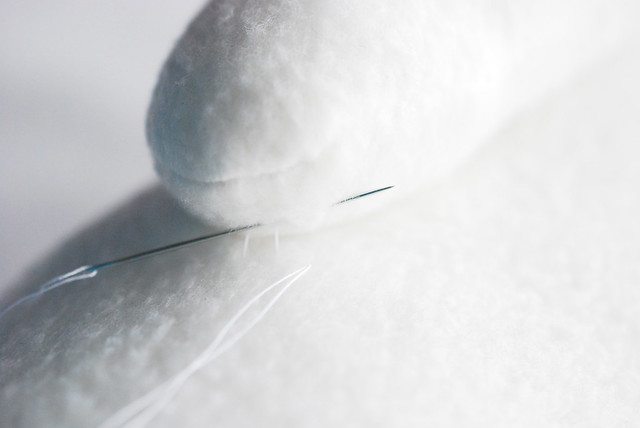
The second arm is much easier...just stick it on!

Wampa Plush

Of course, you'll want to tear it off again right away, because it's just so much fun.

Wampa Plush
Wampa Plush

Being from Hoth, wampas prefer the snow, which is why I had to plan ahead and get these photos of him looking like he's in his natural habitat. Or maybe I actually went to Hoth for a quick photo shoot...I'll never tell!

But whether you have snow or sand or something in between, I hope you and your new friend have fun together on Star Wars Day! May the fourth be with you!

printable // star wars day journal cards

Star Wars Day Journal Cards


Sunday is a major holiday: Star Wars Day. And since I love Star Wars and a good pun (May the 4th be with you!), I knew that I couldn't let this day pass by unnoticed here on Wild Olive. So, get ready for some patterns, projects and printables from long ago in a galaxy far, far away...starting with with journal cards that fit with Project Life!

Download the Star Wars cards here in PDF format.
Download the Star Wars cards here in PNG format.

Star Wars Day Journal Cards

The printable page has two filler cards and two cards that are ready for your notes. Perhaps you could interpret what R2D2 is saying?

Star Wars Day Journal Cards

For a bit of romance, this quote is perfect for Star Wars-crossed lovers. It's soft and subtle (in a Death Star texture sort of way), and I love it. I showed my 14-year-old brother and he asked me what it meant. Clearly he's not watching these movies for the love stories!

Star Wars Day Journal Cards

And then there's Yoda. I find his little "hmmm?" to be so charming, and it's best to do your own Yoda impression while reading this. And a little tip: when you add your own journaling to this, Yoda speak write in you must.

Star Wars Day Journal Cards

I hope these bring some of the force to your journaling!

printable // butterfly mobile

Butterfly Mobile


With a fluttering butterfly scattered throughout April's posts, I couldn't resist getting in one last idea that is actually a butterfly that will flutter in the breeze! This simple mobile (no balancing...but it does move, thus making it a mobile!) is easy to put together and looks so pretty as spring finally fills the air.

Butterfly Mobile

Here's what you need:

Butterfly Mobile Printable Template PDF
Paper
Scissors
Glue stick
Thin string

By the way, do you just love how my printer decided to get all streaky for this? Ignore that...I promise it's not a glitch in the file!

Butterfly Mobile

Cut out all of the pieces and fold the wings in half. Use glue stick to hold them closed, or for a more fluttery look, leave them un-glued.

Butterfly Mobile

Fold the body piece in half, then add plenty of glue to the entire blank side.

Butterfly Mobile

Place the two wing pieces onto one half of the glued body.

Butterfly Mobile

Before folding the body piece on top of the wings, stick one end of the string between the layers. Squeeze it all shut, but don't press so hard that you see creases from the sandwiched layers.

Butterfly Mobile

At intervals along the string, glue two flower circles together around the string. At the top, tie a loop in the string for hanging.

Butterfly Mobile
Butterfly Mobile

Hang your mobile so it catches a bit of a breeze now and again!

pattern // fluttering butterfly

Butterfly Pattern


Have you been collecting the hexagon-framed embroidery patterns that I've been creating each month? It's time for another and of course, it's the Fluttering Butterfly.

The full color version of this has the hexagons on the wings filled in with different colors, which you can do with satin stitch on this pattern. Or, try outlining the hexagons in one color, then stitching another line in a different color inside those lines. But those are just two ideas...I'm sure you'll find even more wonderful ways to stitch this little lady!


If you make something with this, I'd love to see! Tag your Twitter or IG photos with @molliejohanson or add pics to the Wild Olive Flickr group!