
Advent wreaths come in many shapes and sizes, and this one isn't even a wreath at all, but rather, an Advent candle garland. It's stitched with words and icons (Wild Olive style!) that represent each week, and it's an easy project to make through this season.
We love to celebrate Advent at my house. Celebrate may not always be the right word, actually. Observe might be closer, because sometimes there's some sadness and longing that comes with Advent. But all of that helps make Christmas more of a celebration.
And I don't know about you, but even when I'm thinking that I'm ready for Advent, I'm rarely actually ready. Case in point: I started this project on the first Sunday of Advent. Ideally, I would have had this whole thing ready to go and display each week. Instead, I'm making it along the way. And you know what? I like that. It's part of the process of waiting well.
The idea I had was to make an embroidery for each week. (Last year I made some larger patterns) Then I thought about the candles, and tried to come up with a way to include them, and then...what if the candles were a garland! It's abstract, with a yellow tab for the flame, but if you squint, you'll see candles. Maybe at some point, I'll add some greens in between, but for now, I have green sparkle string.
If you'd like to work on this along with me, please do. Below you'll find the first two patterns for weeks 1 & 2. They are hope (with an anchor...see Hebrews 6:19) and peace (with a dove). Both are on purple candles.
In the next few weeks, I'll share the patterns for the joy, love, and Christ candles.
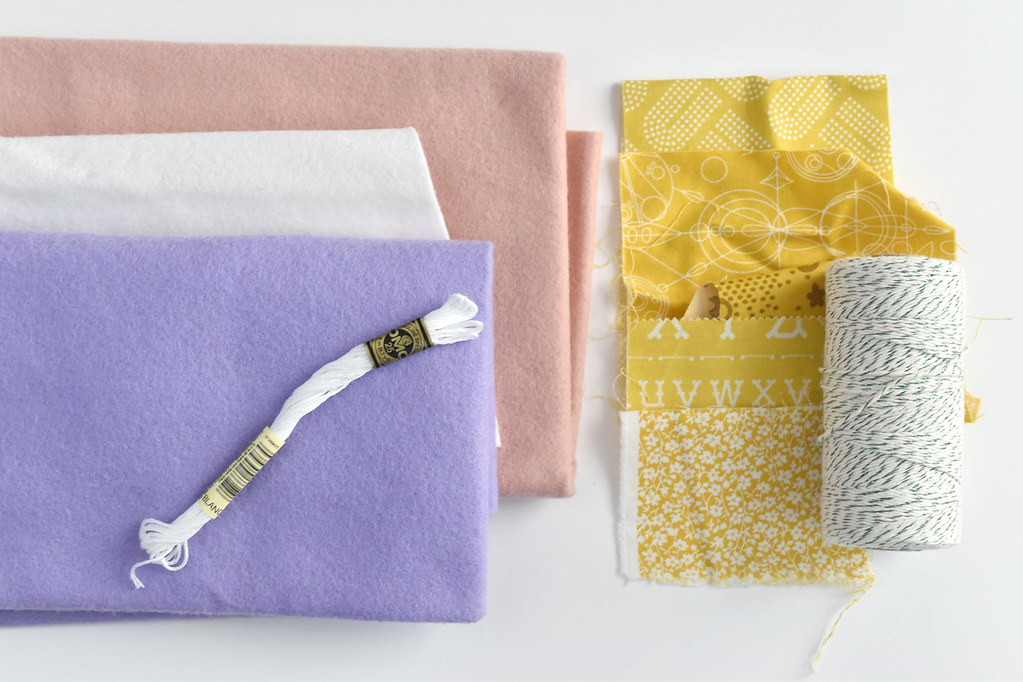
You will need:
Purple, pink, and white felt (I use Benzie Design felt!)
Embroidery floss
Tracing paper
Yellow fabric scraps
String
DOWNLOAD THE PATTERN FOR WEEKS 1 & 2
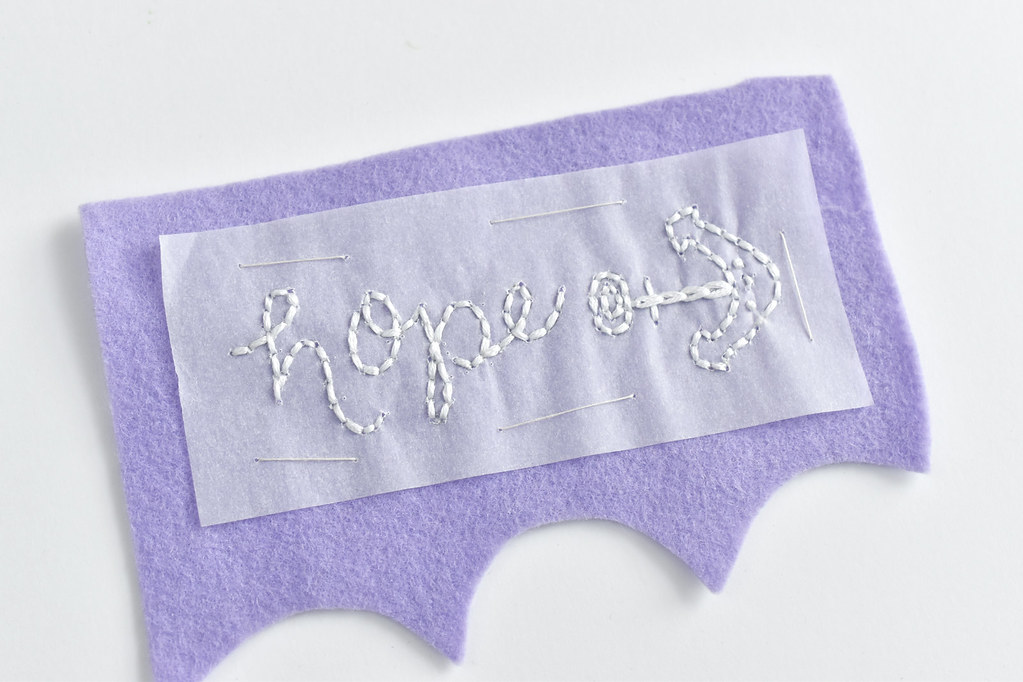
To make each candle, trace a pattern onto thin tracing paper. Baste the paper onto the felt. I used to always use pins for this, but basting the paper is a little easier for me because there's nothing for the embroidery thread to catch on.
Stitch through the felt and the paper as you embroider the design. I used all six strands for this. On the eyes for the anchor, I wrapped the needle just one time for the french knots so they were tiny.
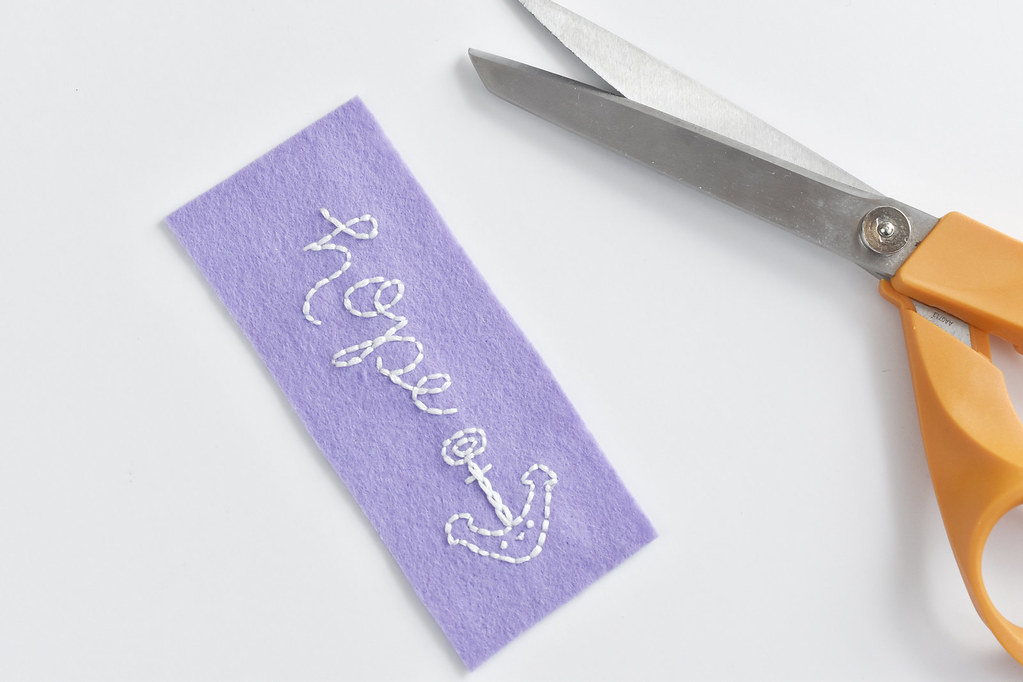
Tear away the paper and trim the felt down to 2"x5". You may find that it's simpler to cut the felt to size before you stitch from the previous step.
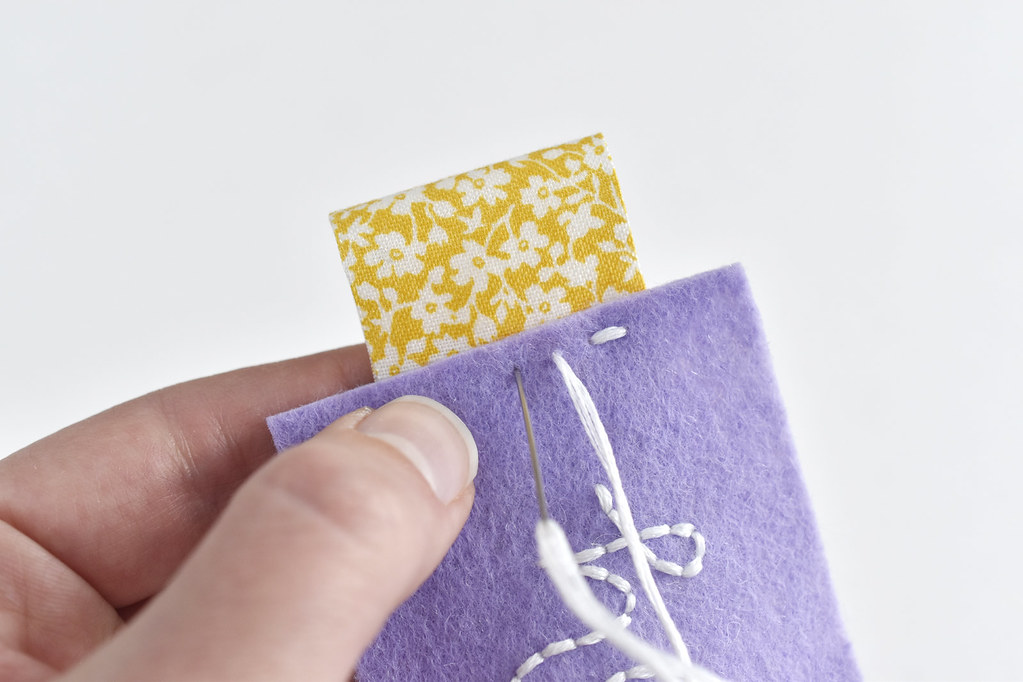
Cut a small rectangle of yellow fabric and fold it in half. Hold it behind the top of the felt piece and stitch it in place. I stitched with running stitch, then went back and filled in the gaps with running stitch, which, by the way, is called holbein stitch.
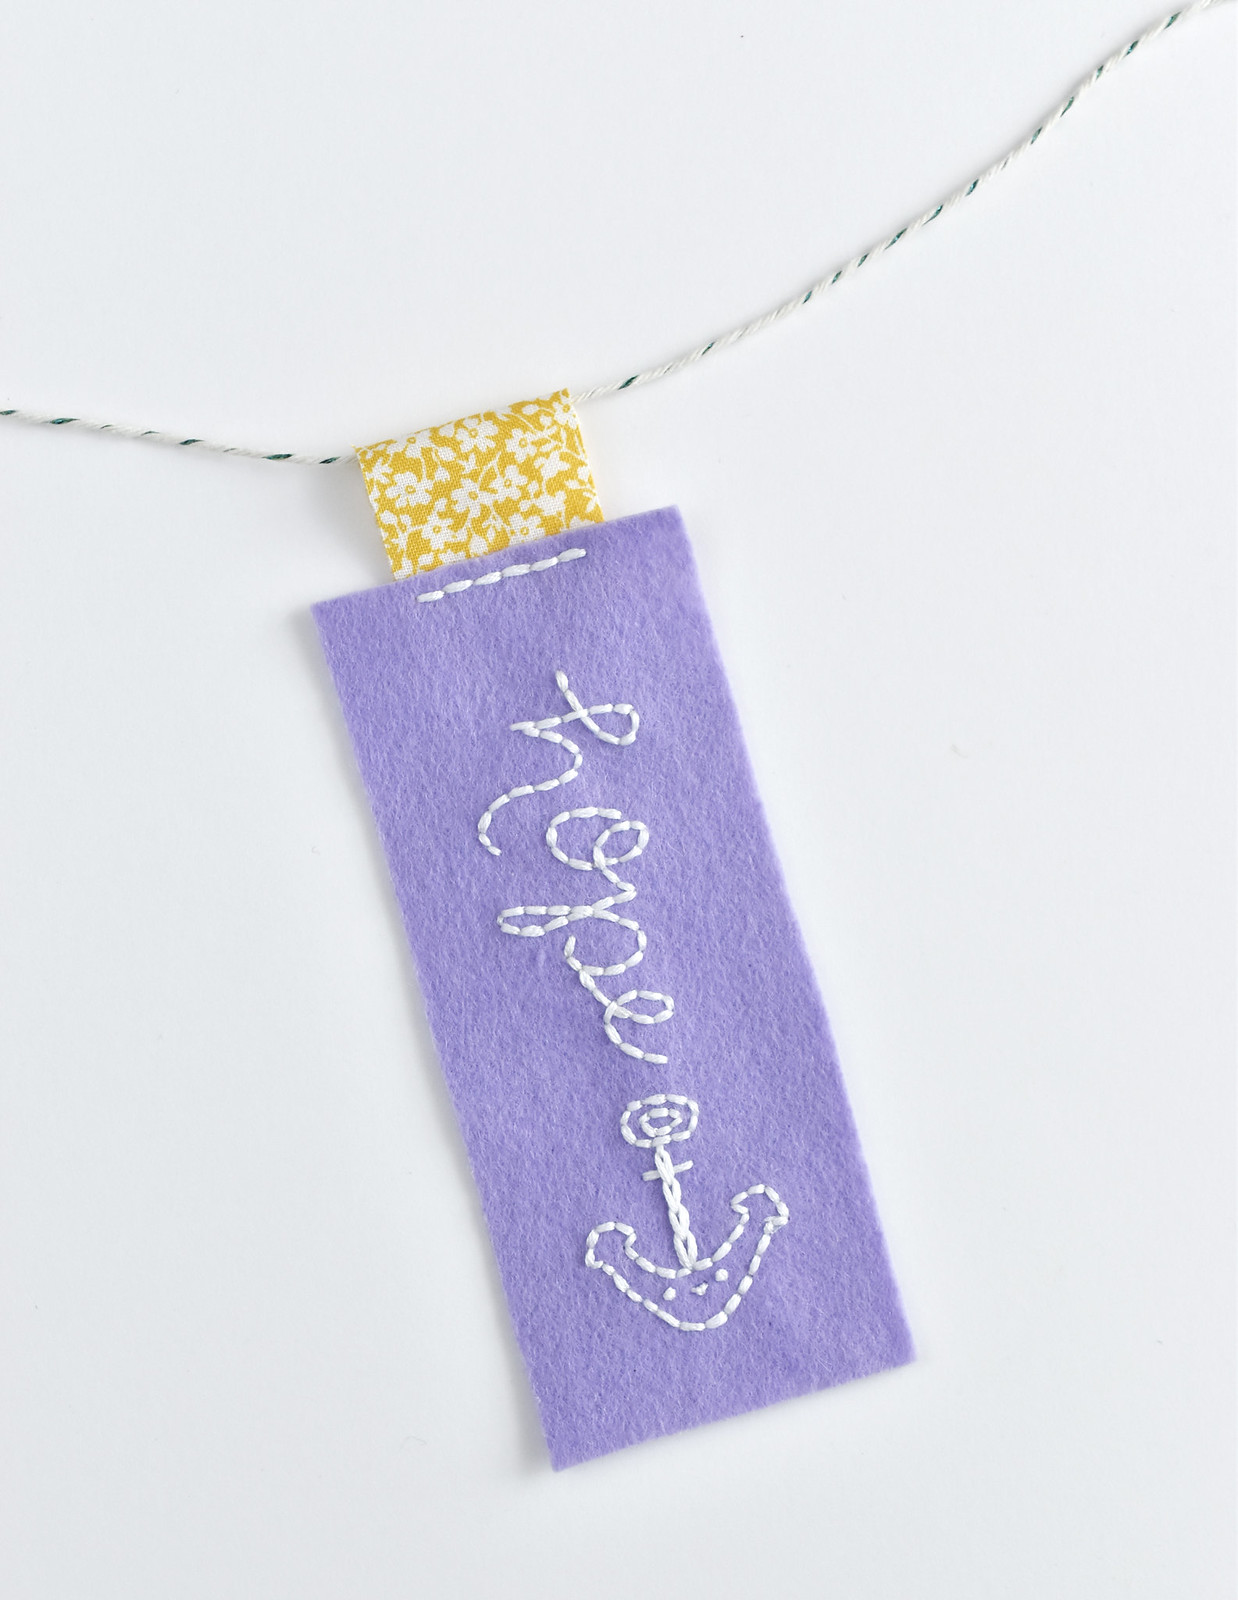
Thread a hanging string through the candle tab/flame. Tie a loop in each end and add candles each Sunday in Advent!
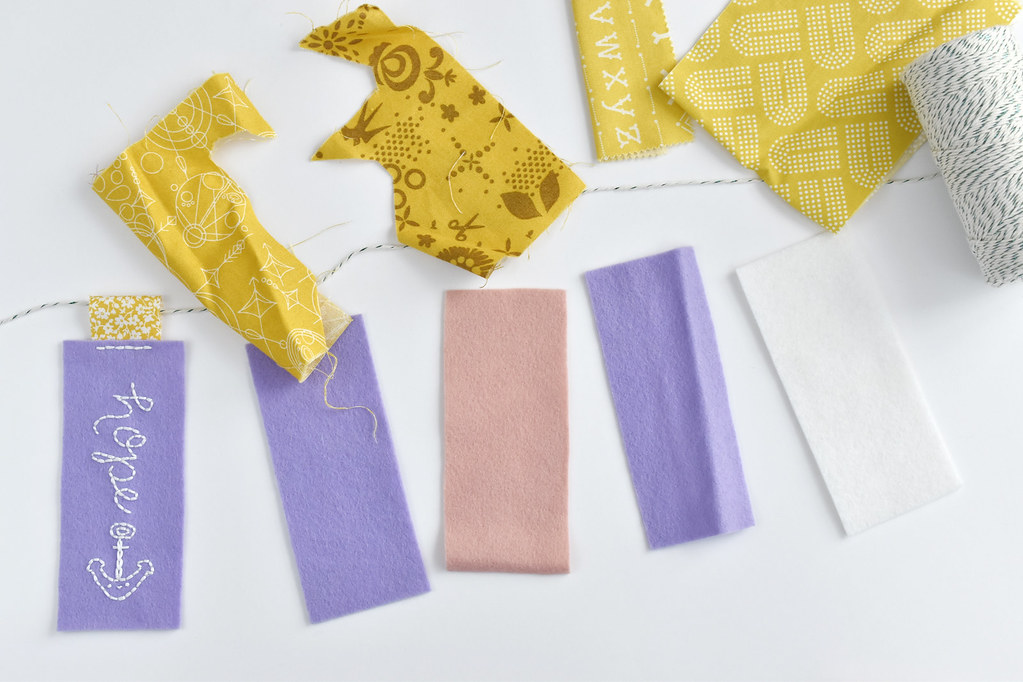
I'm working on this project week by week, but this gives you an idea of where we're going. Normally I'd feel bad about not having a finished project to show, or even having all the patterns ready! But Advent is about waiting, so this is probably okay!
You can find the patterns for weeks 3 & 4, plus the Christmas Day calendar here.
This is lovely, Molly. Thanks for creating this project for us!
ReplyDeleteI love this project! Do not feel bad about being caught off guard. Advent sneaks up on me every single year without fail. I am the person in the Catholic bookstore the Tuesday after Advent starts (the store is closed Sunday and Monday) buying the candles for the Advent wreath. Last year, they ran out and had to reorder and we were trying to use birthday cake candles in the wreath for most of the first week without burning down the house. I bought them yesterday and even bought a set for an equally not-quite-together-but-very-well-intentioned friend!
ReplyDeleteSo sweet...just as you are! I have printed off the template. (((((hugs)))))
ReplyDeleteThis is so cute!! Nice creation .
ReplyDeleteI am your new follower, hope to see you on my blog.
https://clickbystyle.blogspot.in/
So cute! So ready for week three!!
ReplyDelete