


One of the things I love about embroidery is that you only need to know a few stitches to be able to make something wonderful. But even though you can do very well with only two or three, you can also learn many, many stitches. The thing is, I enjoy designing and stitching patterns that have a lot of outlining, so I'm not always sure how to put those stitches to use. I'm trying to find good ways to use these stitches while hopefully spreading more embroidery fun with you!
Today I've brought back my friend Olive along with a great way to use the fishbone stitch.

Don't worry, Olive! Since I've never had reason to stitch an actual fish bone, I thought that some palm branches would be a better option. No fish needed!

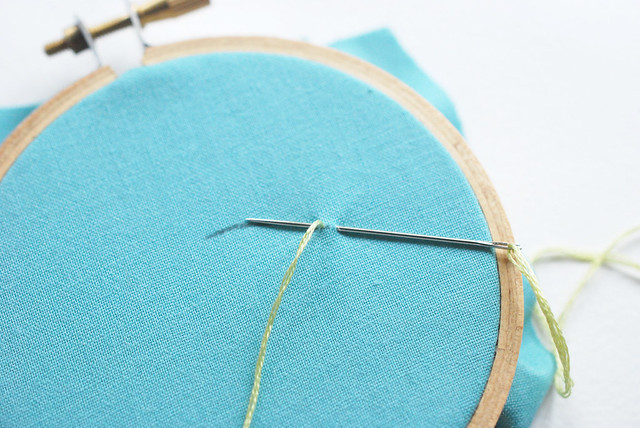
Start with some hooped fabric and draw a curved line. You could draw outer lines to define the edges of your shape, but since we're going for a branch, a little freeform stitching works well. Bring the needle up through the fabric just shy of the end of the line.
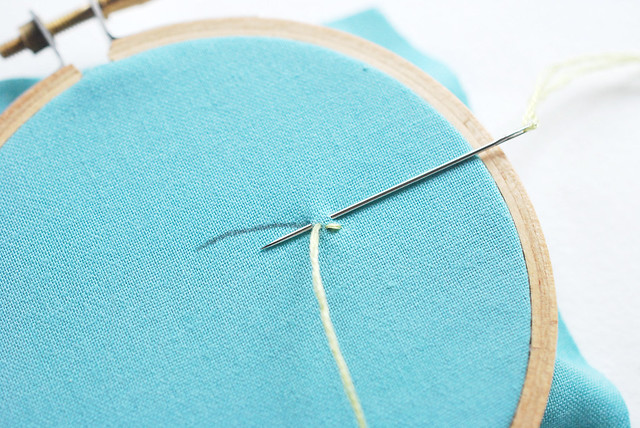
I'm using the sewing method (see my previous post here), but you could use the stabbing method if you prefer. In one stitch, take the needle down just over the end of the line, then back up on the line, just past where the floss came up from the back.
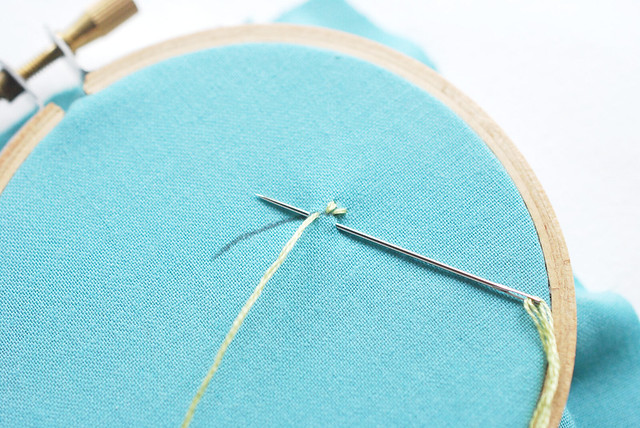
Try to envision the leaves of the palm branch coming off the center line. Take the needle down where the end of the first leaf should be, and bring it back up along the center line.
The next stitch is just like the previous, but along the bottom of the line.

Good question! The stitches should go at an angle, sticking out from the center line. The stitches on each side go at a different angle. In the example I'm stitching here, one side is angled up, and the other is angled down. Let's keep going!
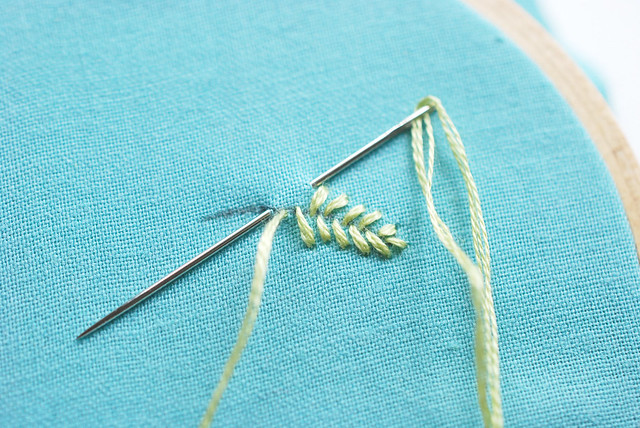
As you continue stitching, leave just a bit of space between each stitch, and lengthen them as you go. If you want to make the center a little more dramatic, you can bring the needle up just to the right or left of the center line so that you see a little more overlap.
At this point, I should mention that this isn't a true fishbone, but rather, an open fishbone. The big difference is that with a standard fishbone stitch, the lines stitches coming from the center are closer together...touching even! Try them both!
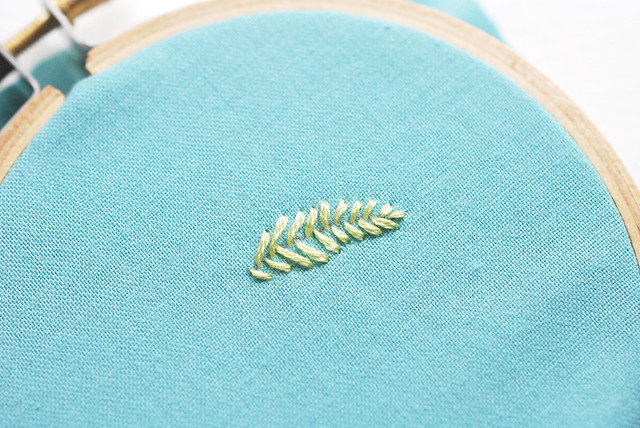
Thanks, Olive! Notice how the stitches got longer toward the center of the branch and then shorter again at the end. That's my version, but you could easily change it up and alter the stitch length, spacing, and even the angle.
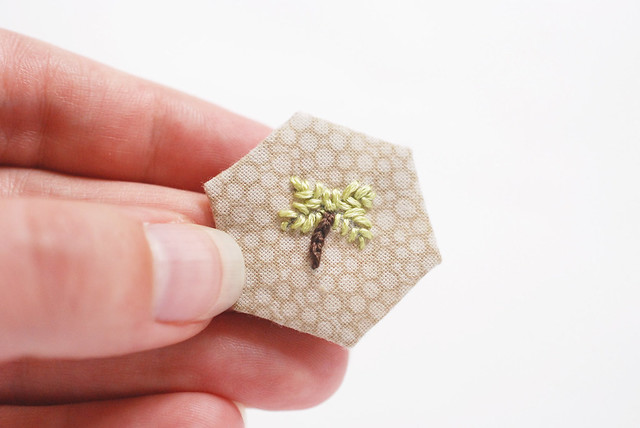
And since my fishbone palm branch came out like this, I thought it might be fun to try it at a much smaller size. So I grabbed a 5/8" hexagon I had close by and tried adding an itsy bitsy palm tree.
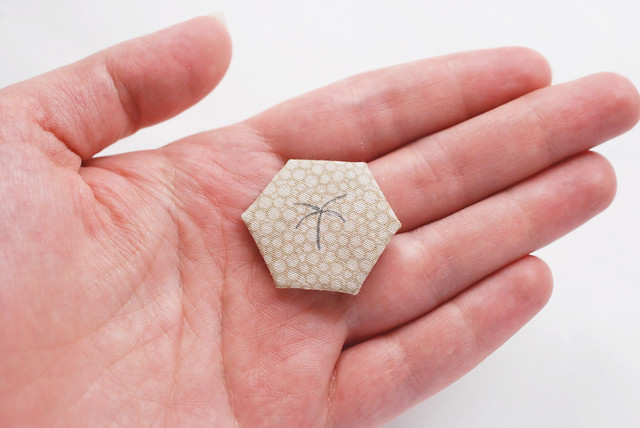
No pattern is needed, this tree is just a few slightly curved lines.
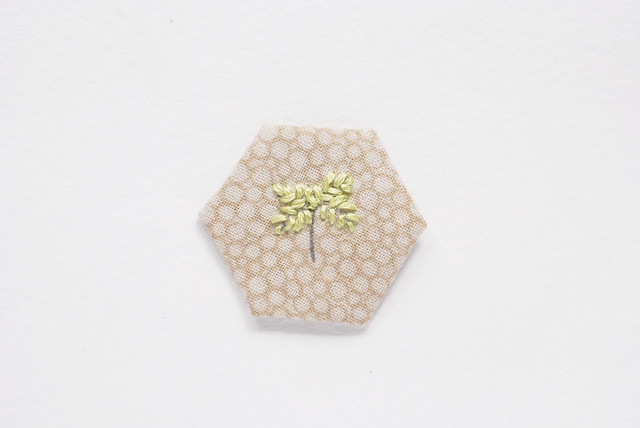
Tiny fishbone stitches make up the branches. In the center where the branches come together, stitches that would overlap can be omitted.
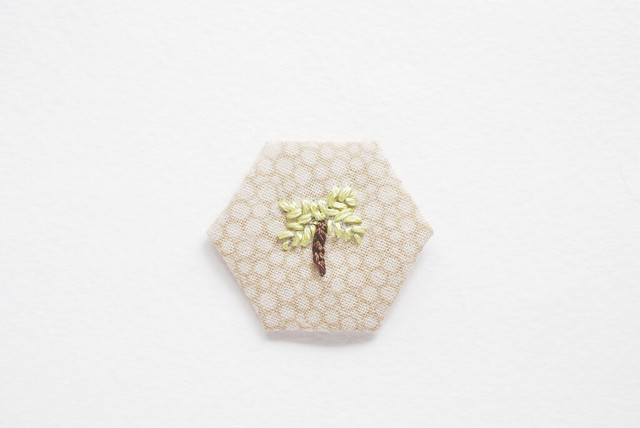
To finish it off, the tree trunk is stitched with chain stitch. Itsy bitsy stitching is always cute, don't you think? And just picture this stitched on a pocket or shirt cuff! Perfect for end of summer vacation wear!
That is incredibly cute! I love the way your mind works :)
ReplyDeleteLove the tiny Palm tree, What will you do next? Love to see what you turn the hexagon into.
ReplyDeletevery nice this work. ;)
ReplyDeleteThank you for this sweet little tutorial! And you finished it with a hexie, which makes it even better. :-D
ReplyDeleteLovely!!!
ReplyDeleteGemma
Faded Windmills
Pretty cute...I have been sewing some red white blue fabric scraps randomly into a patriotic table runner and became very hot, so taking a break. I'm thinking embroidery might be a good idea on this hot July day in Texas.
ReplyDeleteCooool. I do this stitch every now and again but didn't know what it was called.
ReplyDeleteLoved your idea to create a cute artwork. I will definitely try it out. The explanation is also given nicely. Thanks for sharing the creative ideas.
ReplyDeleteso cute, love!
ReplyDeleteHey there :) Love the way you use the olive in your posts :)
ReplyDeleteWow you have done a marvelous job on this. Truly, nice work and keep it up.
ReplyDelete