


Here we are at the last post of a 3-part series on keeping the back of your embroidery tidy. I happen to think that working towards neat and pretty embroidery on both sides is a good habit and practice all the time. But it becomes especially important when you're stitching something that will be seen from both the front and back. Tea towels and other linens are one example of embroidered items that should look as nice on the reverse as they do on the front.
It was with this in mind that the I Heart Tidy Embroidery series came to be. An email from Reene prompted it, and she brought up a brilliant question: what stitches look best when the back is going to be seen occasionally?
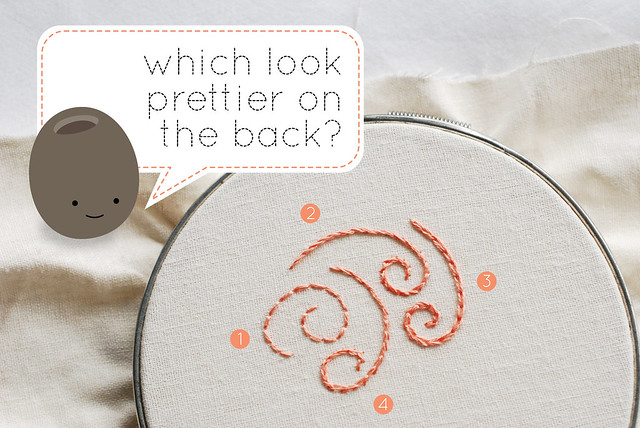
Here are some swirls that I stitched up for an example. Each was stitched with 3 strands of DMC floss.
1: Back stitch - my favorite!
2: Stem stitch - I can finally do this stitch!
3: Chain stitch - stitched with the reverse method...love that!
4: Split stitch - most of the time, I think it's ugly!
How your embroidery looks on the front should be your first concern. Obviously. And don't let my love for back stitch or disdain for split stitch sway you from what you like. But this is about the back of your work so let's flip this over.
If you look at vintage embroidery, you'll find certain stitches that show up more than others. Back stitch, for example, rarely makes an appearance in the table linens that I have in my collection. It never really occurred to me that one reason could be how the stitches look on the reverse. Maybe that had nothing to do with their stitch choices (and frequent use of stem stitch!), but maybe it did.
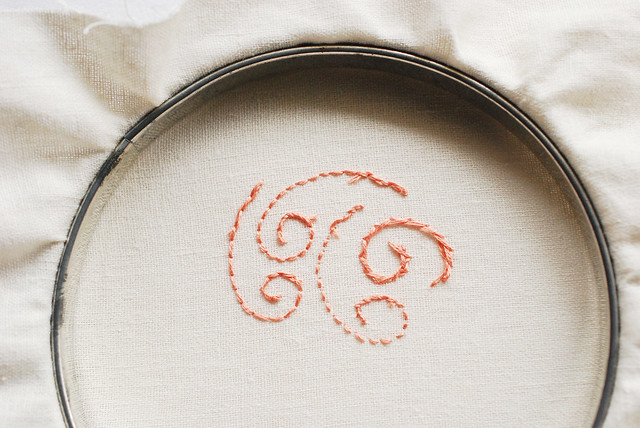
Look a little closer and you'll see what I'm talking about.
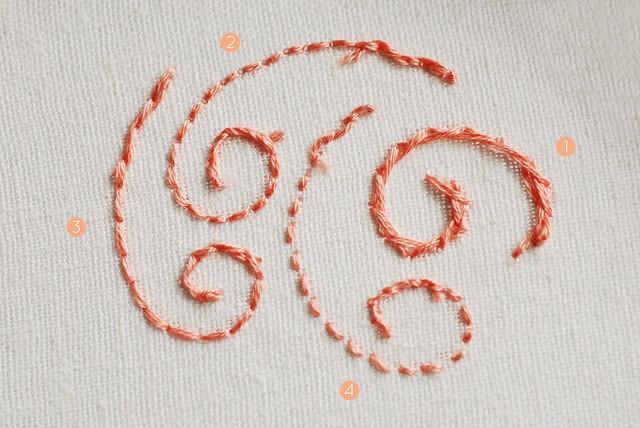
1: Back stitch - the least tidy!
2: Stem stitch - even and pretty!
3: Chain stitch - long, lovely stitches!
4: Split stitch - it looks better on the back than on the front!
Do you notice that some of these look like the front of the swirl of back stitch? That means that if you use stem or chain stitch, the back of your work will indeed look nearly as beautiful as the front of the embroidery design! Of course, your stitching may look slightly different than this, depending on the stitch spacing, but you've gotta admit, if you choose your stitches wisely, it makes a huge difference when it comes to tidy embroidery.
The next time you're stitching something and you want your backside to look mighty fine (yes, I did just say that), follow these three guides and you'll be sure to impress:
Find more embroidery help in the rest of my Embroidery Basics series, and if you have any specific questions or would like me to cover additional techniques, let me know in the comments!
I only know how to back stitch so it's obviously my favorite. Lol. The chain stitch is gorgeous.
ReplyDeleteGreat post! And yes, I want my backside to look mighty fine!!! LOL :) I am the back stitch queen, so I need to explore some of these different stitches for sure!
ReplyDeleteThis is fantastic, it's so interesting to see the way the different stitches look on the back! I have wanted to stitch some towels or napkins so this is a great resource!
ReplyDeleteI really liked this series, so many helpful tips! Your stitches are so neat and pretty! :)
ReplyDeleteThanks so much for this series. I am just learning to embroider and am so excited about it. There are certainly habits that seem better acquired upfront as I am learning rather than having to correct them later. Thanks!!!
ReplyDelete